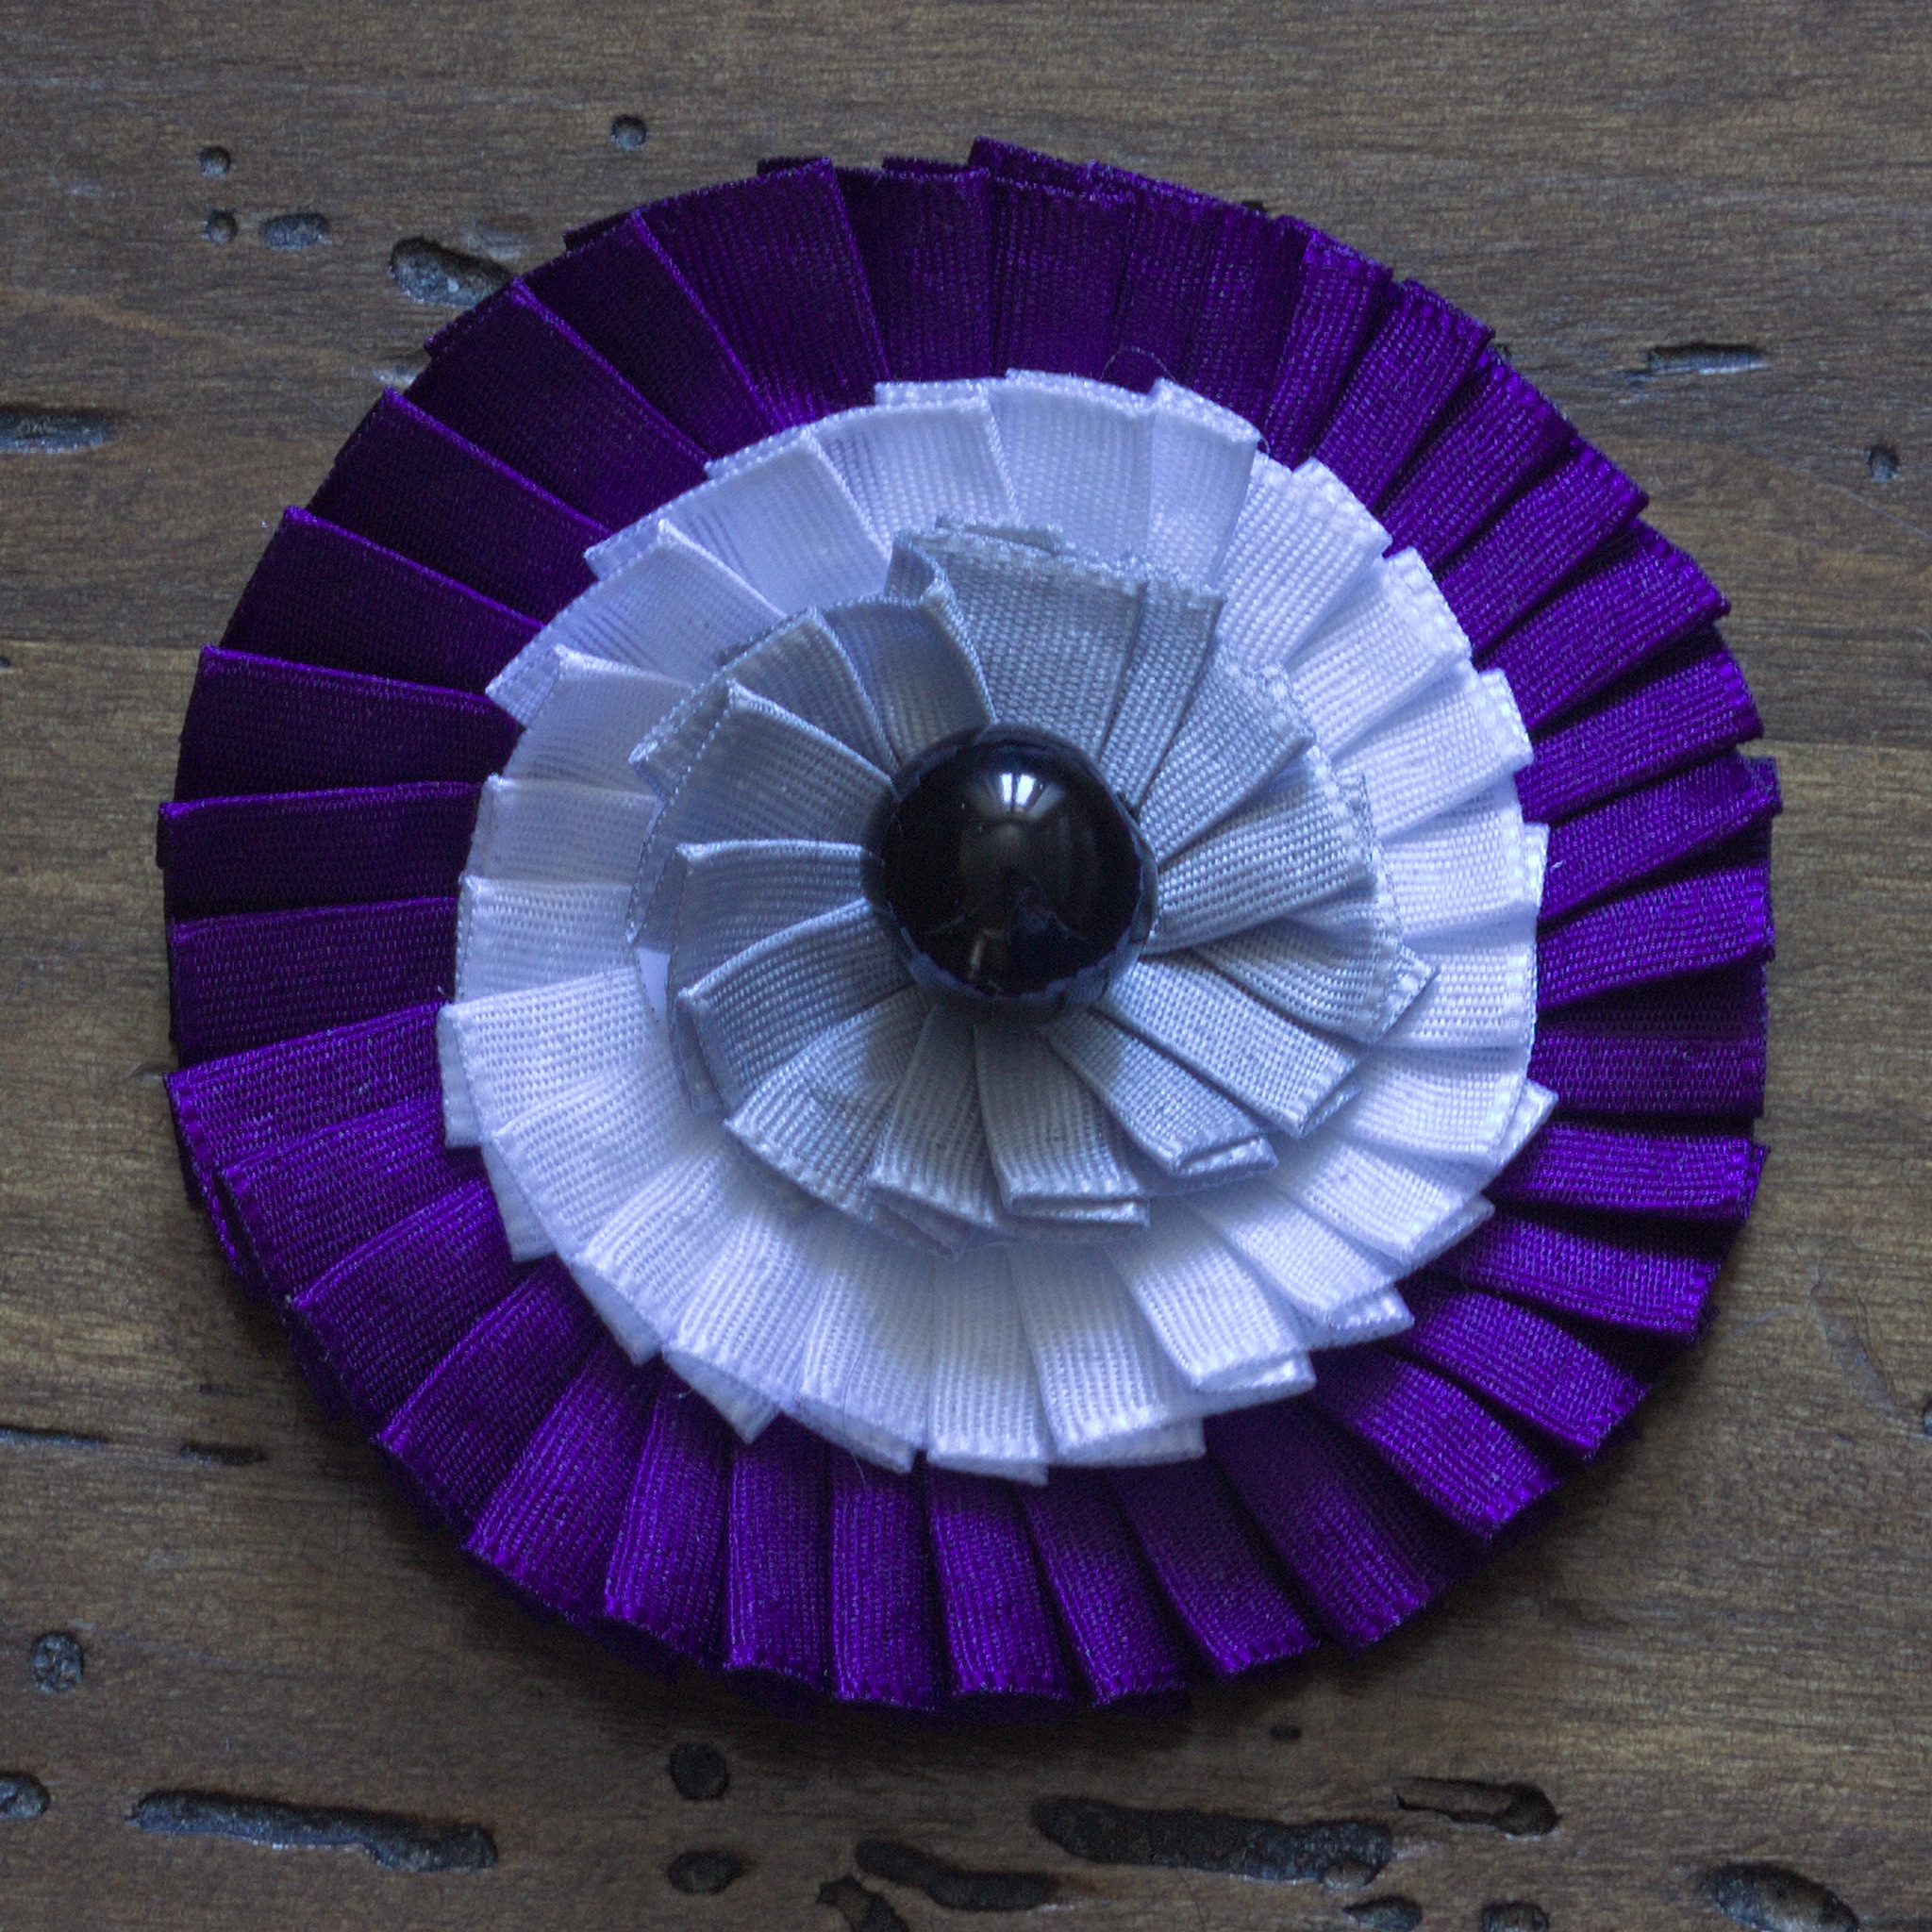
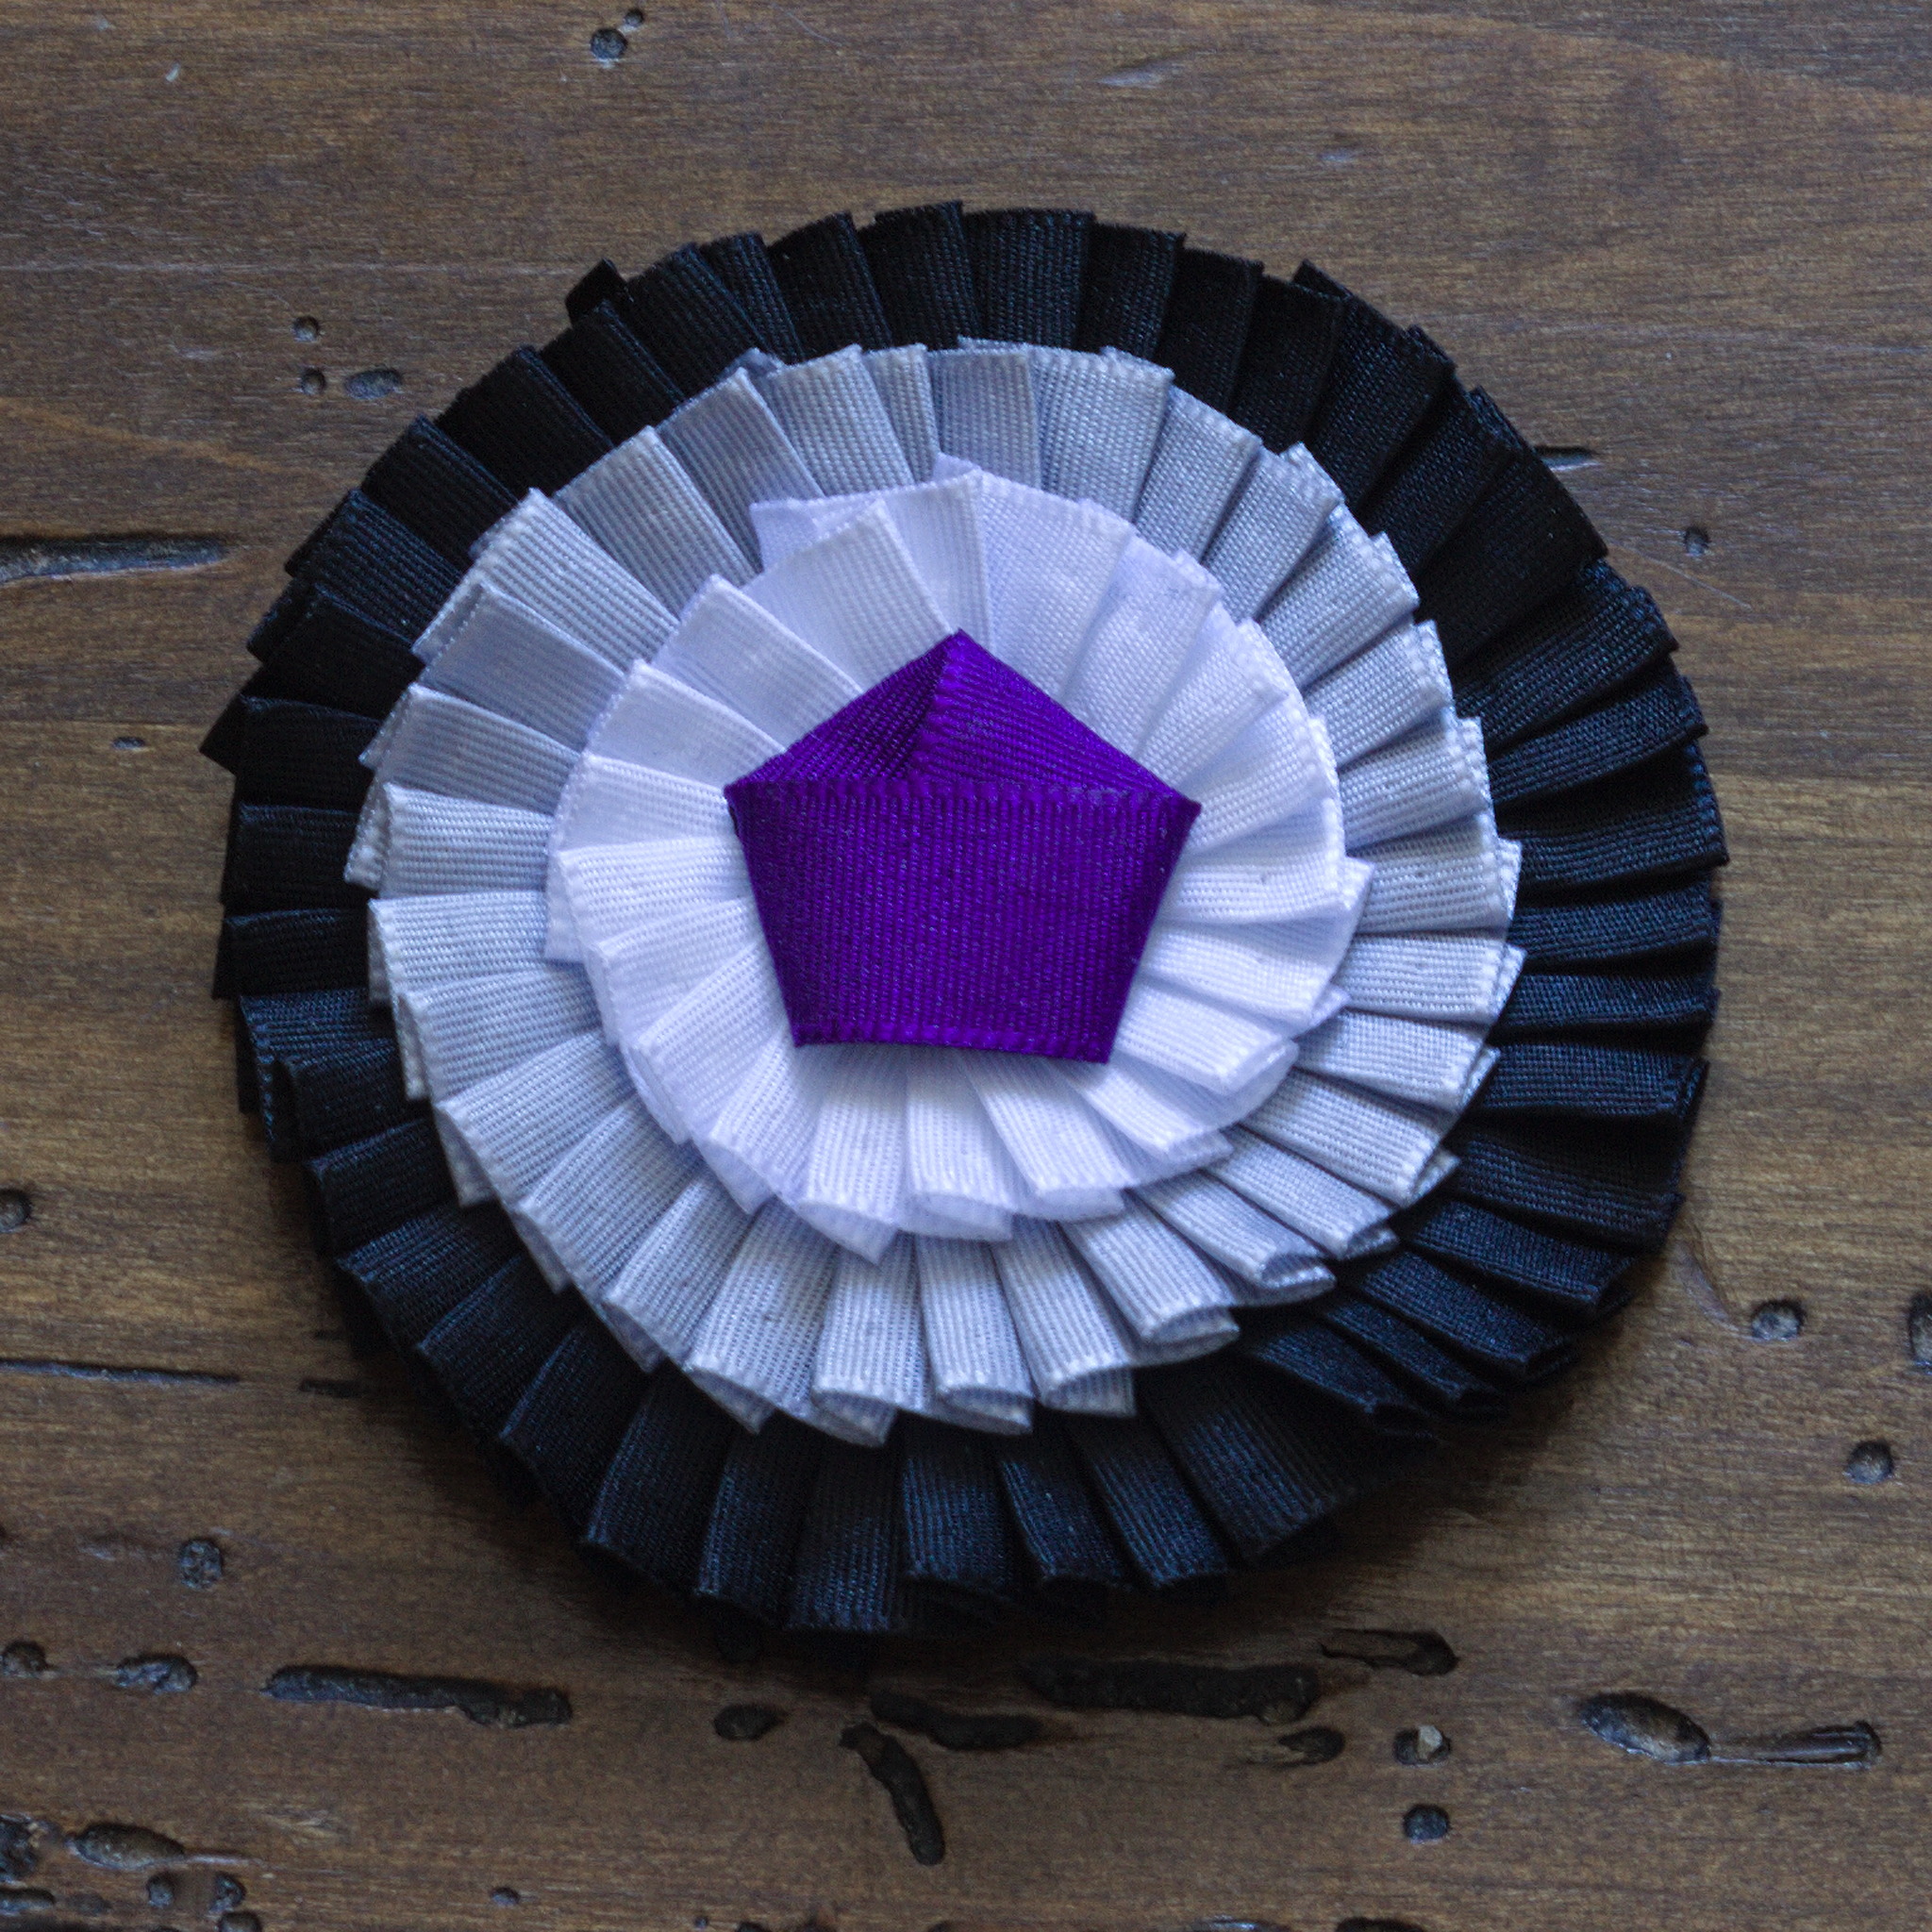
Multi Colour Cockade
Materials
about 1 m ribbon in each colour;
optional, a button, a pin or a bead as a center piece;
some scraps of backing material: felt, buckram or both;
sewing thread that matches the felt and/or the centermost ribbon.
Any kind of ribbon could be used, but the best ones, especially for your first attempts, should press easily and keep their shape.
For the backing, you could simply use some felt, but having a layer of some stiffer material, like buckram or even just some stiff fabric, will give more stability to the result; it should be some material that doesn’t fray, or you should finish it before using.
A second layer of backing is added to cover the first one and make the result neater: for this one felt is a nice choice.
Pattern
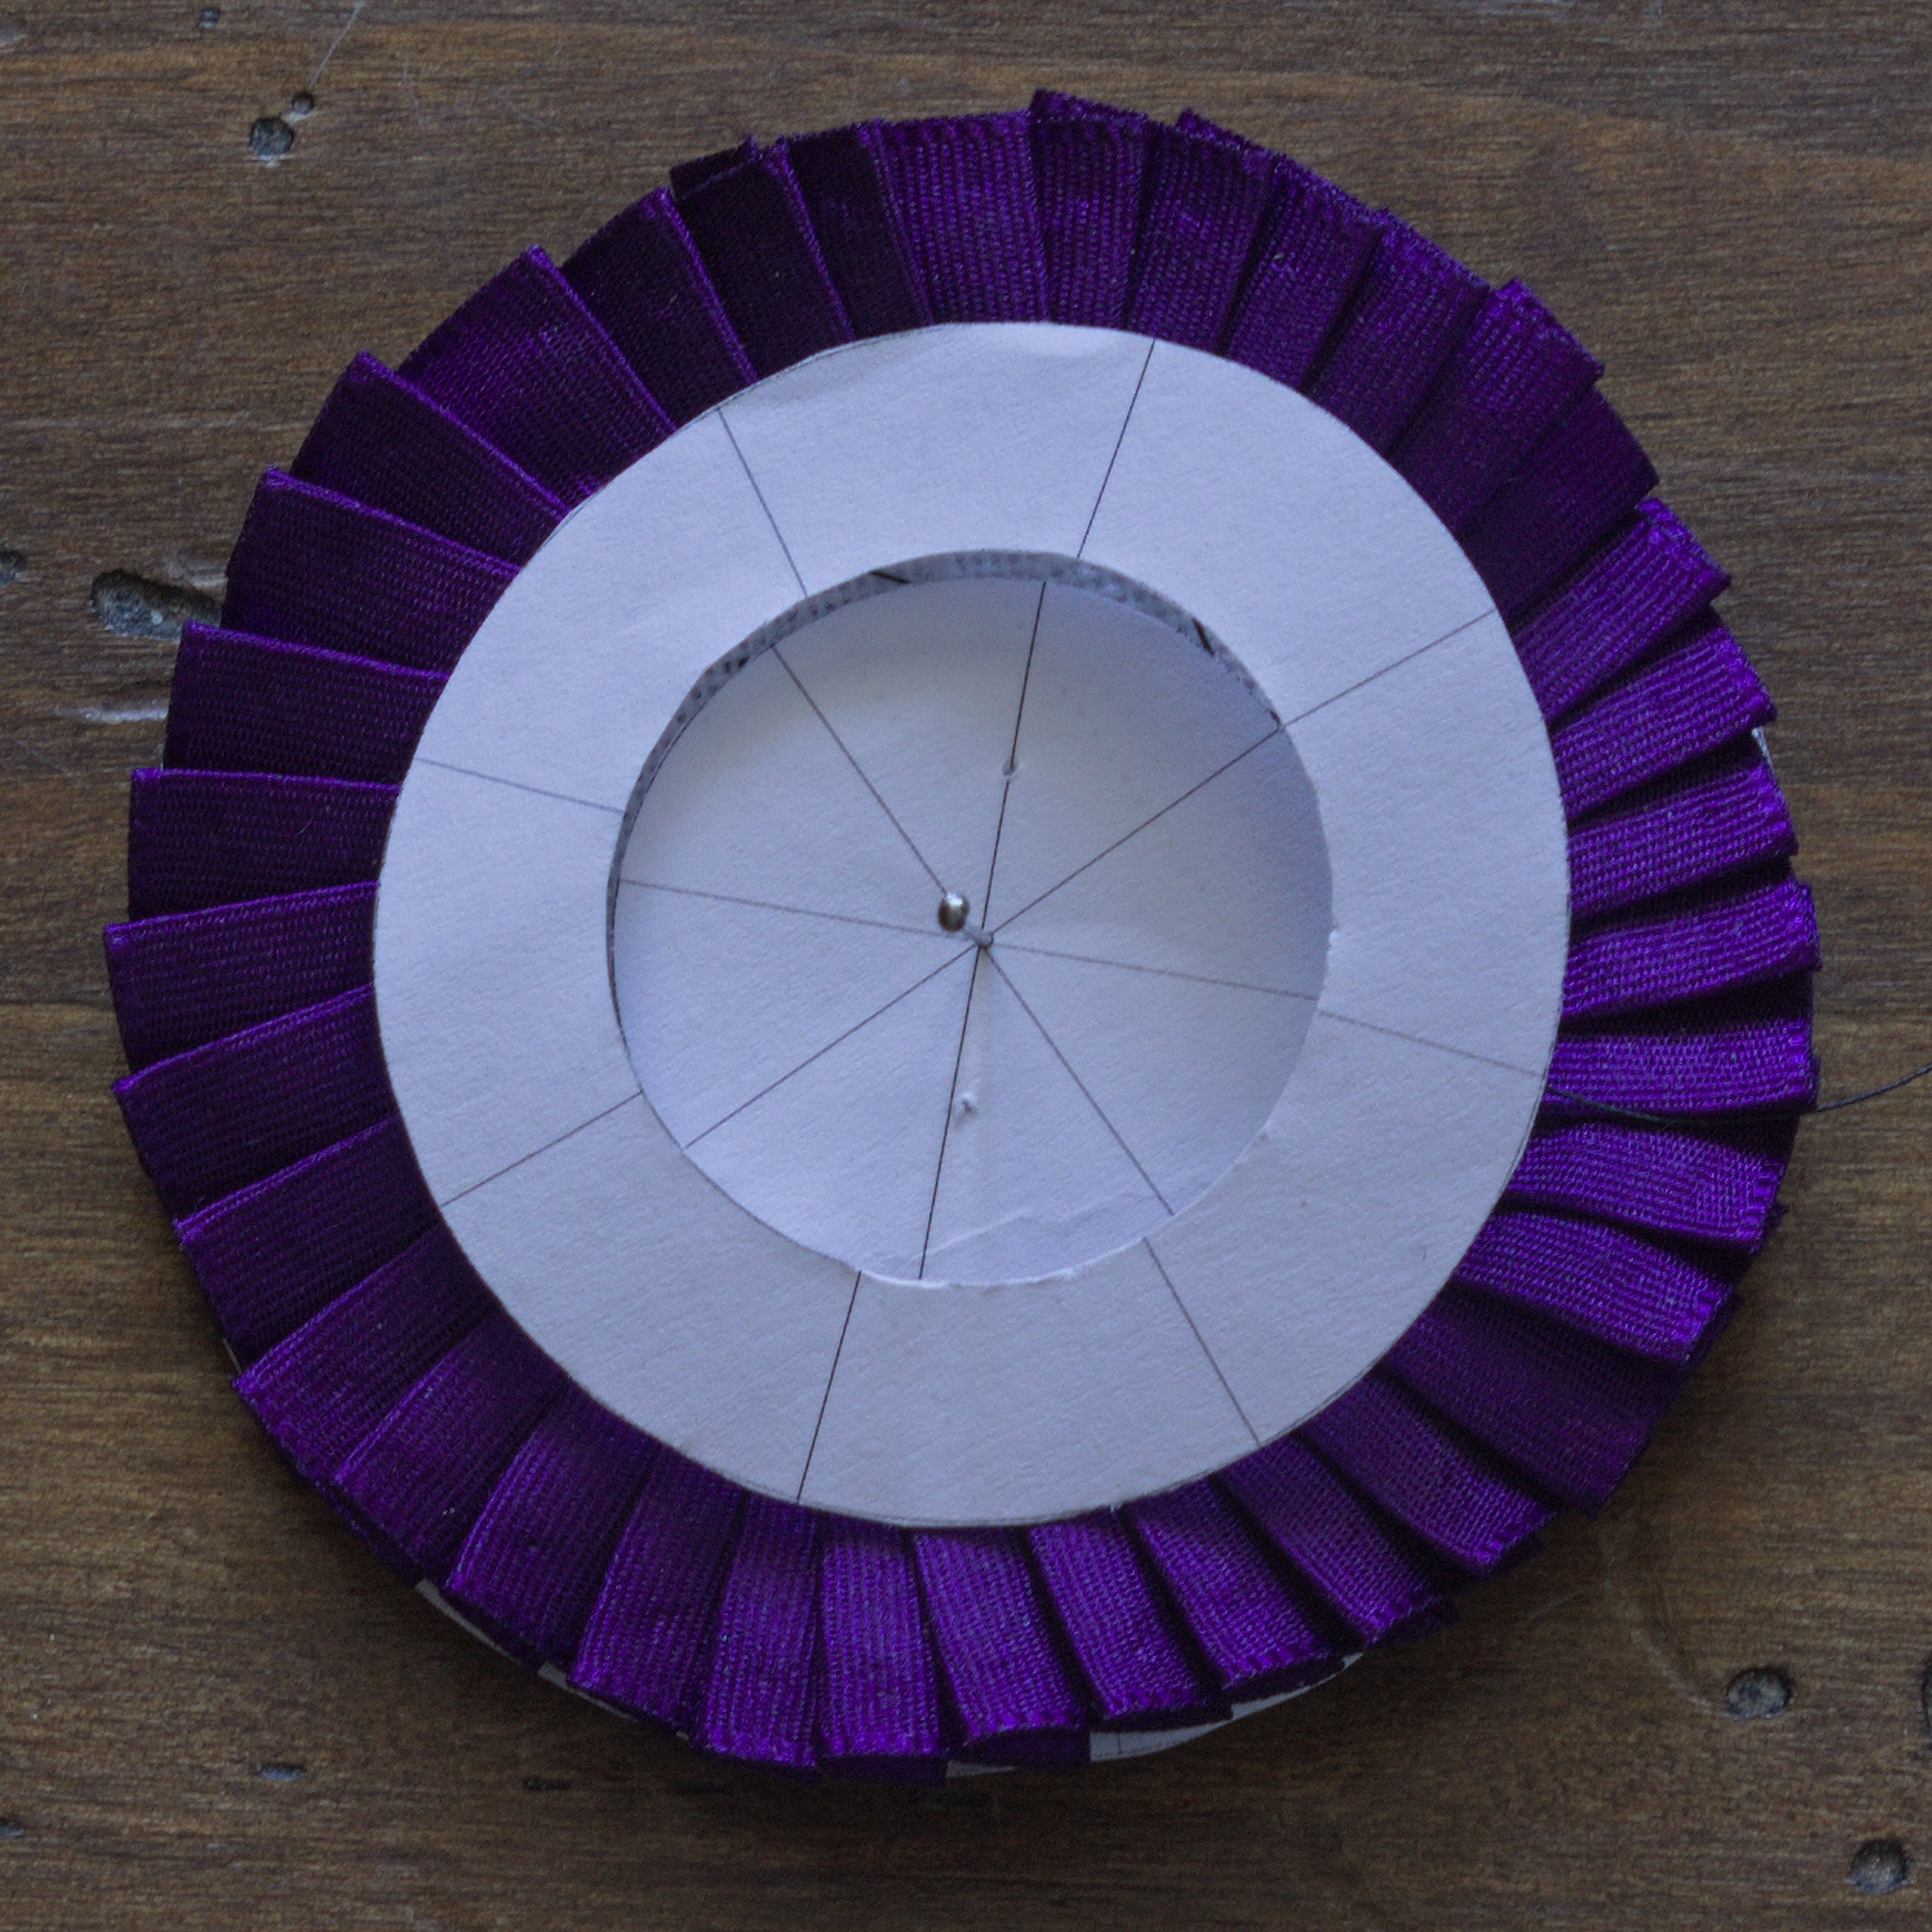
Draw a circle as big as your center piece, or with the same radius as the width of your ribbon if using a small center piece like a bead, then draw more concentric circles each with a radius bigger than the previous one by two thirds of the width of the ribbon used for that layer.
For 15 mm ribbons you can download a pattern from cockade_15mm.svg.
I’d recommend printing the pattern on scrap paper, as it will have to be cut and pinned into, and it will be easier to work with two.
Instructions
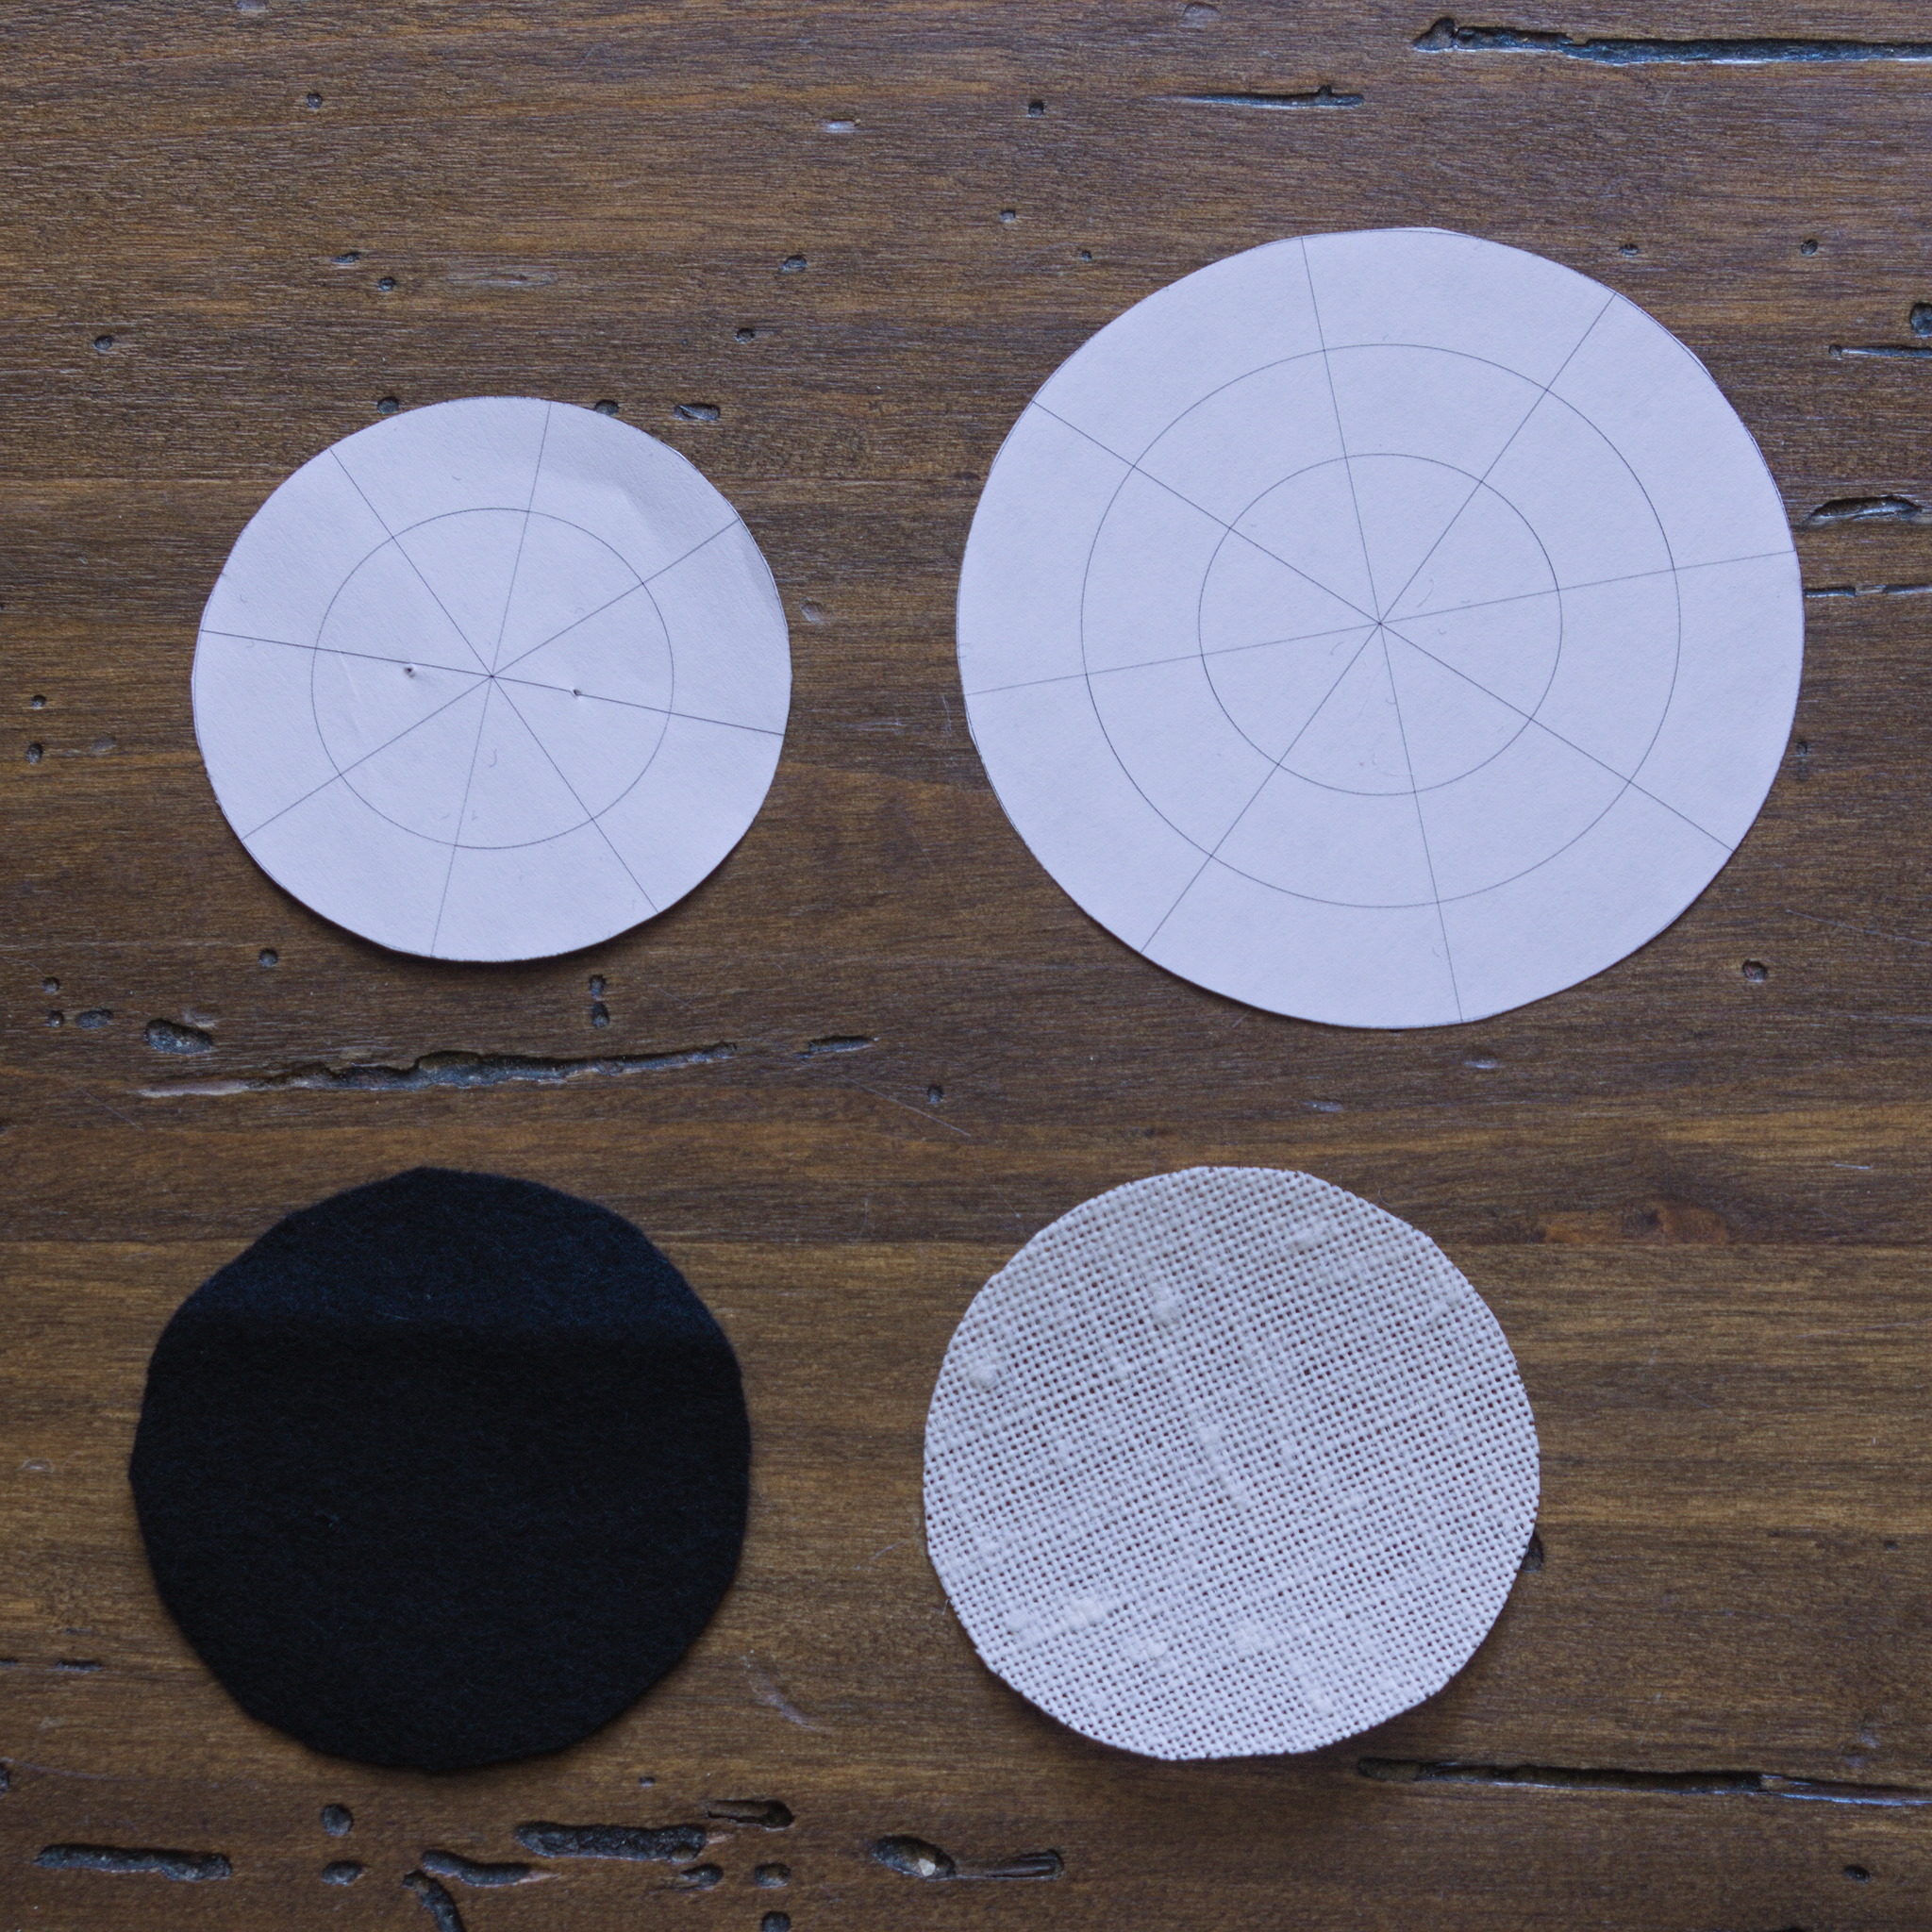
Cut one of the paper patterns at the widest circle, and another one at the next smaller circle.
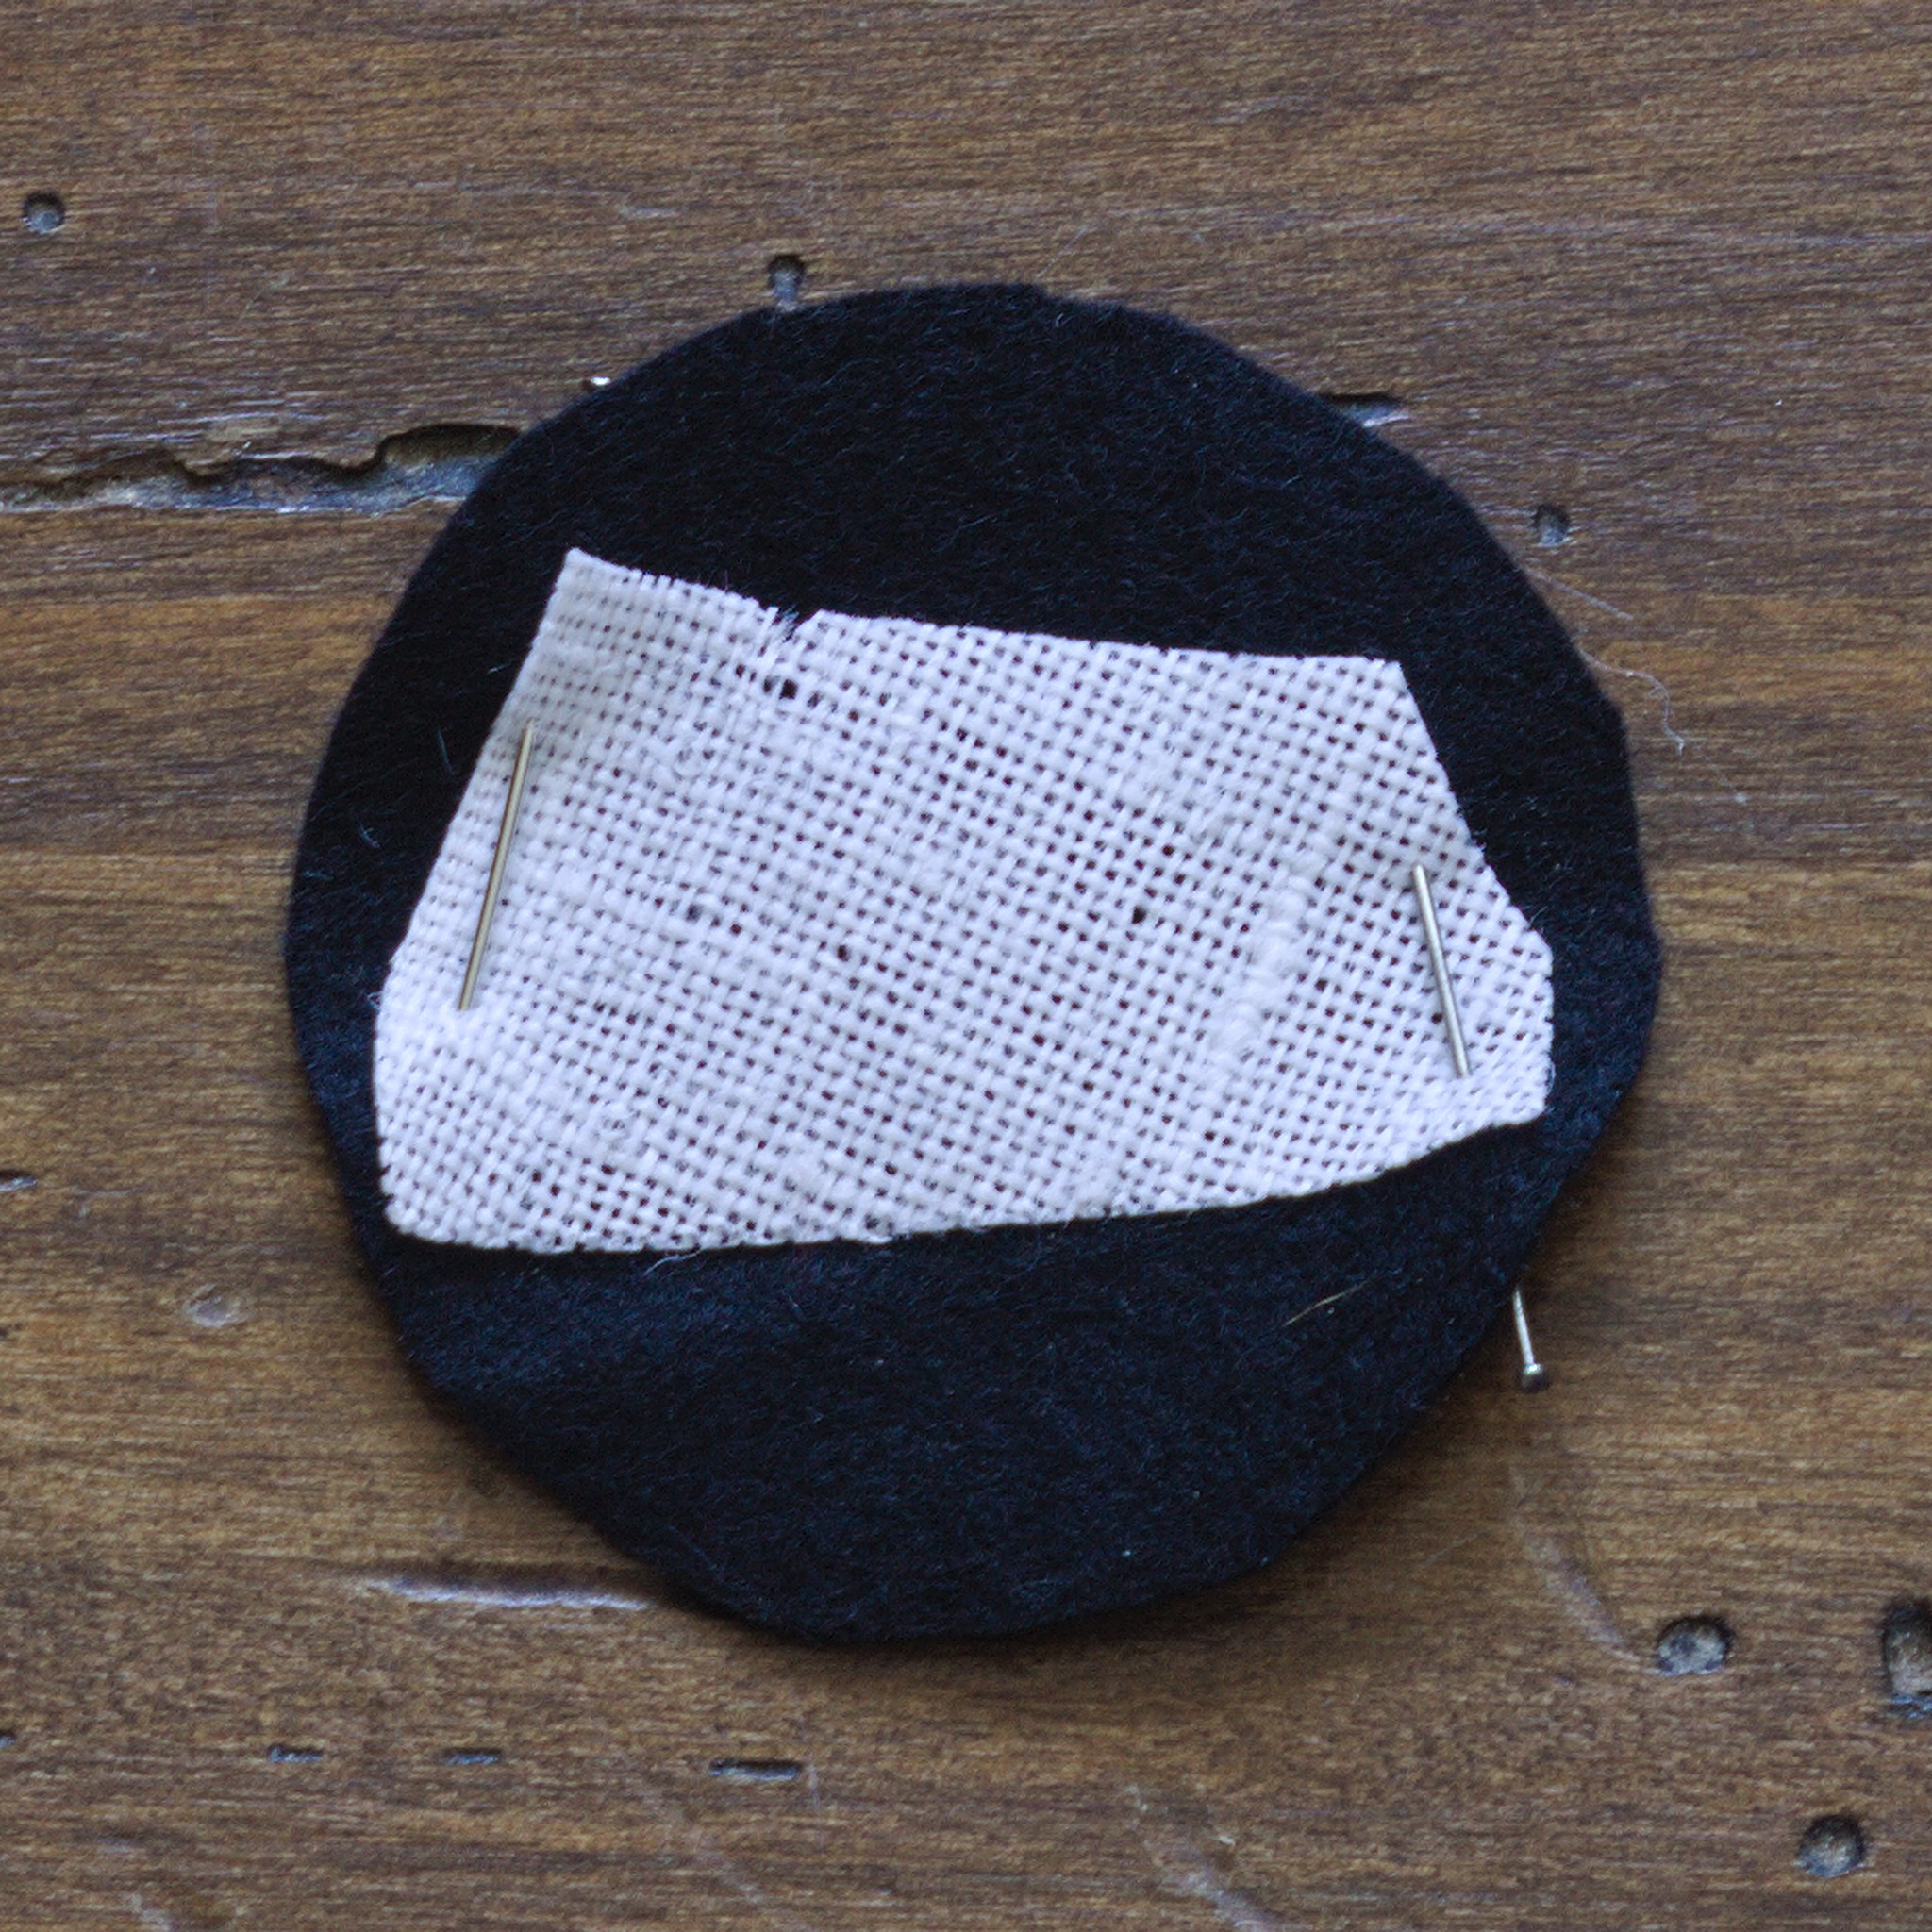
Cut one piece of the stiffer backing material the size of the latter pattern. Cut also a piece of felt in the same size, and put it to the side.
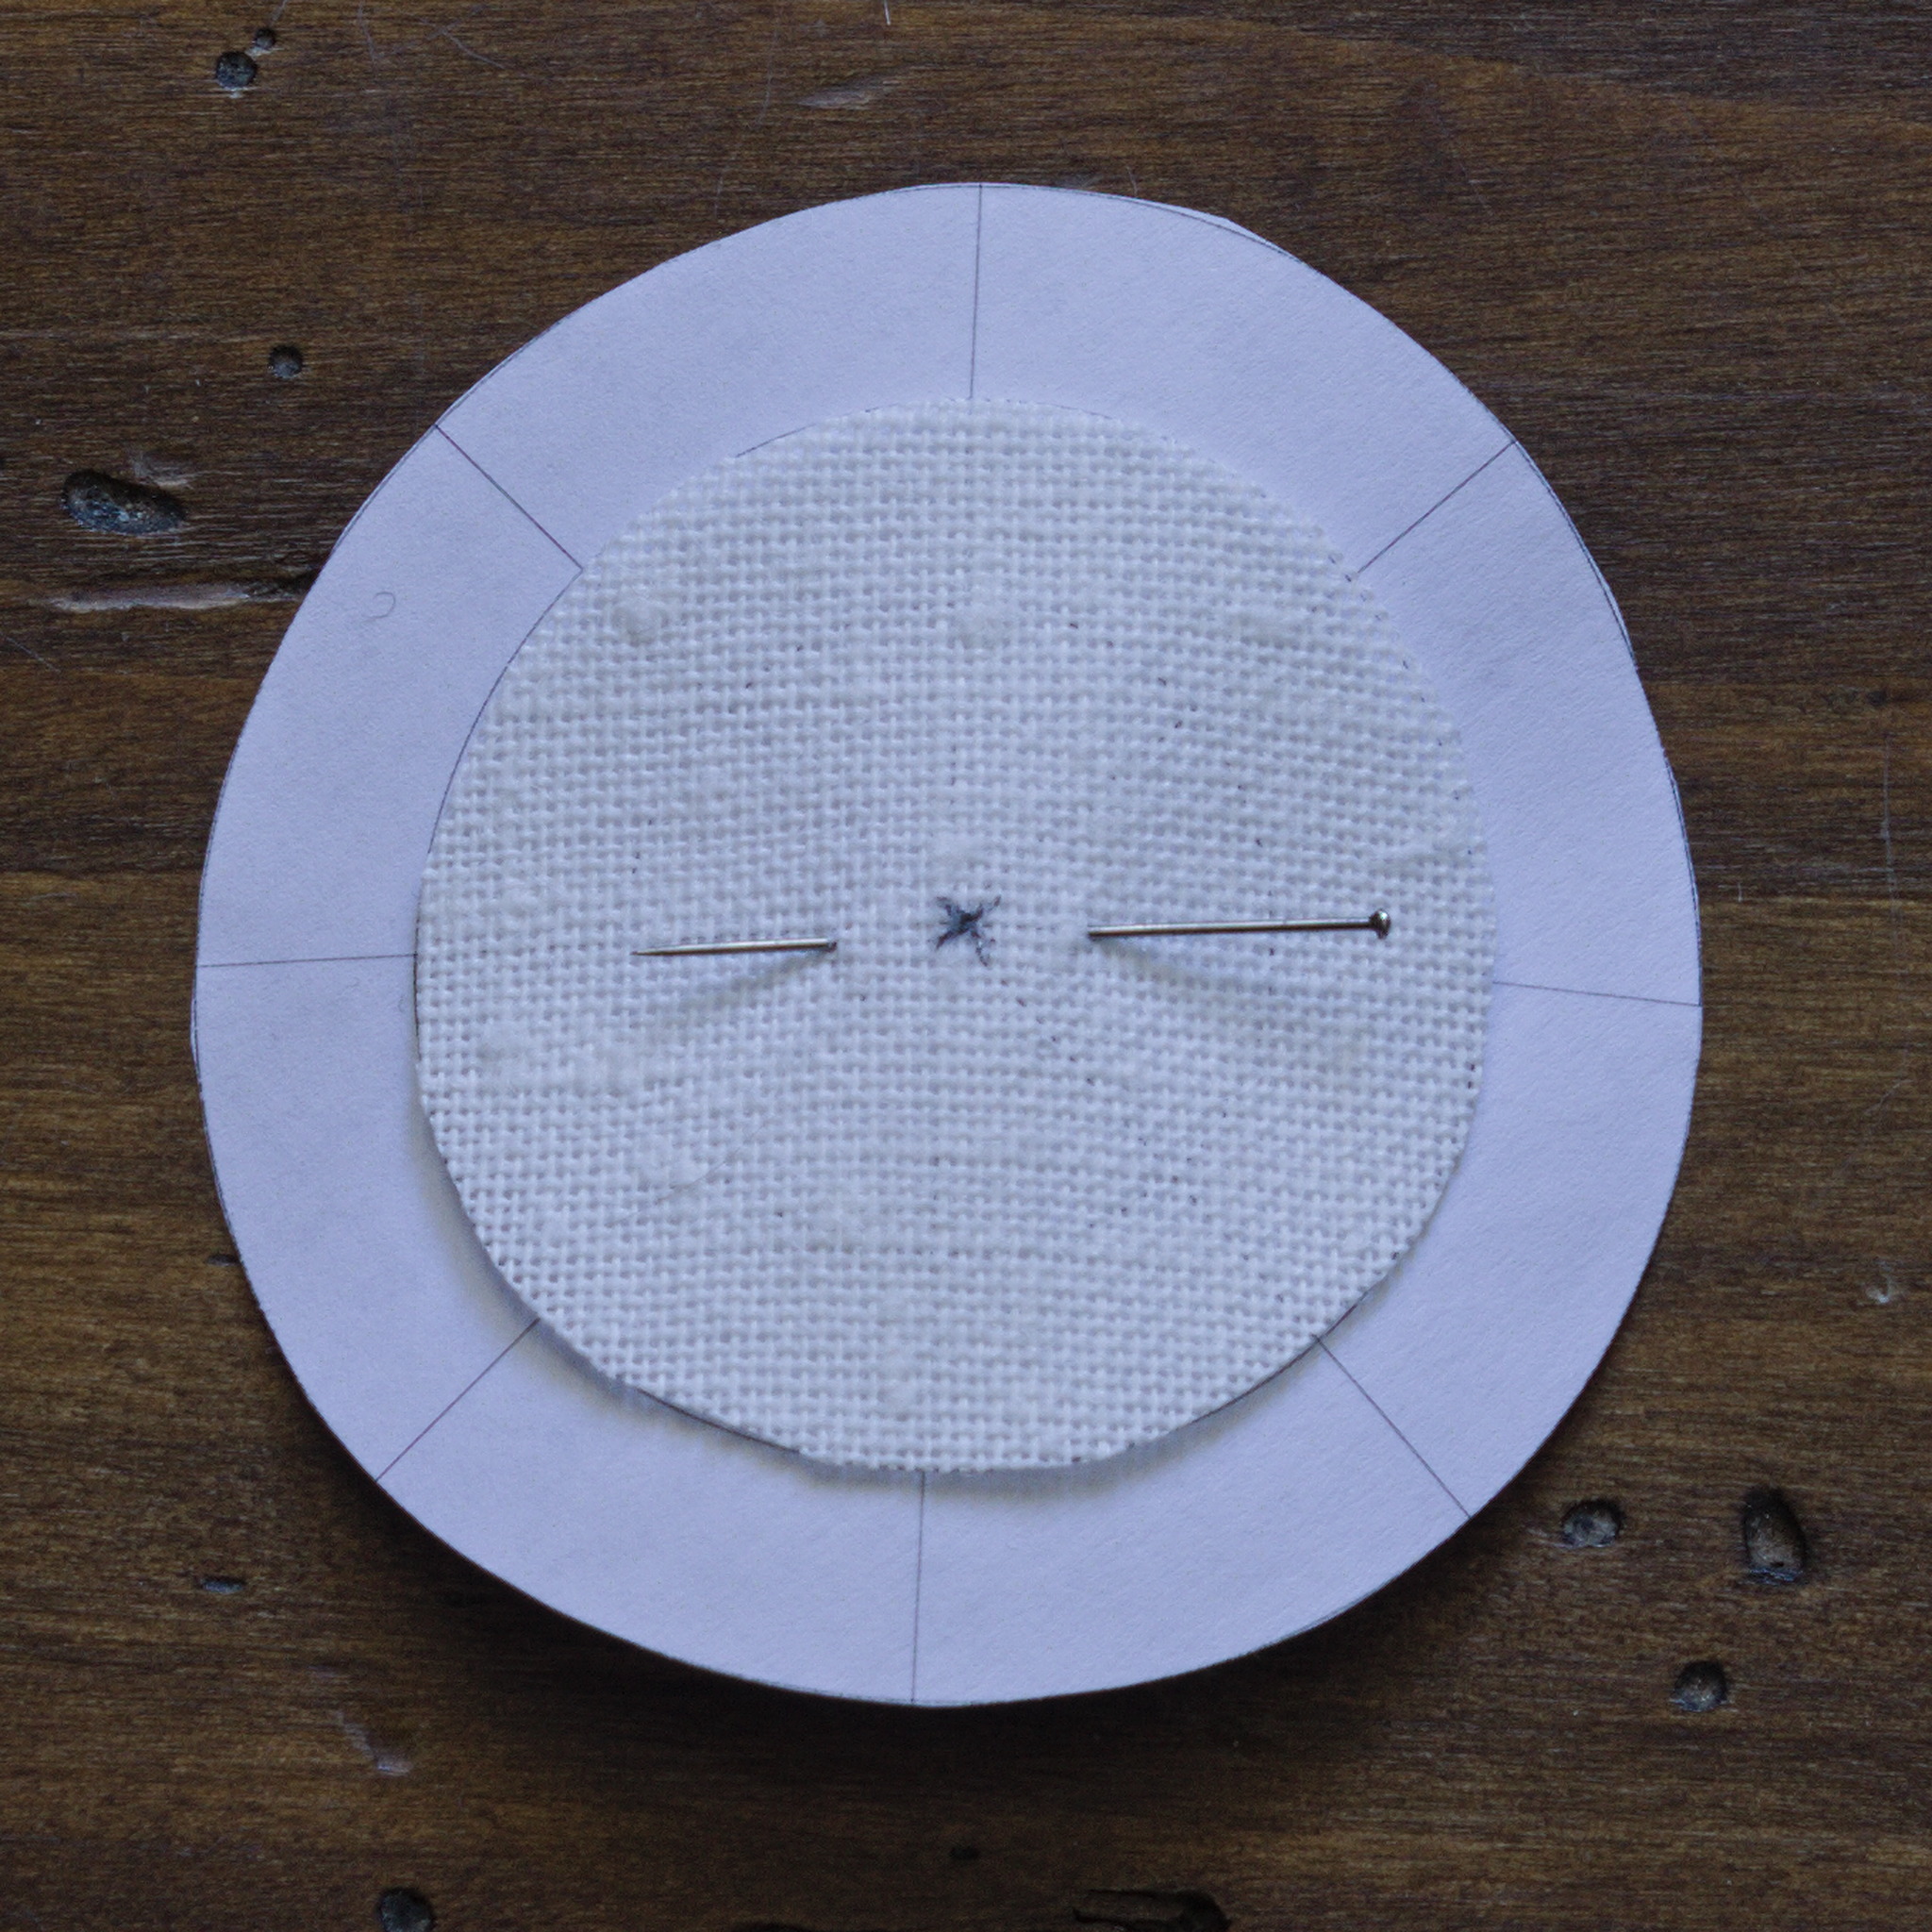
Pin the backing to the complete paper pattern, mark the center point.
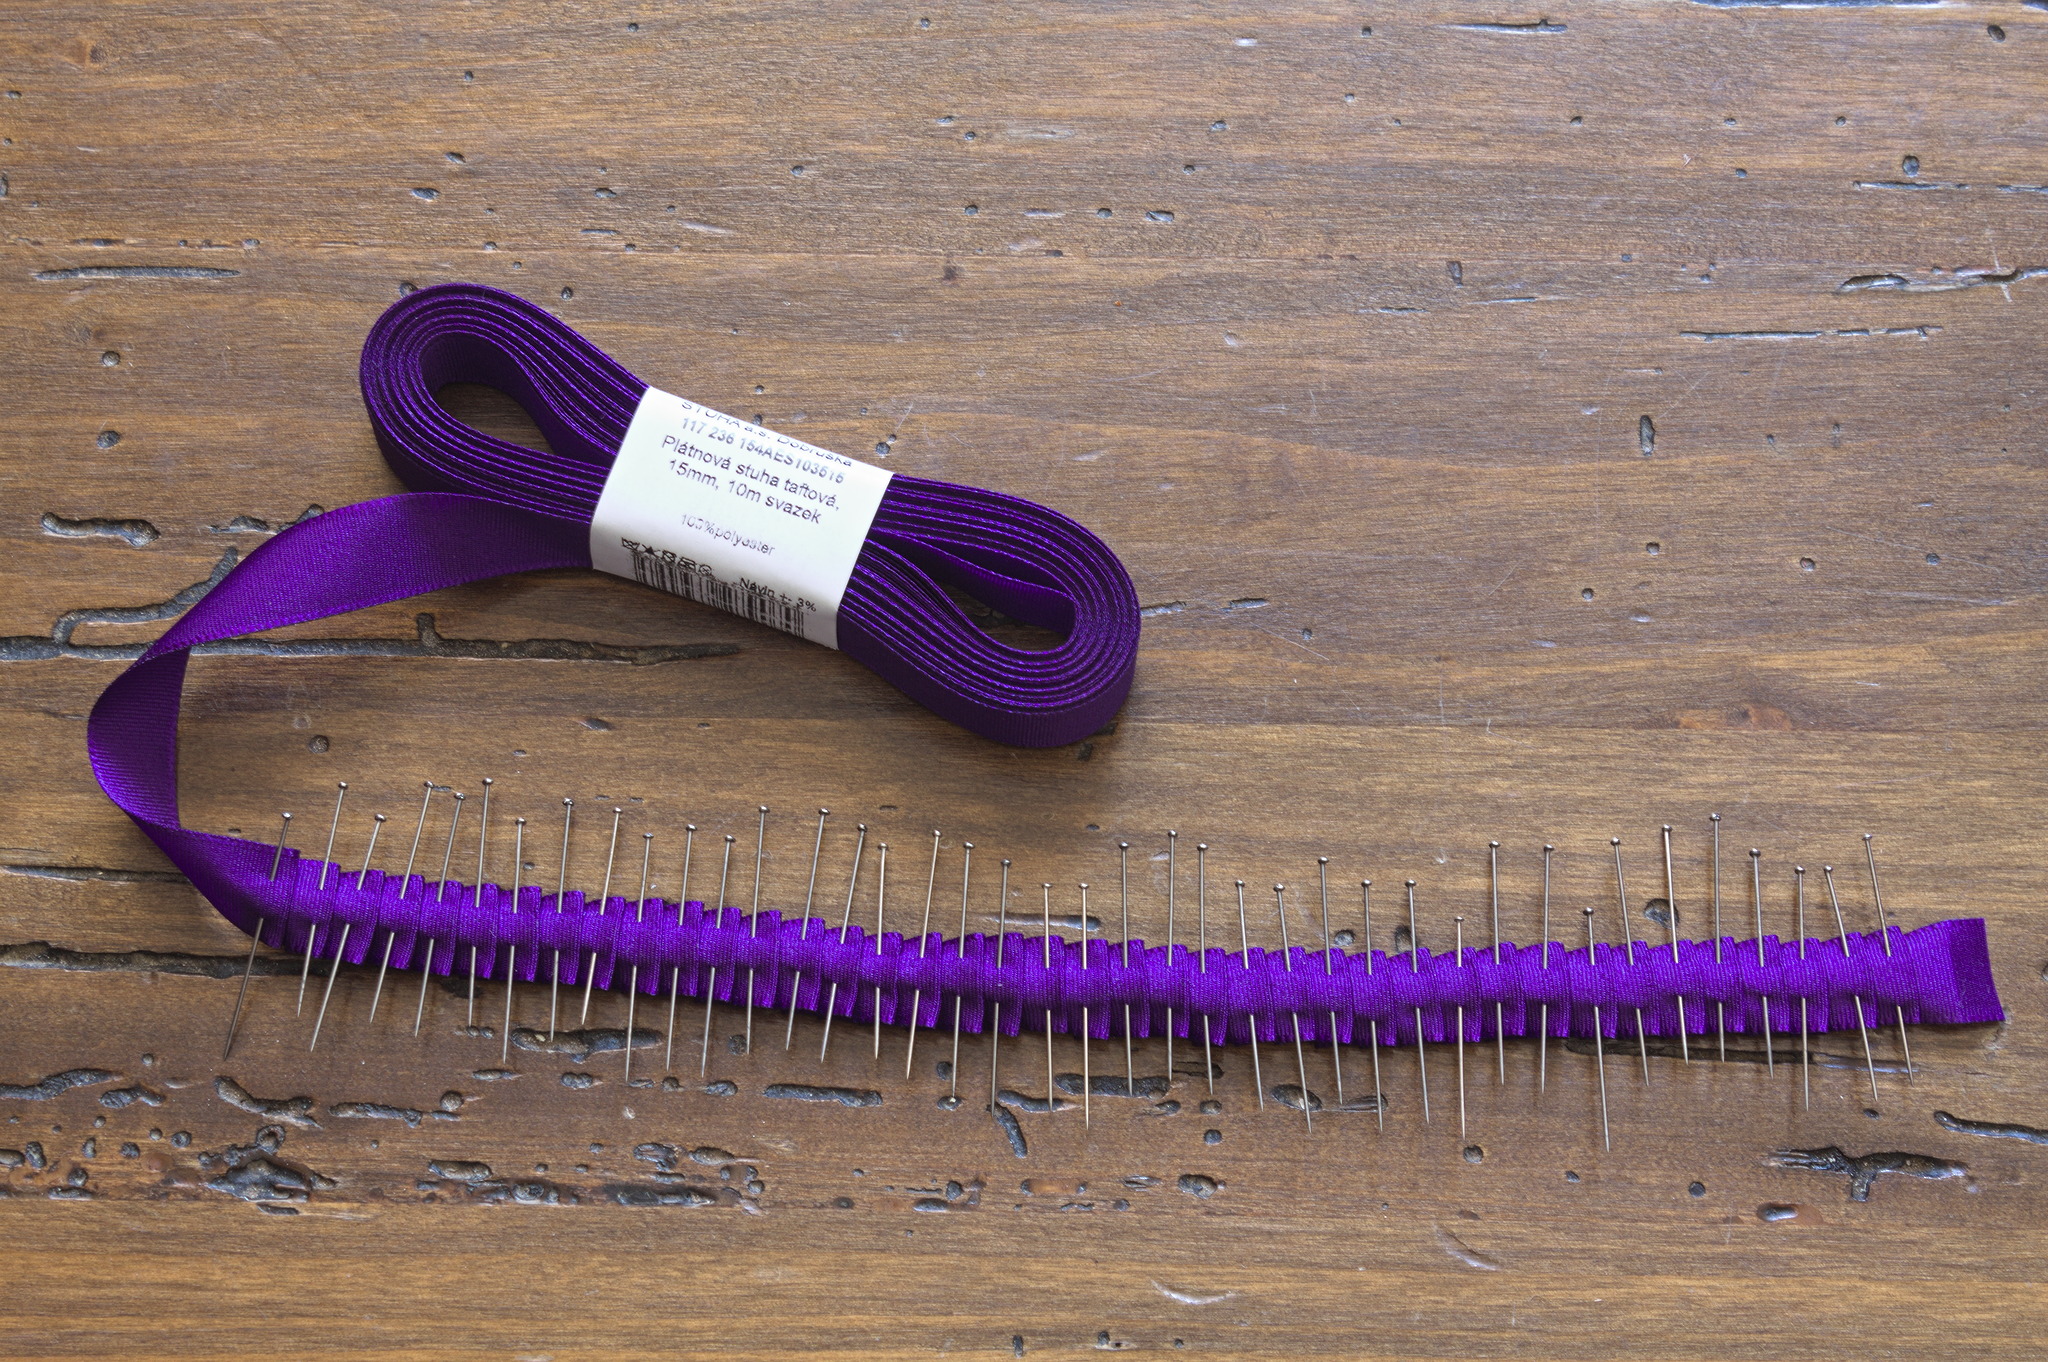
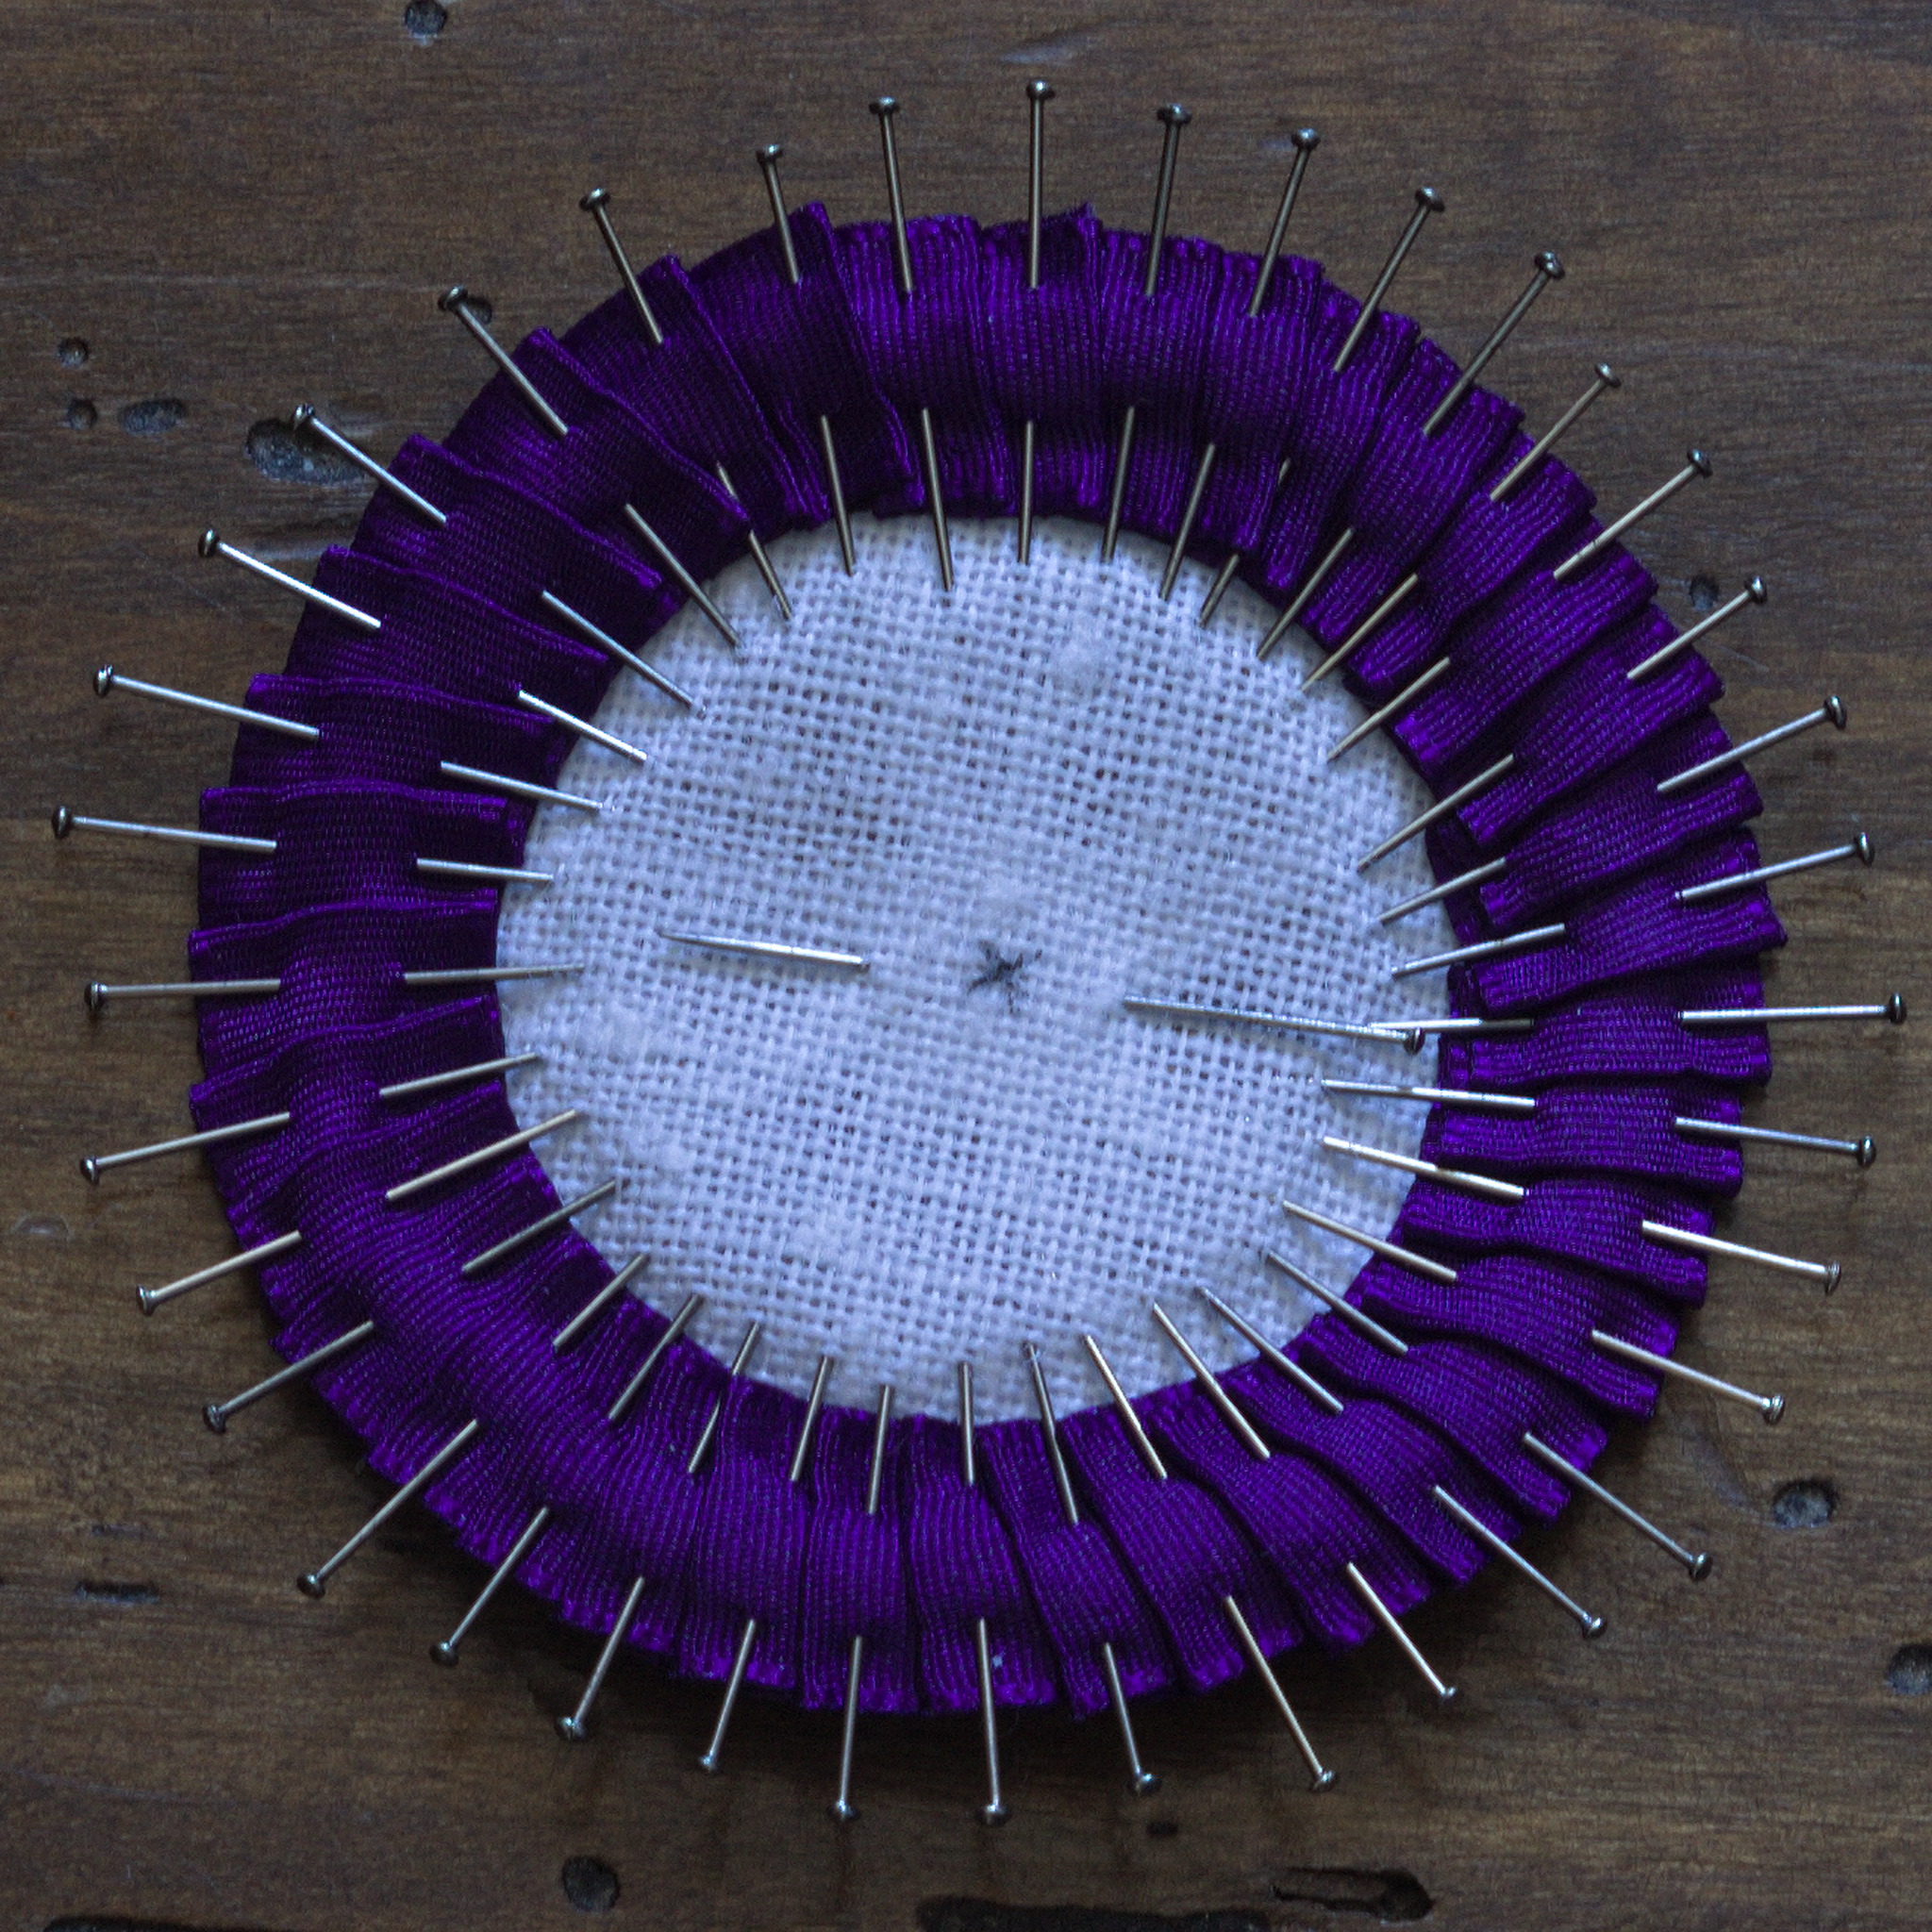
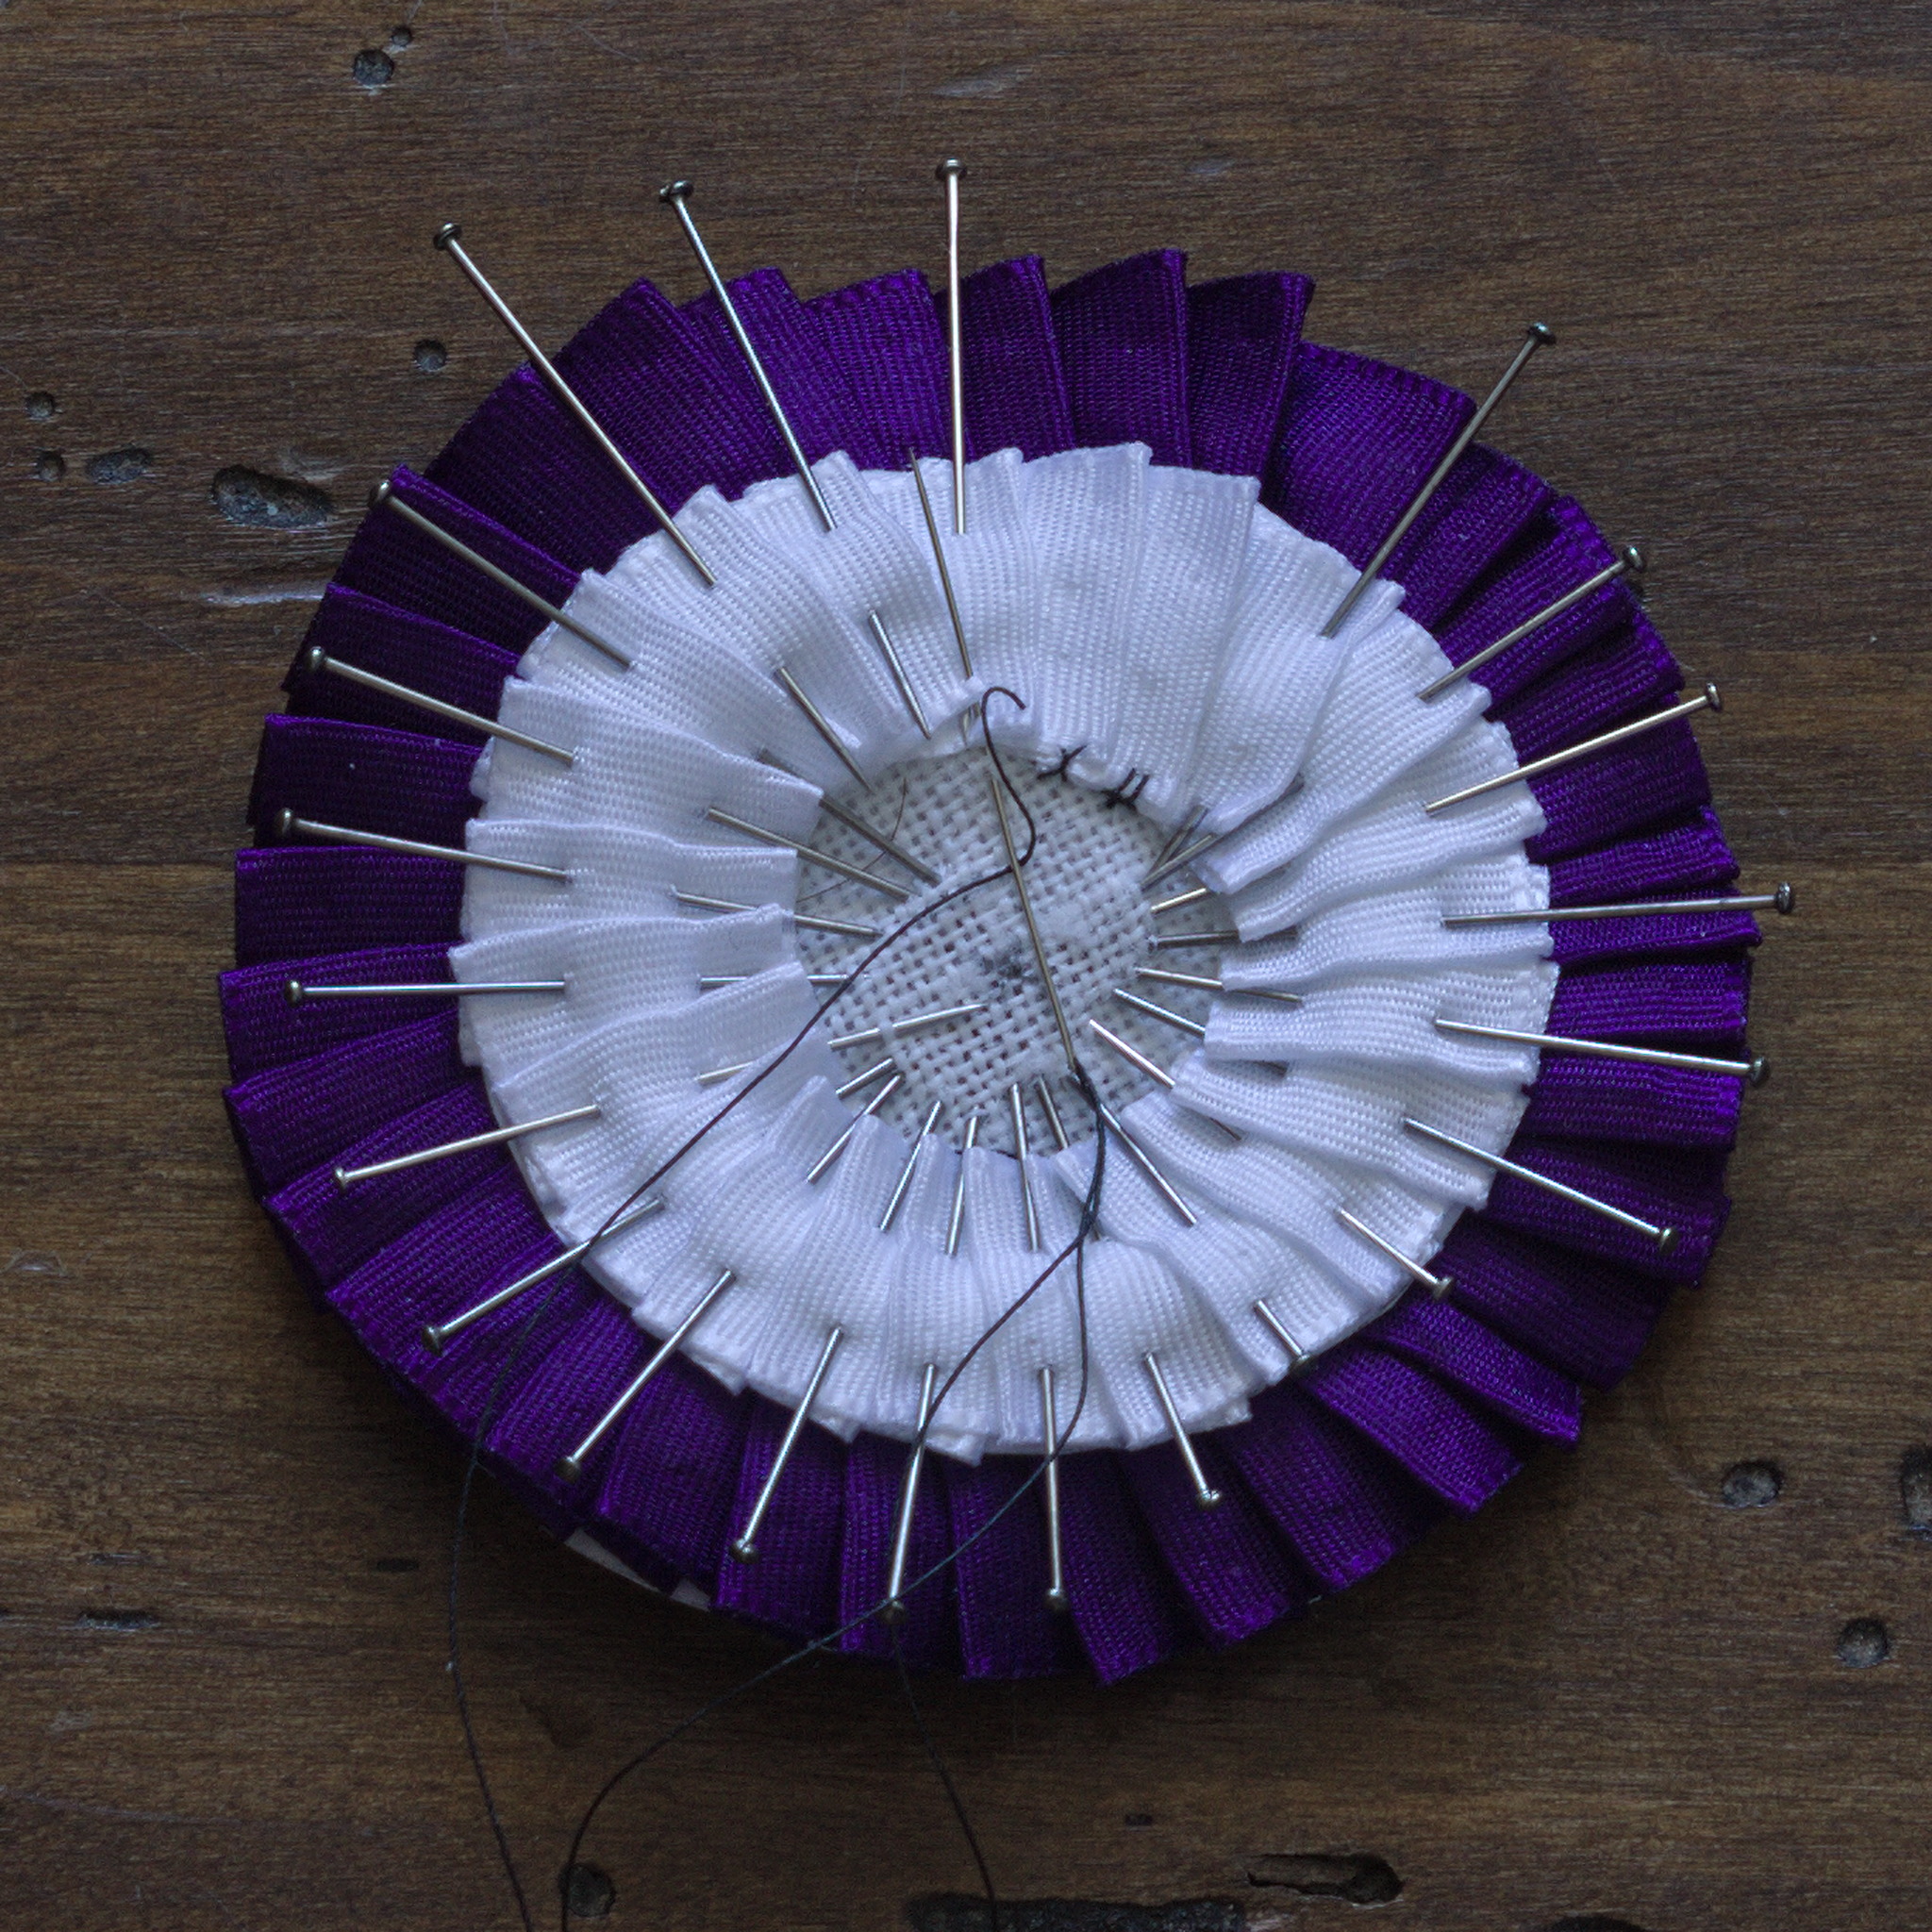
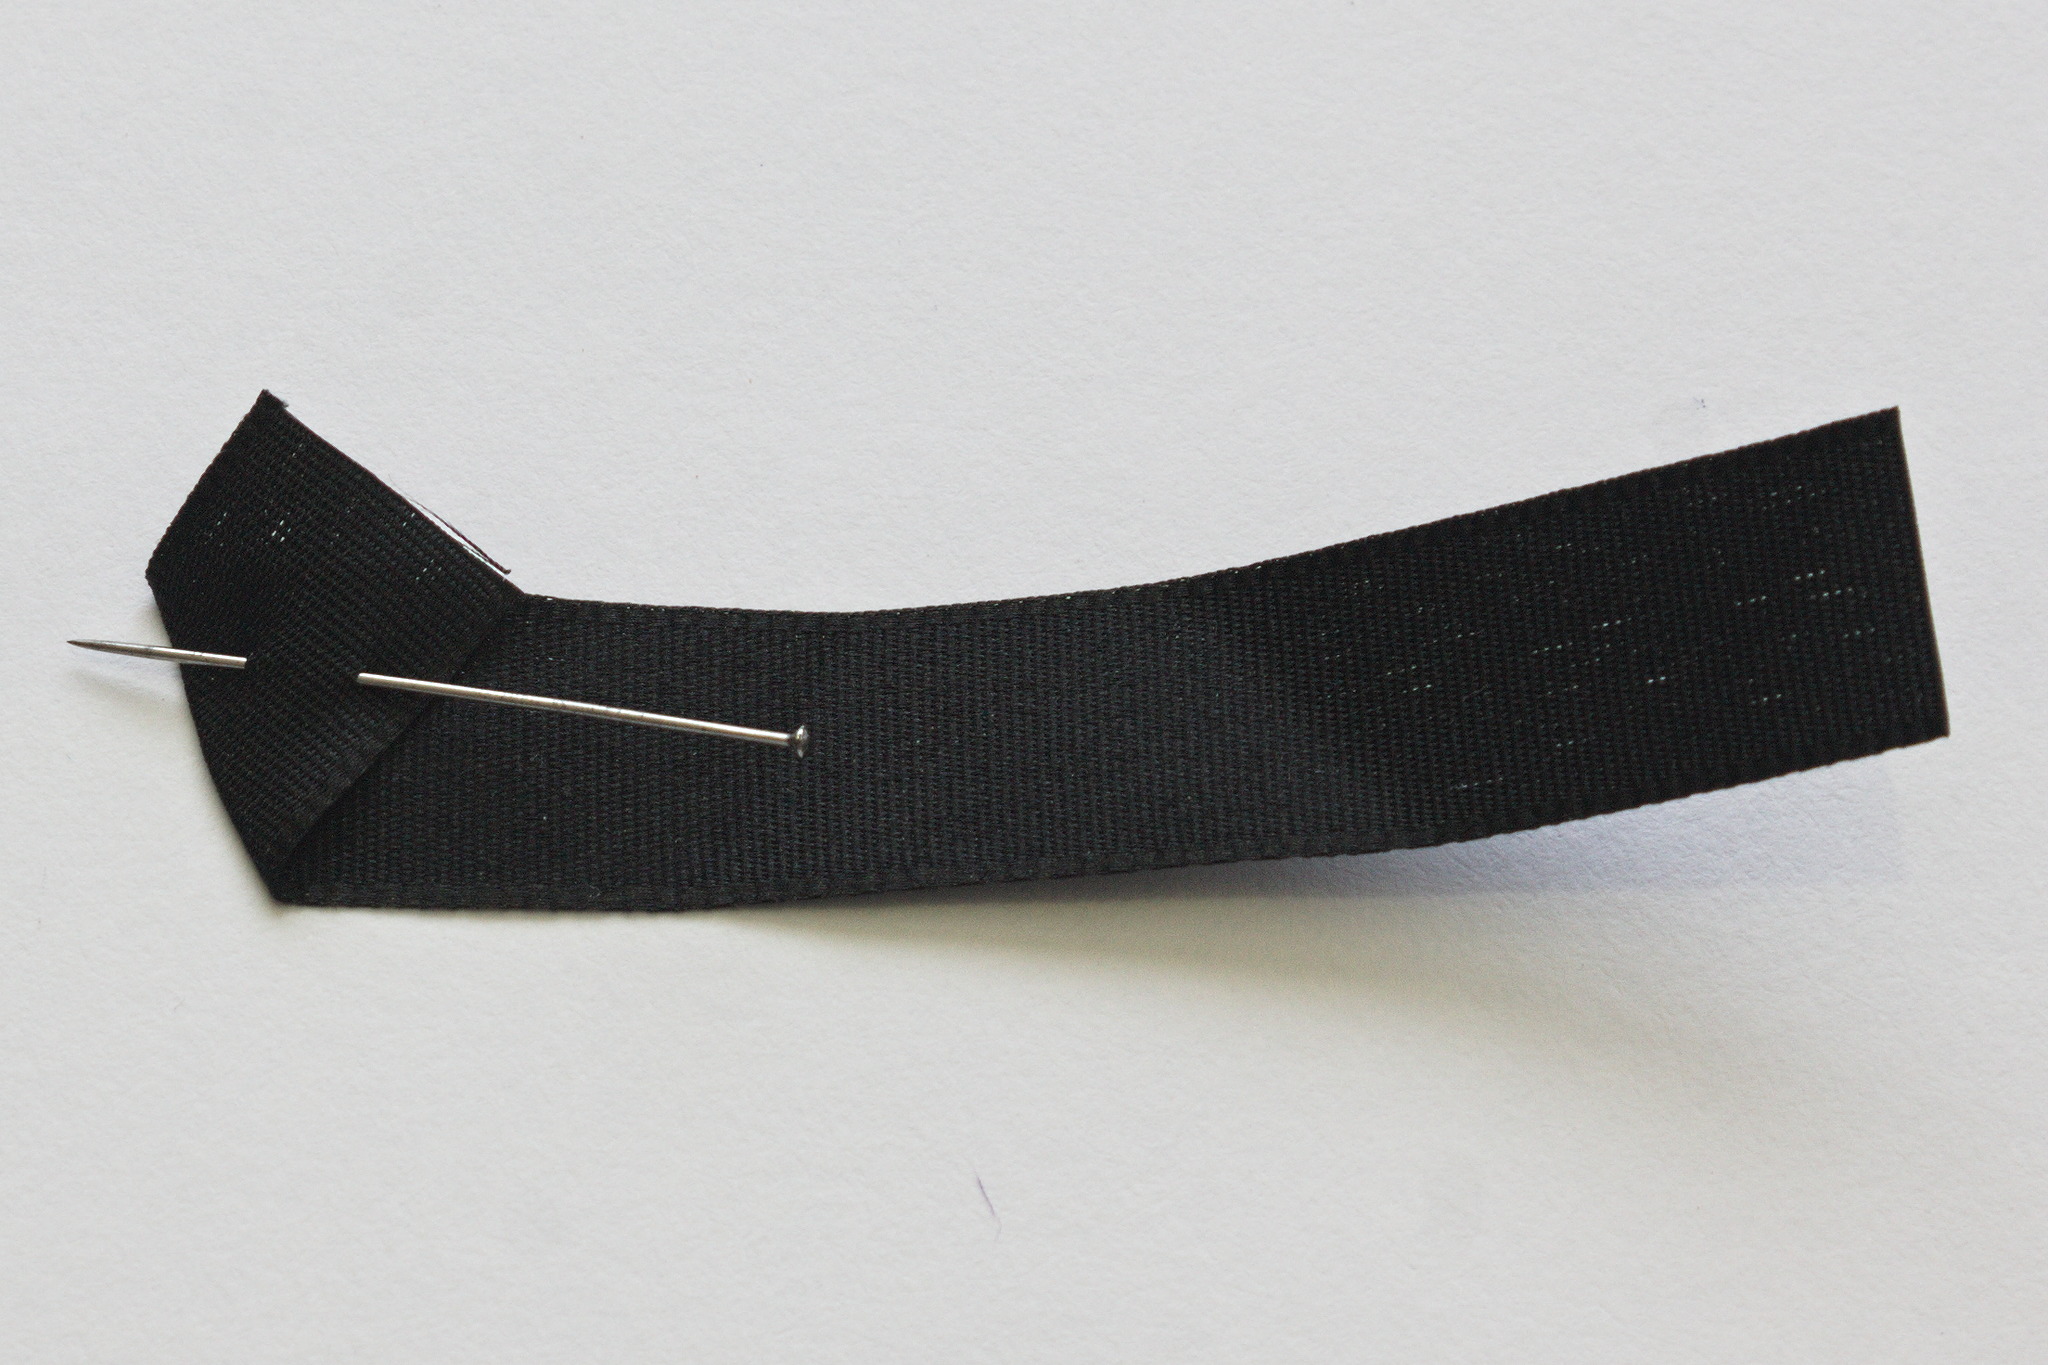
Measure the circumference of the outer circle of the pattern, pleat the outer ribbon to about that length, starting with a folded edge and pinning each pleat, but don’t cut the end.
Tip
Knife pleats 5 mm deep every 10 mm are a good starting point, and what is being used in this tutorial, but feel free to experiment with different pleat patterns.
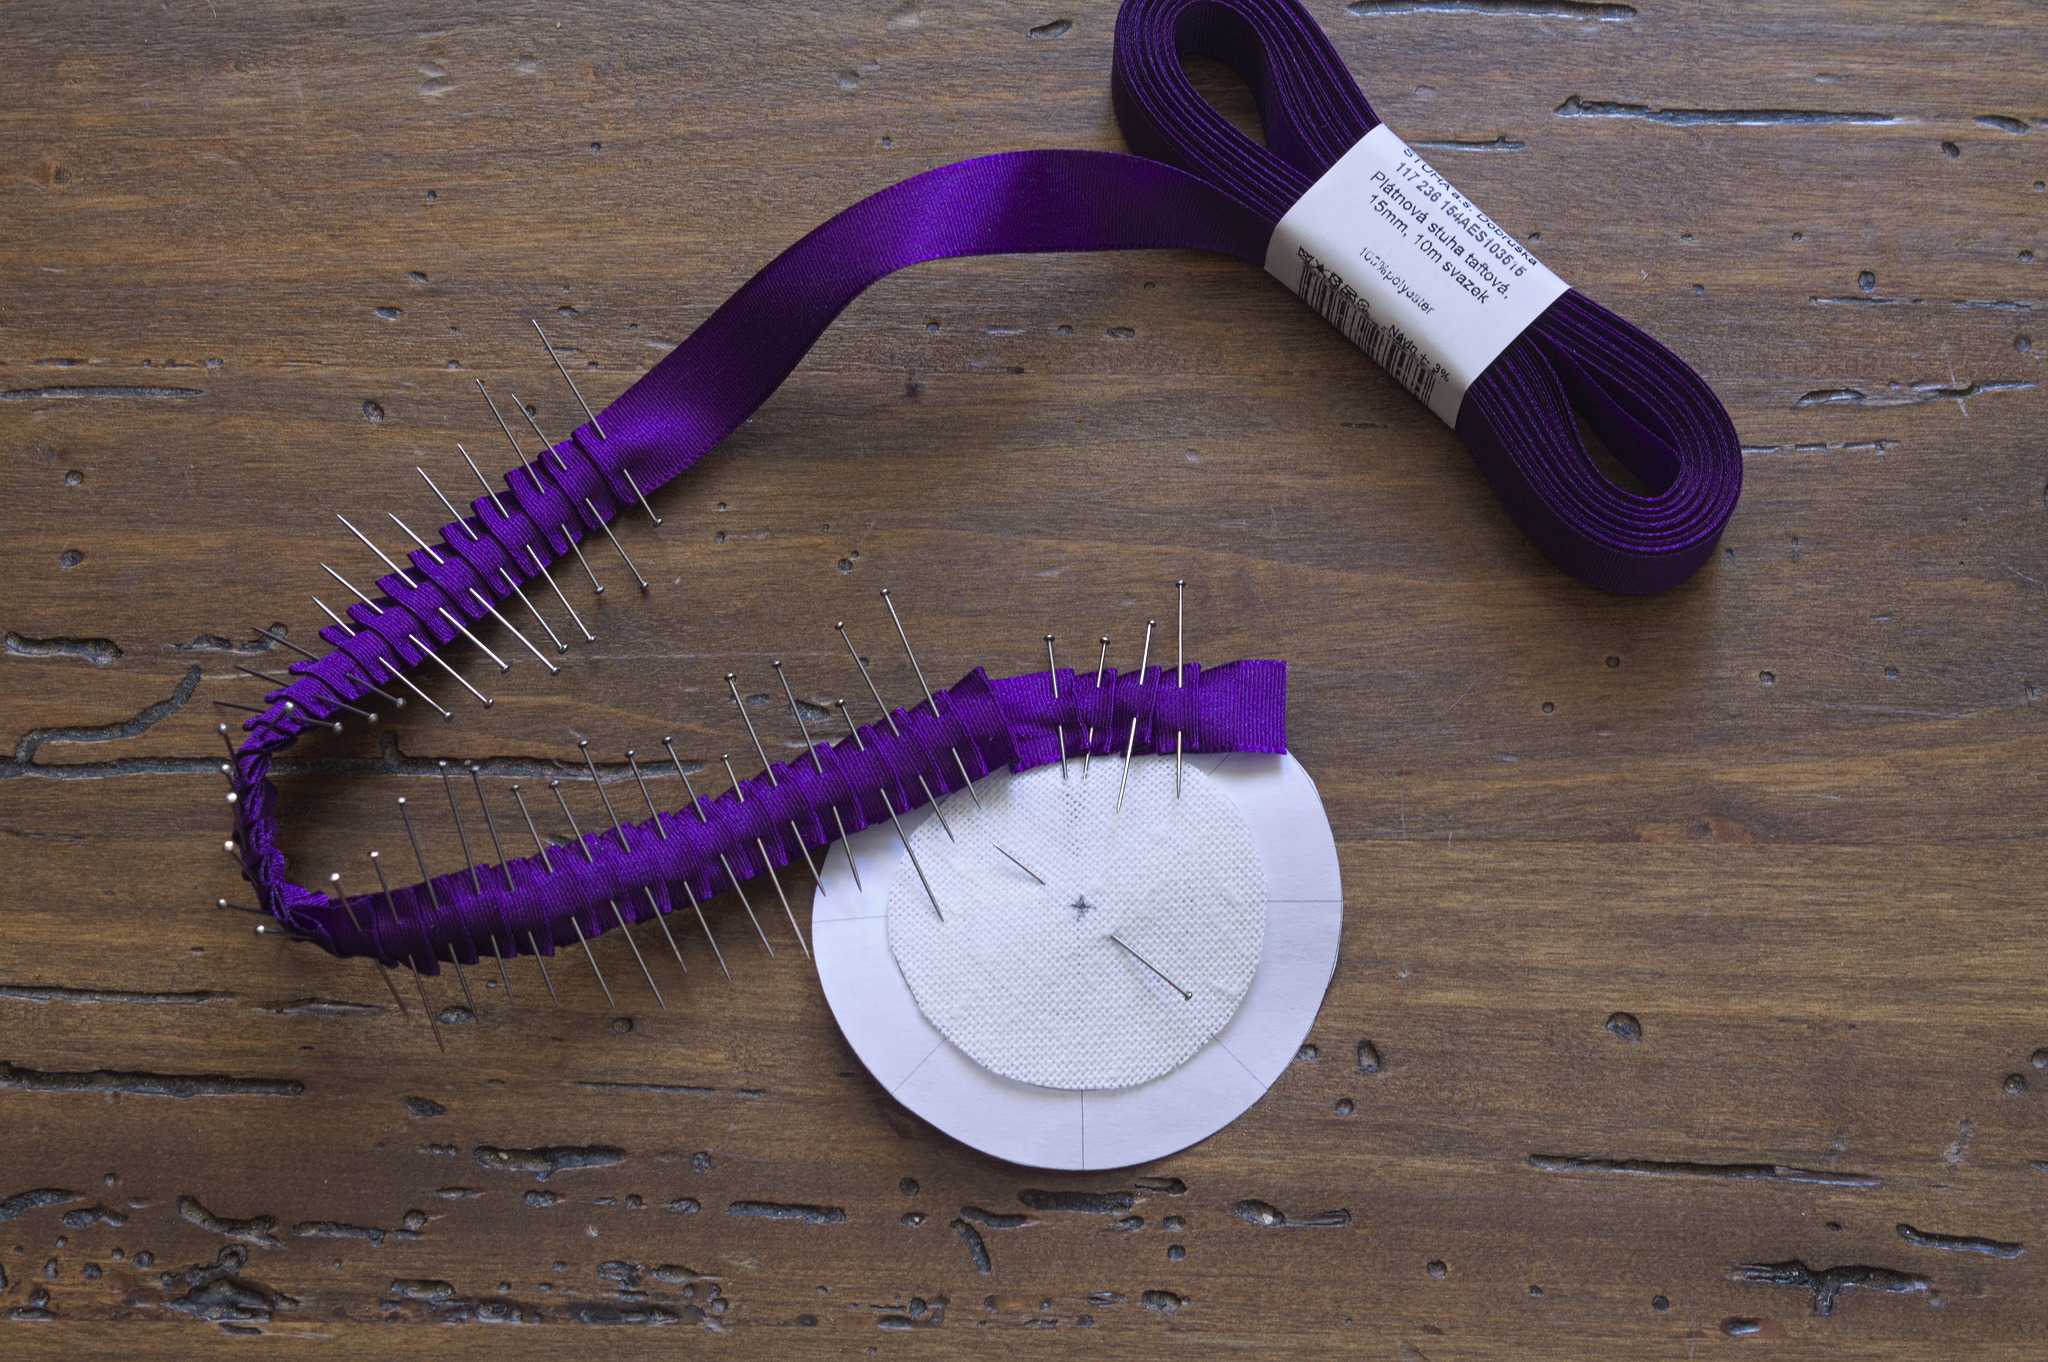
Starting a couple pleats from the free end, remove the pin from one of the pleats, align that pleat with the outer edge of the pattern and pin it back to the backing.
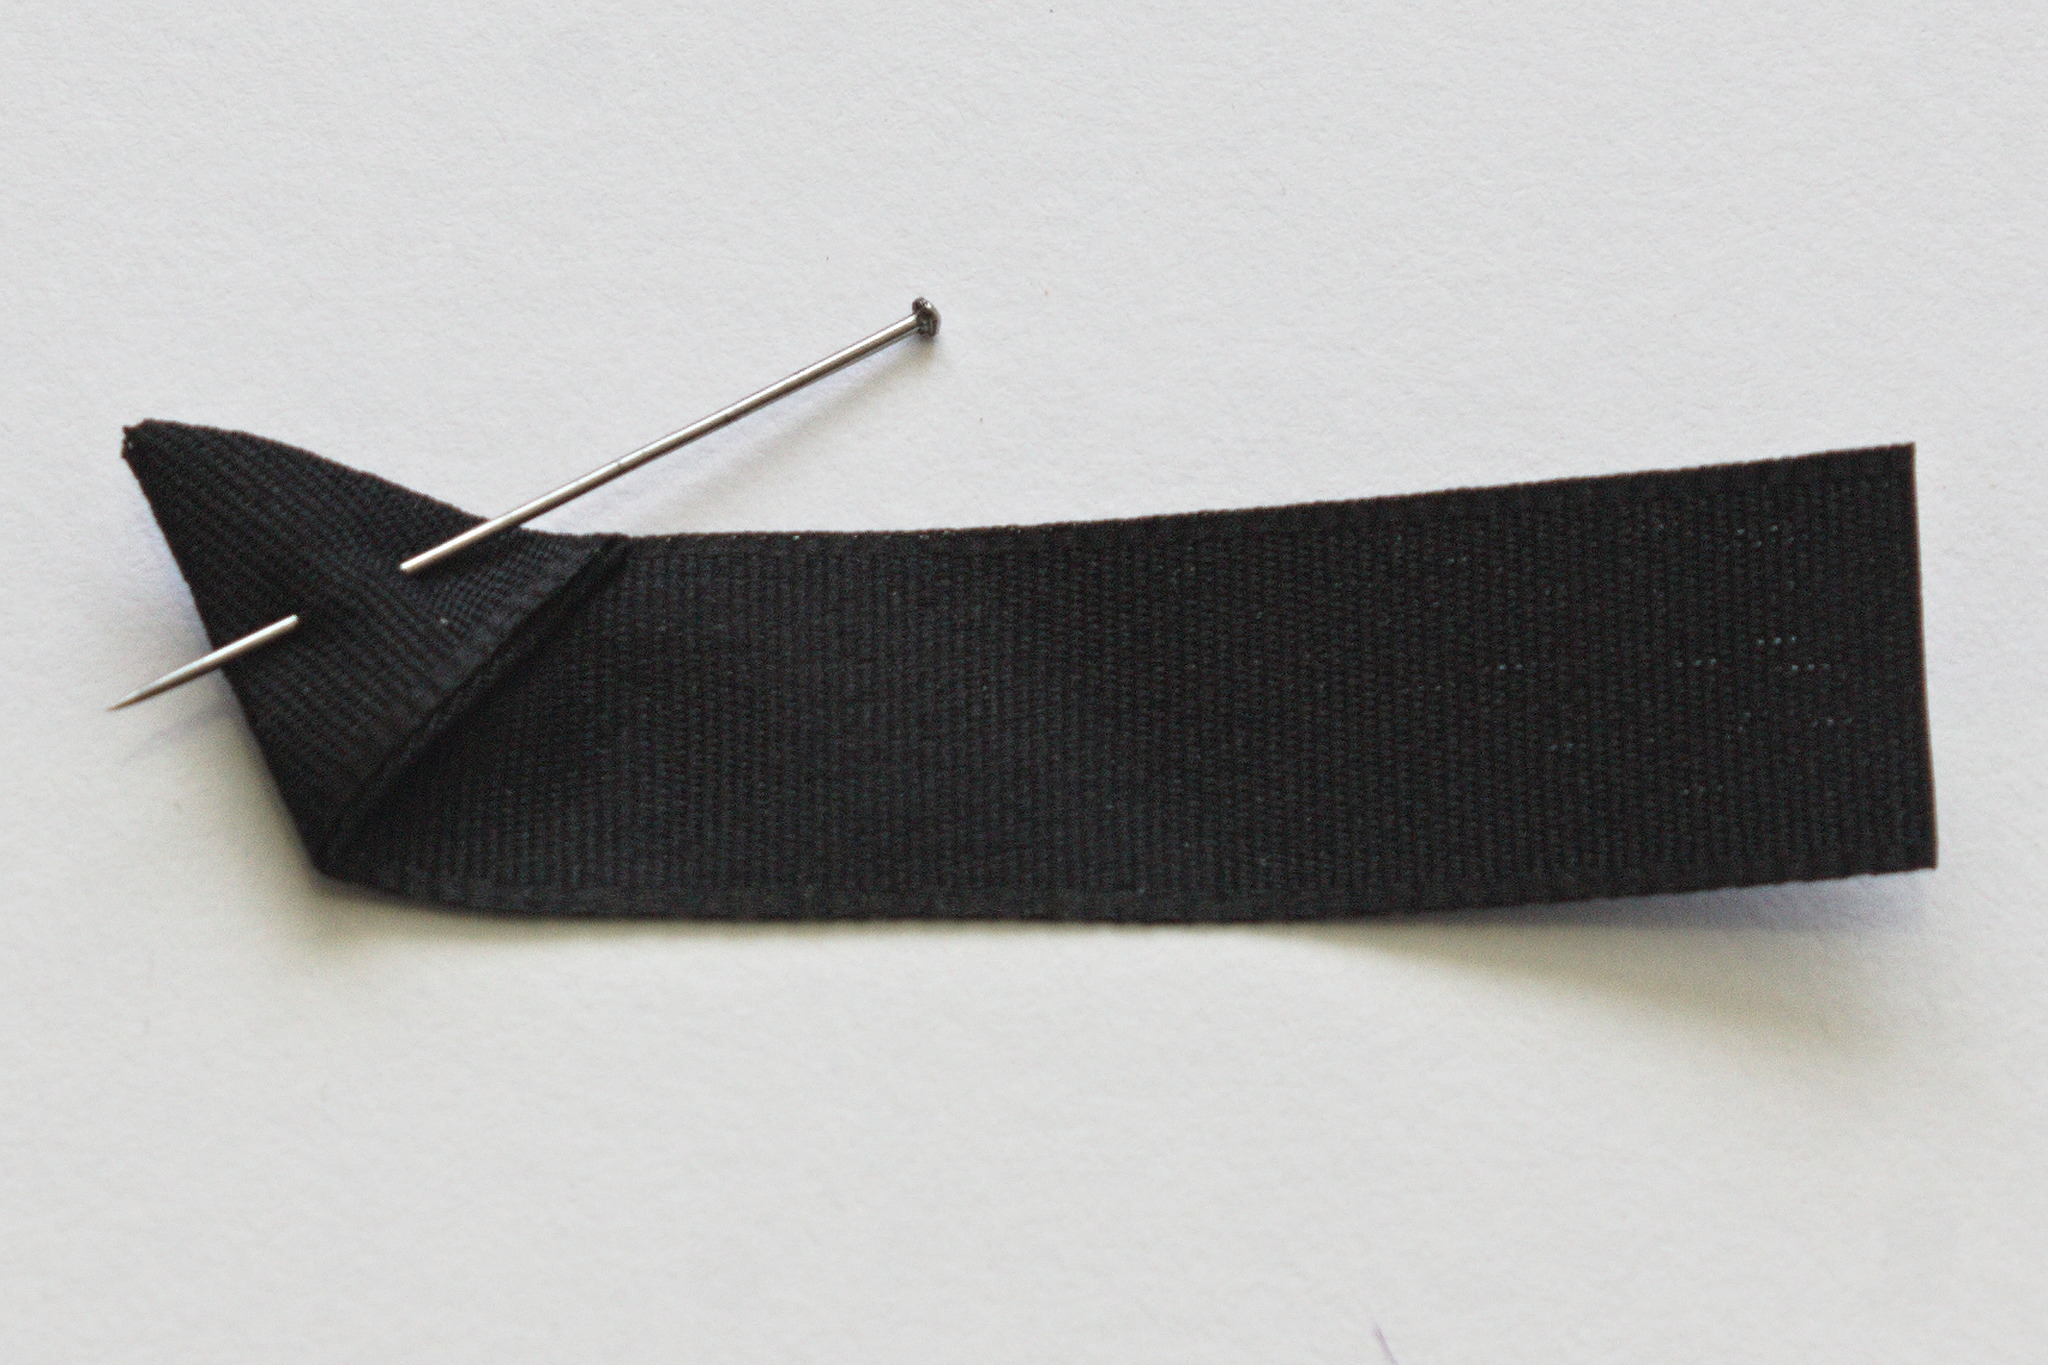
Remove the pin from the next pleat, curve the ribbon following the outer edge of the pattern and pin the pleat back to itself and the backing. Continue doing so until close to the end.
Tip
At this stage bury the points of the pins between the backing and the paper pattern, to minimize the risk of stabbing.
When only a few pleats remain, cut the ribbon at the right length

and nest the end into the fold at the beginning, hiding the raw edges;
pin the joint and the remaining pleats to the backing.
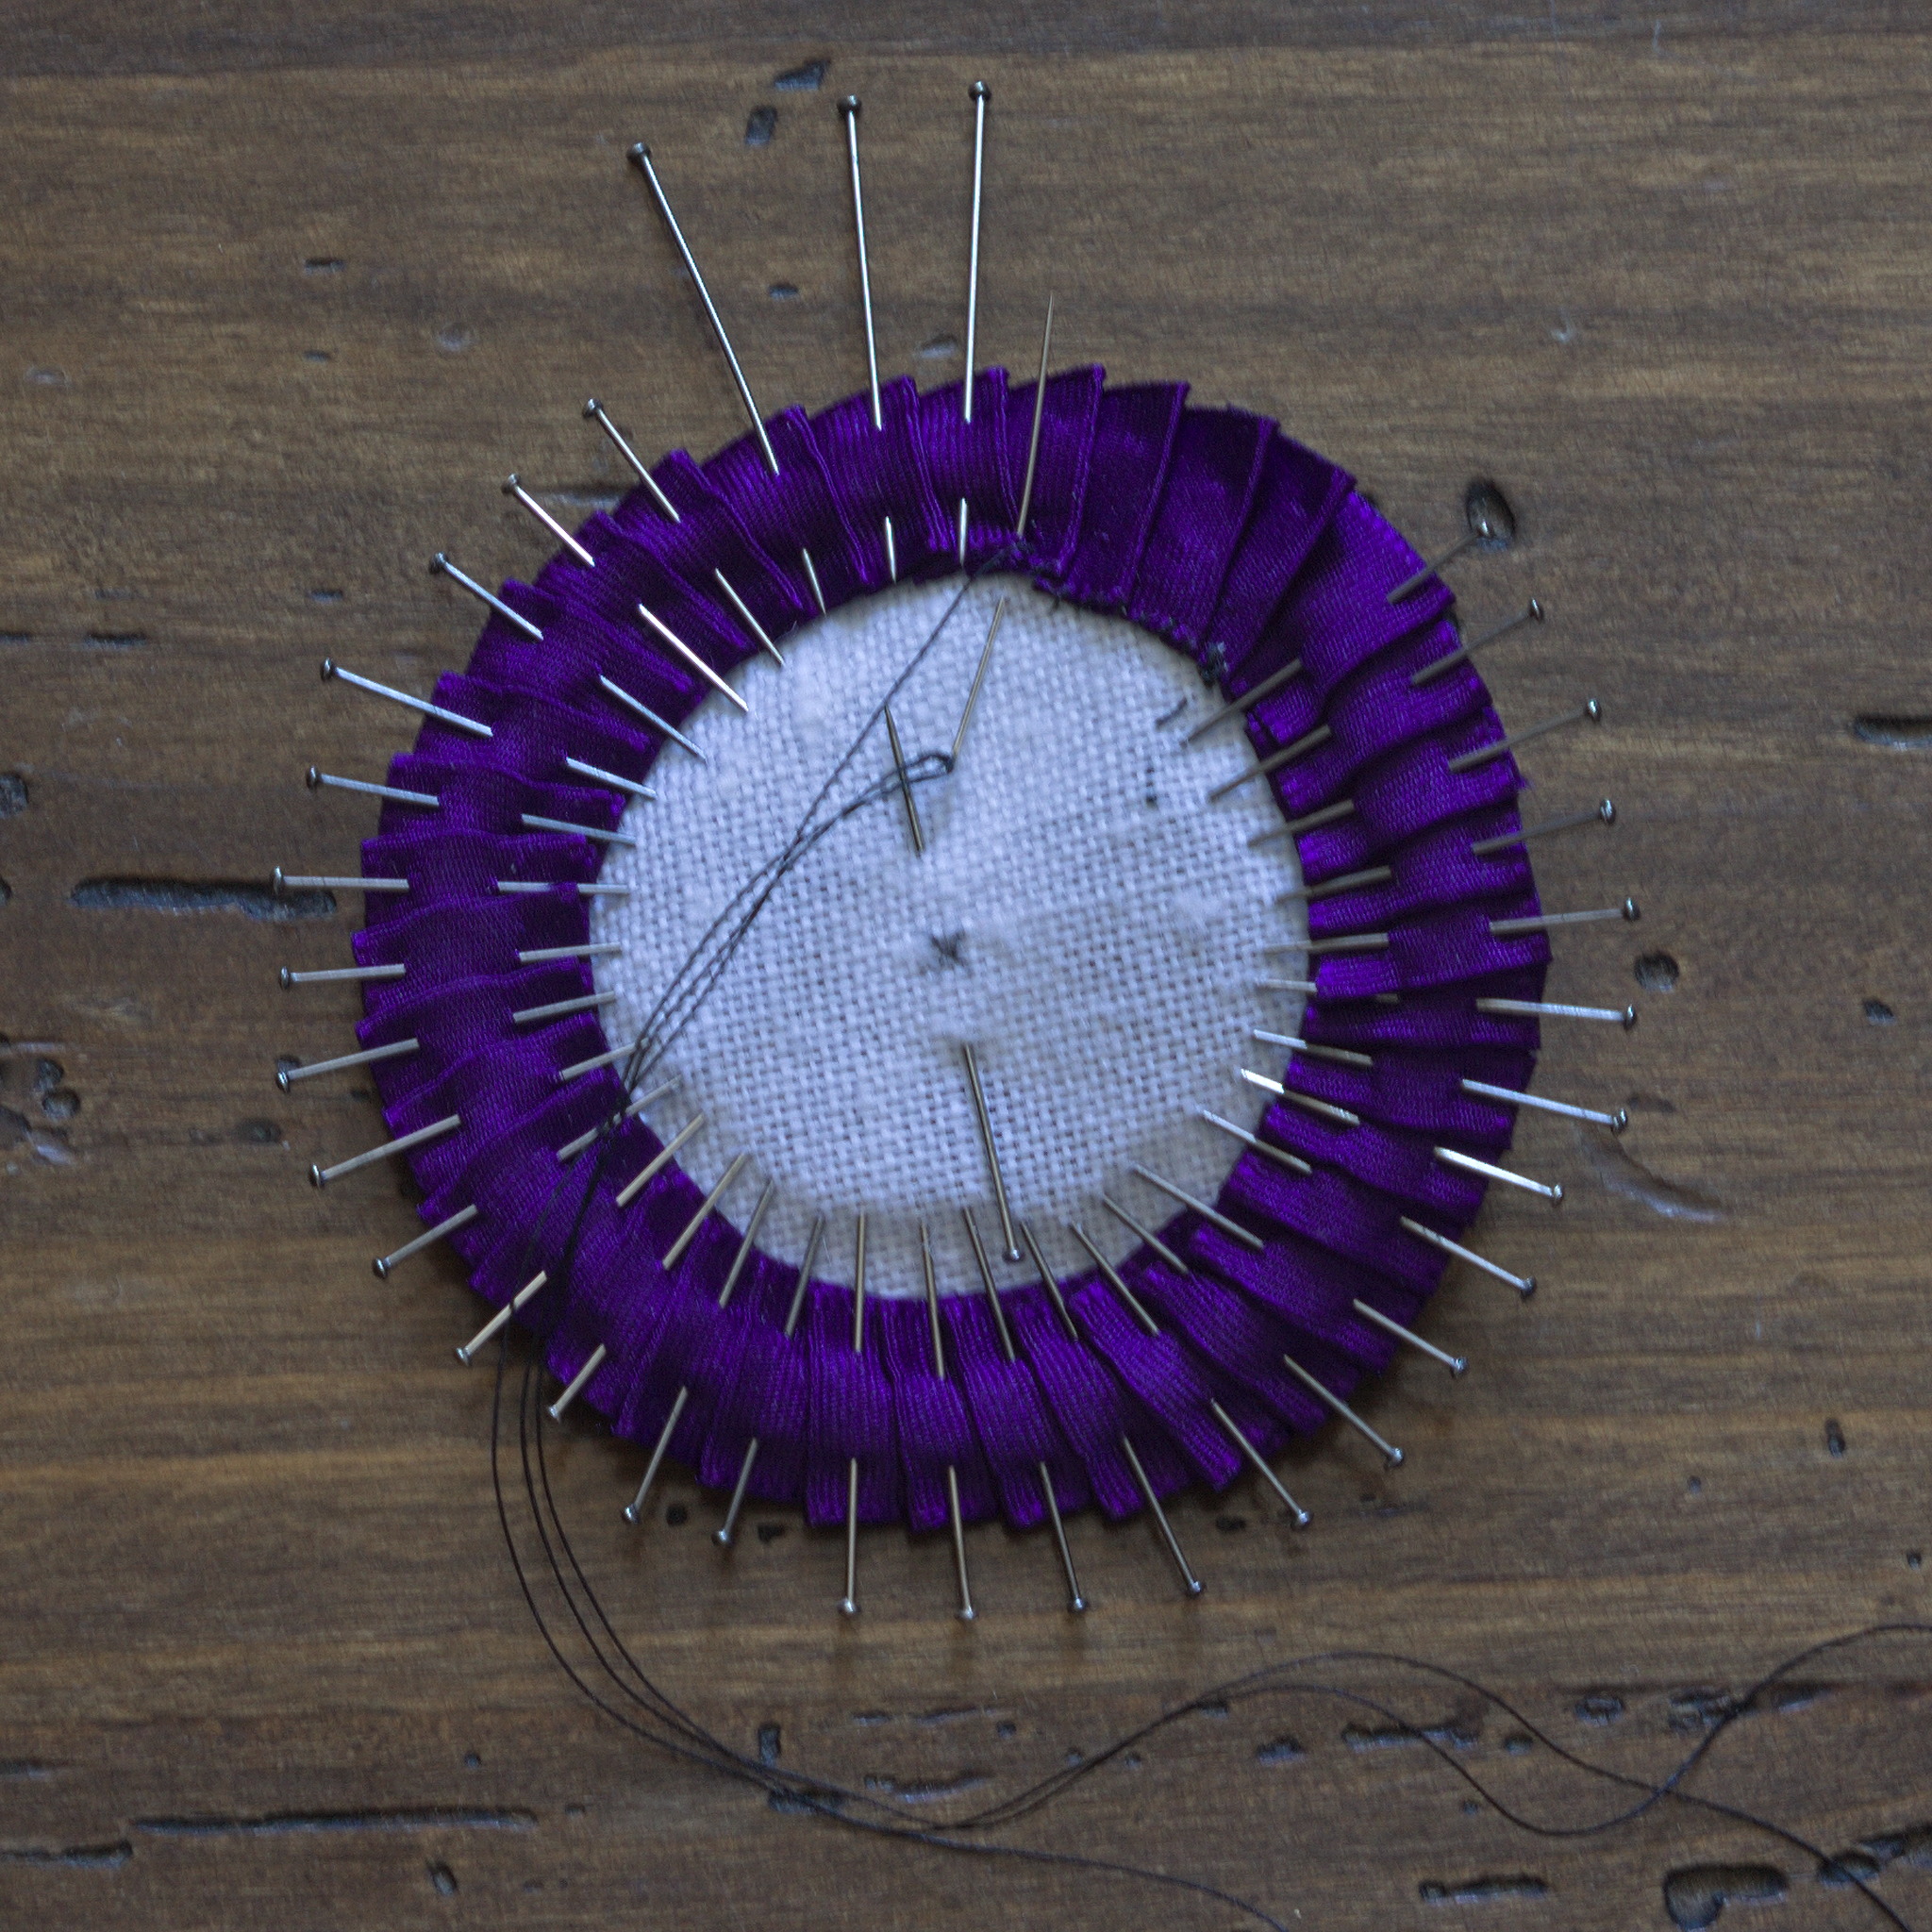
Whipstitch the ribbon to the backing at the base, taking at least two or three stitches in each of the pleats.
Tip
If you’ve buried the points of the pins, pull out the two or three in front of where you’re sewing to be able to manipulate the needle into the fabric.
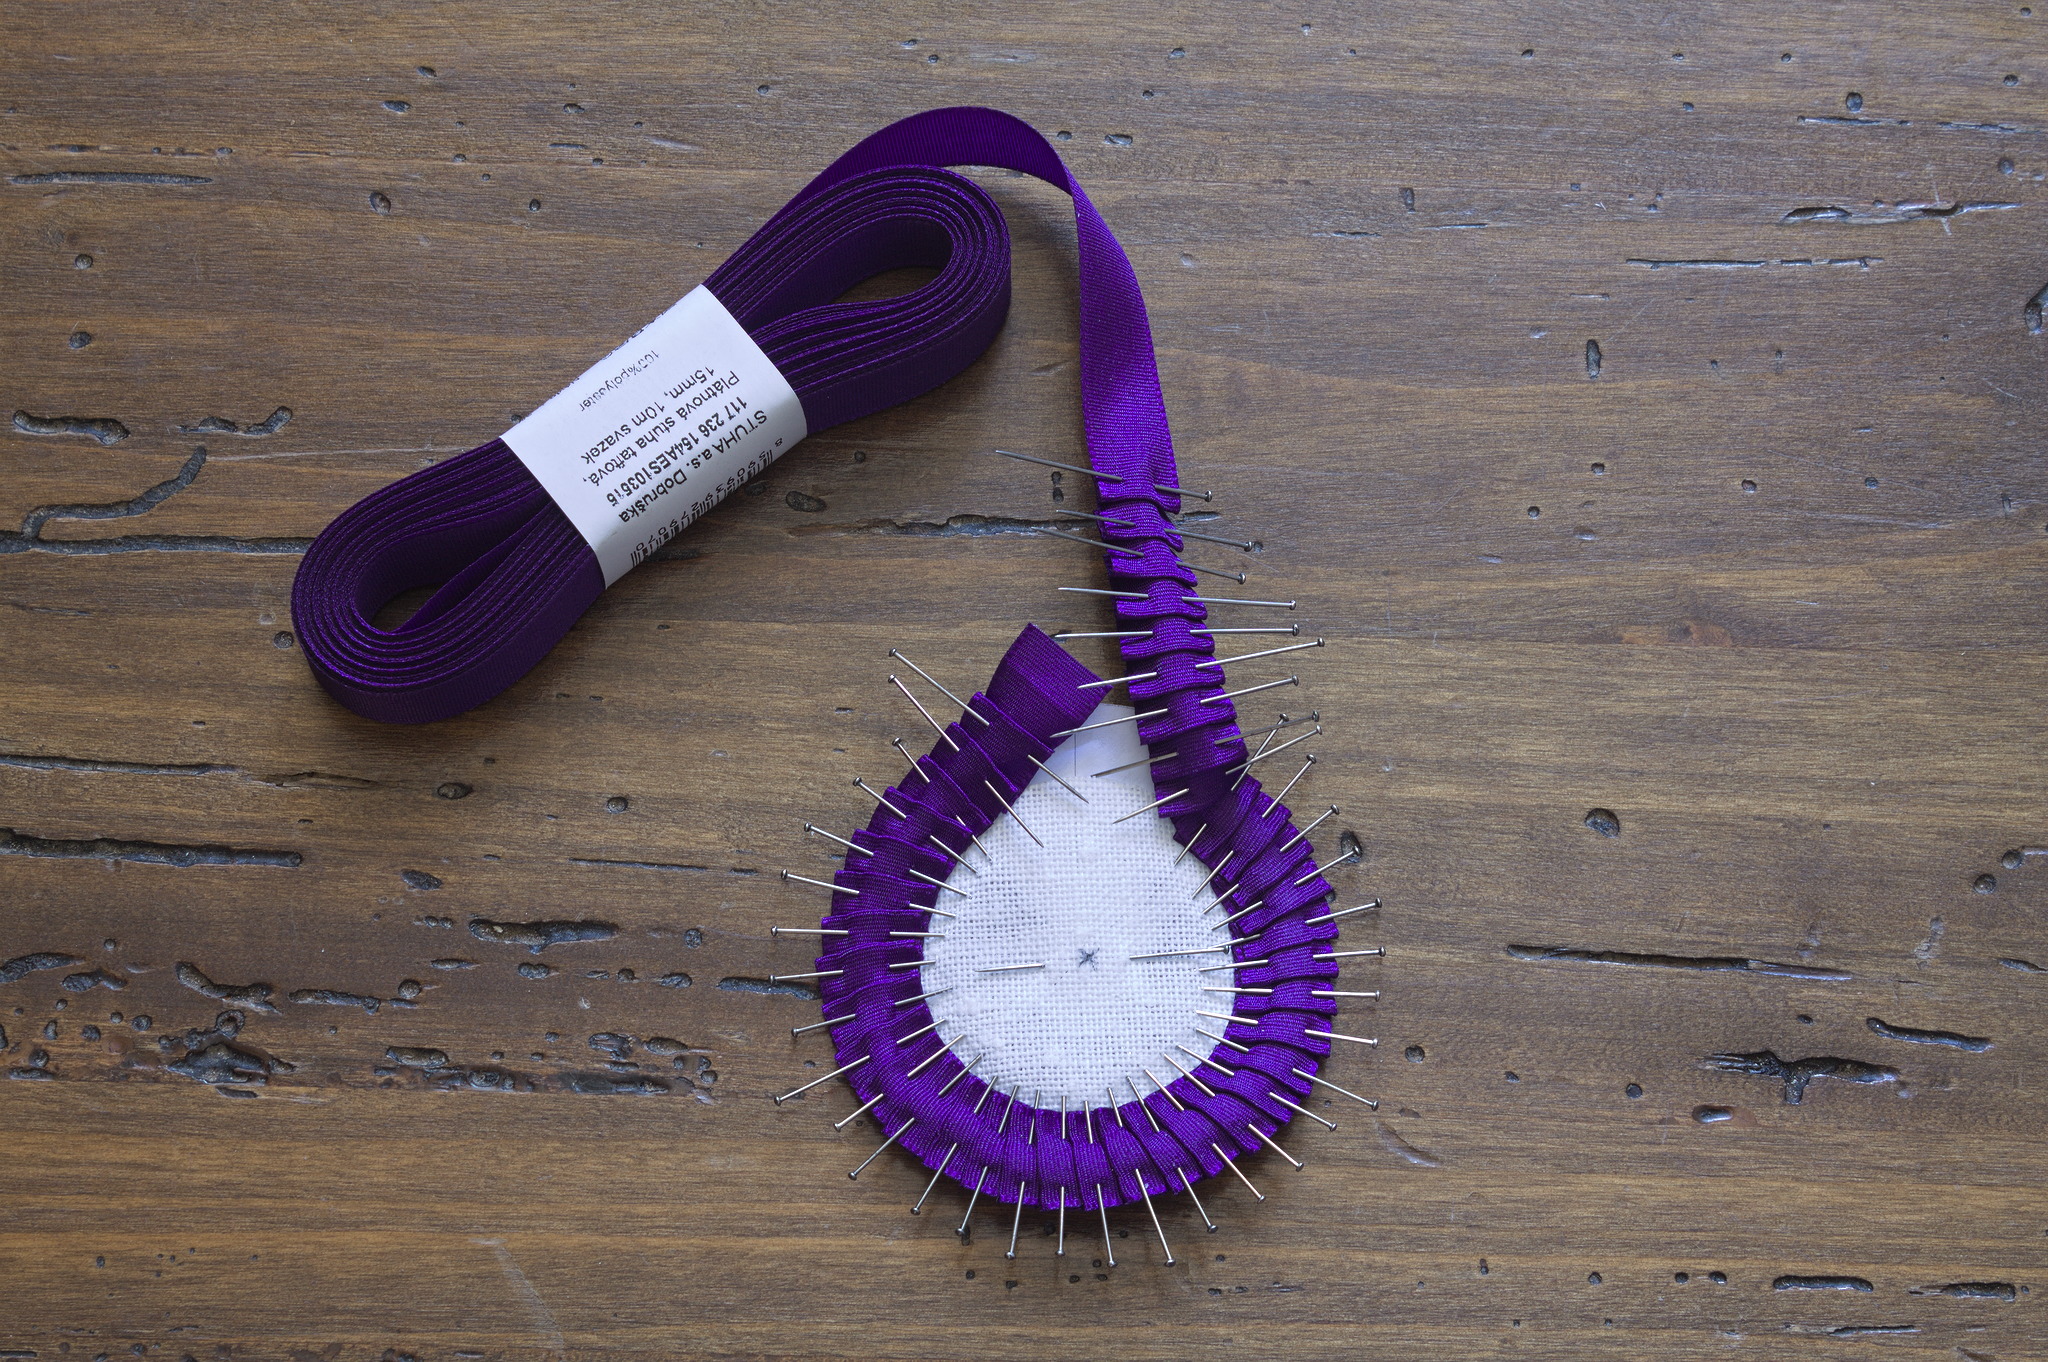
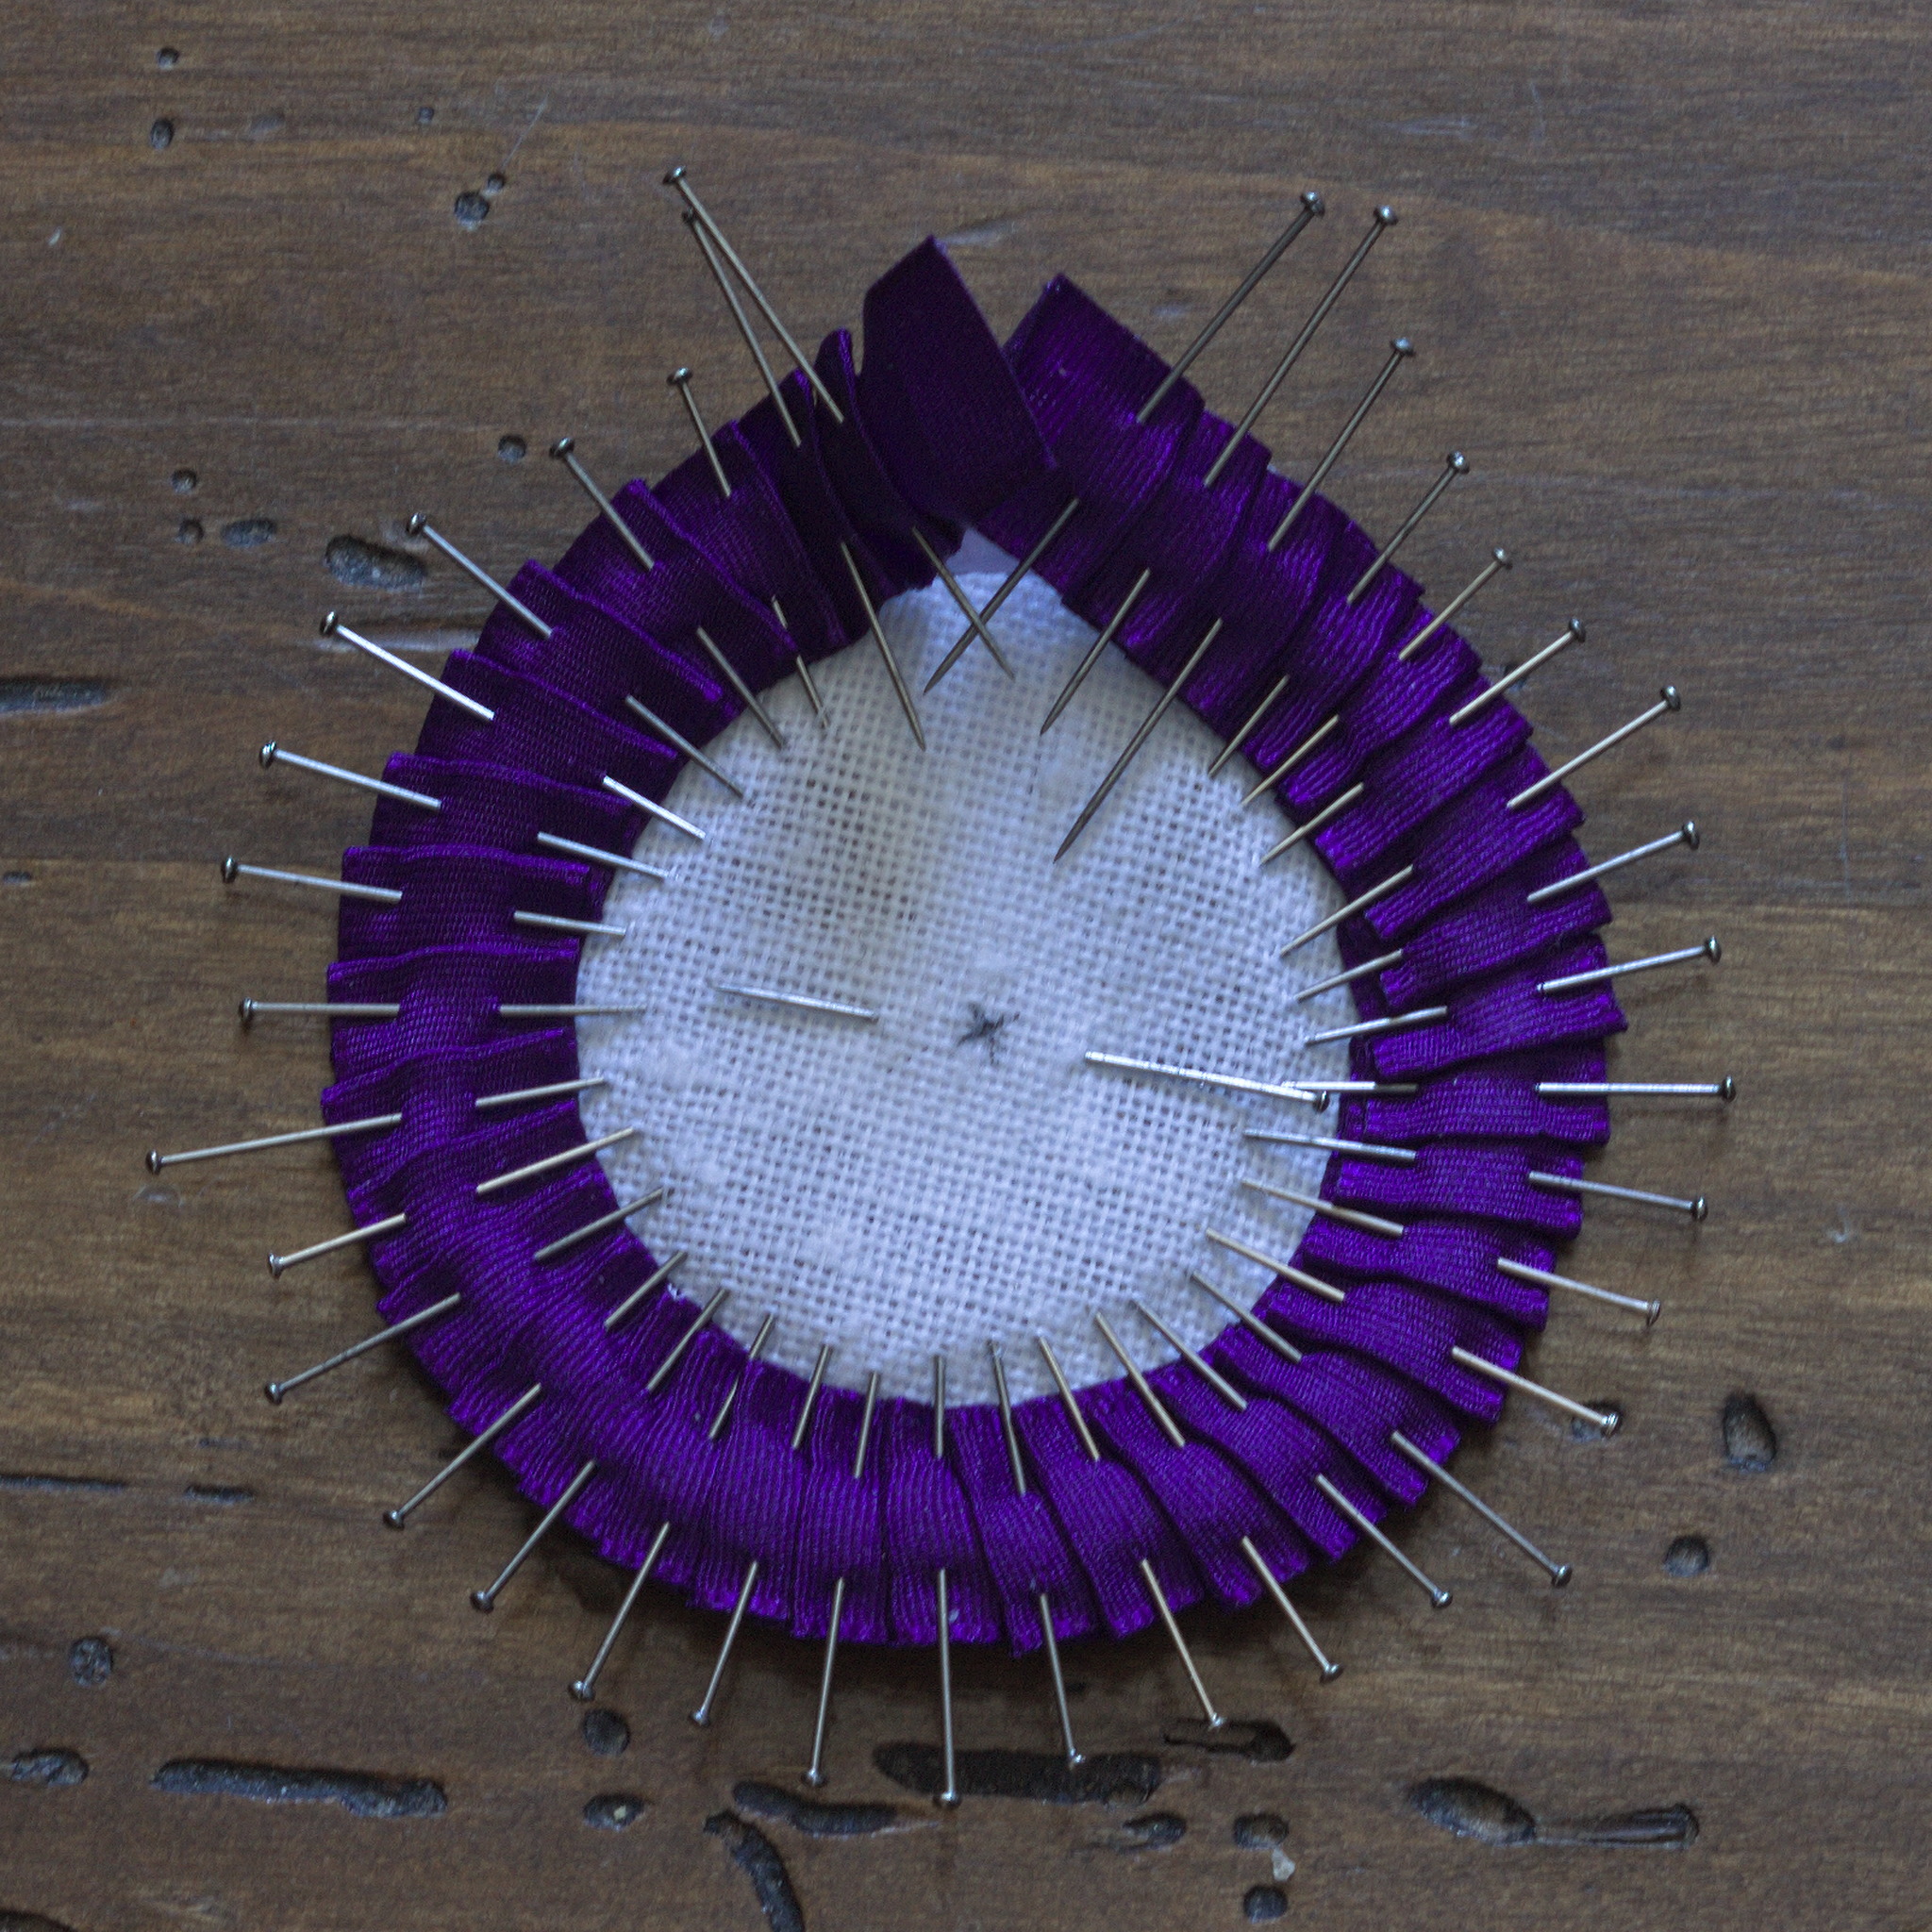
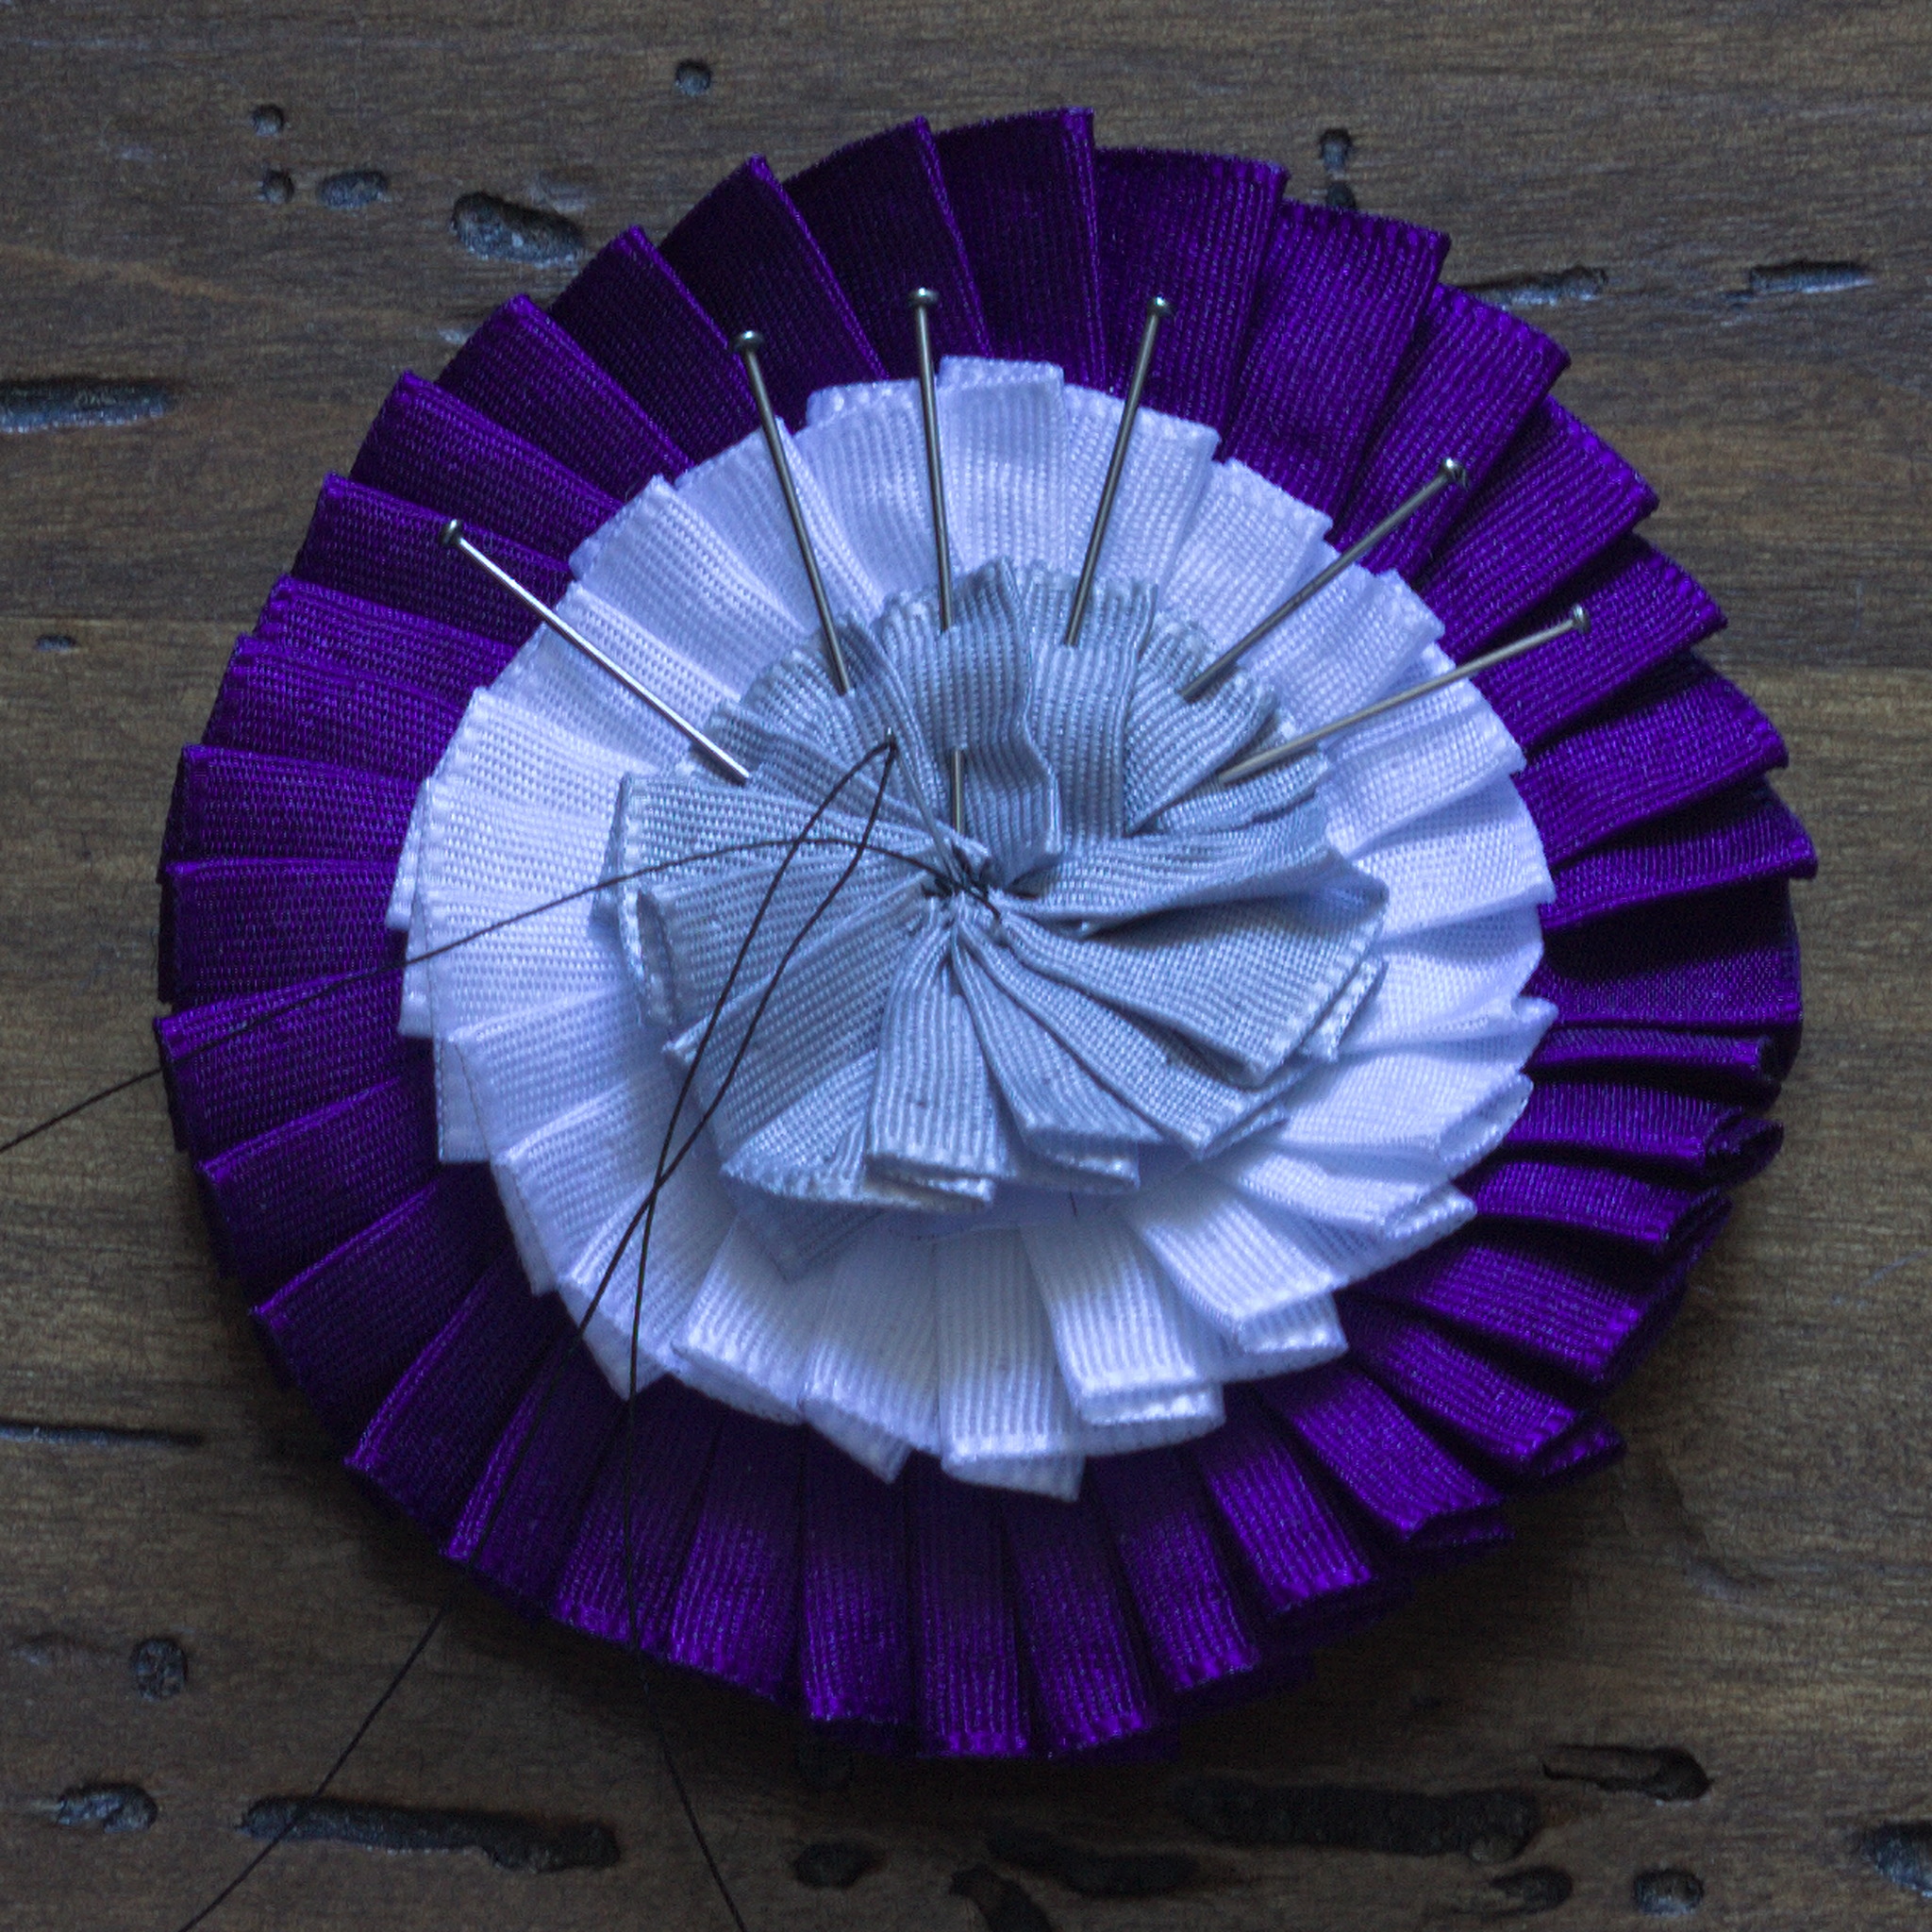
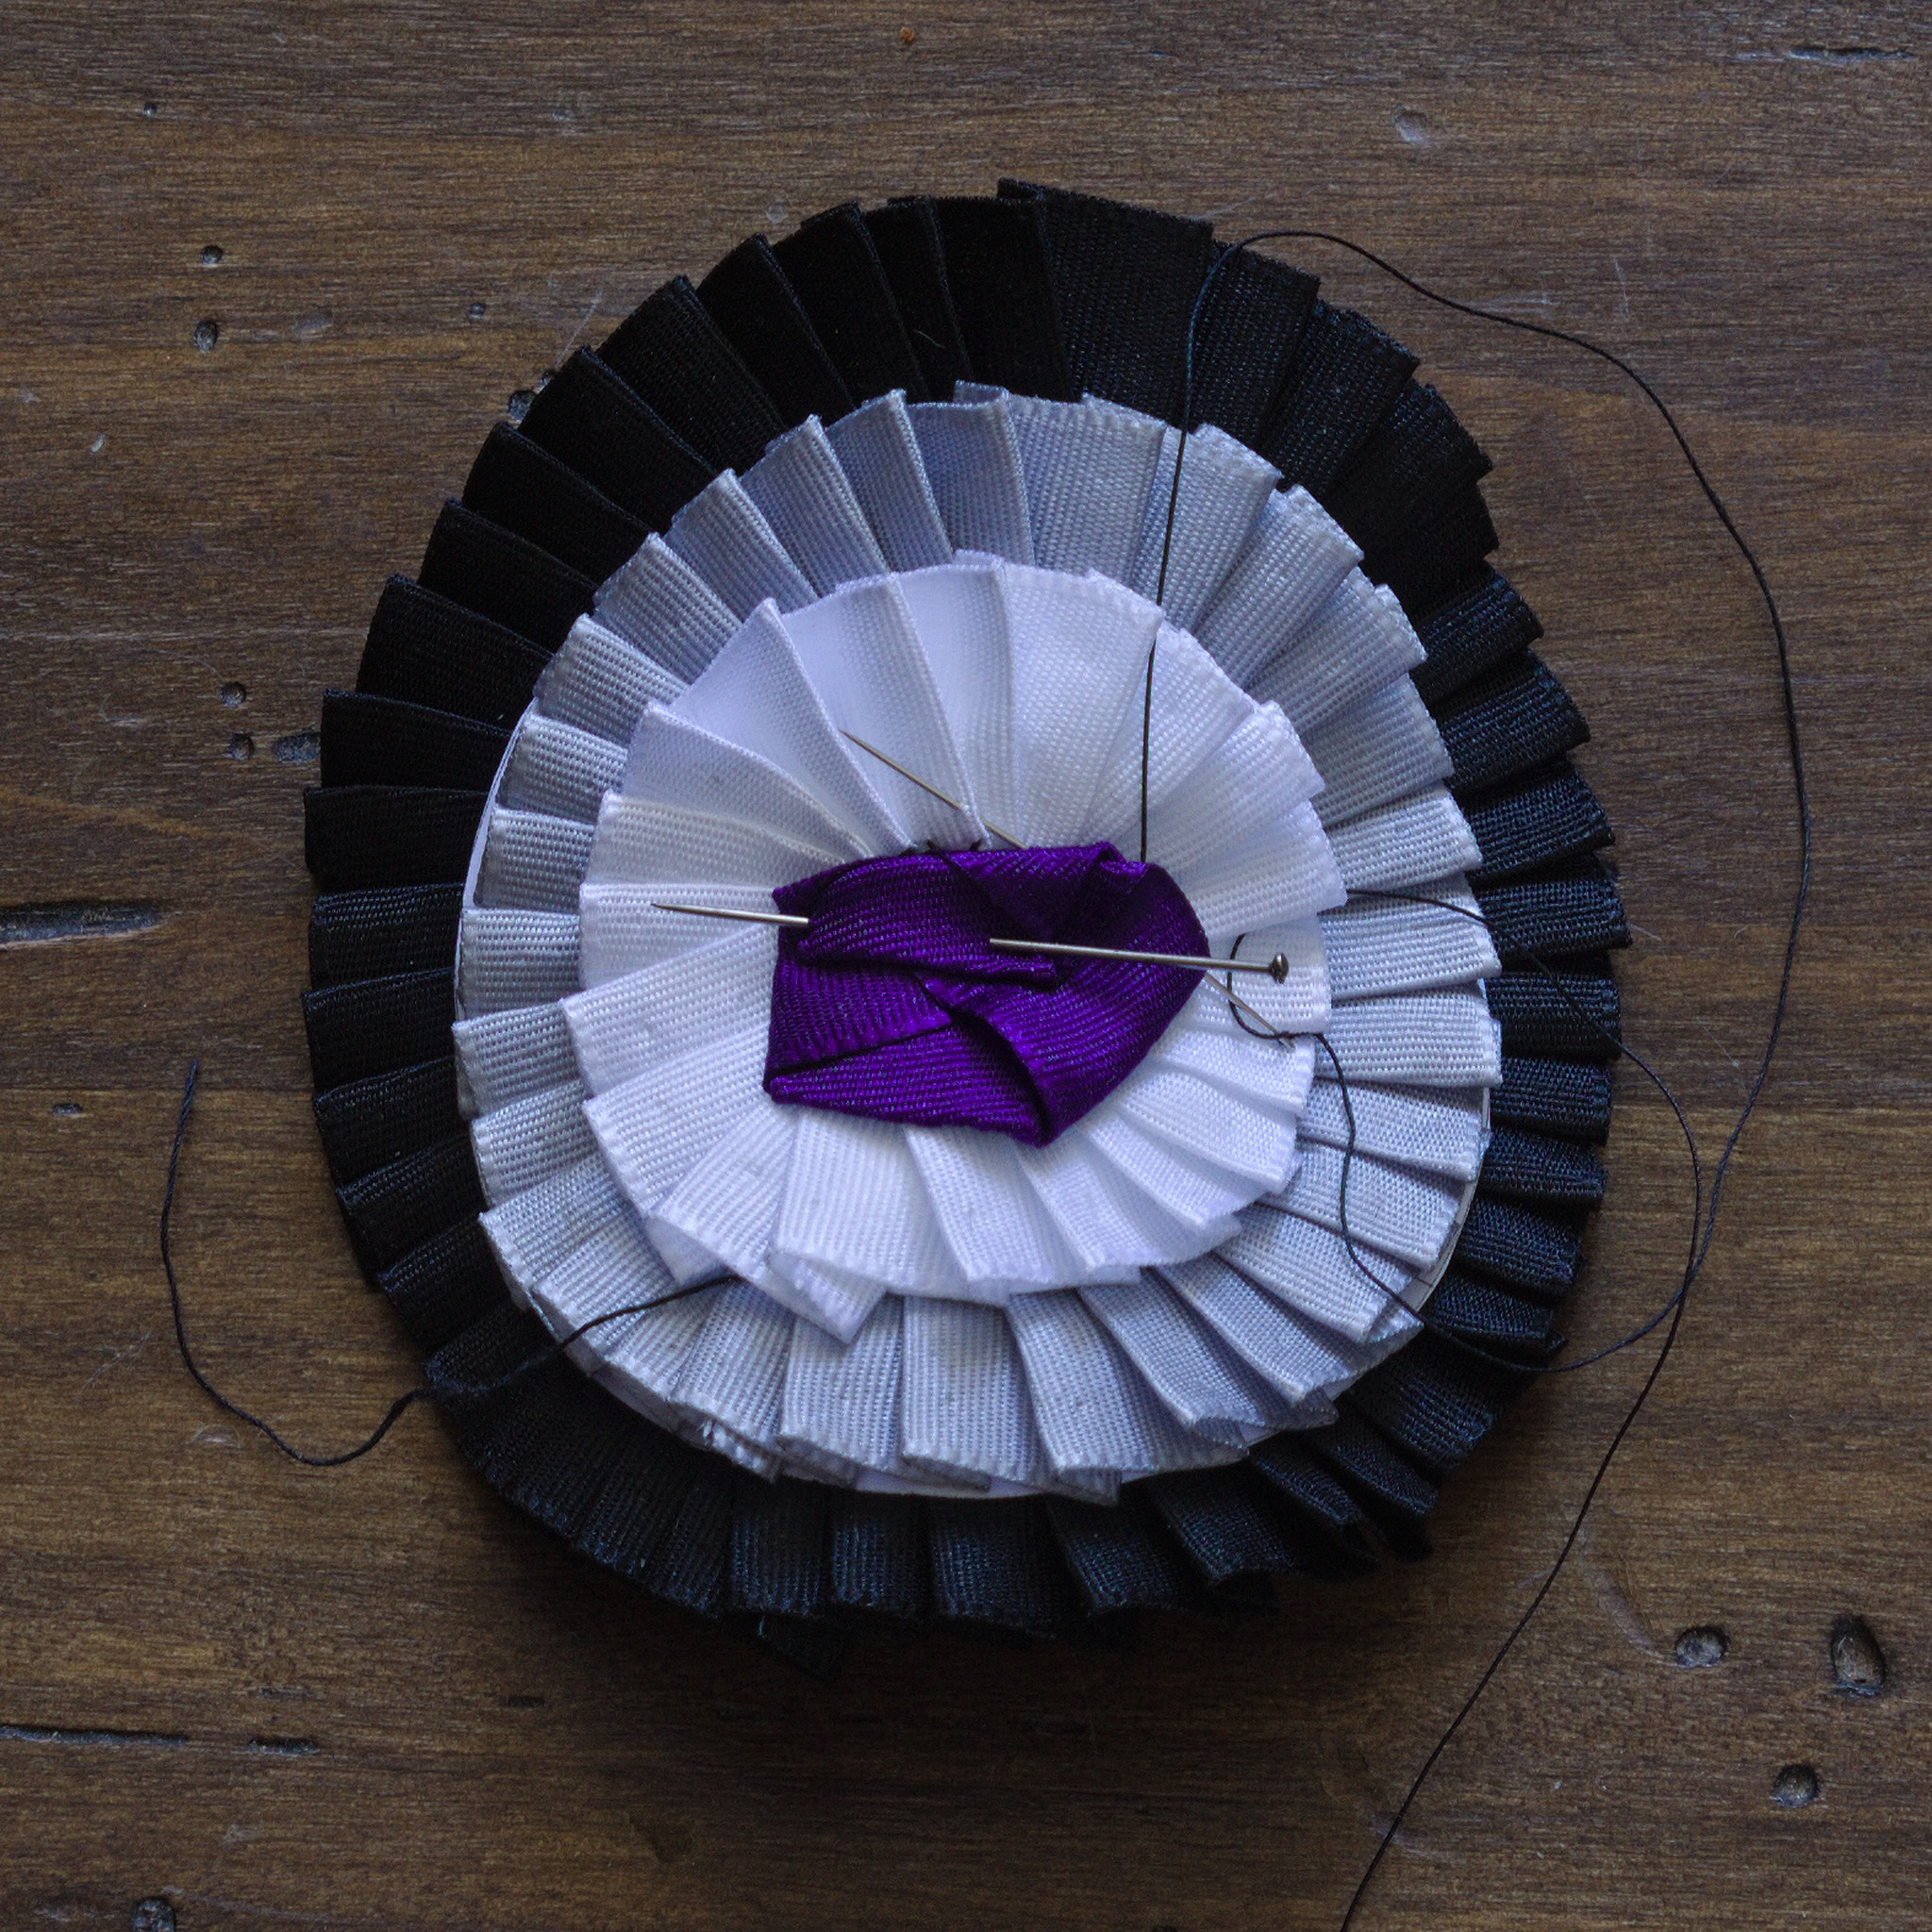
Cut the next size ring from the second paper pattern, measure its outer circumference and pin it to the front of the cockade, centred on it, and above the ribbon you’ve just sewn.
Tip
You can use the rest of the paper pattern to help align the ring.
Pleat the next ribbon and pin it to the paper pattern and the backing and whipstitch it to the backing like the previous step.
Repeat for the remaining ribbons.
Tip
for the ribbon closest to the center there may not be enough space to insert the needle, so you may have to remove the paper pattern from the back, and use a stabbing motion to do the sewing.
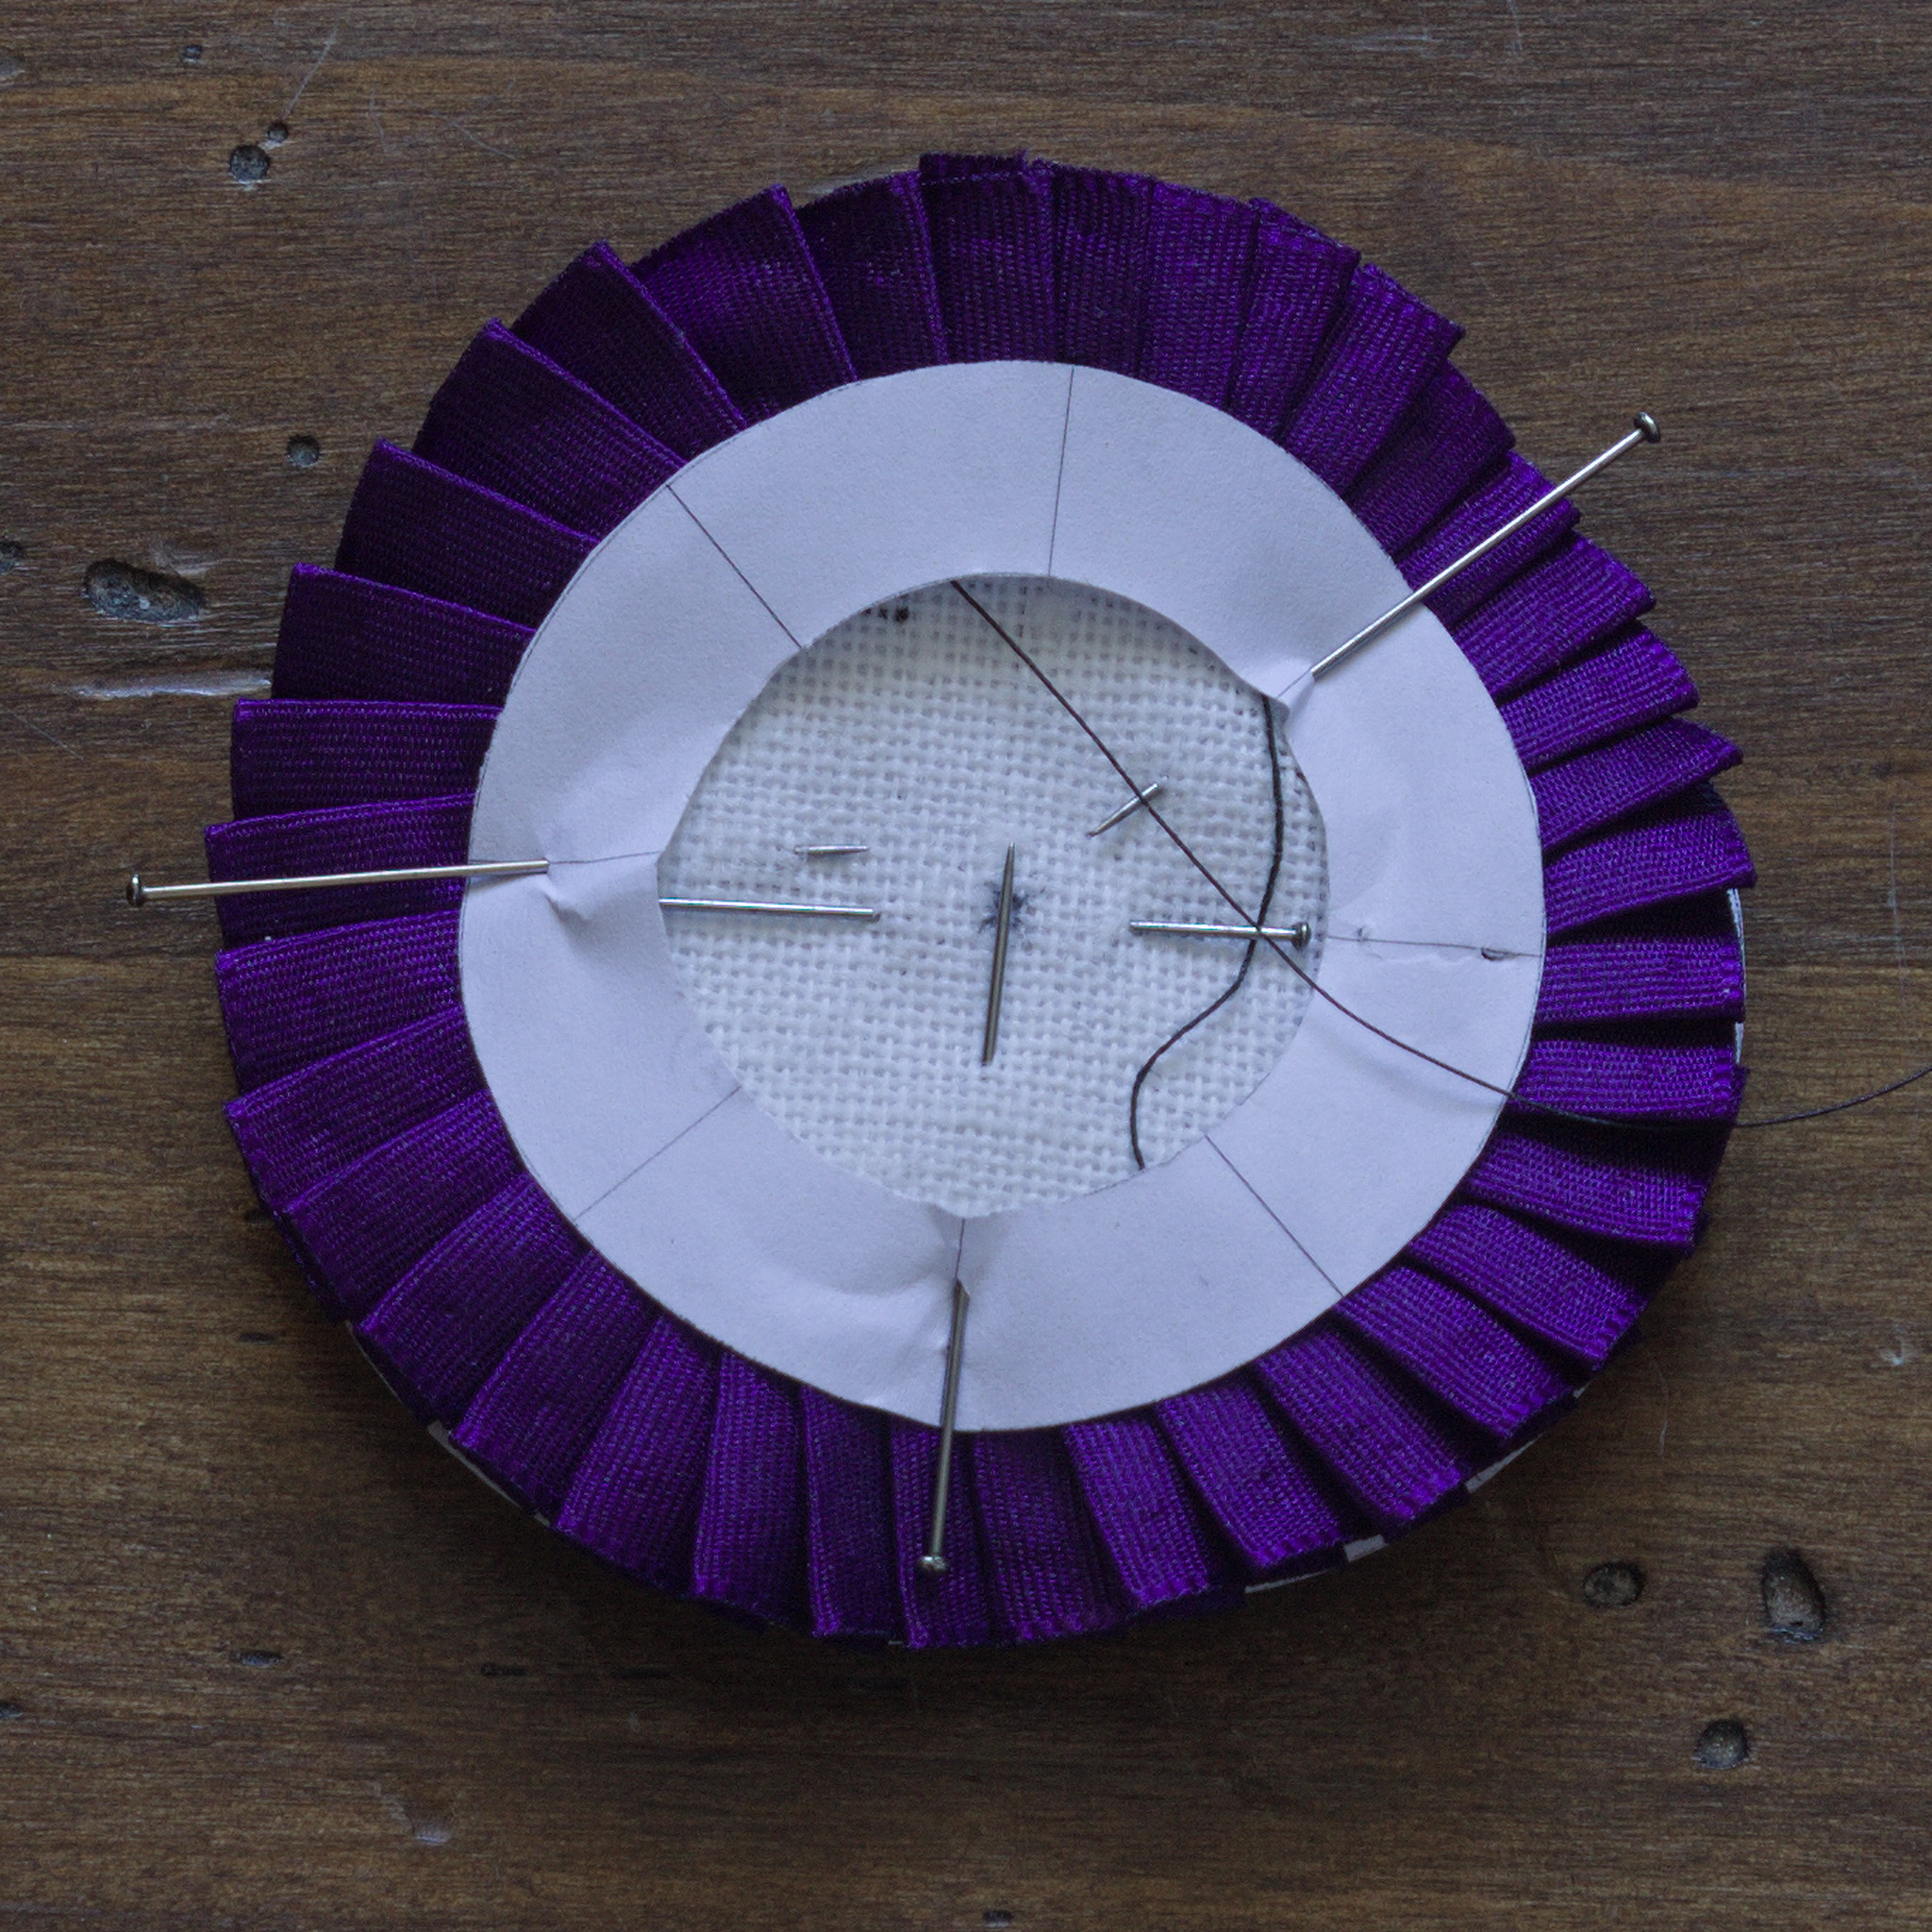
Remove all the paper patterns.
If the centrepiece is not flat, give a good press to the cockade, to fix the pleats in place, otherwise you may do it after it has been attached.
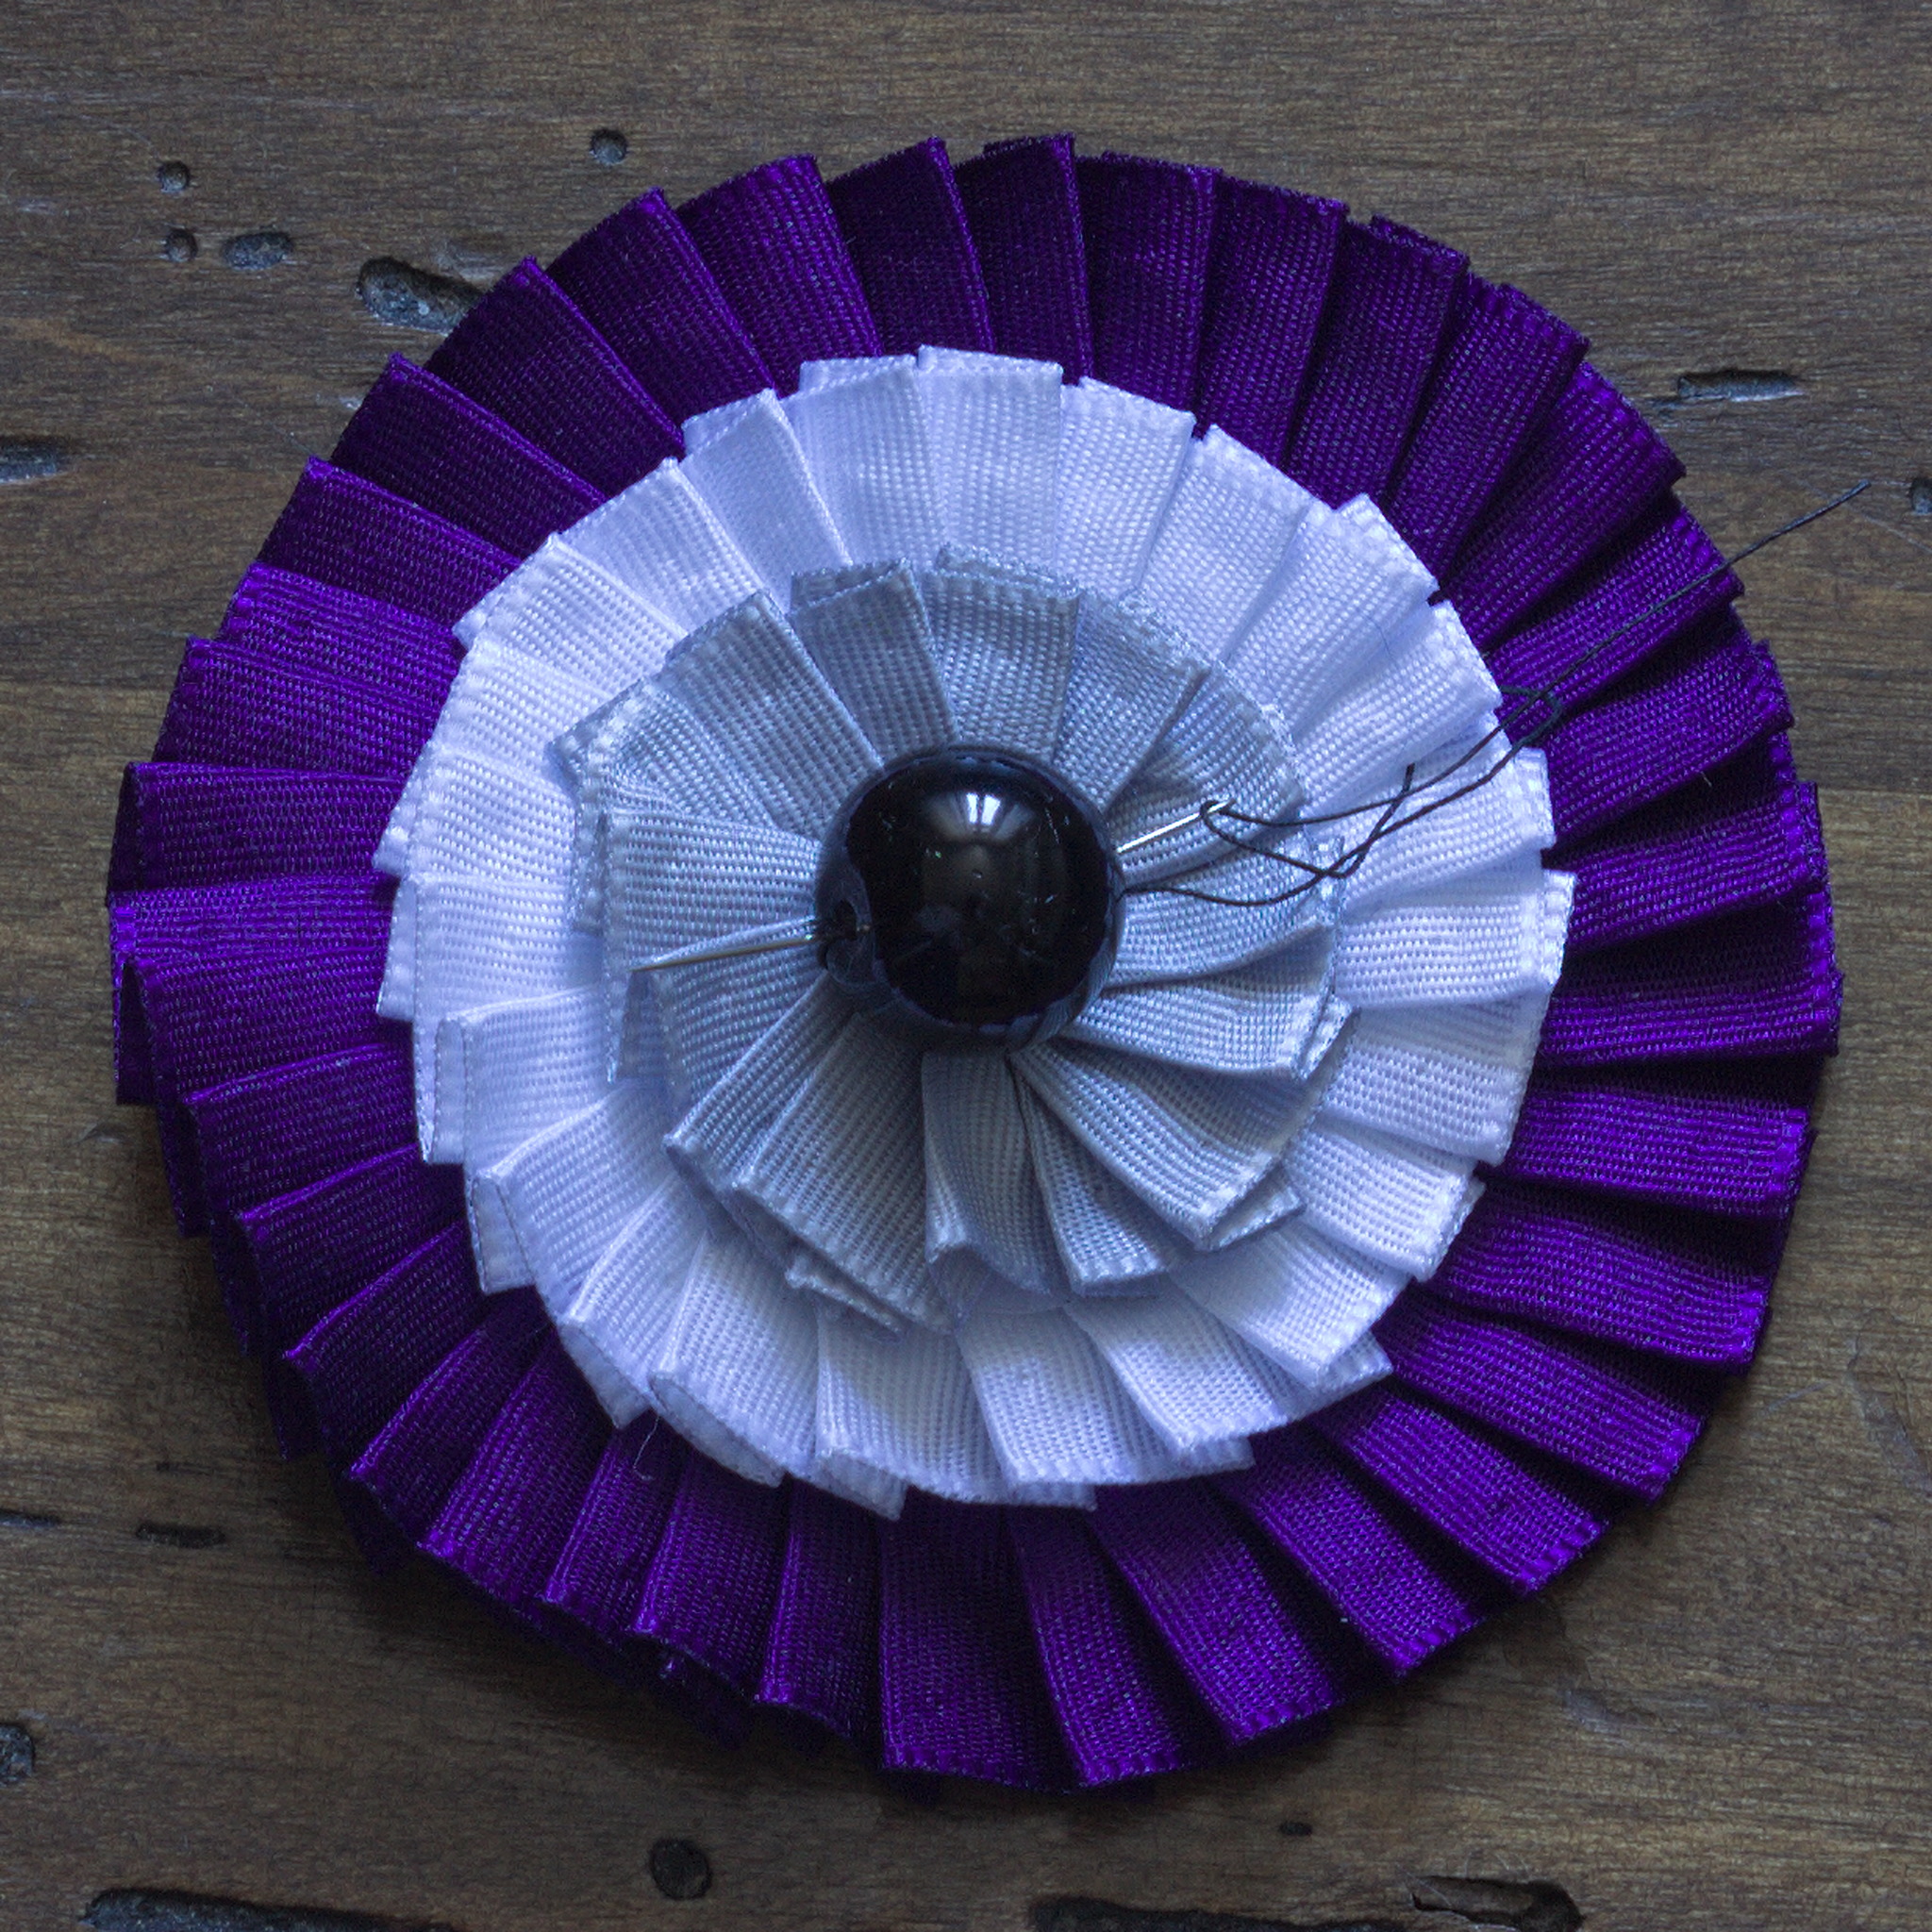
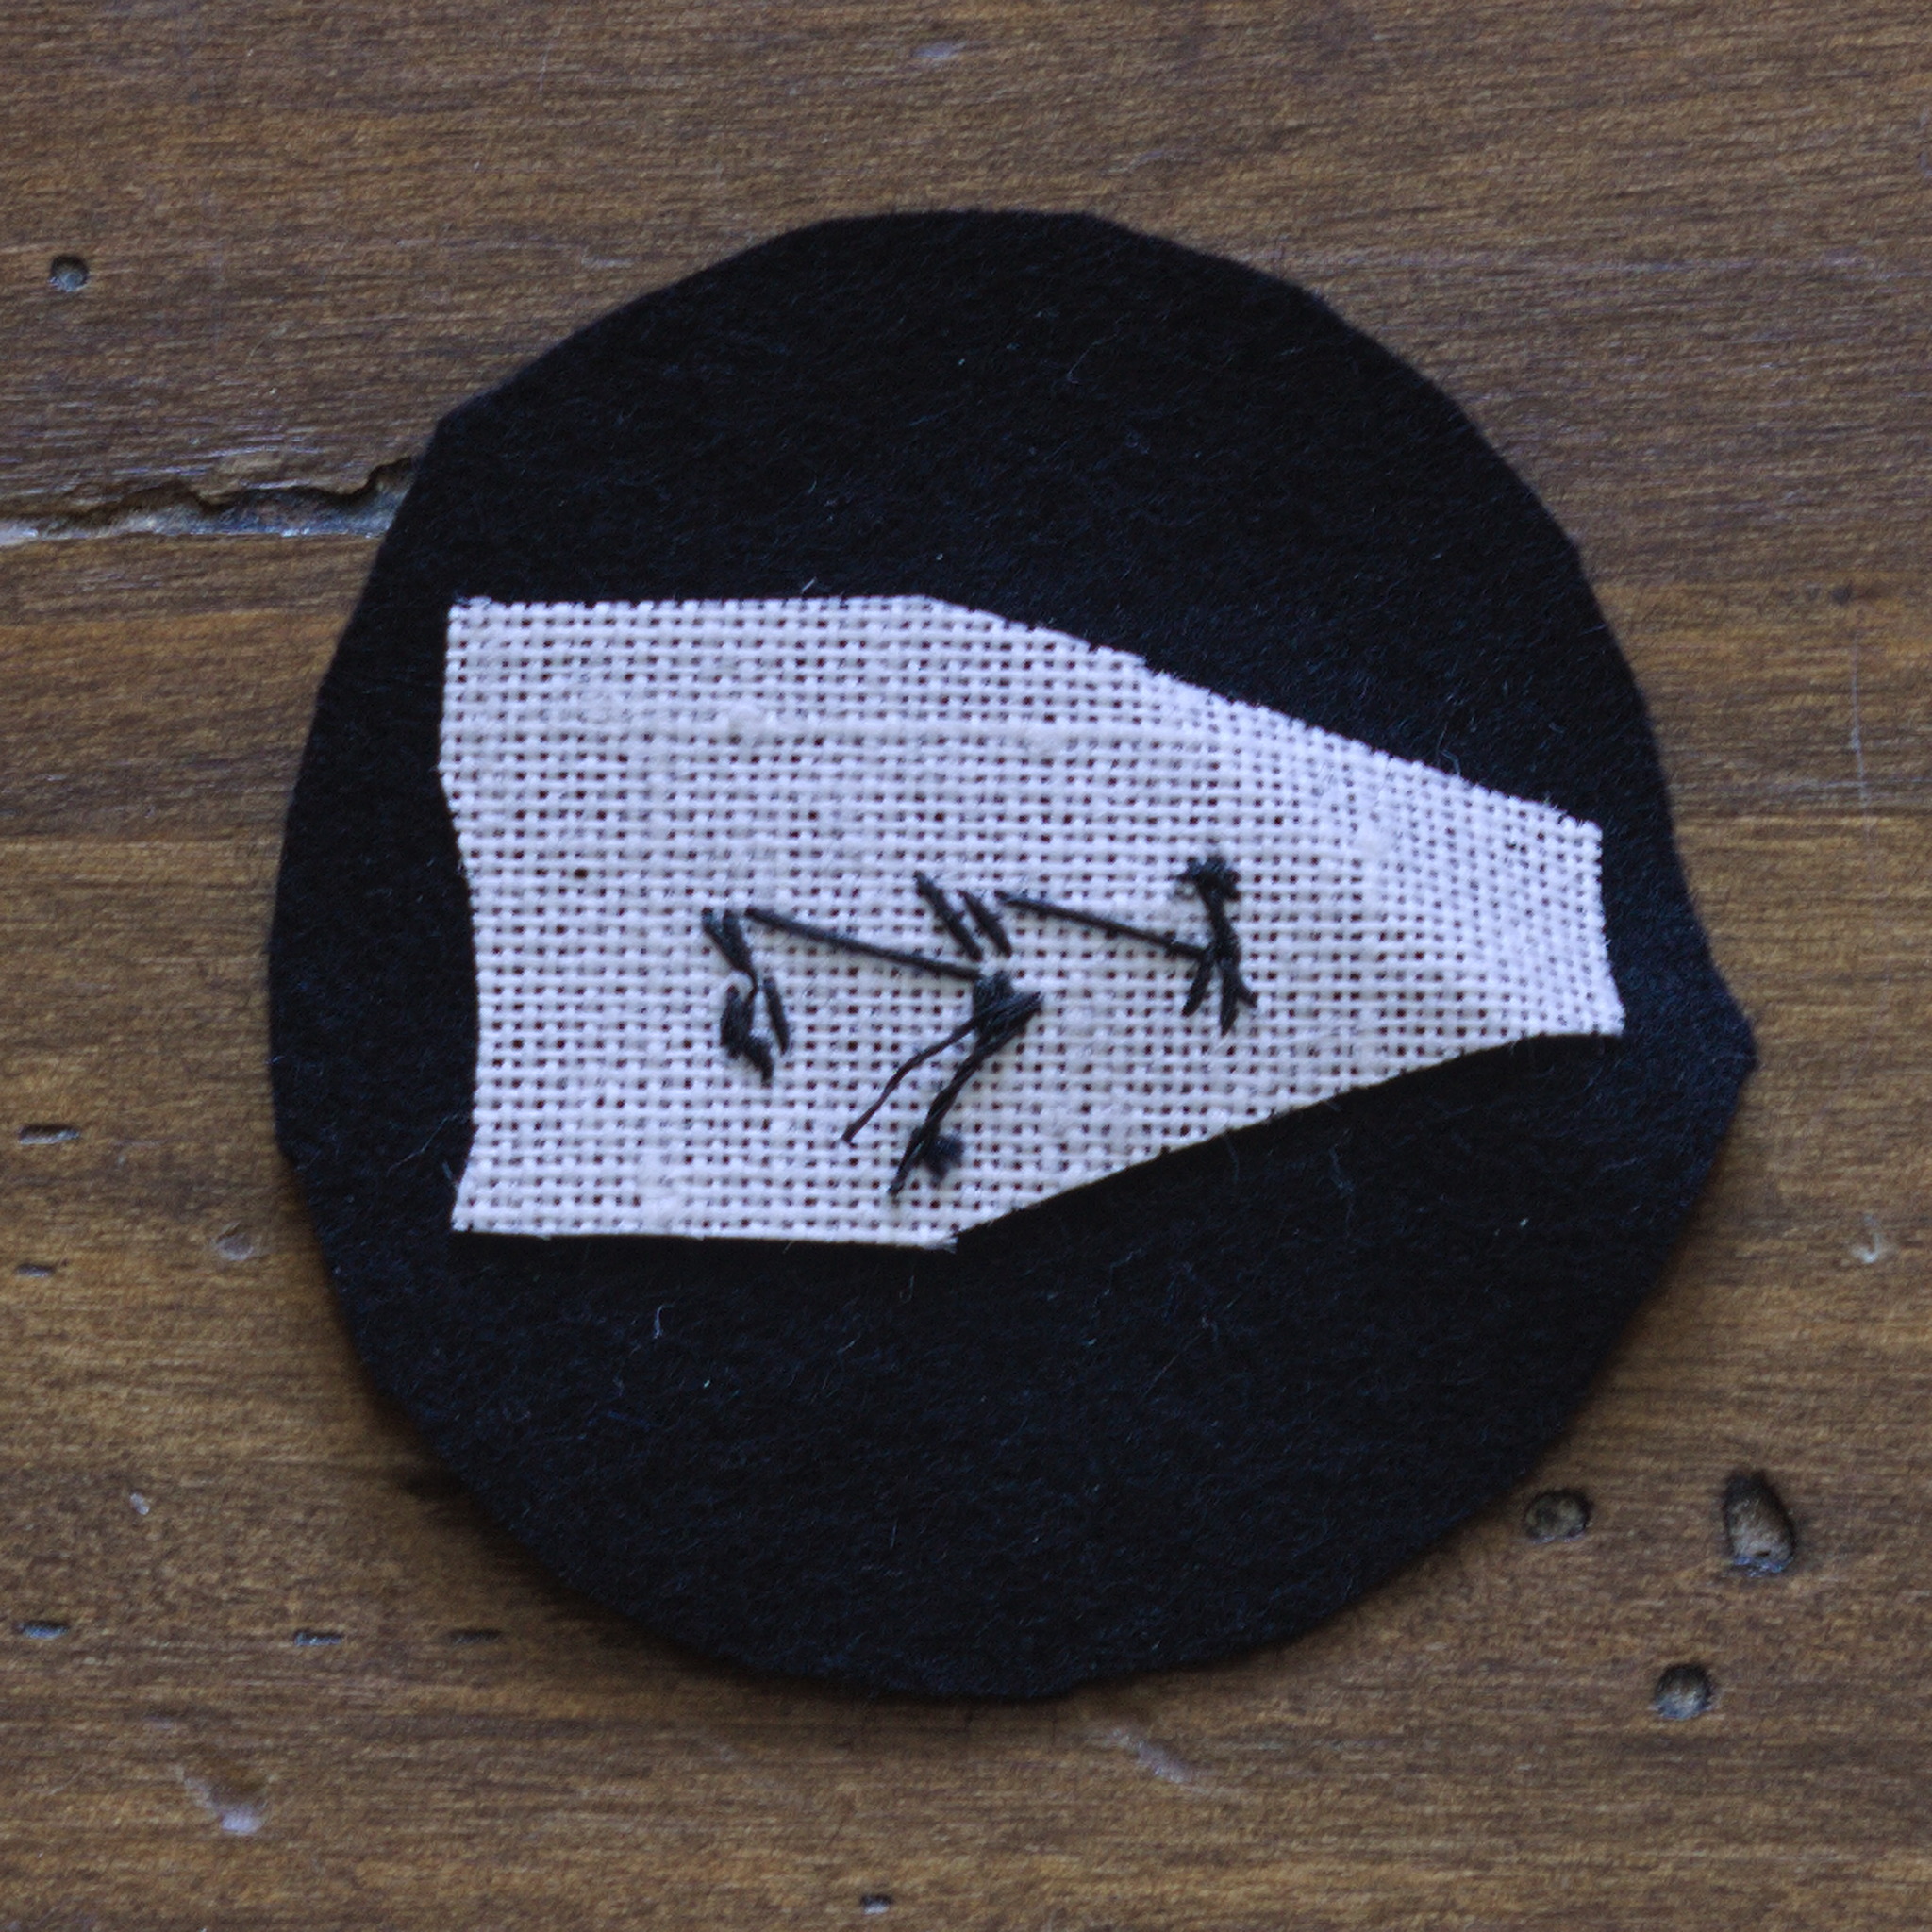
Sew the centrepiece to the center of the cockade, trying to hide the stitches.
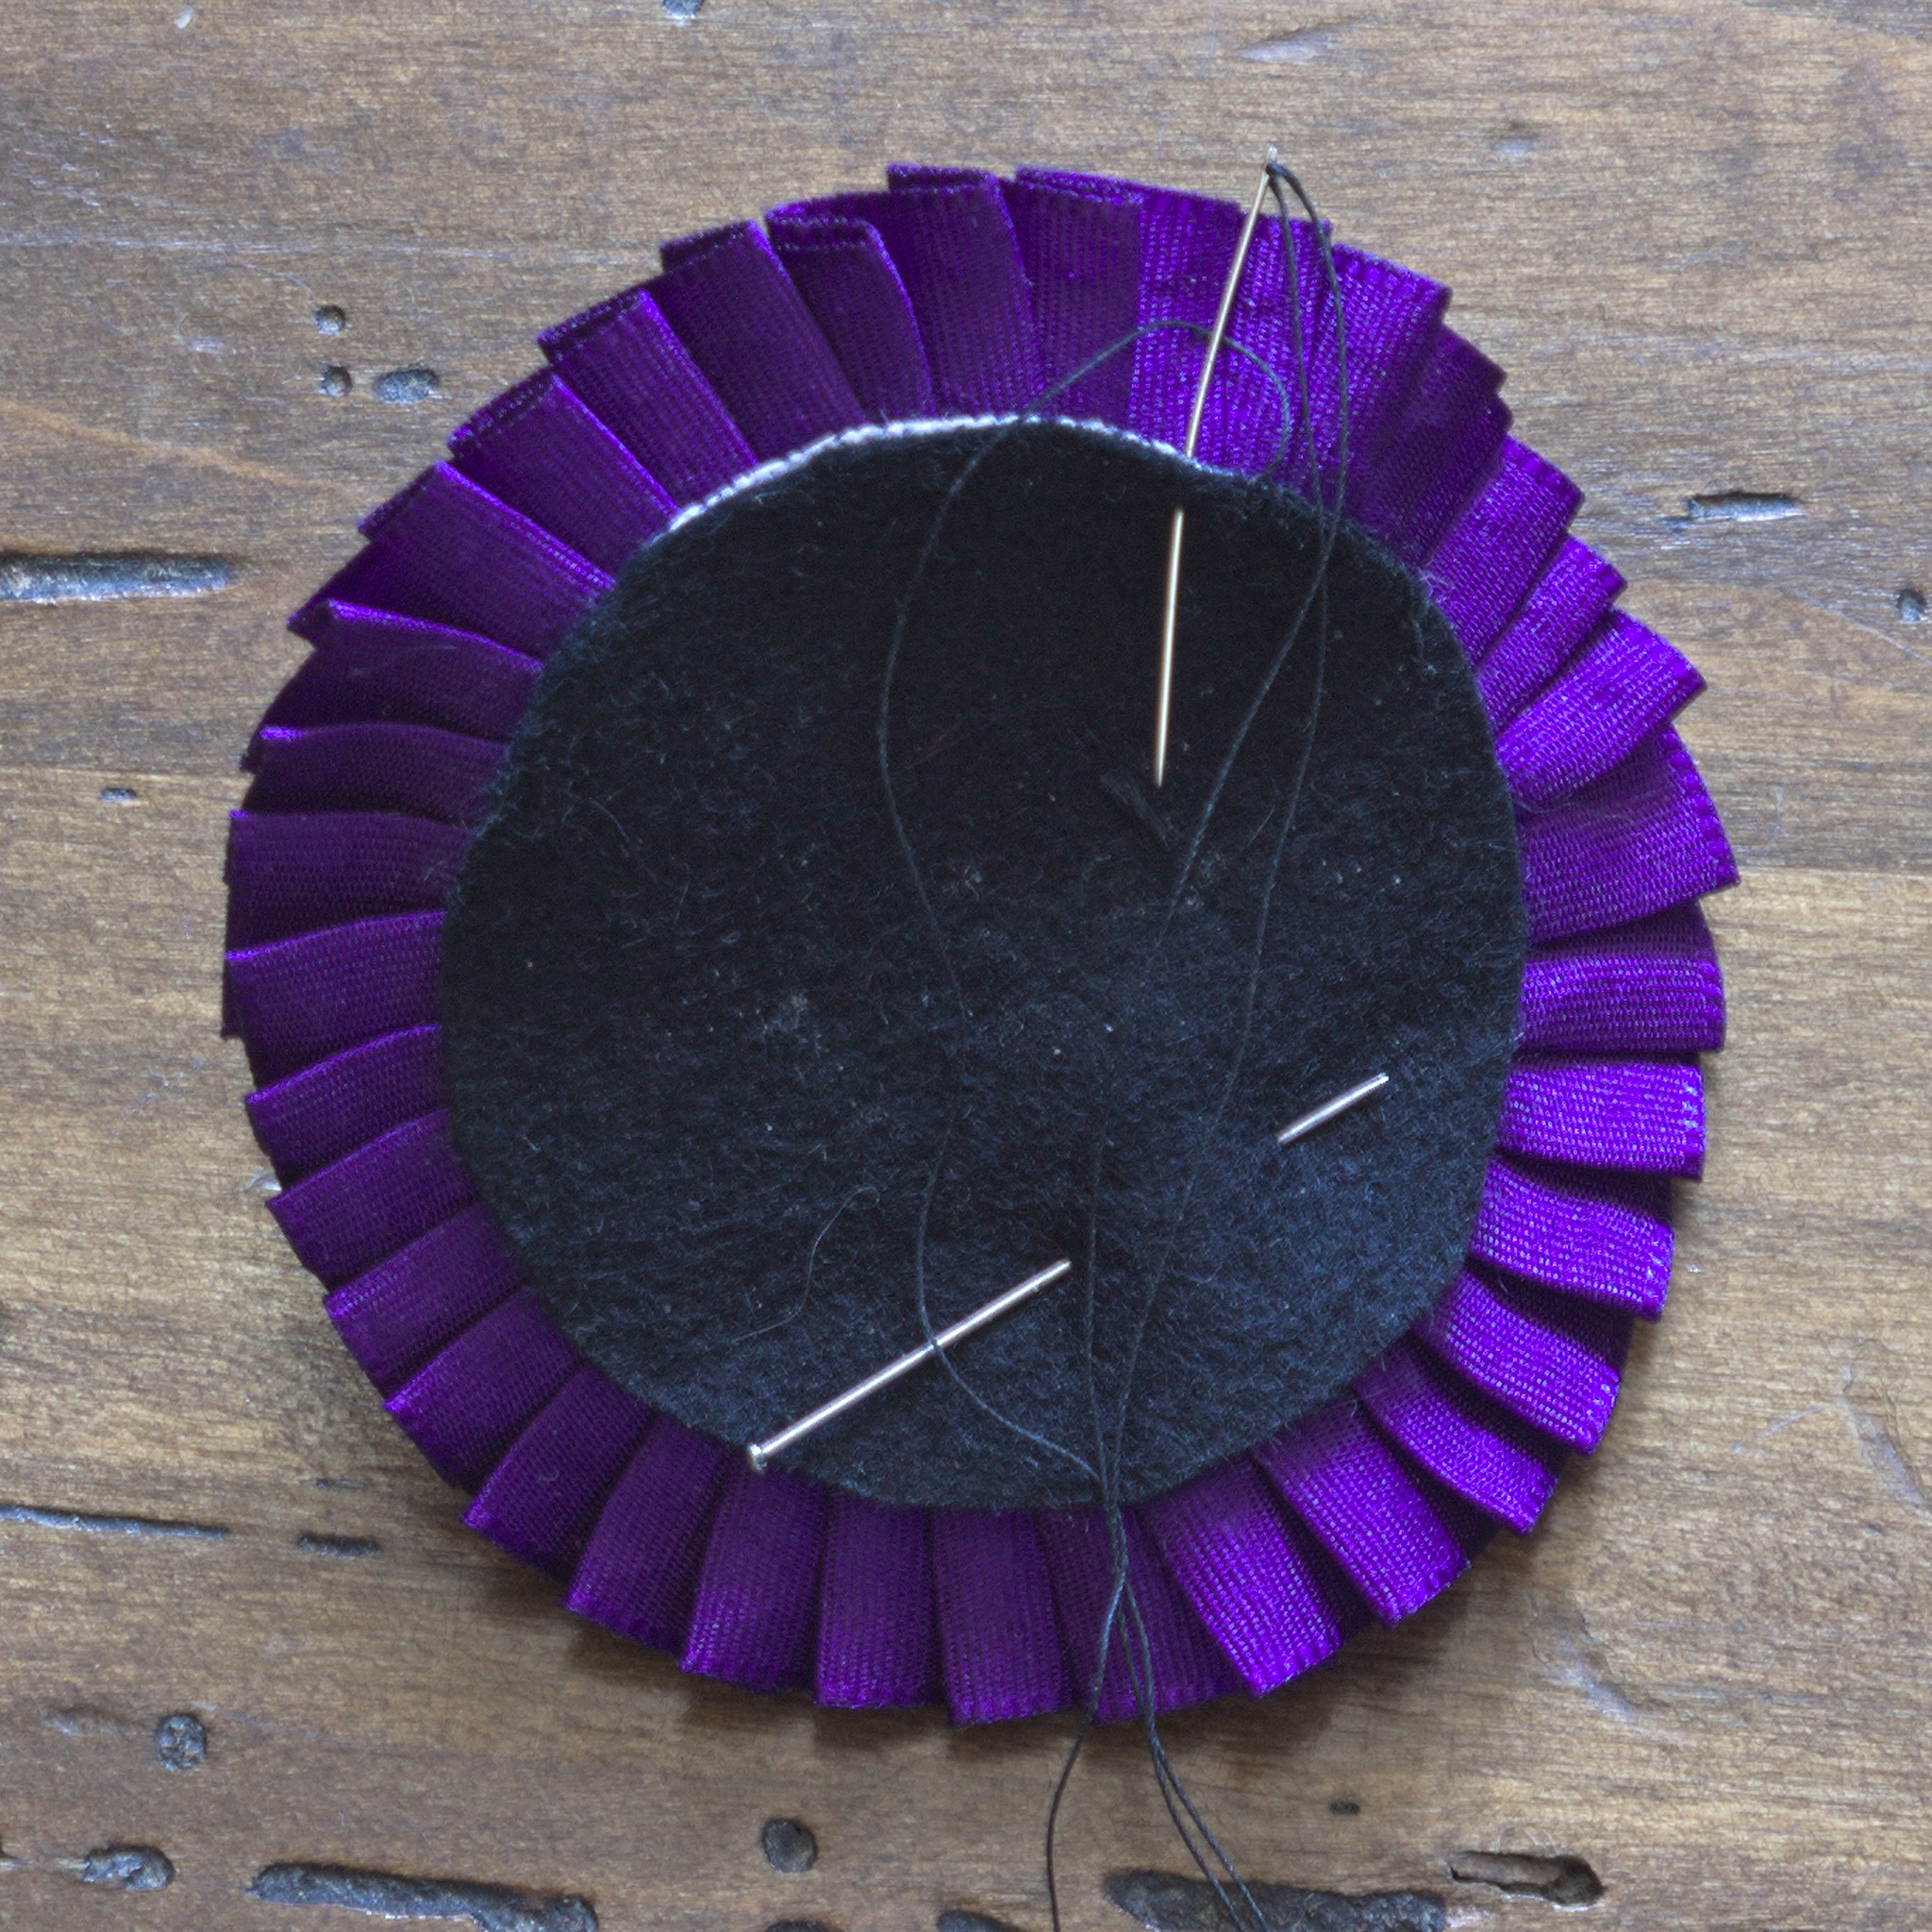
Sew the felt backing to the sturdy backing with a blanket stitch, going all around the circumference.
Variants
Pin backing
To add a pin backing, cut a small scrap of sturdy backing material bigger than the pin. Odd shapes are fine.
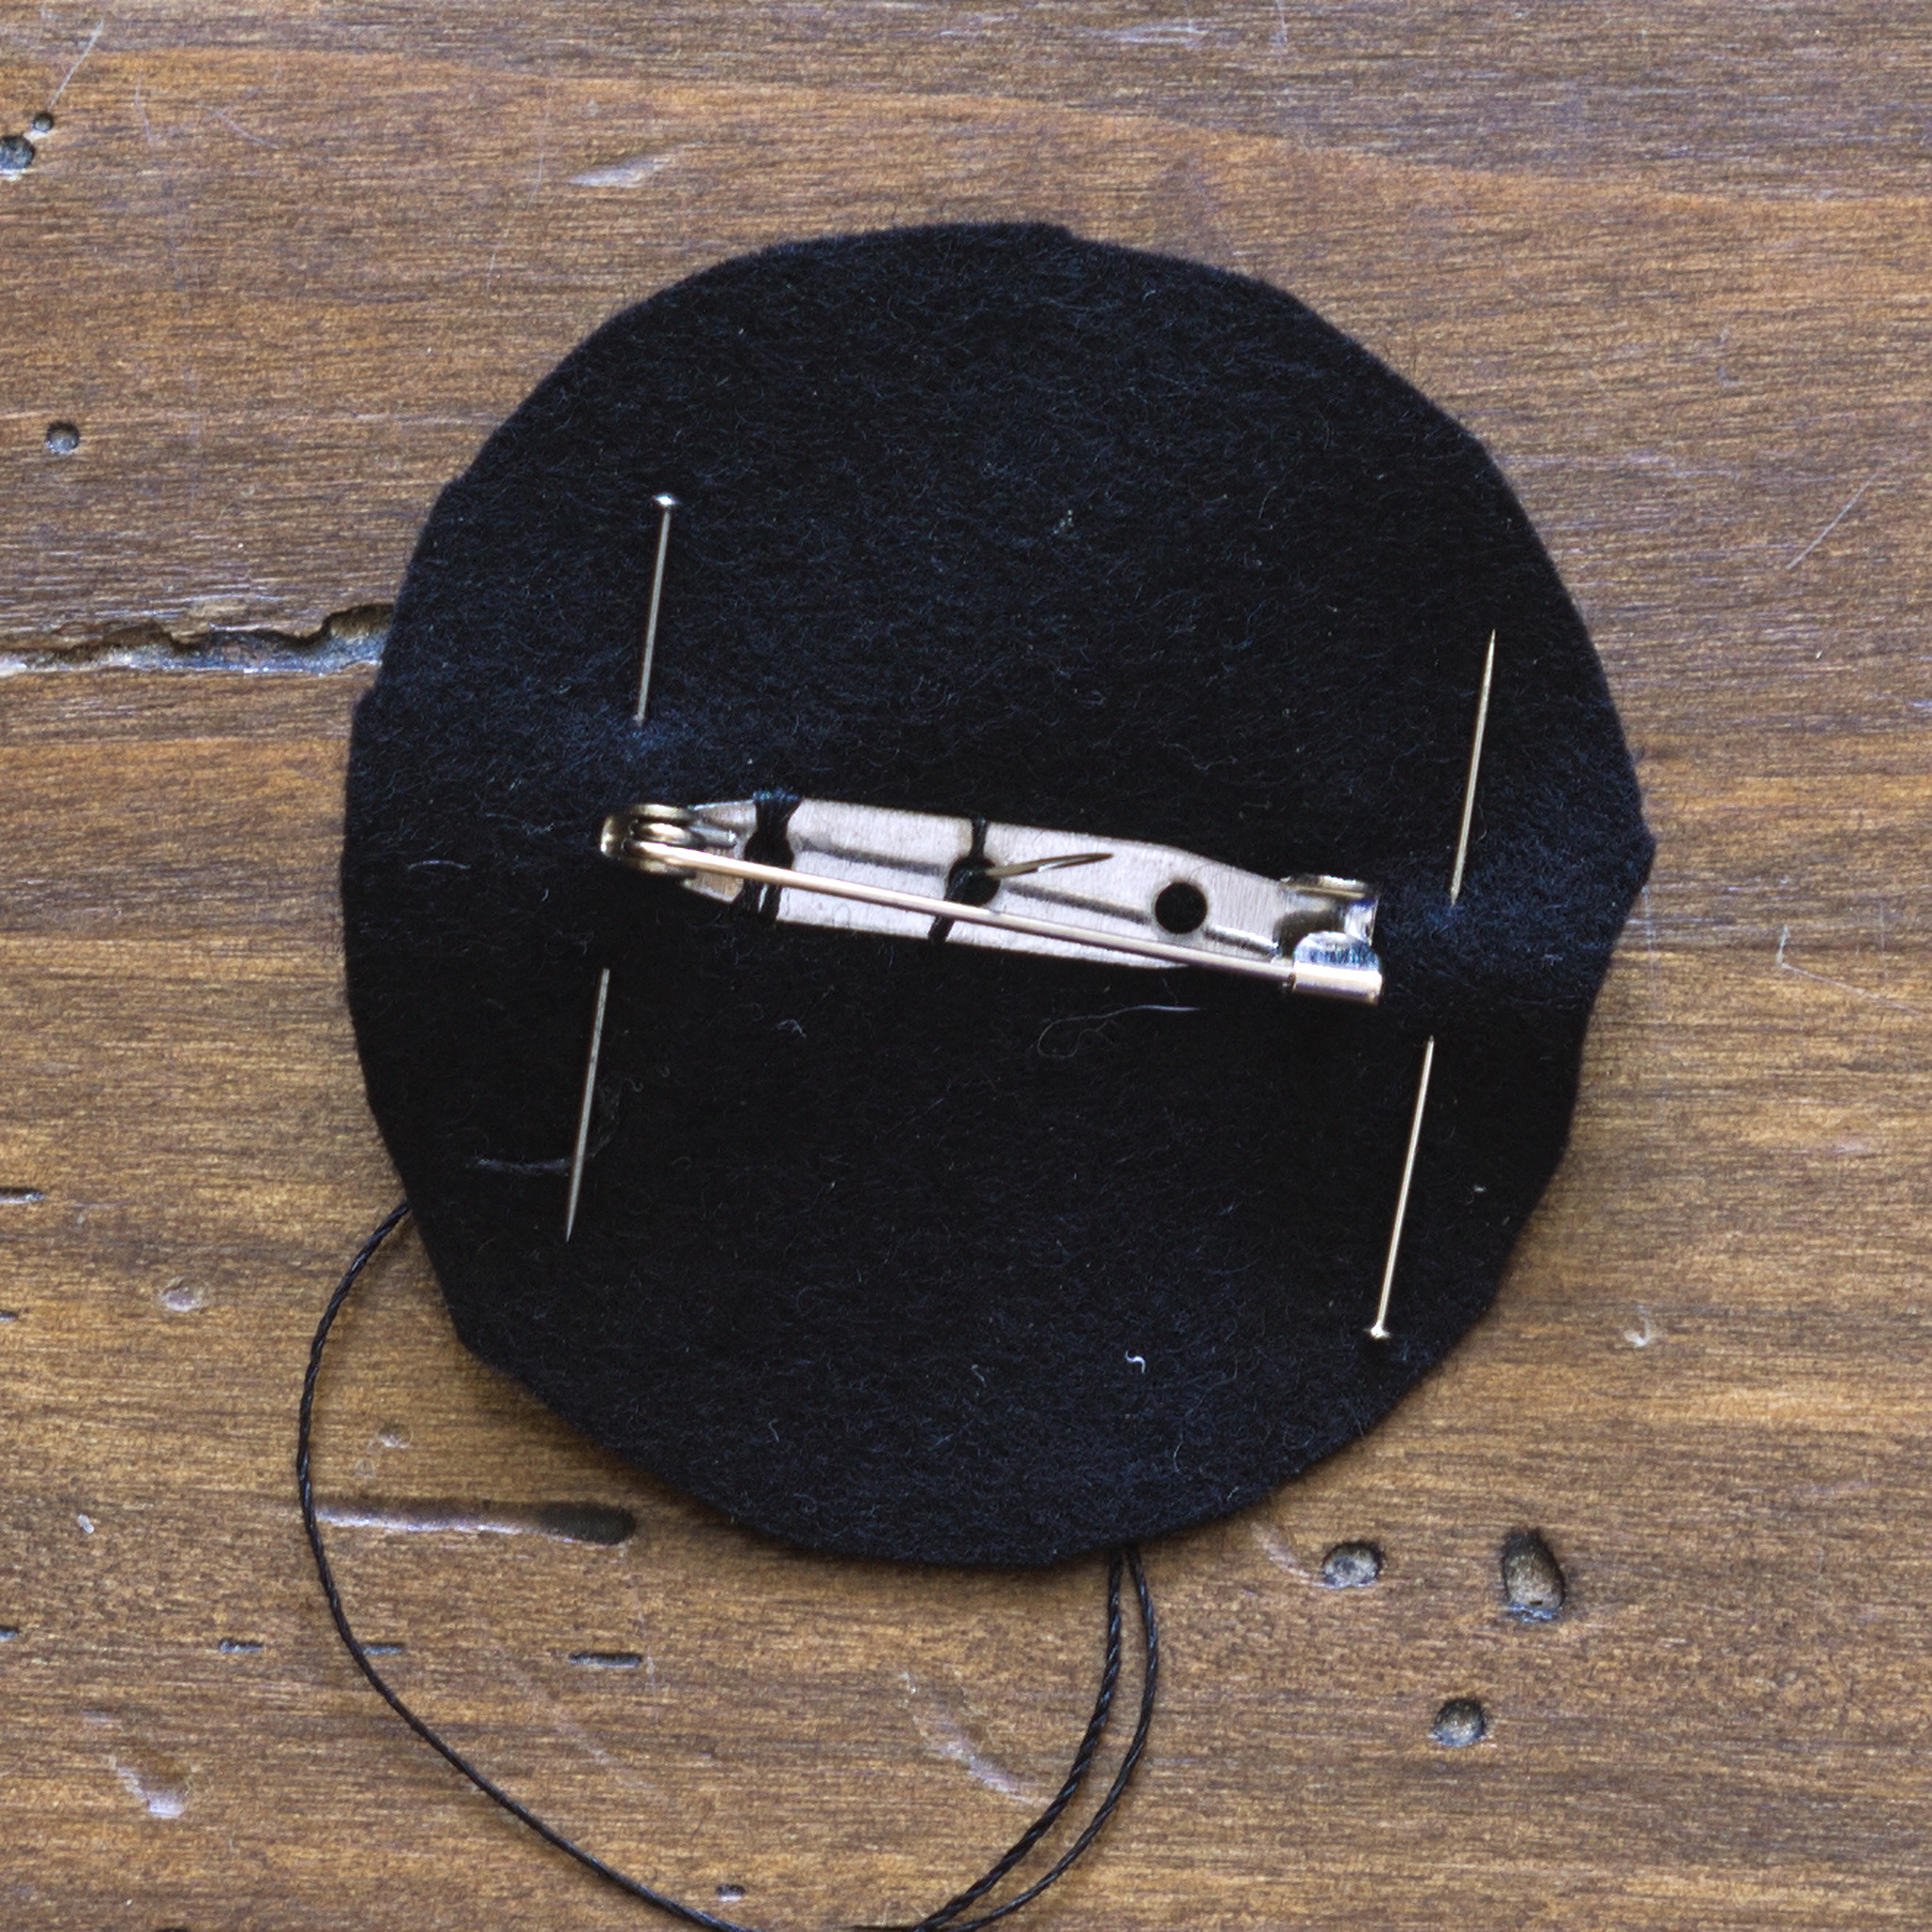
Pin the sturdy backing to the felt backing, and sew the pin to both, centred on the felt.

Put the felt over the back of the cockade, whipstitch the sturdy backing to the backing of the cockade, for added security.
Sew the felt to the cockade as above.
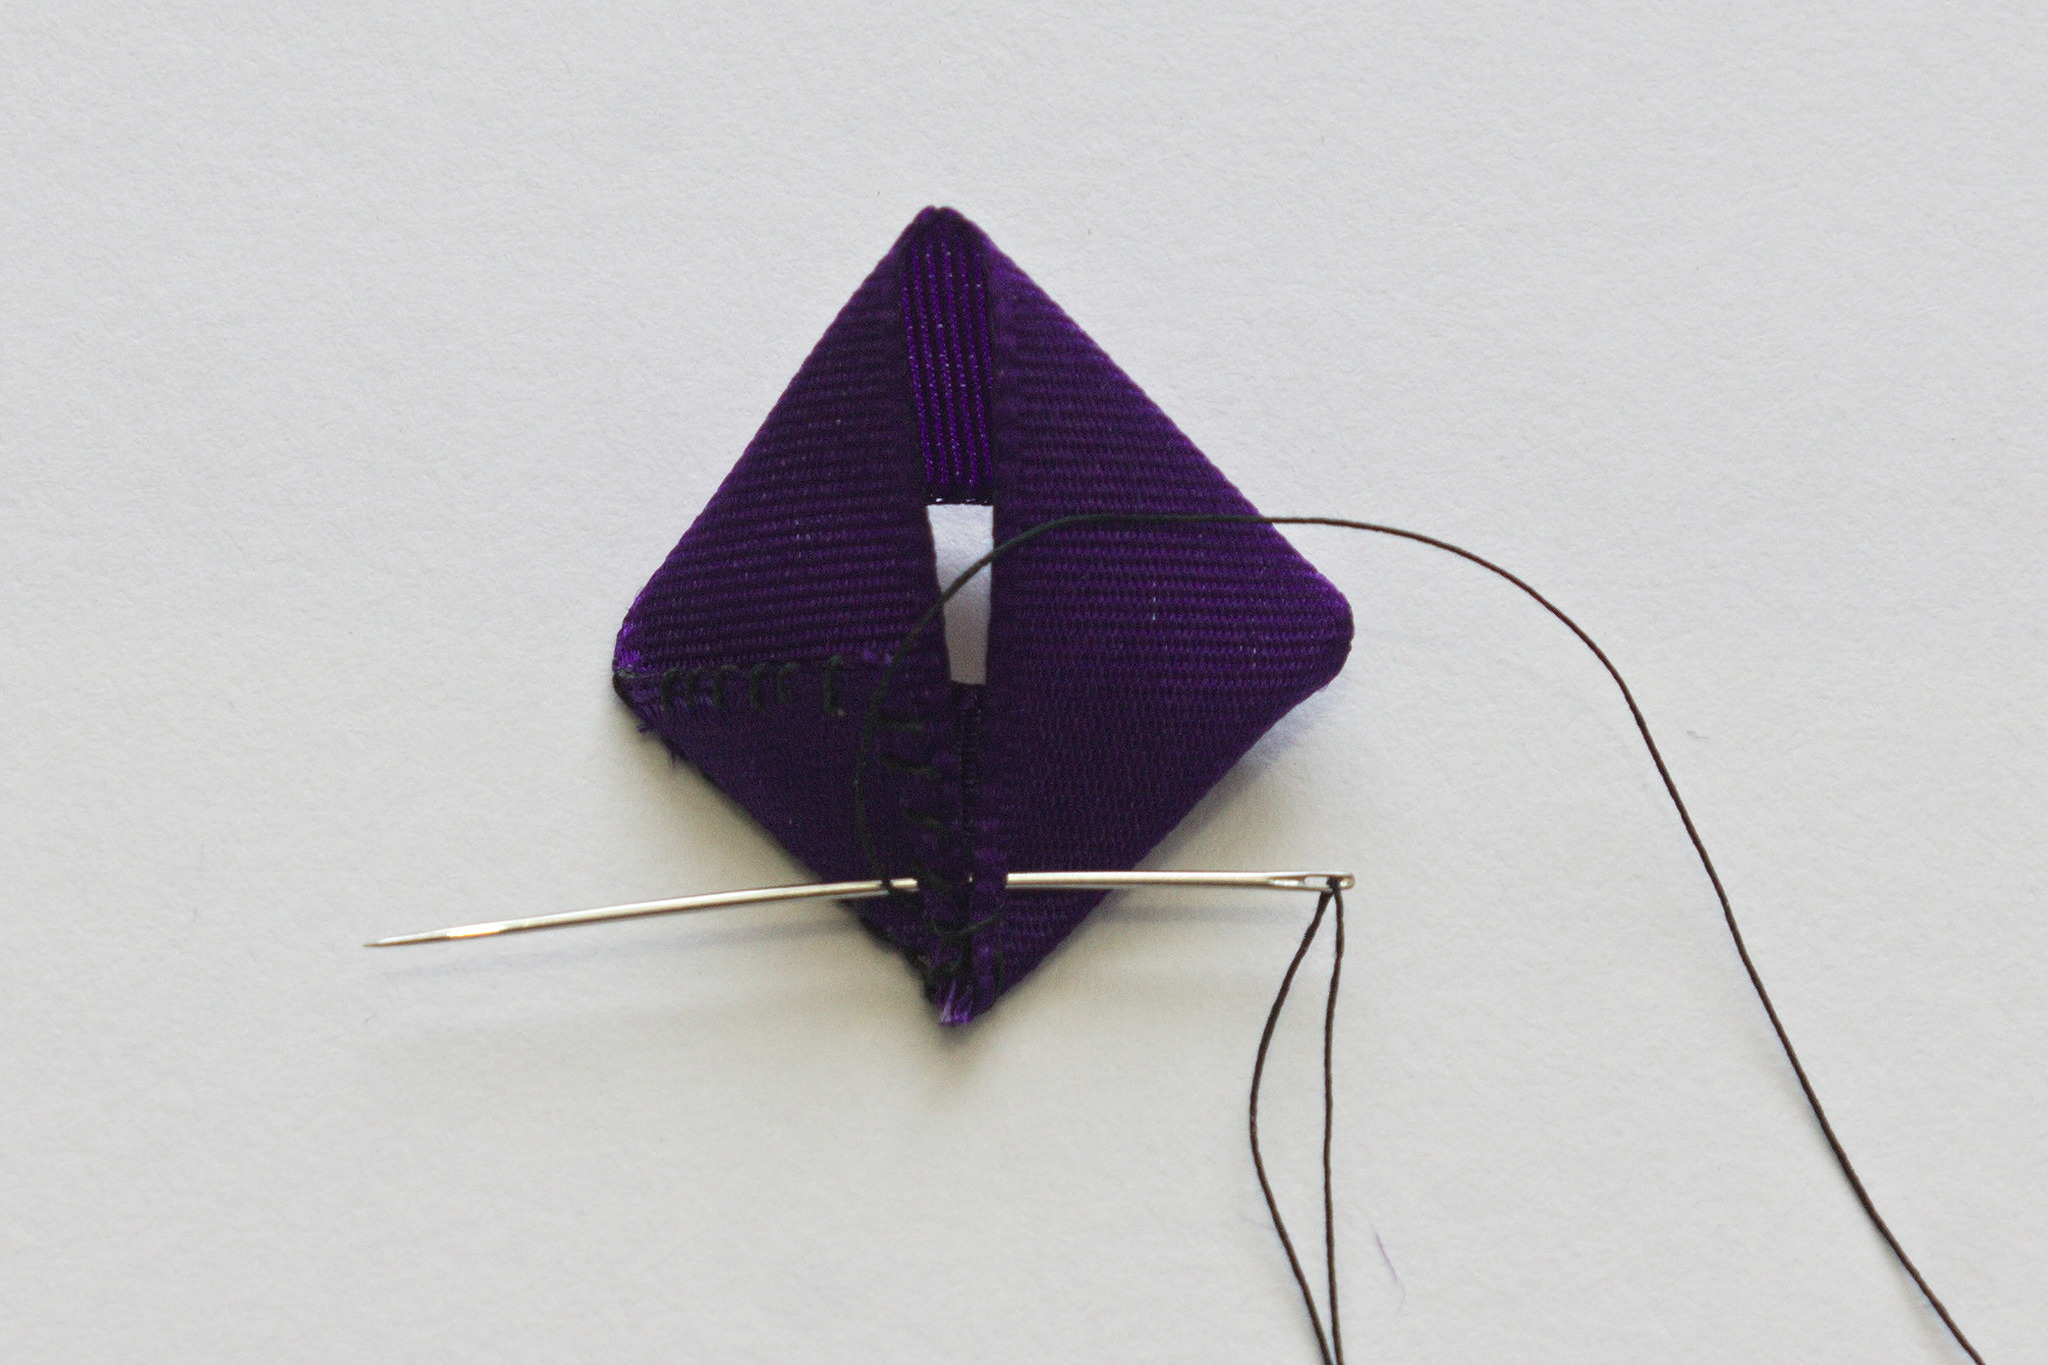
Pentagonal centrepiece
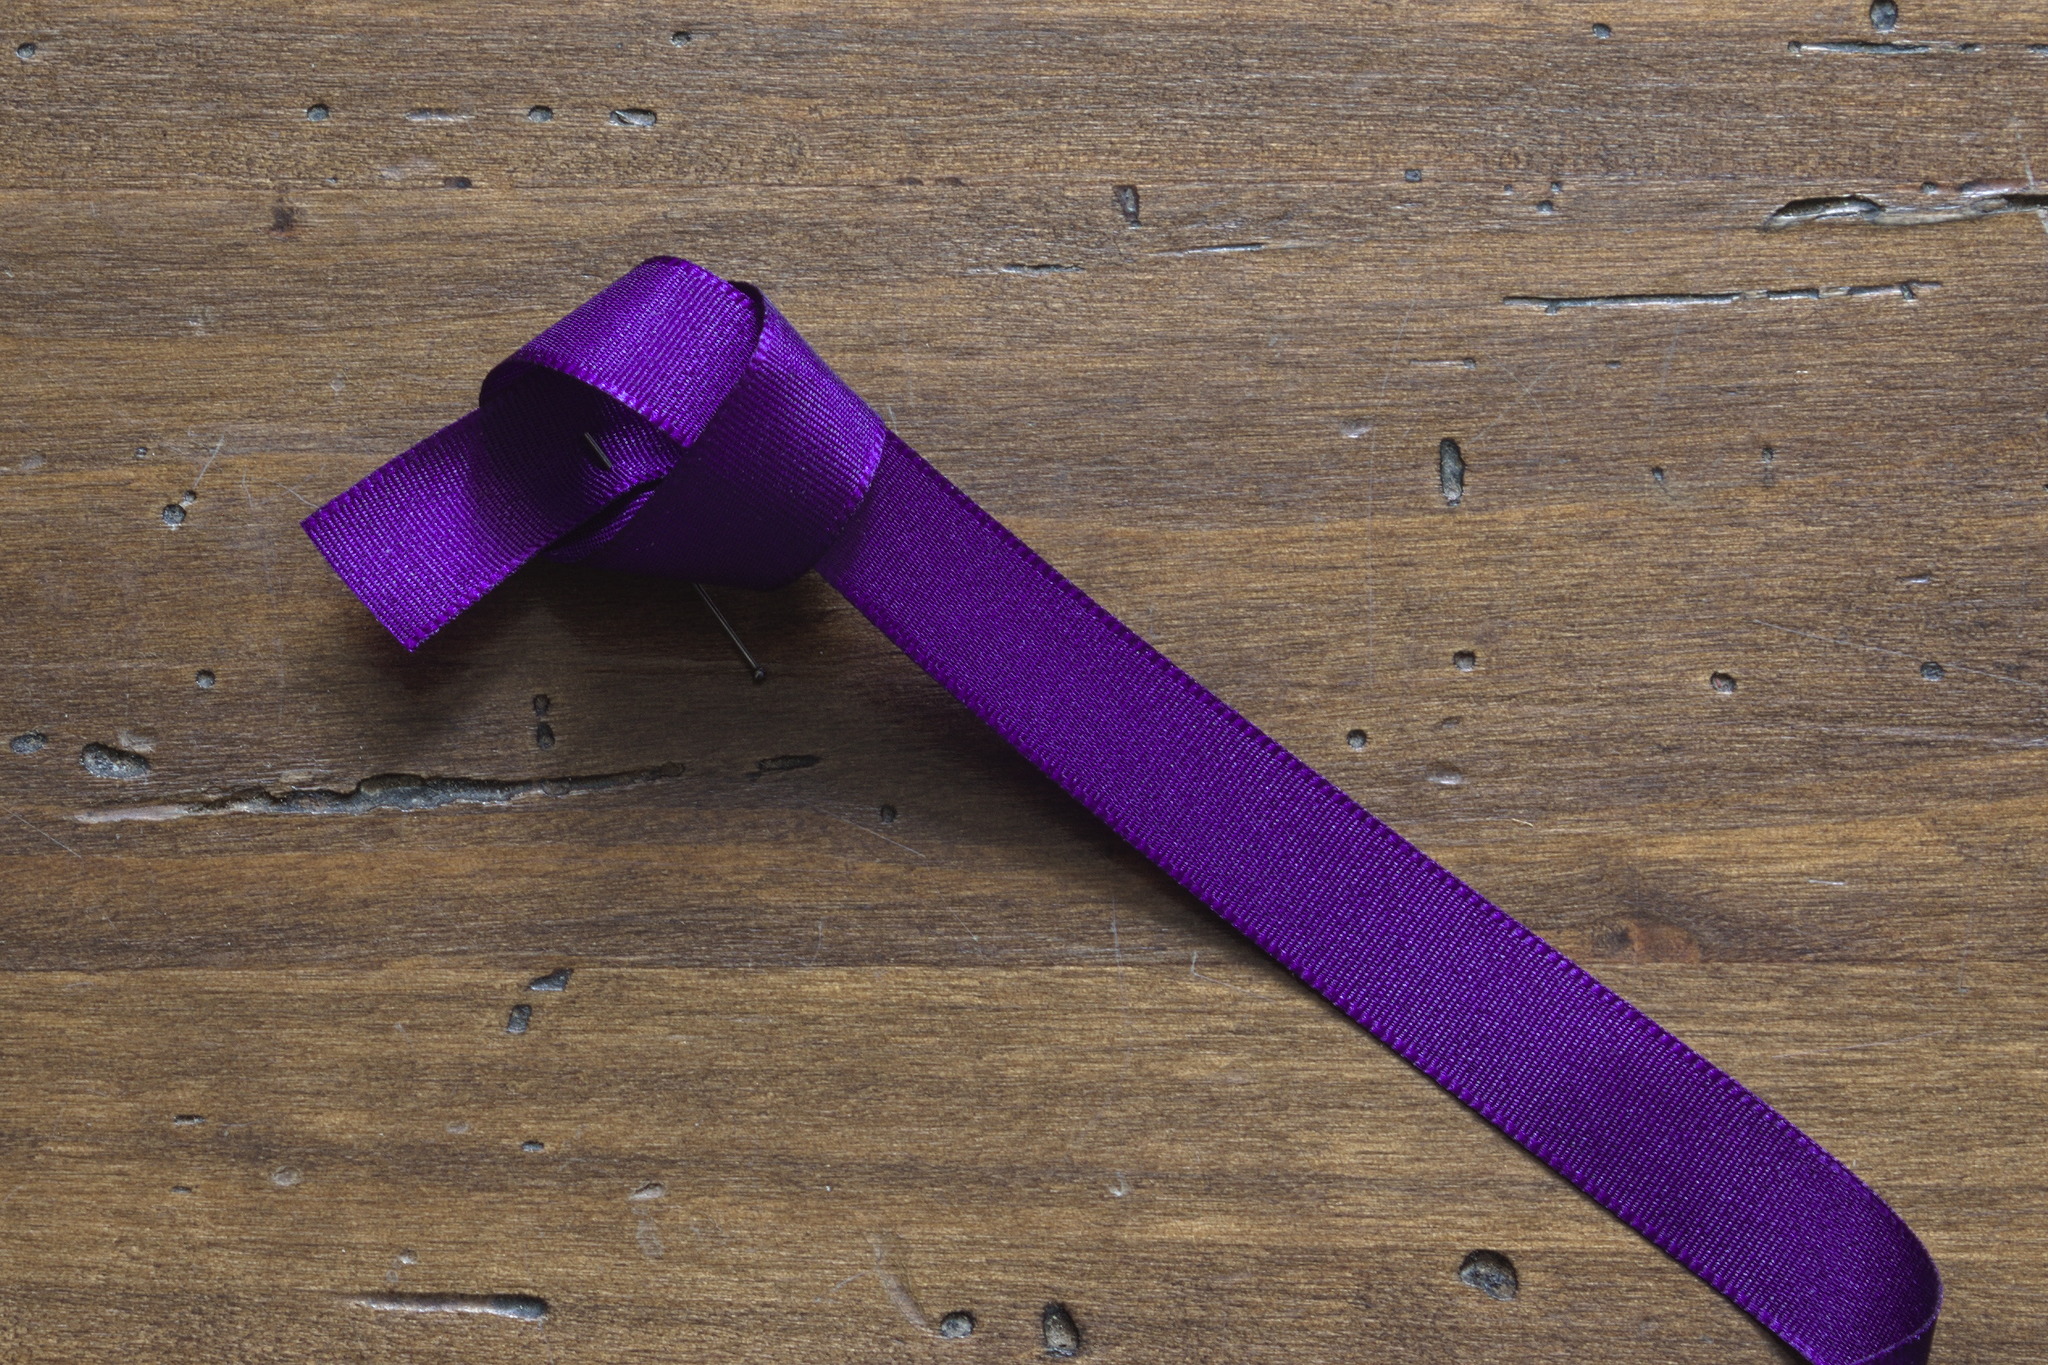
Make a knot at one end of the ribbon.

Pull it flat and cut the ribbon.
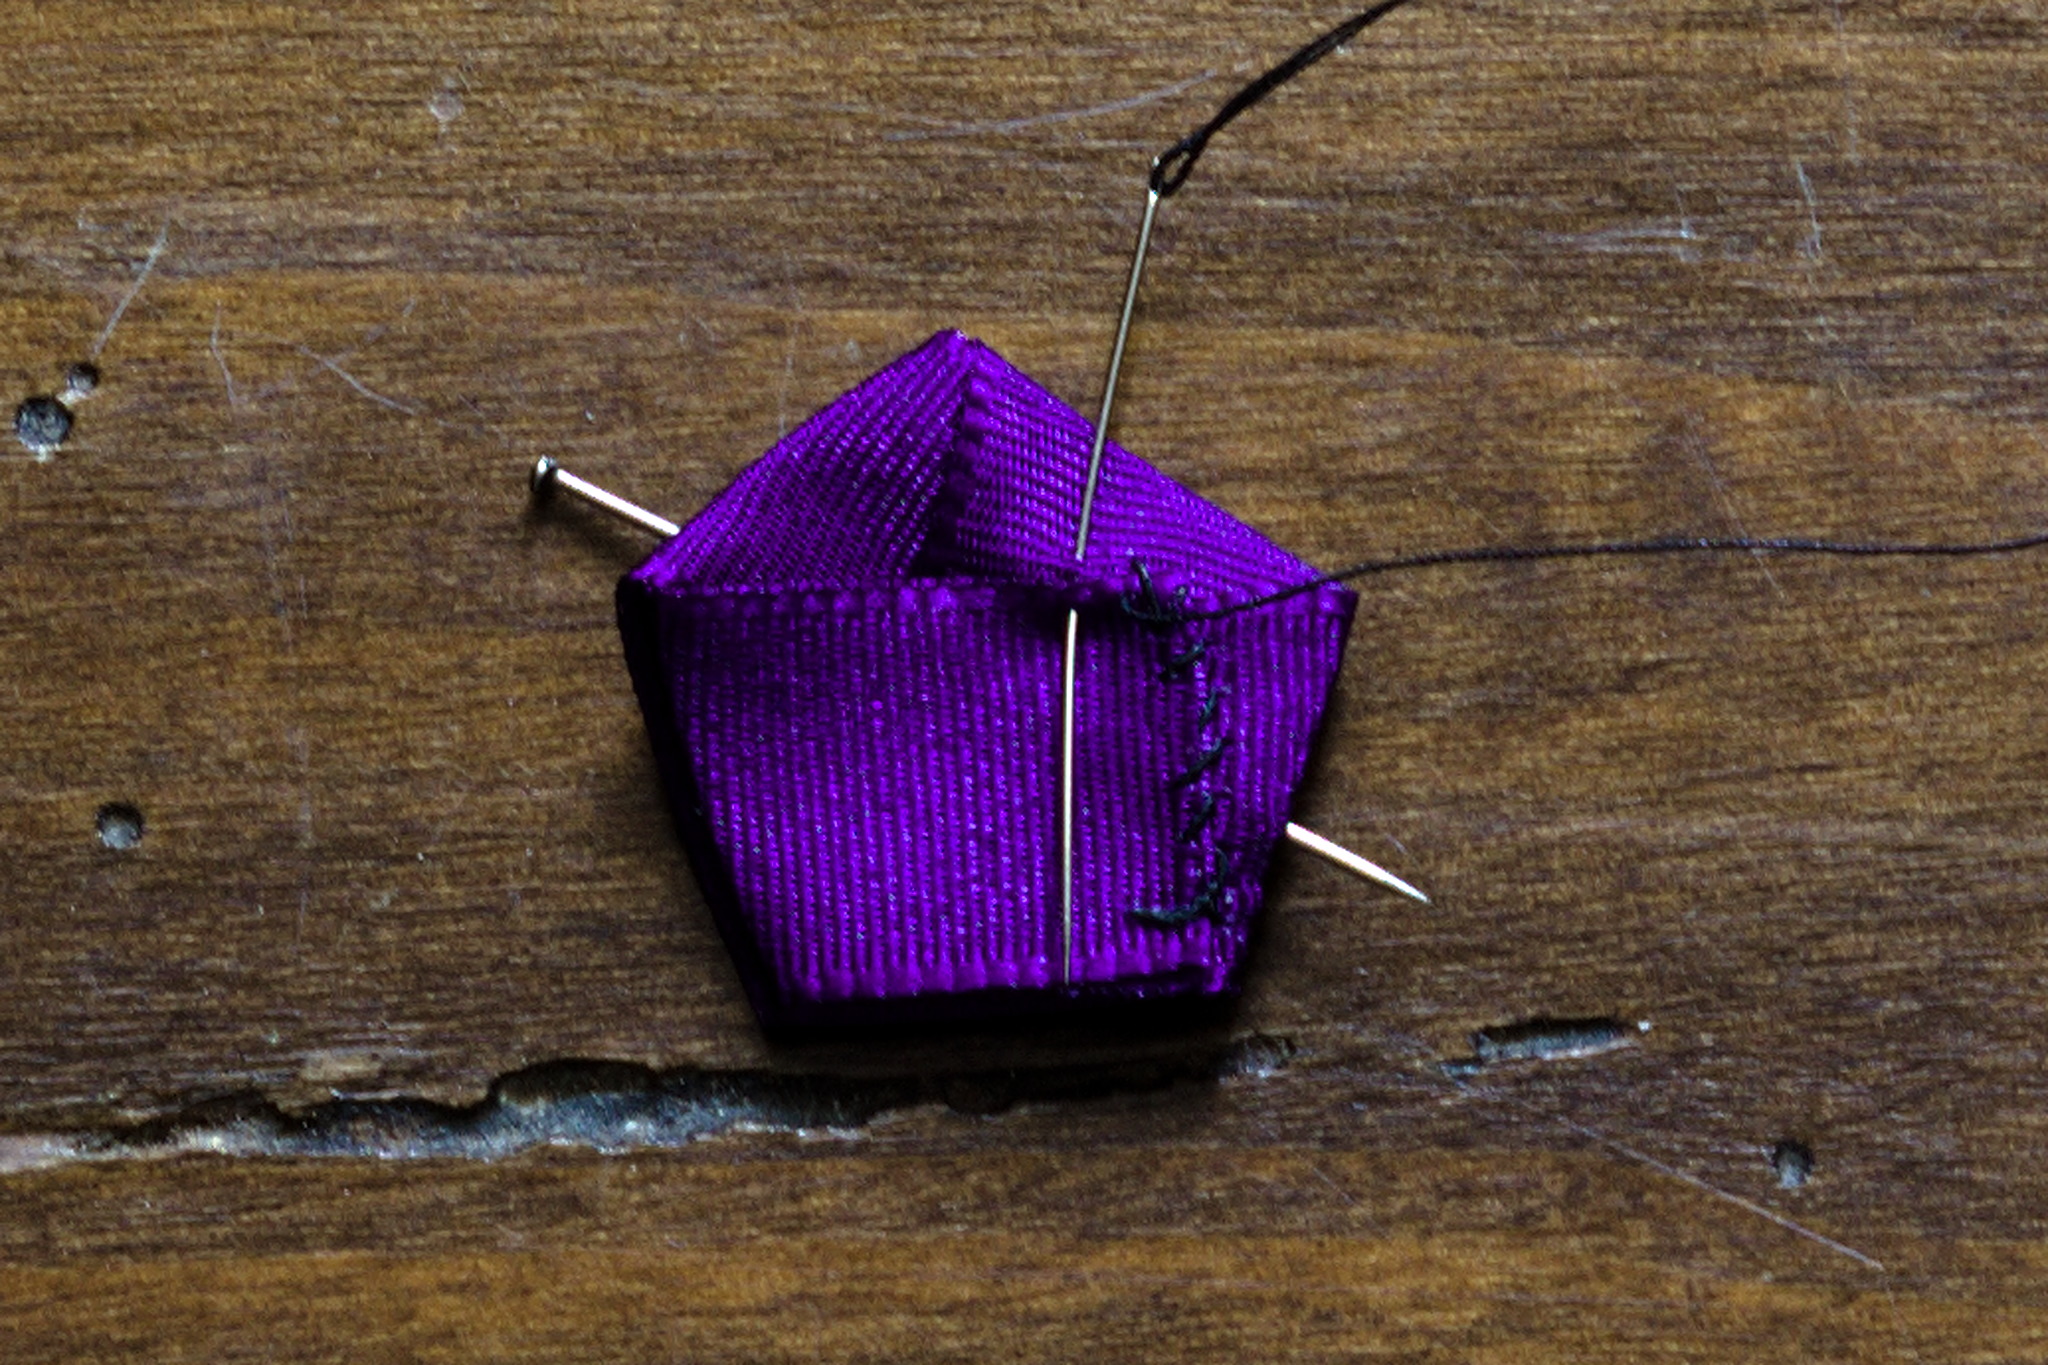
Fold the ends to the back, and whipstitch them closed, making sure not to catch the layers of ribbon visible from the front.
Tack the centrepiece to the cockade with a few stitches in the middle, hidden by its top layers.
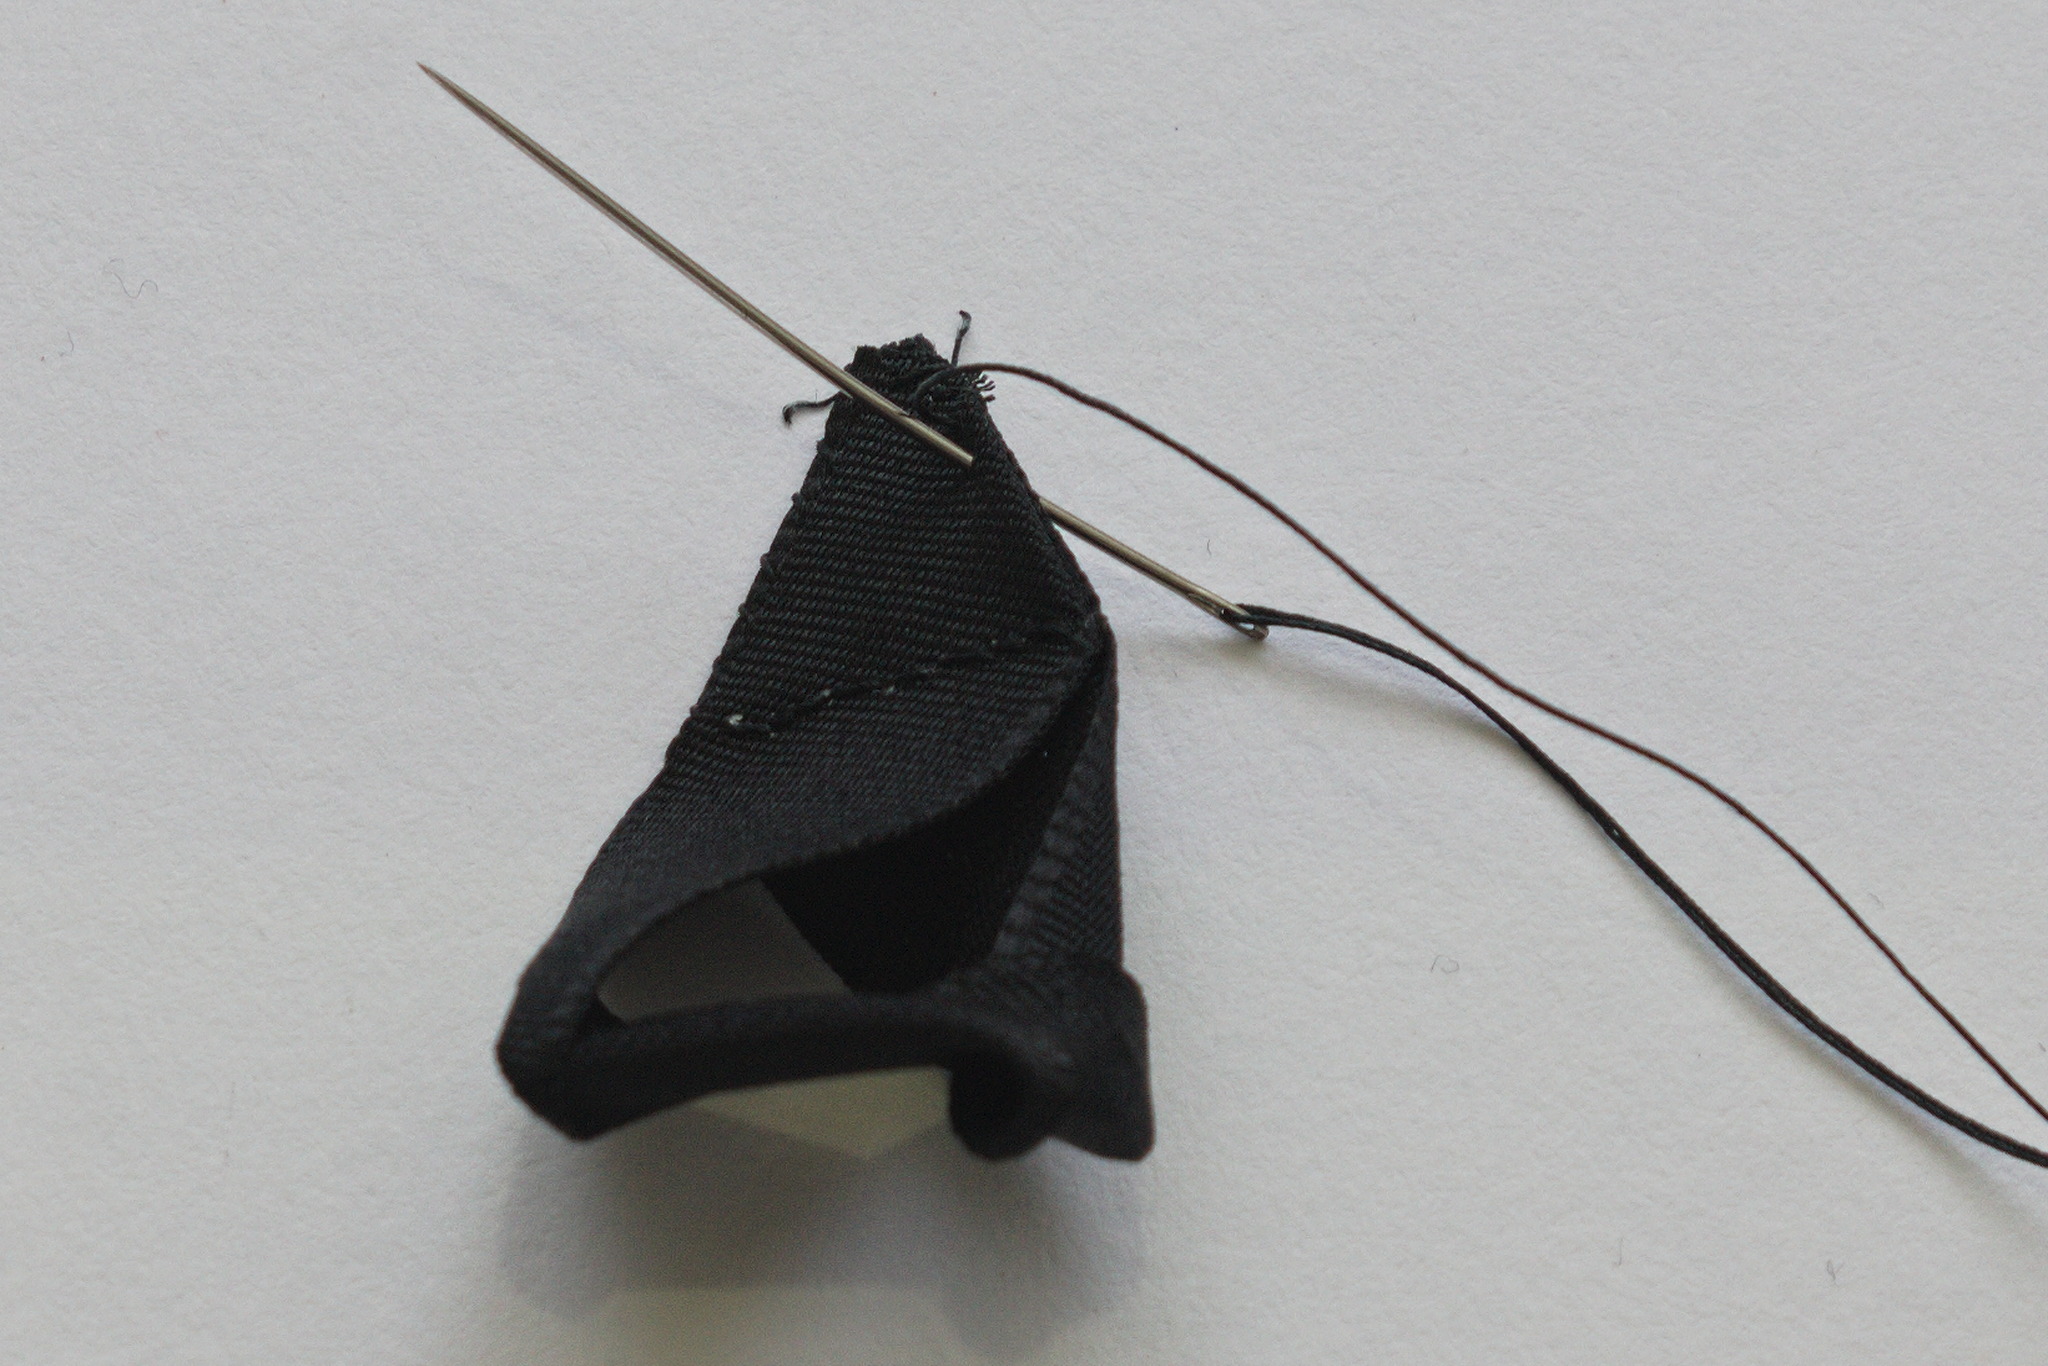
Hexagonal centrepiece
Cut a piece of ribbon about 7 times its width..
Fold an equilateral triangle at one end of the ribbon in order to mark some 60° angle
Fold the ribbon following the edges of the triangle to mark more 60° angles.
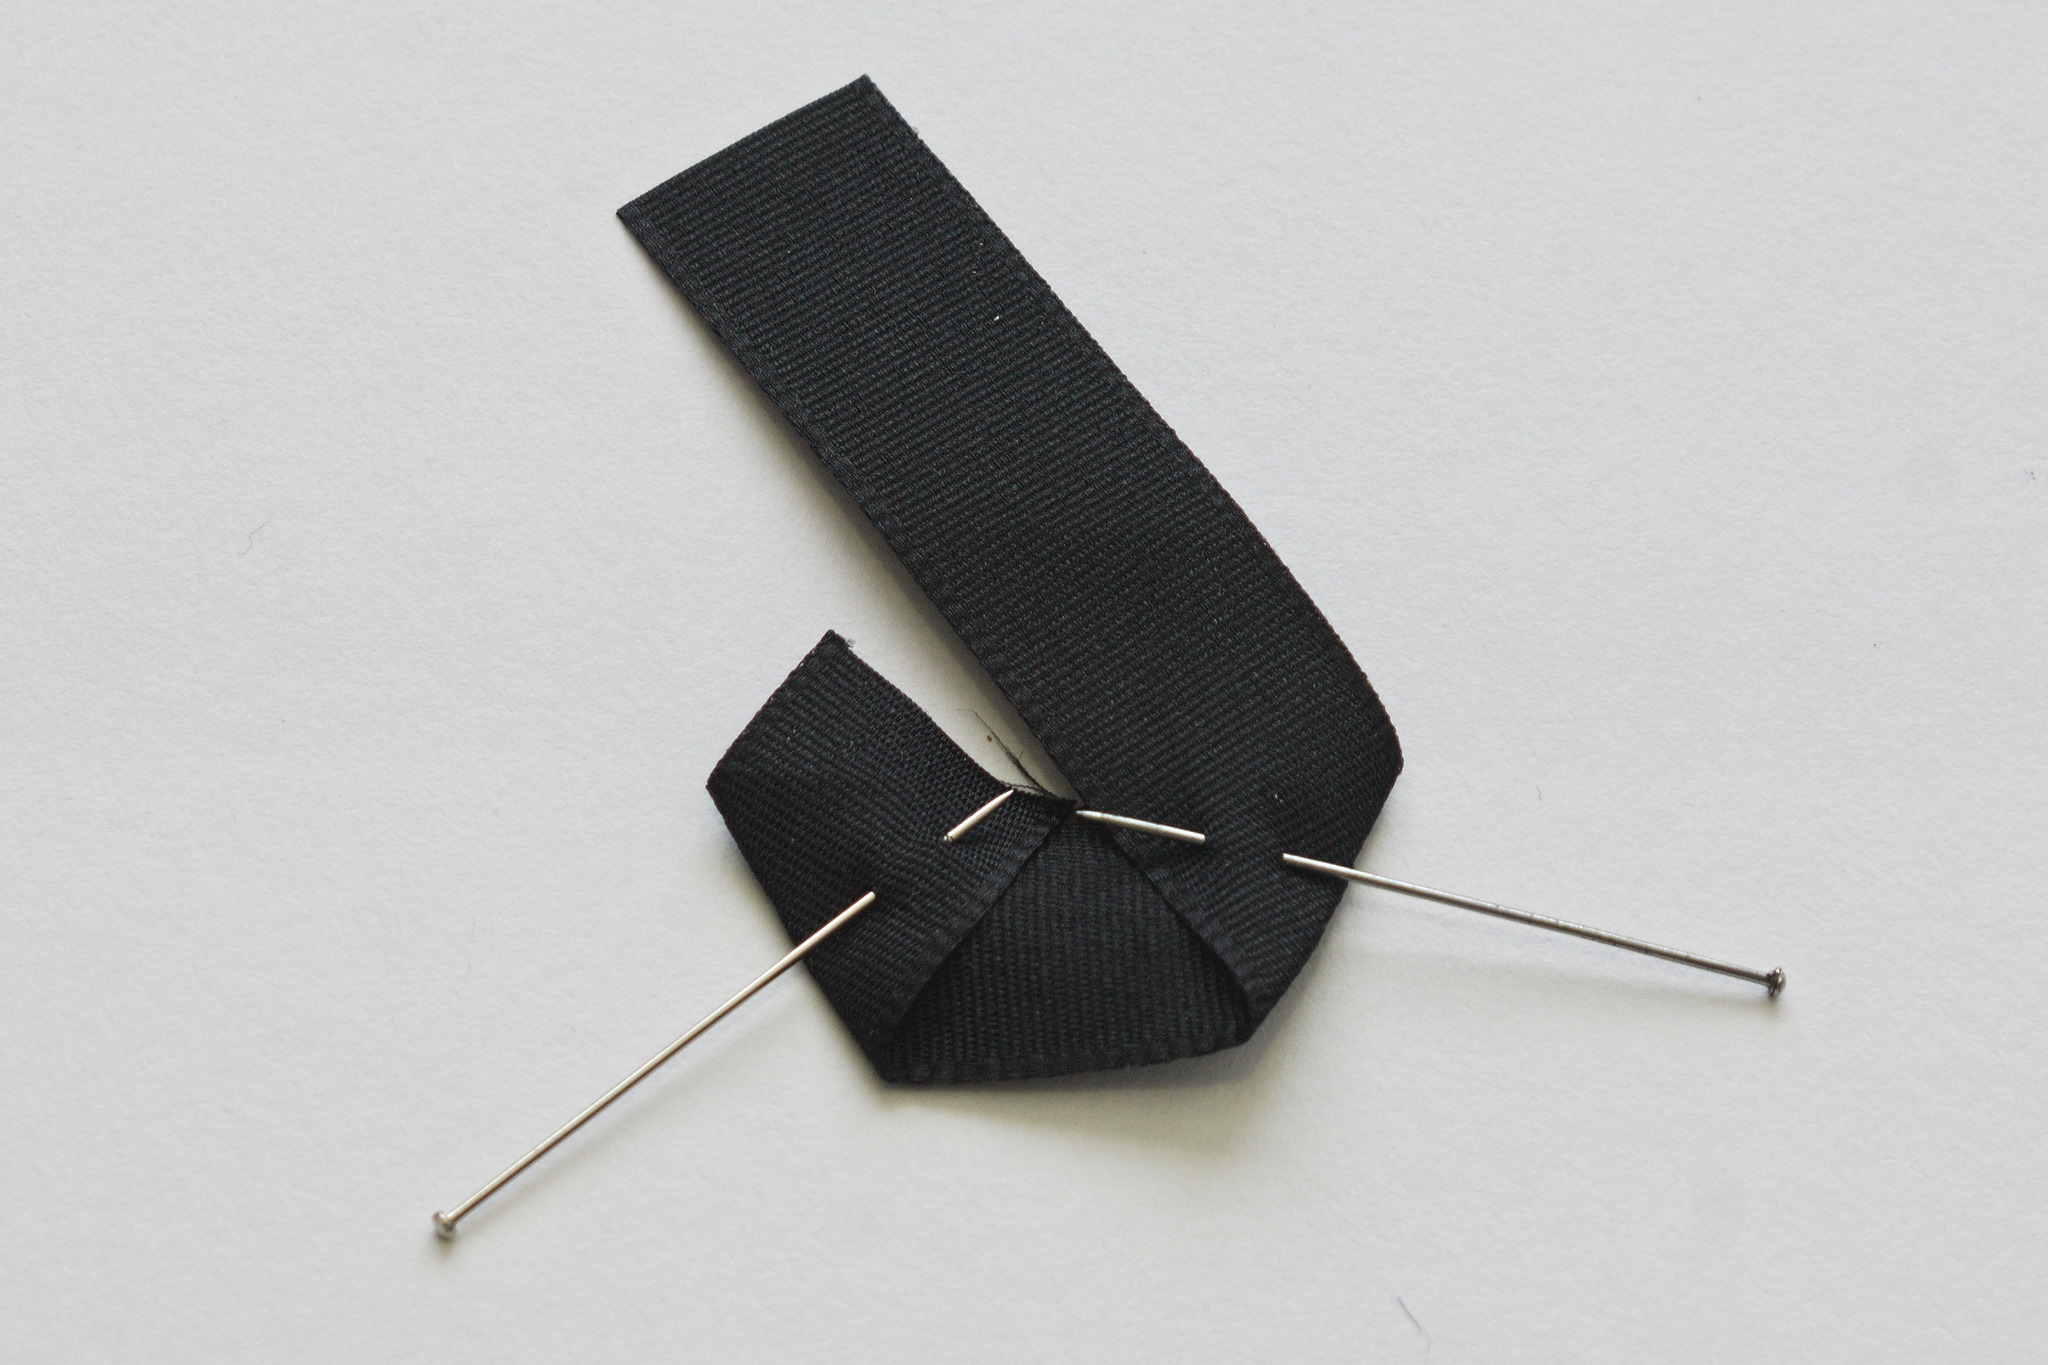
Open it up again, fold one end towards the front, following one of the marked line; make another fold towards the back to form the first half of the hexagon.
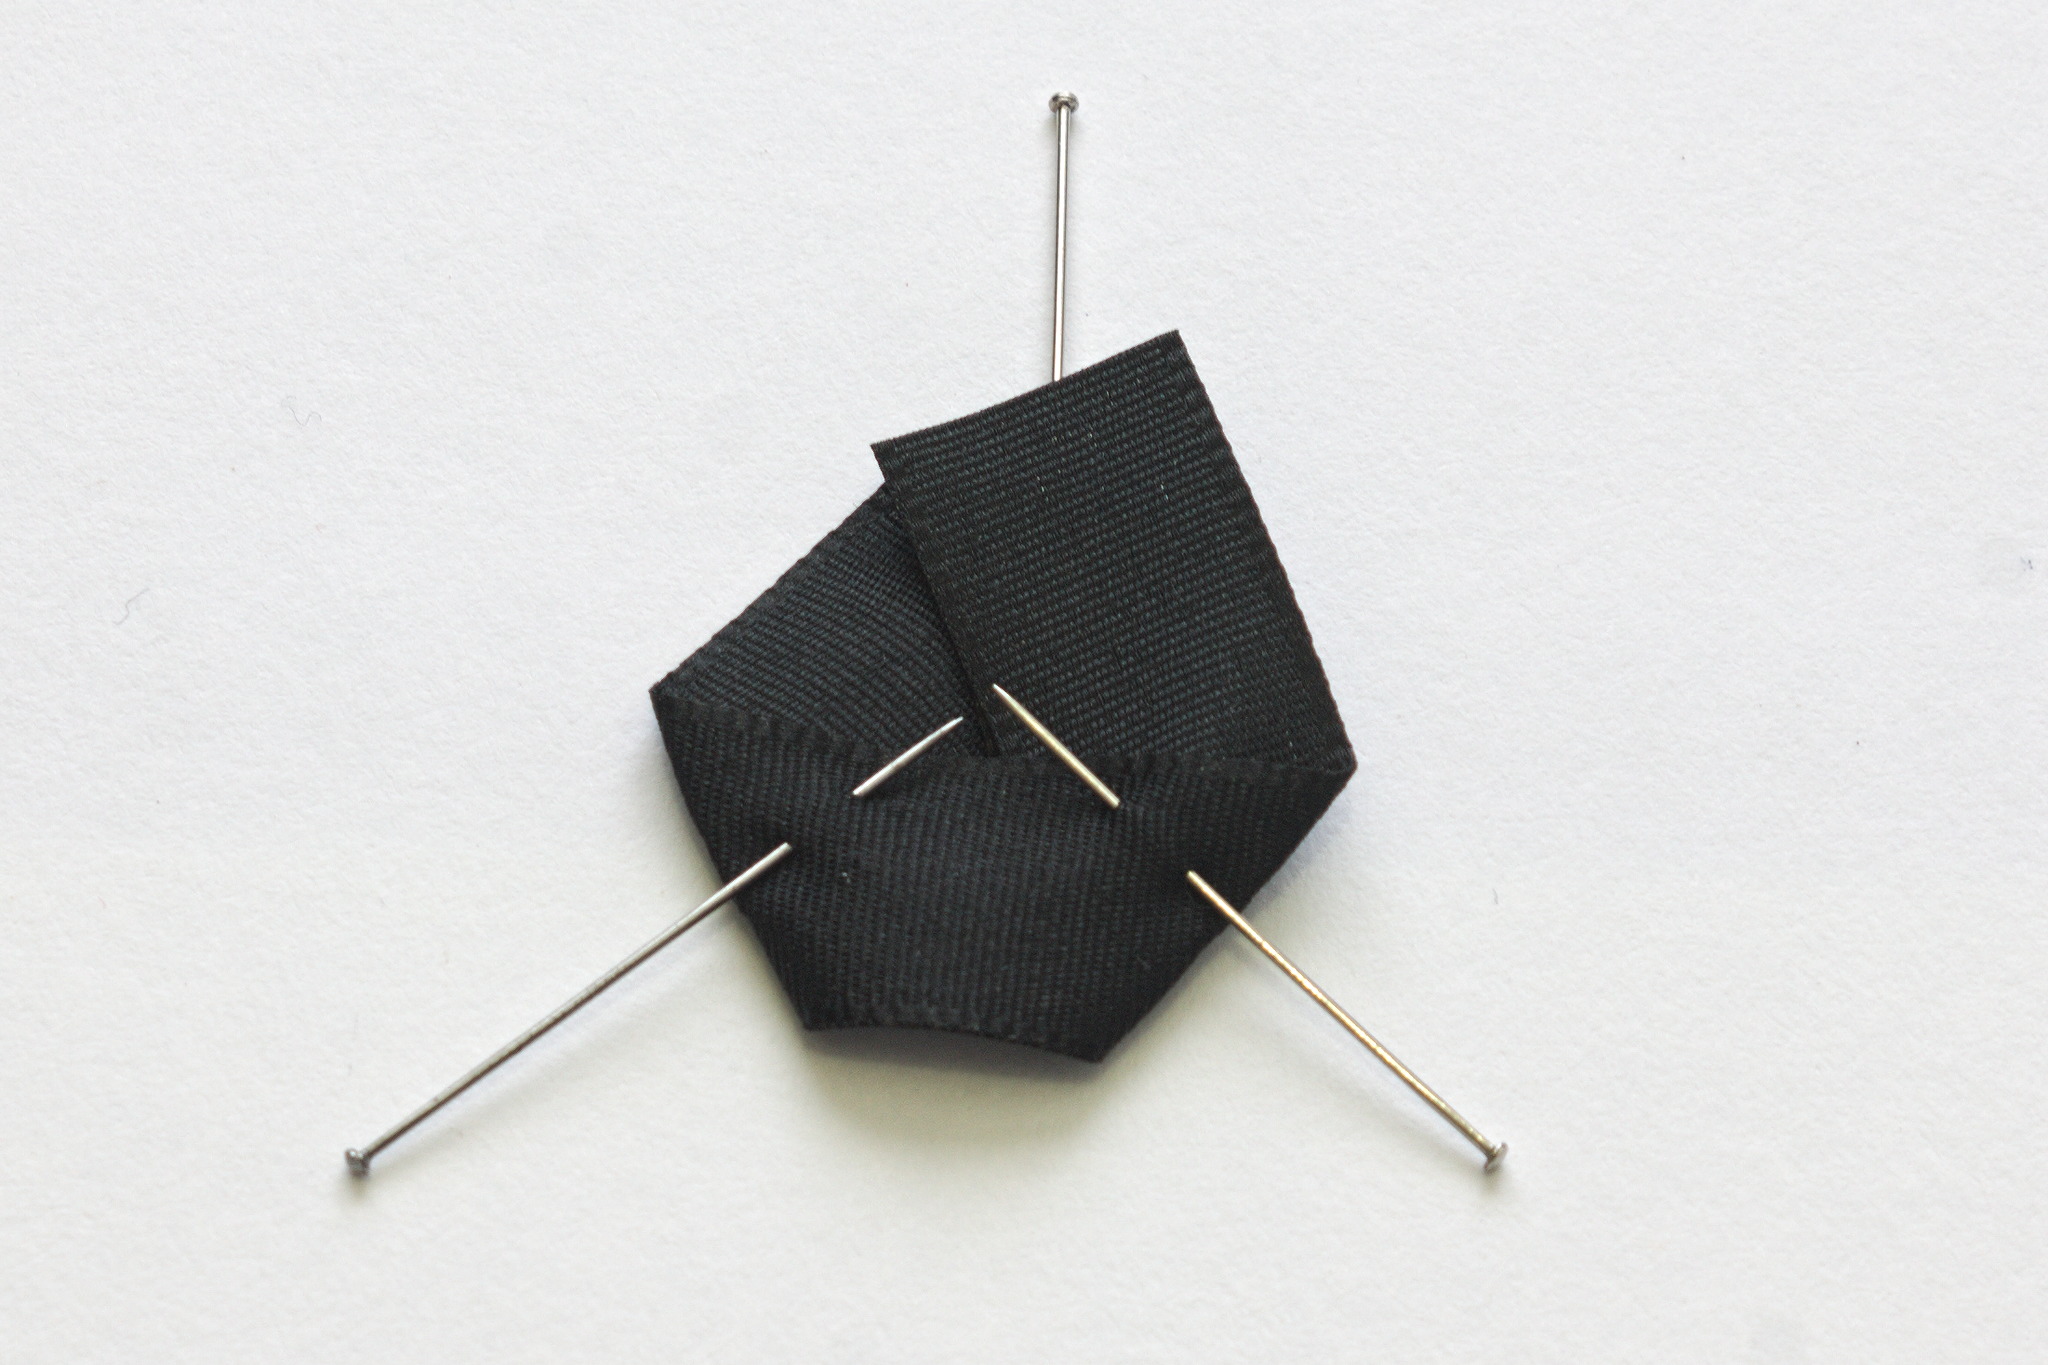
Fold another time towards the back, lining up with the beginning.
Fold the raw edges under, mark this fold well
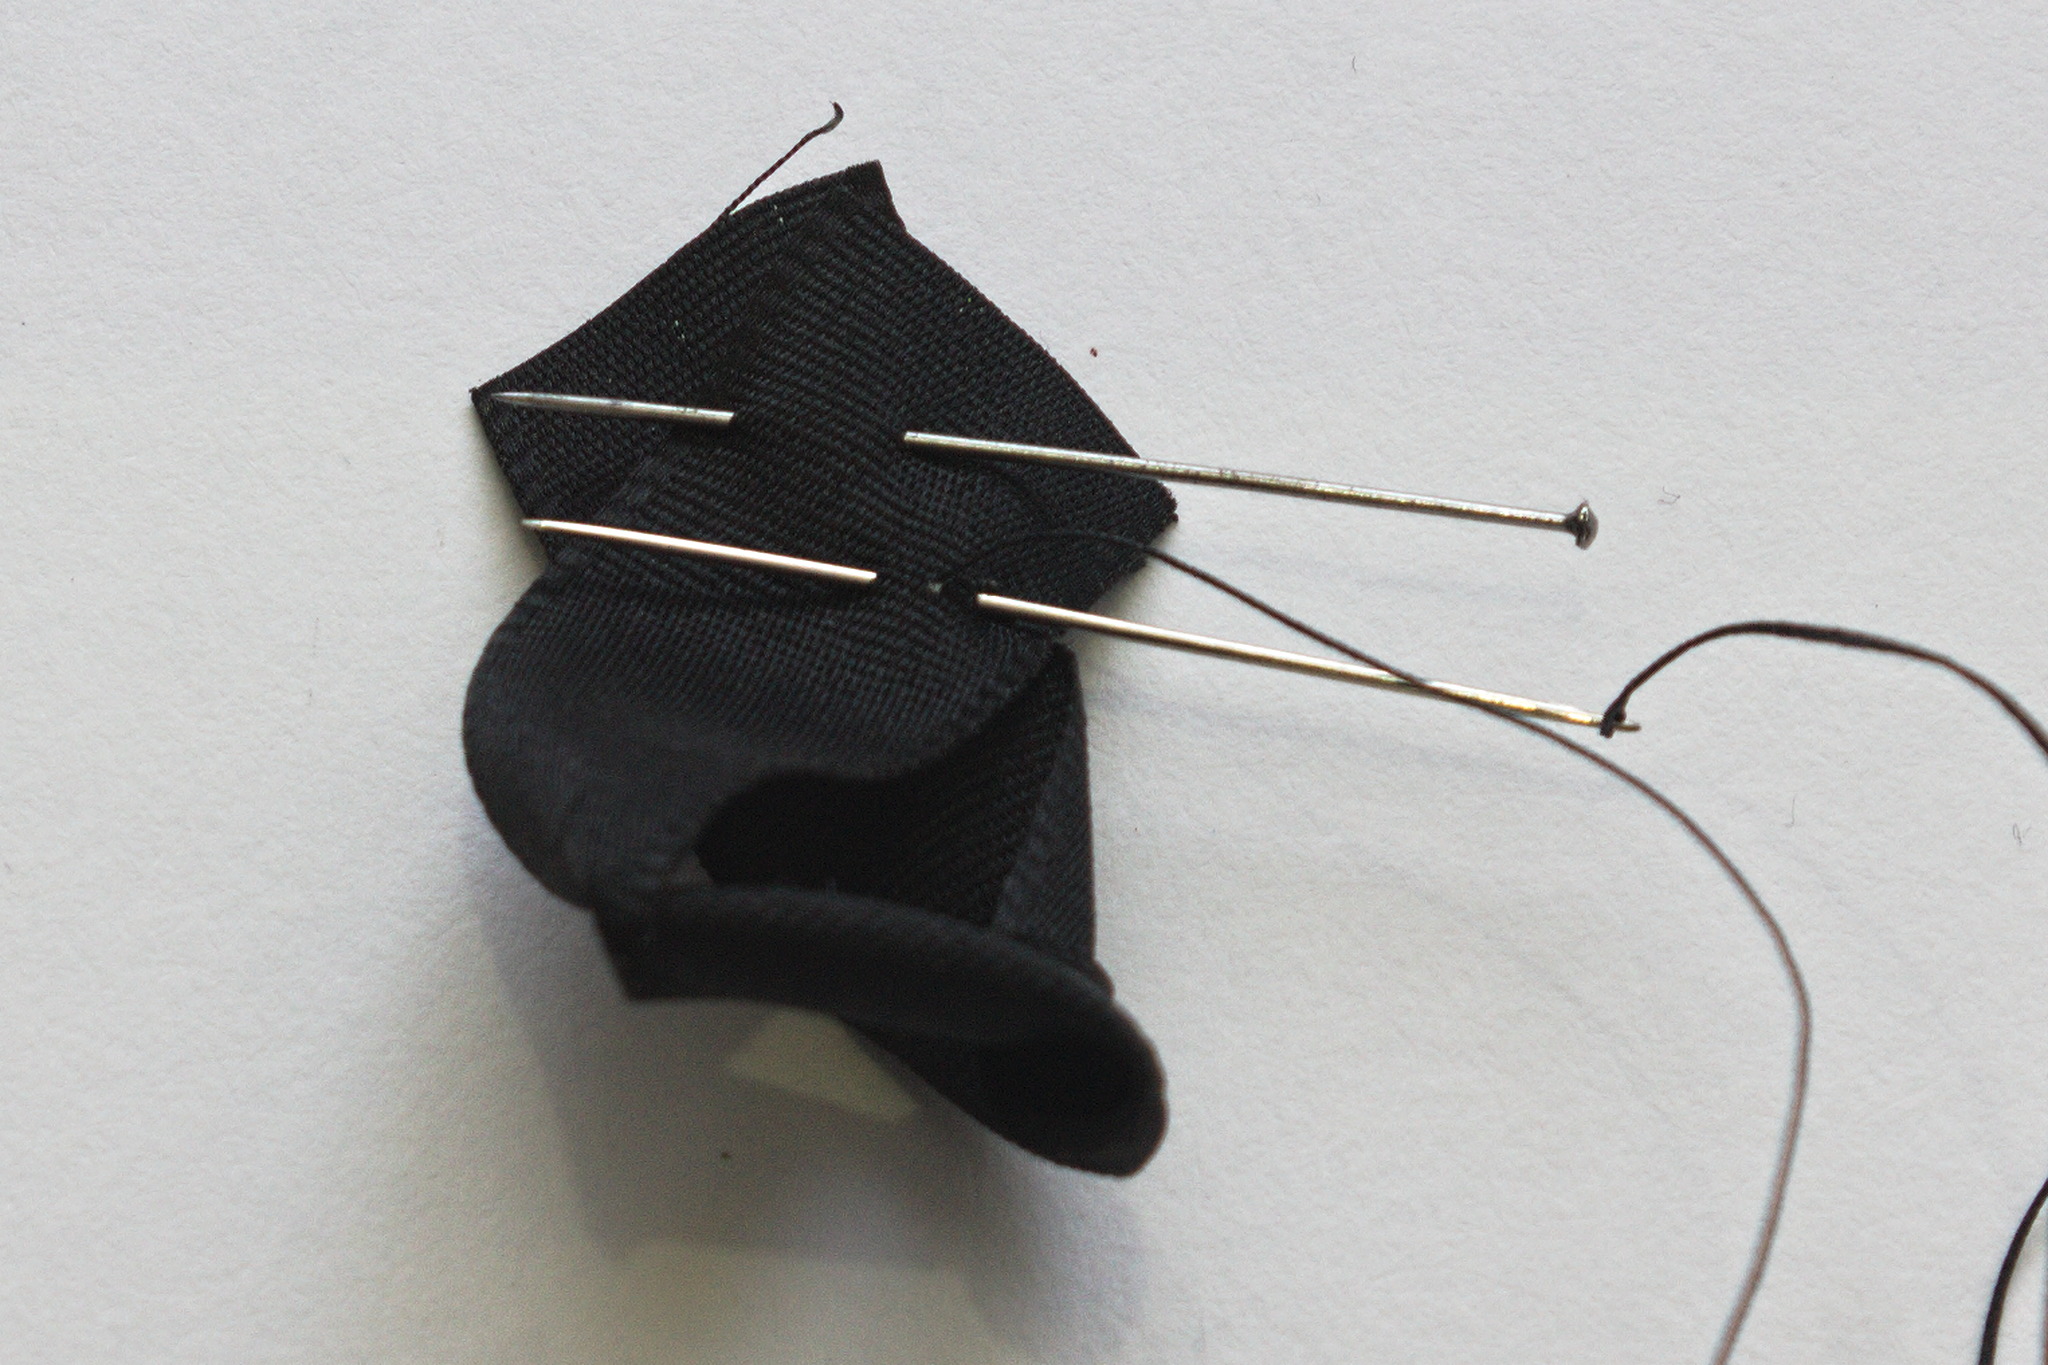
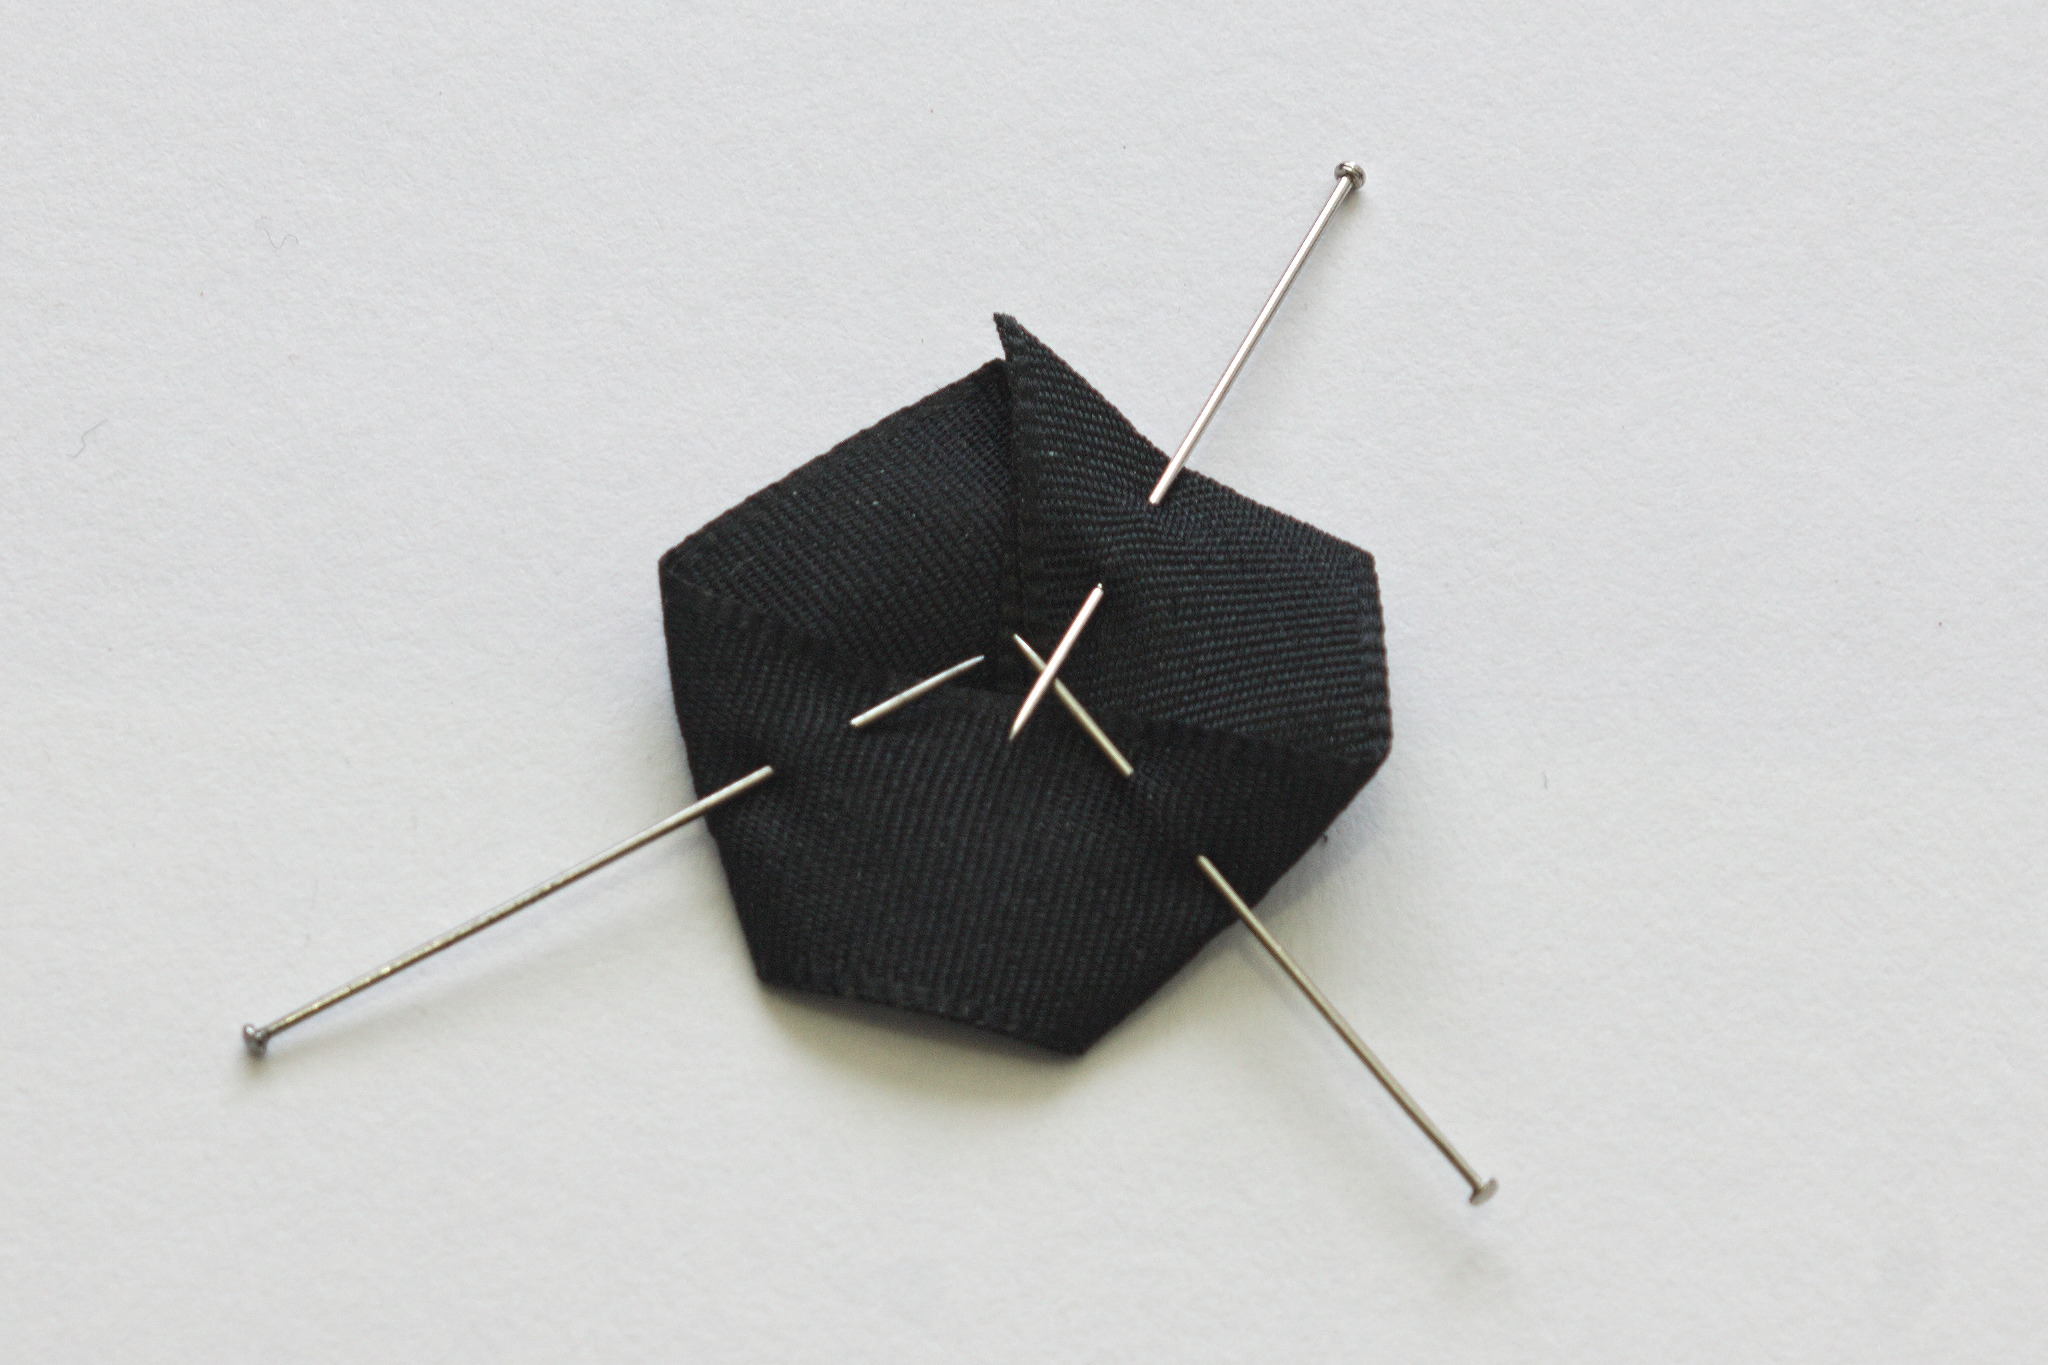
Pin the remaining ribbon, open everythin in such a way that you can sew over this fold with a backstitch.
Fold the raw edges into a neat triangle and whipstitch all around.
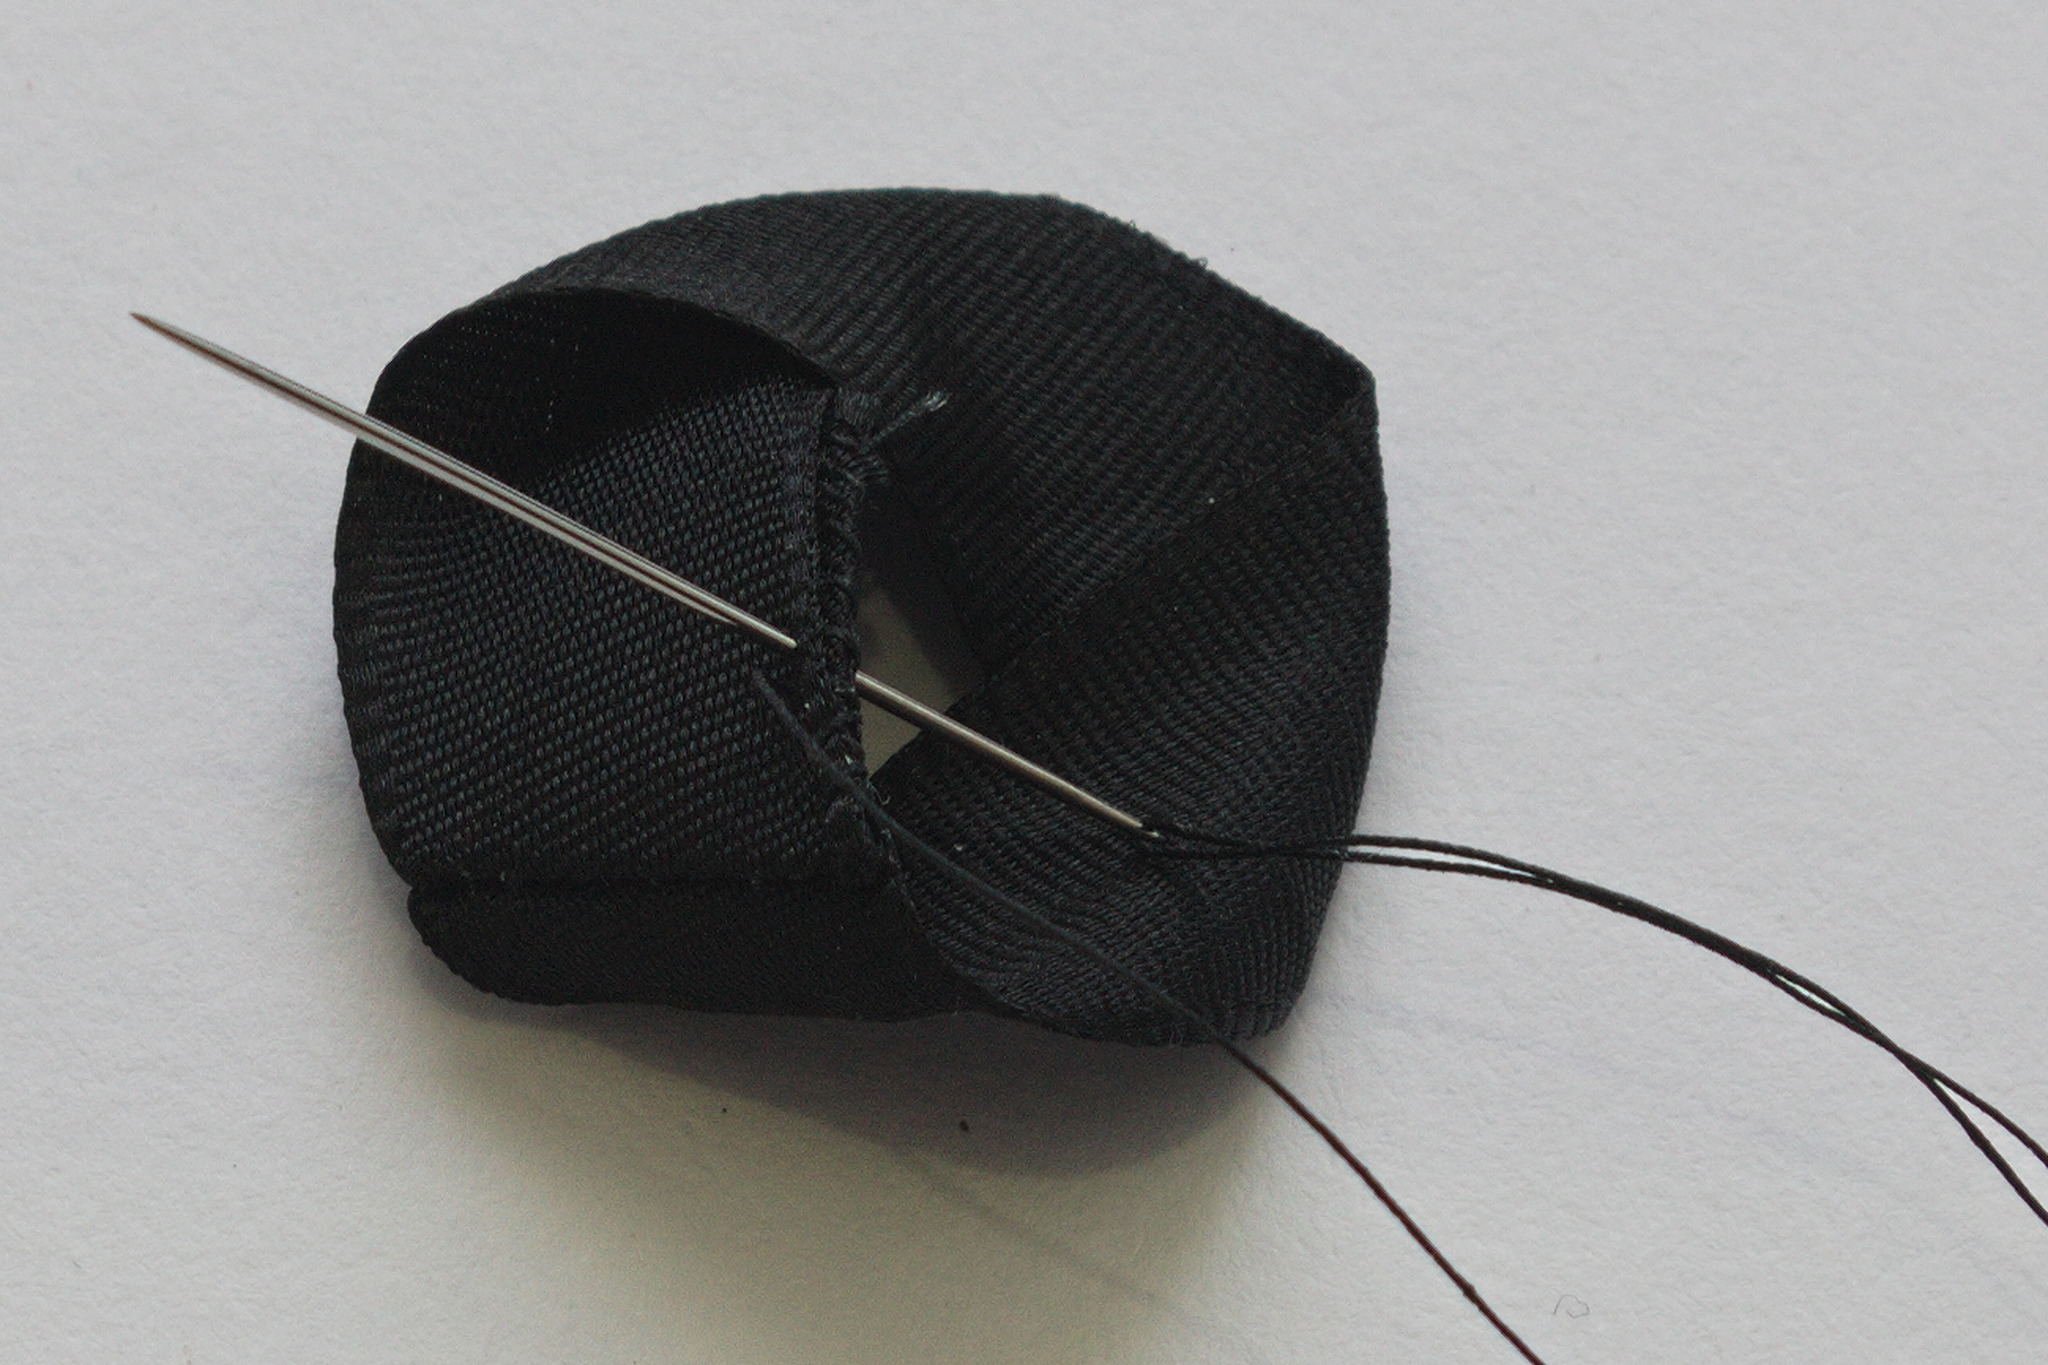
Put the ribbon back into an hexagonal shape, whipstitch the triangle to it on the back.
When tacking the centrepiece to the cockade make sure to pull it into shape.
Square / octagonal centrepiece
Cut a piece of ribbon 5 times as long as its width.
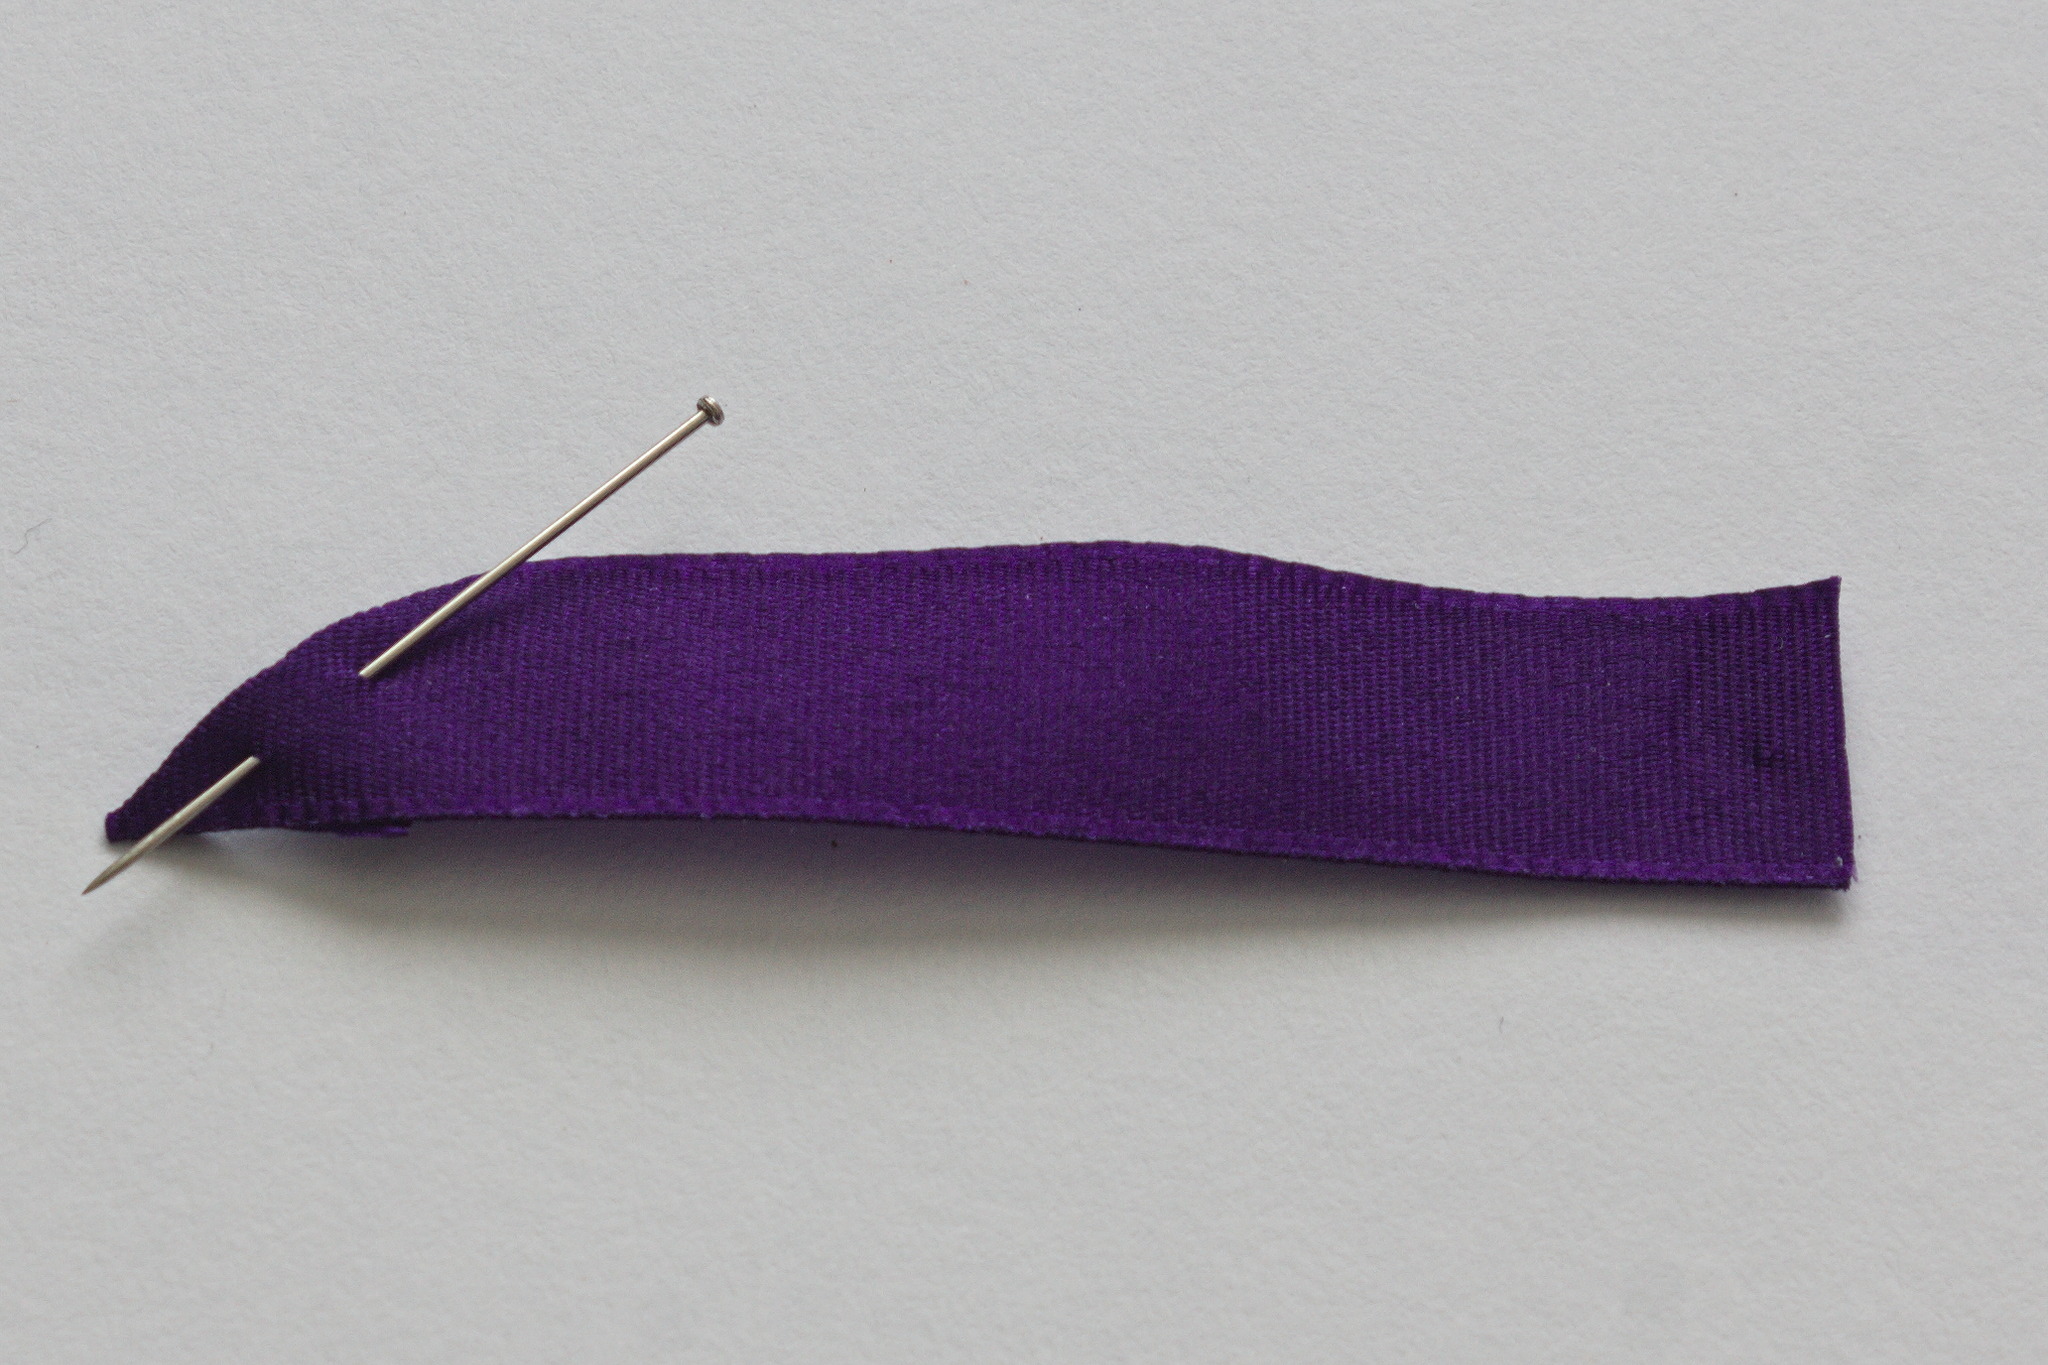
Fold one end at 45° towards the back, mark the fold and open it again.

Take the other end of the ribbon, put it behind the first end at a 90° angle, sew with a backstitch over the marked fold.
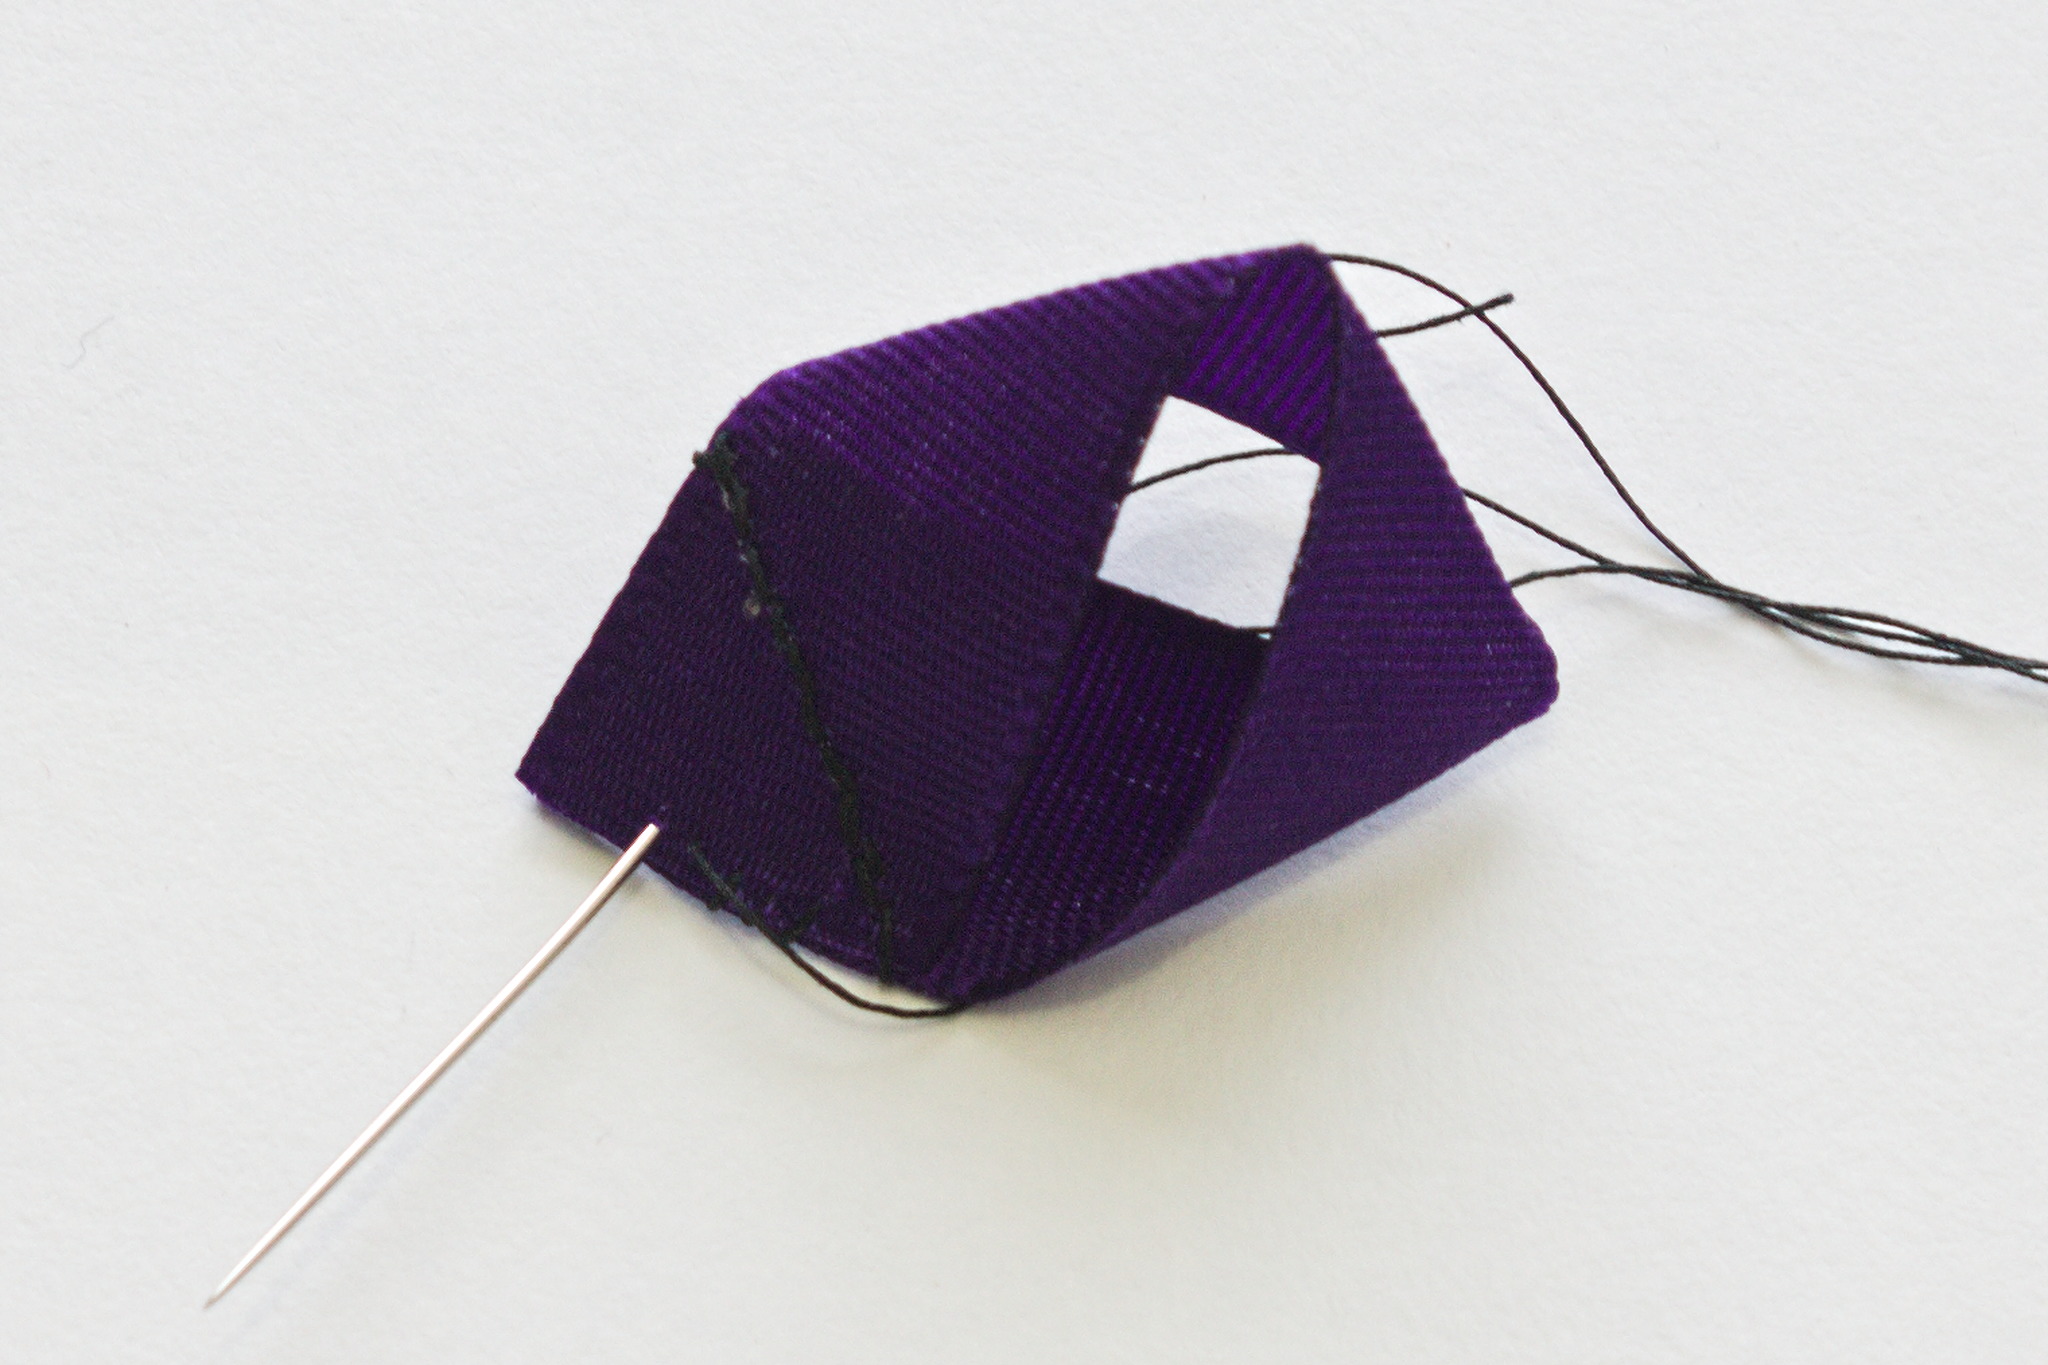
Whipstitch together the free ends of the triangle.
Press the triangle towards the back, and press the ribbon in such a way that if forms a neat square with a slit on a diagonal.
Sew the slit on the back shut, also sewing down the triangle.
Tack down to the cockade hiding the stitches under the front flaps.
Optionally make a second piece and tack it down to the cockade turned 45° from the first.
Gallery
See Also
How To Make 18th c. Cockades on the American Duchess blog: my main source of inspiration, which however used either just one colour, or wider ribbons to make additional layers, and wouldn’t work very well for the four colours cockade I wanted to make.
A forum post commenting on the above tutorial and recommending buckram as a backing material instead of felt.