Pajamas set

These are relatively fitting jersey pajamas (the nightwear, not the original Indian trousers) with a V neck and pointed details at the top hem and long sleeves.
There are options for long and short sleeves and trousers.
It is a pretty simple pattern suitable for beginners, where the main fiddly bit is the point of the V neck, and would be pretty fast to make for an experienced sewist.
Materials
Fabric
Stretch fabric such as cotton jersey, from less than 1.5 m for short sleeves / trousers up to 4 m for a full set (long + short tops and trousers).
Notions
matching sewing thread;
~ 20 cm, 1.5 cm wide cotton tape for each top;
enough elastic 2 cm wide to go around the waist for each bottom;
optional: scraps of fusible interfacing;
optional: fabric paint.
Pattern
Measurements
This pattern uses the Aldrich Drafting System.
You need to take the following measurements:
bust_circ(G04)Bust circumference.
waist_circ(G07)Waist circumference.
hip_circ(G09)Hip circumference; this is not used in the yoke pattern, but will be needed later when cutting the body of the nightgown.
across_back_b(I08)Width of the back from armscye to armscye.
height_waist_side_to_hip(A.20)Vertical distance from the waist to the hip, on the side.
neck_circ(G02)Circumference at the base of the neck.
neck_back_to_waist_b(H19)Vertical distance from neck to waist on the back.
arm_shoulder_tip_to_wrist_bent(L05)Length of the arm
height_waist_back(A.23)From the waist to floor, on the back.
height_waist_side_to_hip(A.20)From the waist to the hip, on the side.
the file ../../drafting_methods/aldrich/aldrich.vit is used by
default by the pattern file and has the list of needed measurements.
Pattern
Get the valentina files for the pattern,
pajamas_top.val and pajamas_bottom.val.
You may want to change the following increments in the Tables of Variables; the defaults are sensible.
For both patterns:
sewing_allowancee.g. 2 cm to allow for flat felled and / or french seams.
For the pajamas top:
finished_length_sidefinished length, without the point;
bottom_point_lengthlength of the point at the center back and front;
neck_dip_frontdistance from the base of the neck to the neckhole, in front;
sleeve_length_jersey3 cm less than the regular length of the sleeve (
arm_shoulder_tip_to_wrist_bent)short_sleeve_lengthto taste, somewhere in the middle of the biceps;
sleeve_point_lengthlength of the point at the hem of the sleeve.
For the pajamas bottom:
finished_length_longfinished length of the long trousers;
finished_length_shortfinished length of the short trousers;
leg_hem_circcircumference of the hem of each leg;
back_risehow much to add to the back to allow for the bum curve: the default is calculated based on the difference between waist and hips;
Instructions
When not otherwise specified, all seams should be sewn with an elastic stitch: either a lightning stitch (if available) or a very narrow zig-zag.
Top
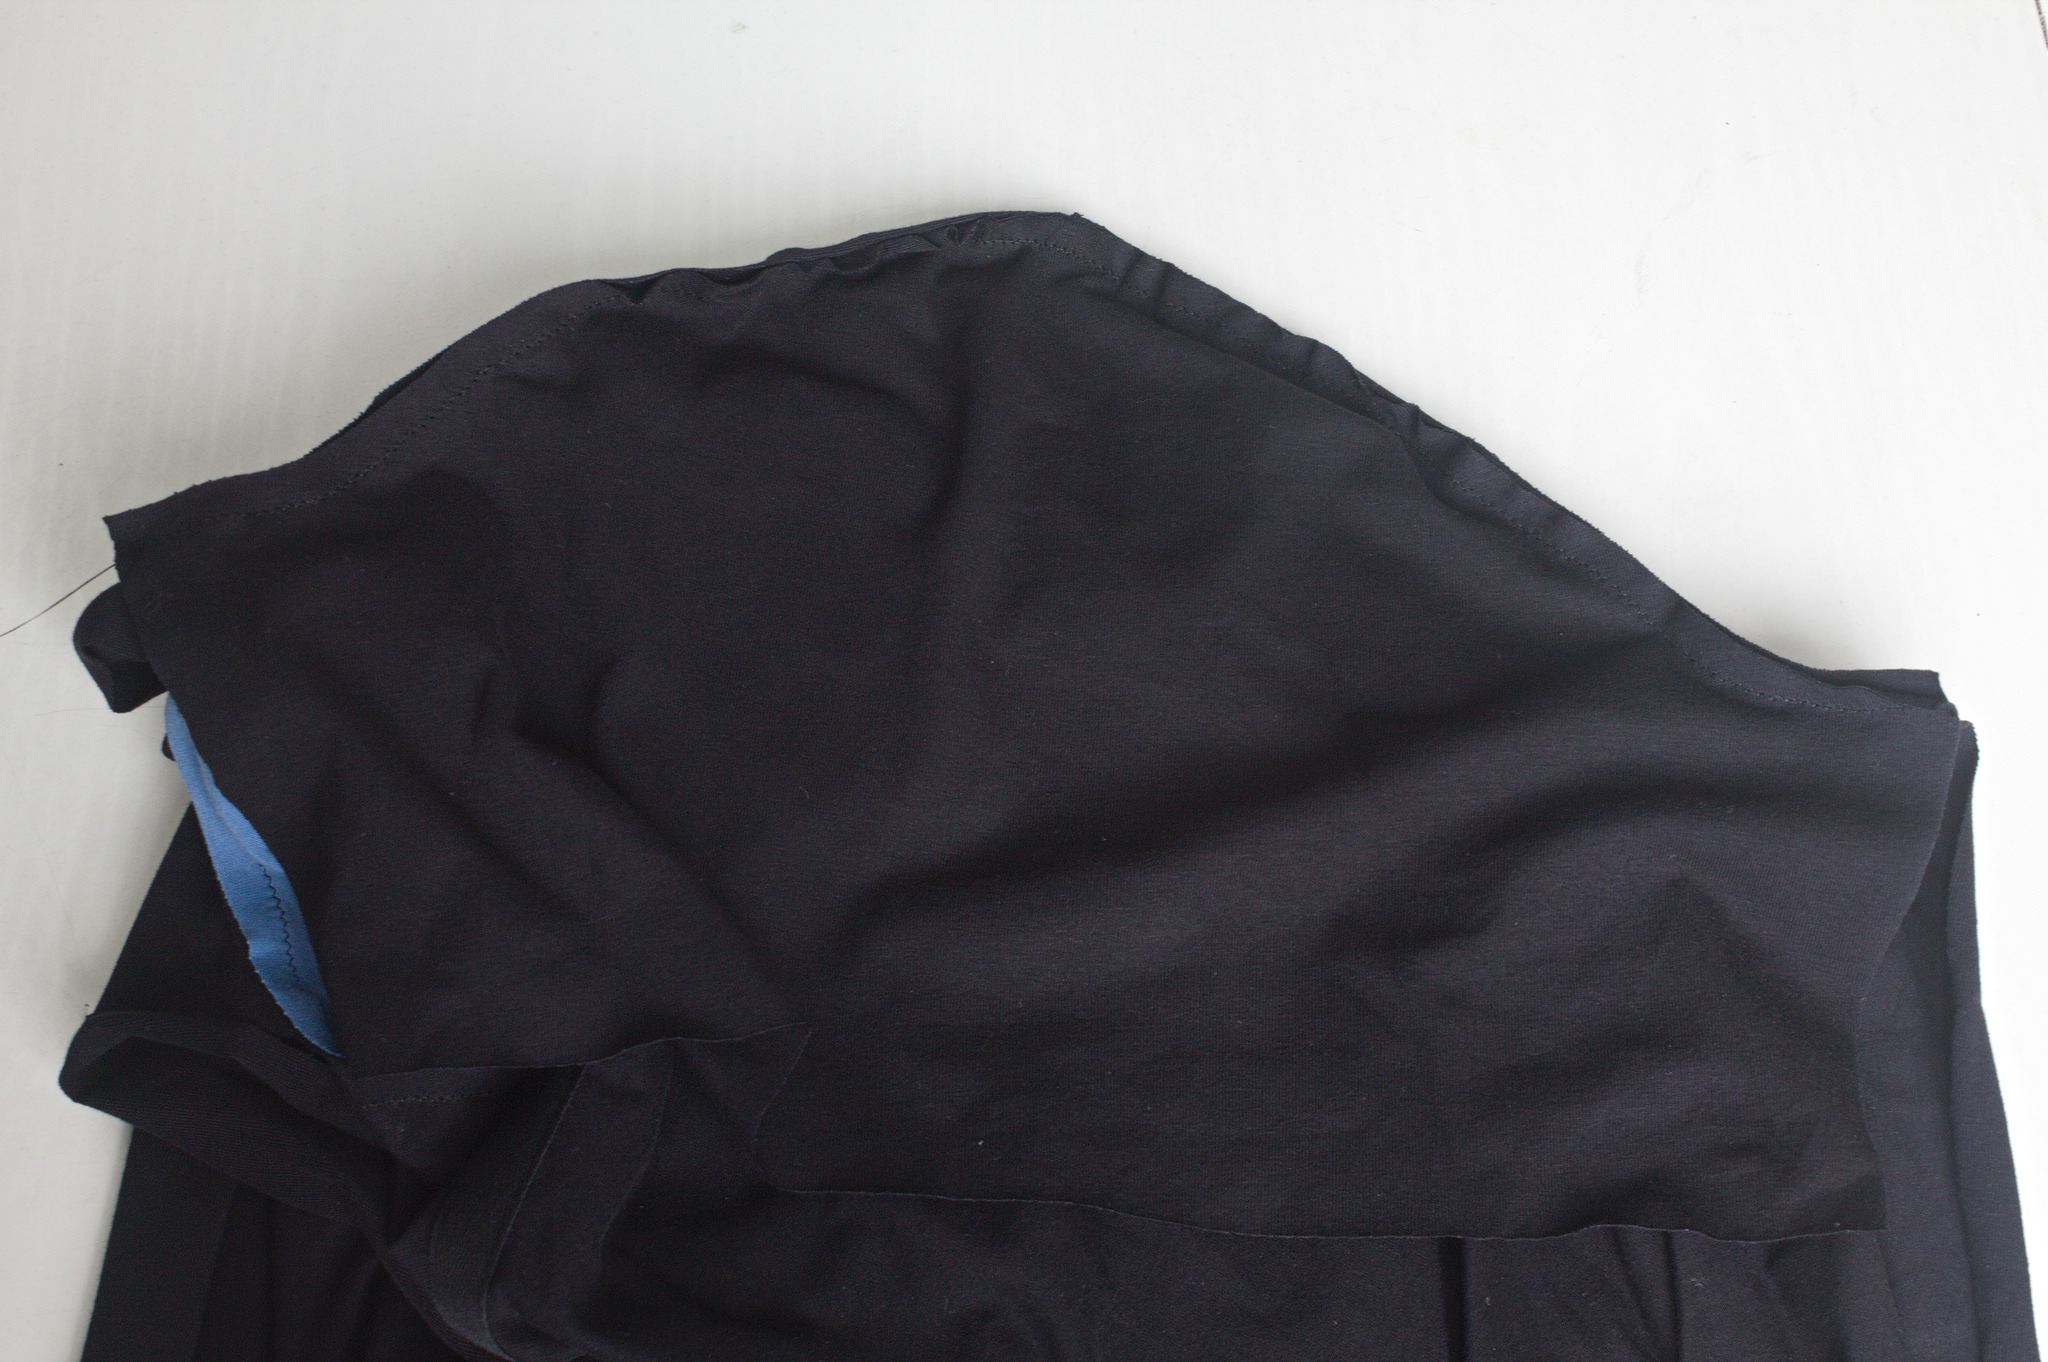
Cut one of the front and back pieces, on the fold of fabric; cut two of your chosen sleeve, also on the fold. The most efficient way is probably to open the fabric flat, fold in just enough of each side to cut the front and back, and then cut the sleeves from the remaining center part.
Tip
if you plan to decorate your pajamas with fabric paint you may want to do so at this stage, on the cut pieces, when you don’t have to deal with the rest of the garment. Since the pattern is designed with a flat block, however, it’s not a big deal to wait until it’s fully assembled.
Also cut the neckhole binding: a cross-grain strip of fabric (along the direction where it is most elastic), long enough to go around the neckhole.
Optionally, if making long sleeves, cut two of the sleeve facing, on the fold.
Tip
You can cut the neckhole binding and the sleeve facings in a contrasting fabric.
Cut two pieces of cotton tape as wide as the shoulder seam.
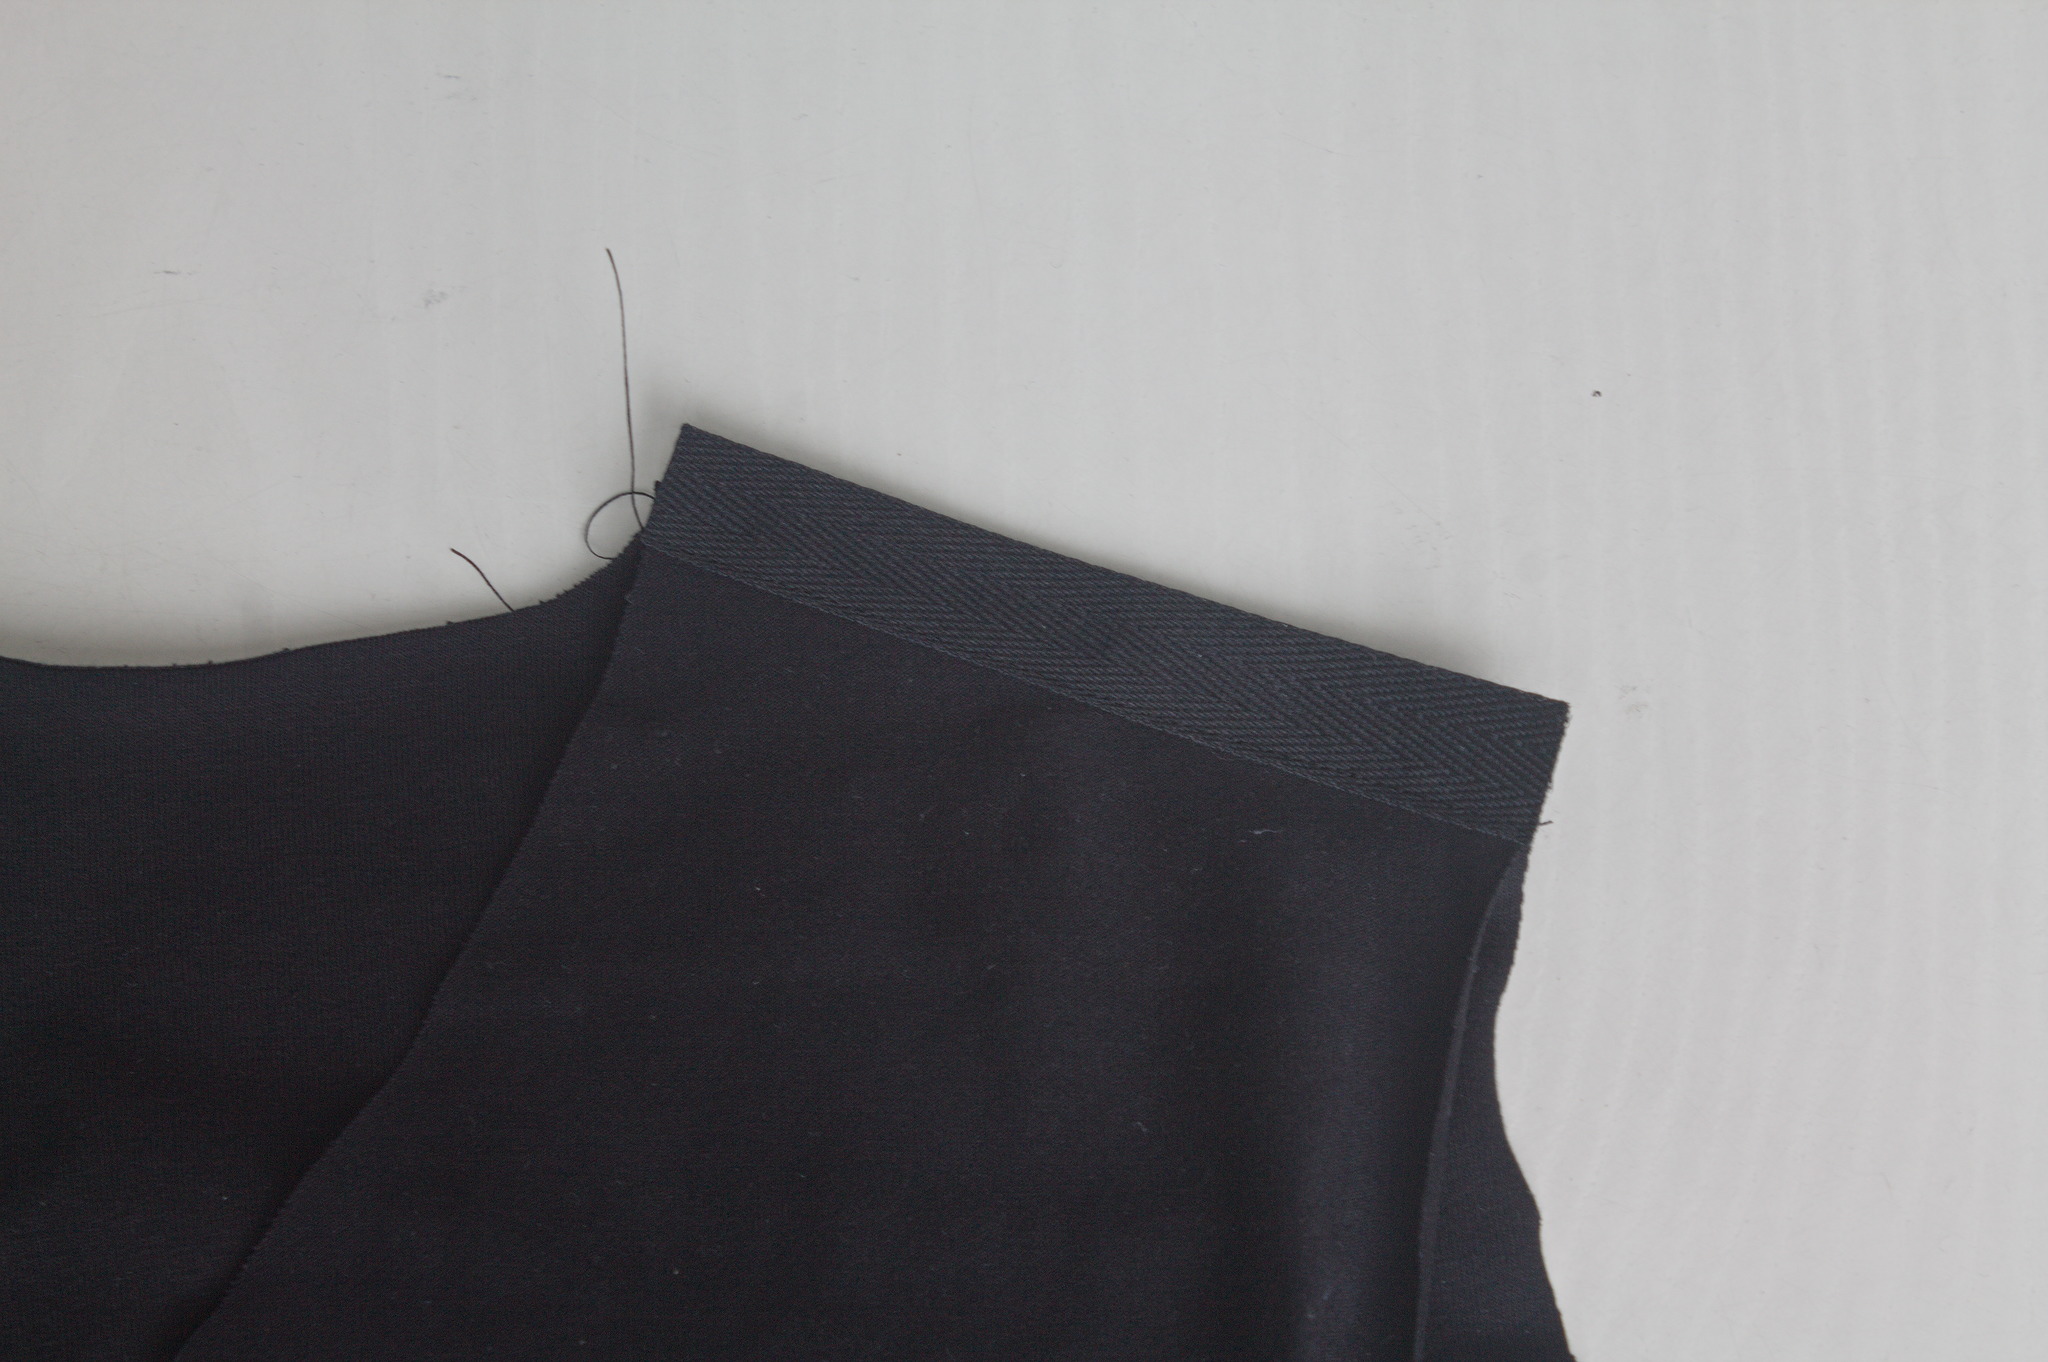
Right sides together, put the front over the back and align the tape so that it just covers the shoulder seam line and sew with a straigth stitch.
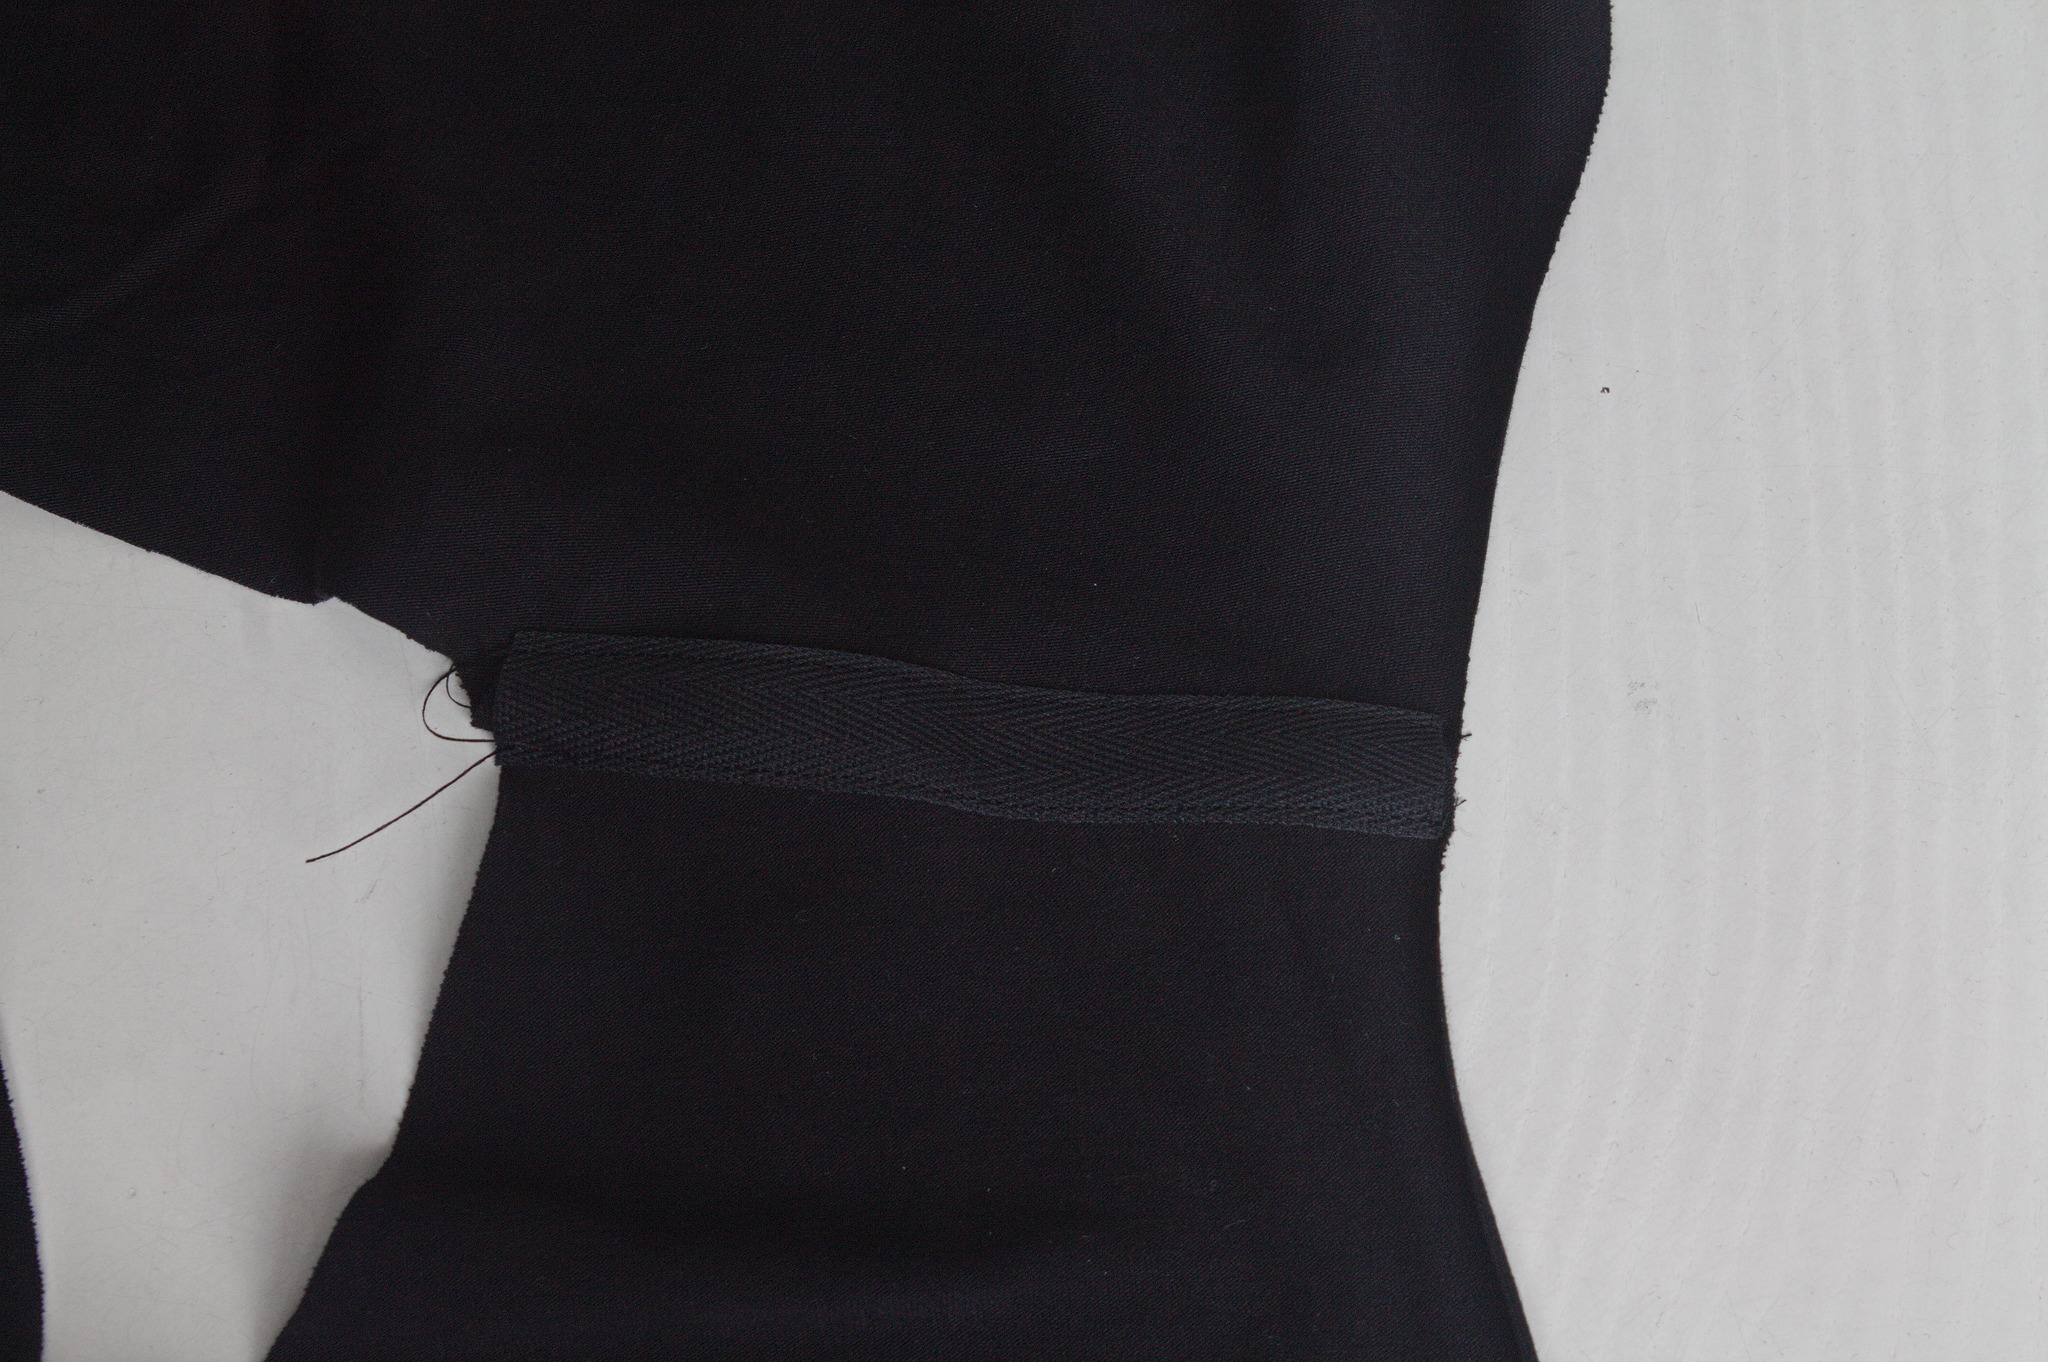
Press everything towards the back and topstitch with a straigth stitch near the other edge of the tape, enclosing all allowances.
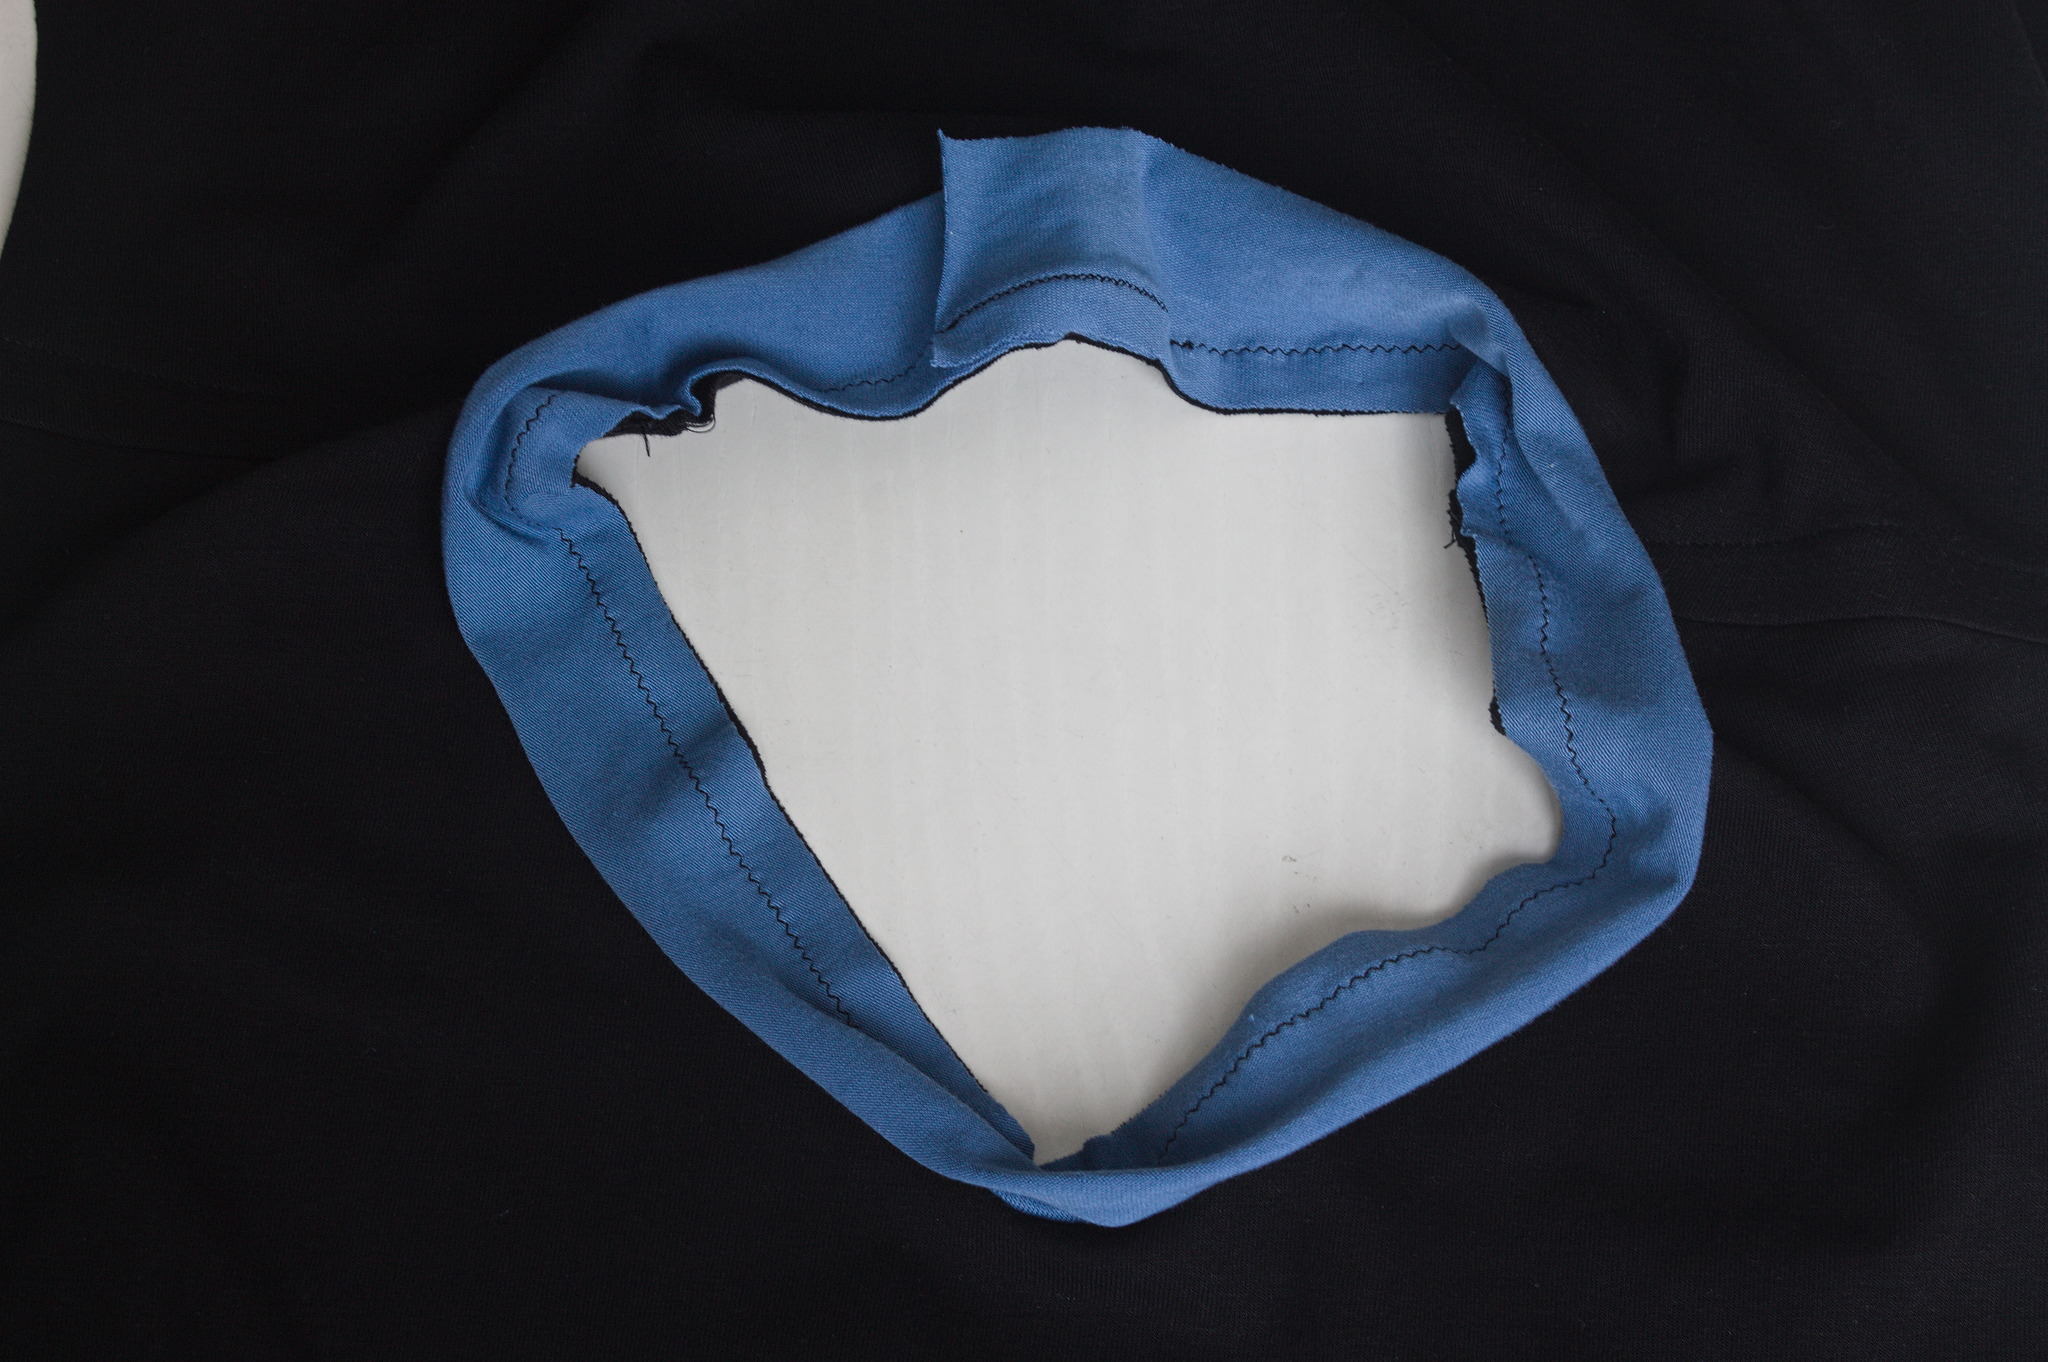
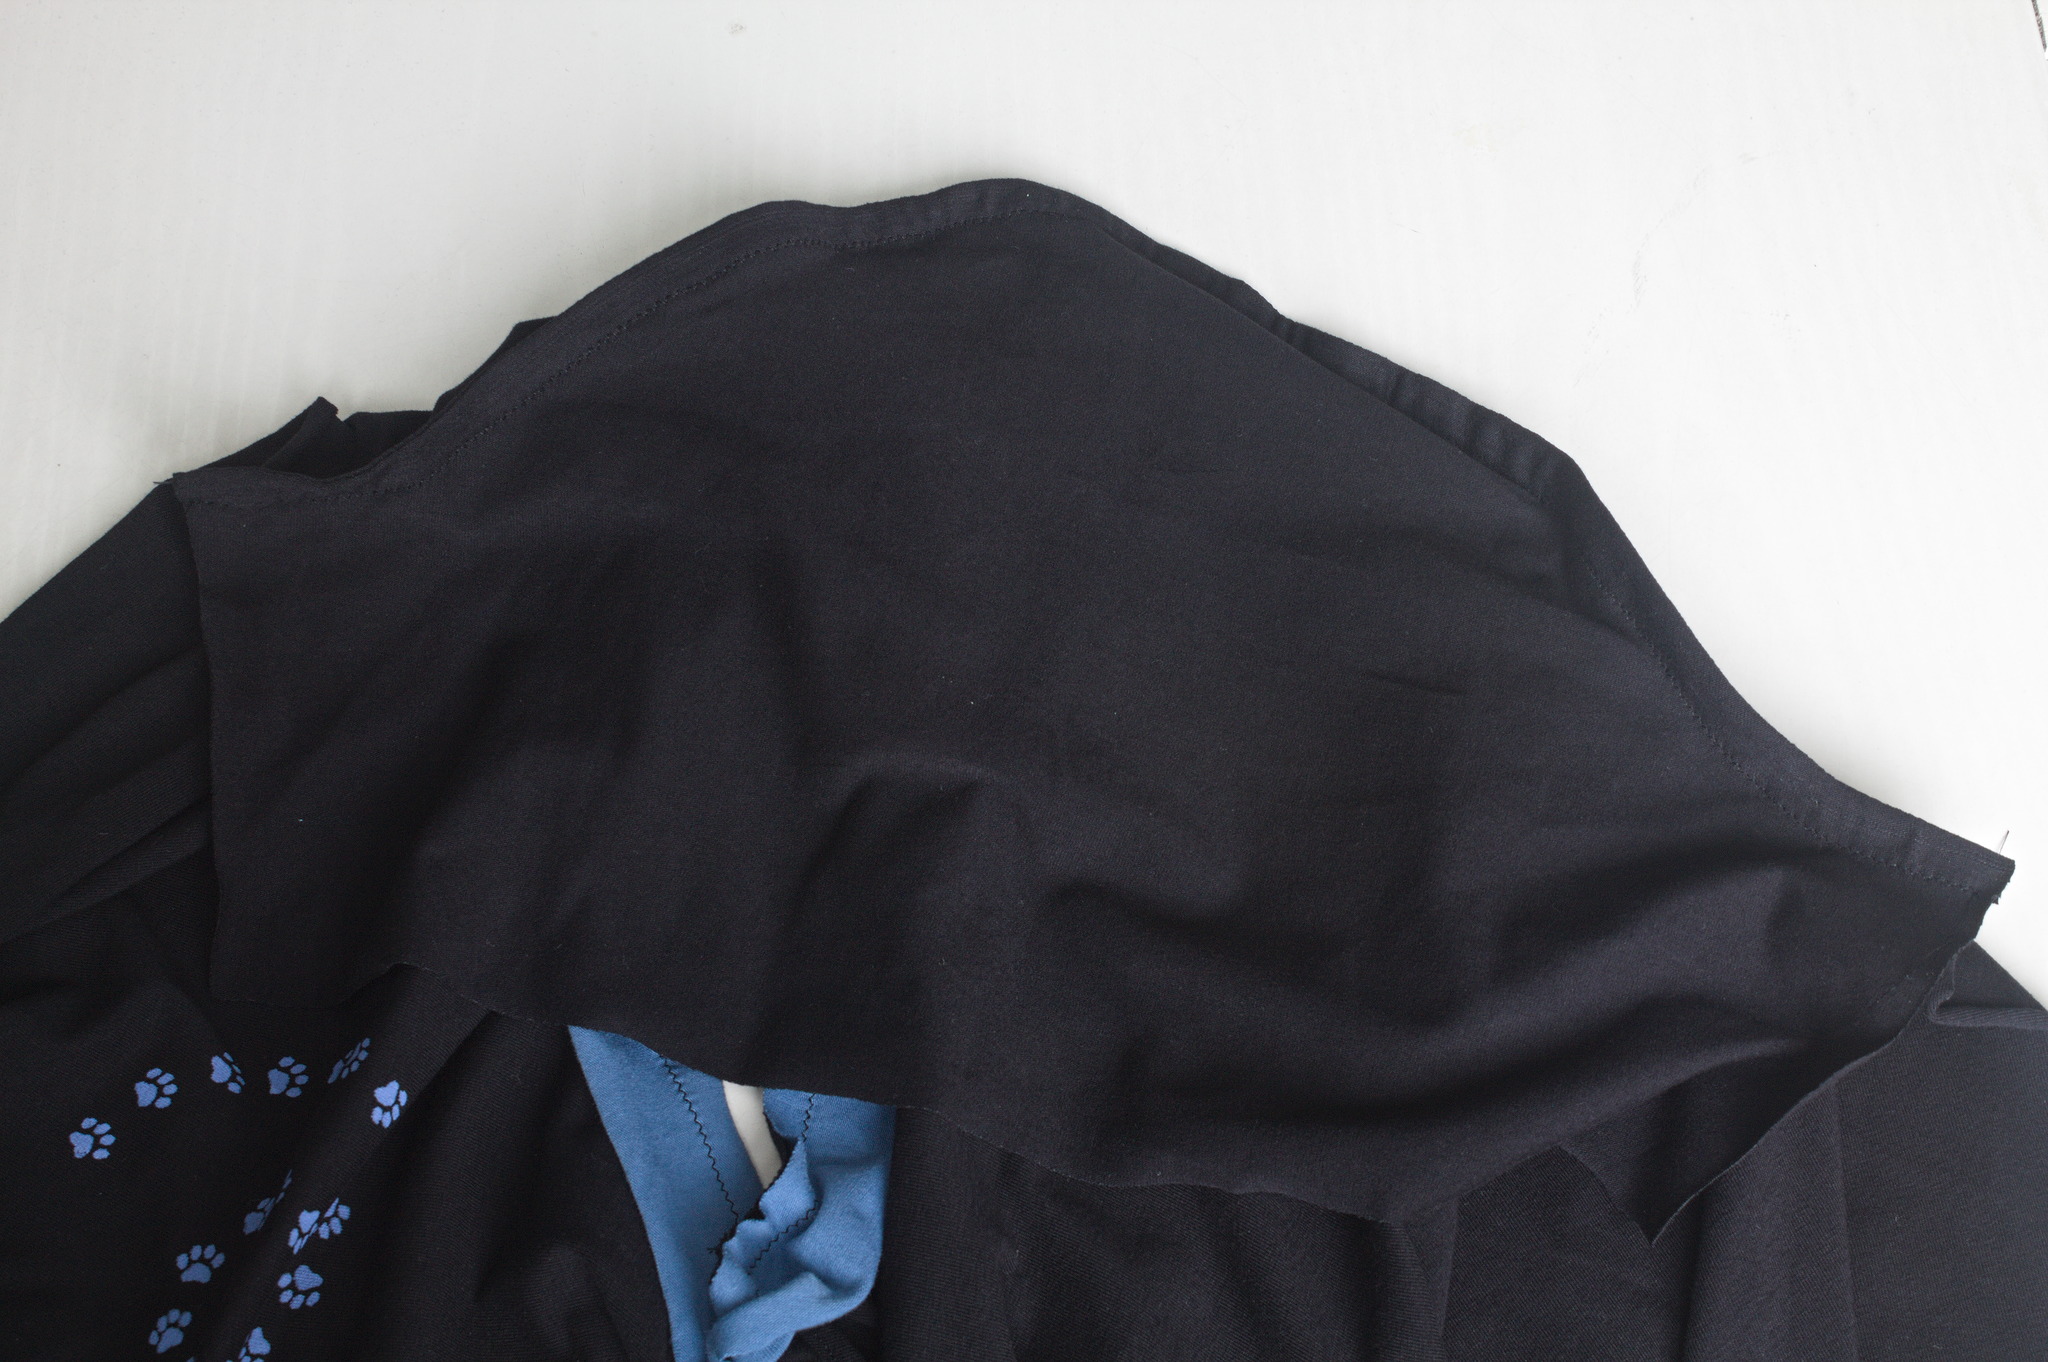
Right sides together, put the binding over the neck, starting from the center back; sew with 1 cm allowance.
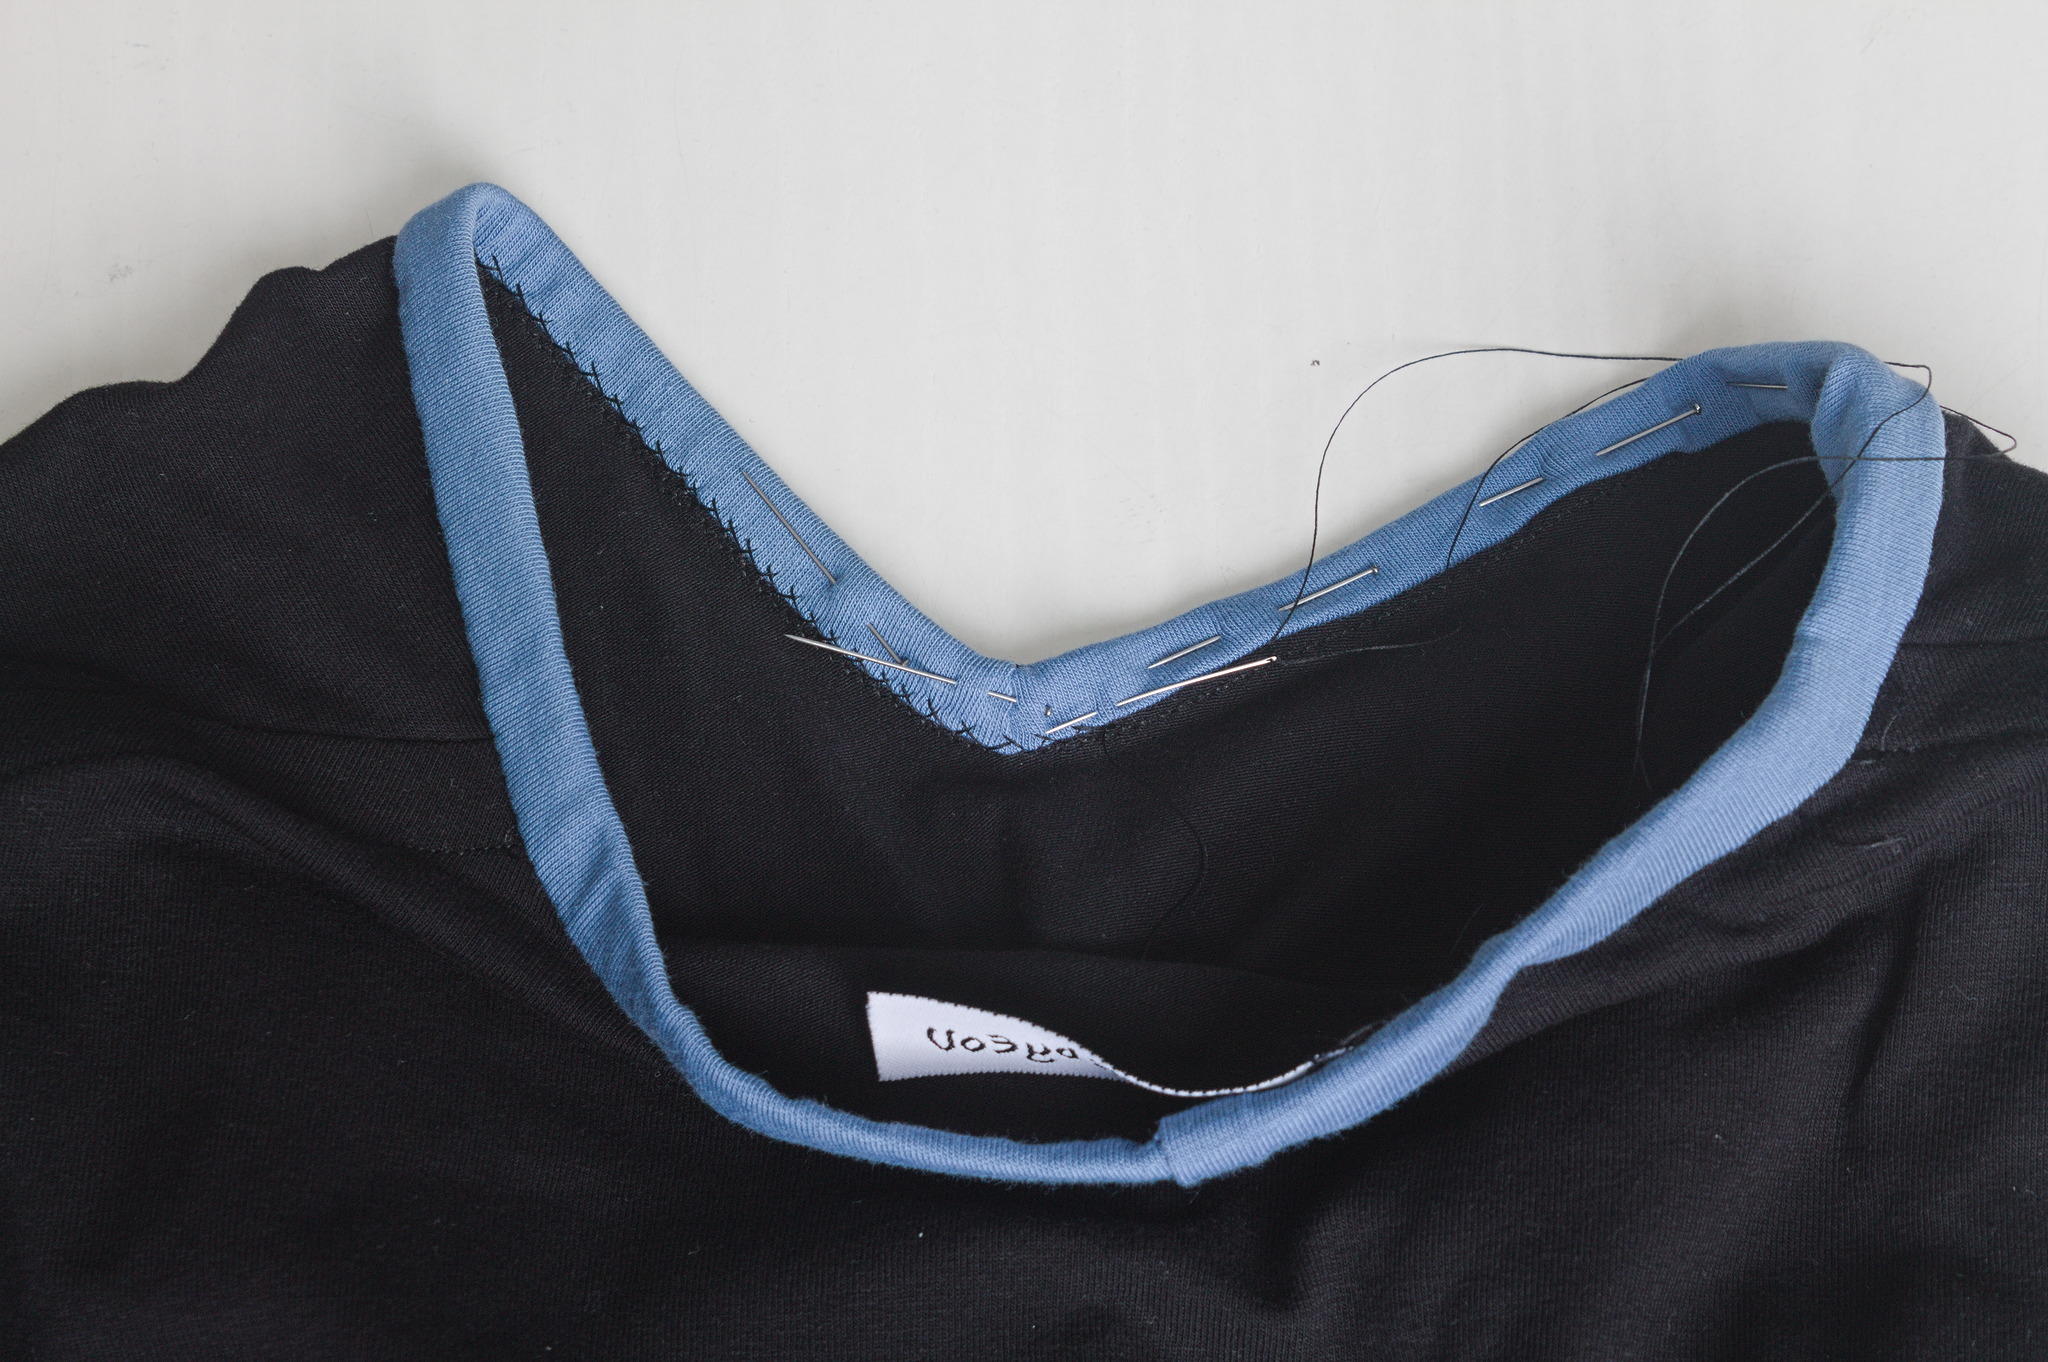
Press the binding up and fold it over the allowances, enclosing them; herringbone stitch it by hand on the wrong side.
Note
Alternatively you can let the binding overlap a bit over the seam on the wrong side, and stitch in the ditch by machine.
Tip
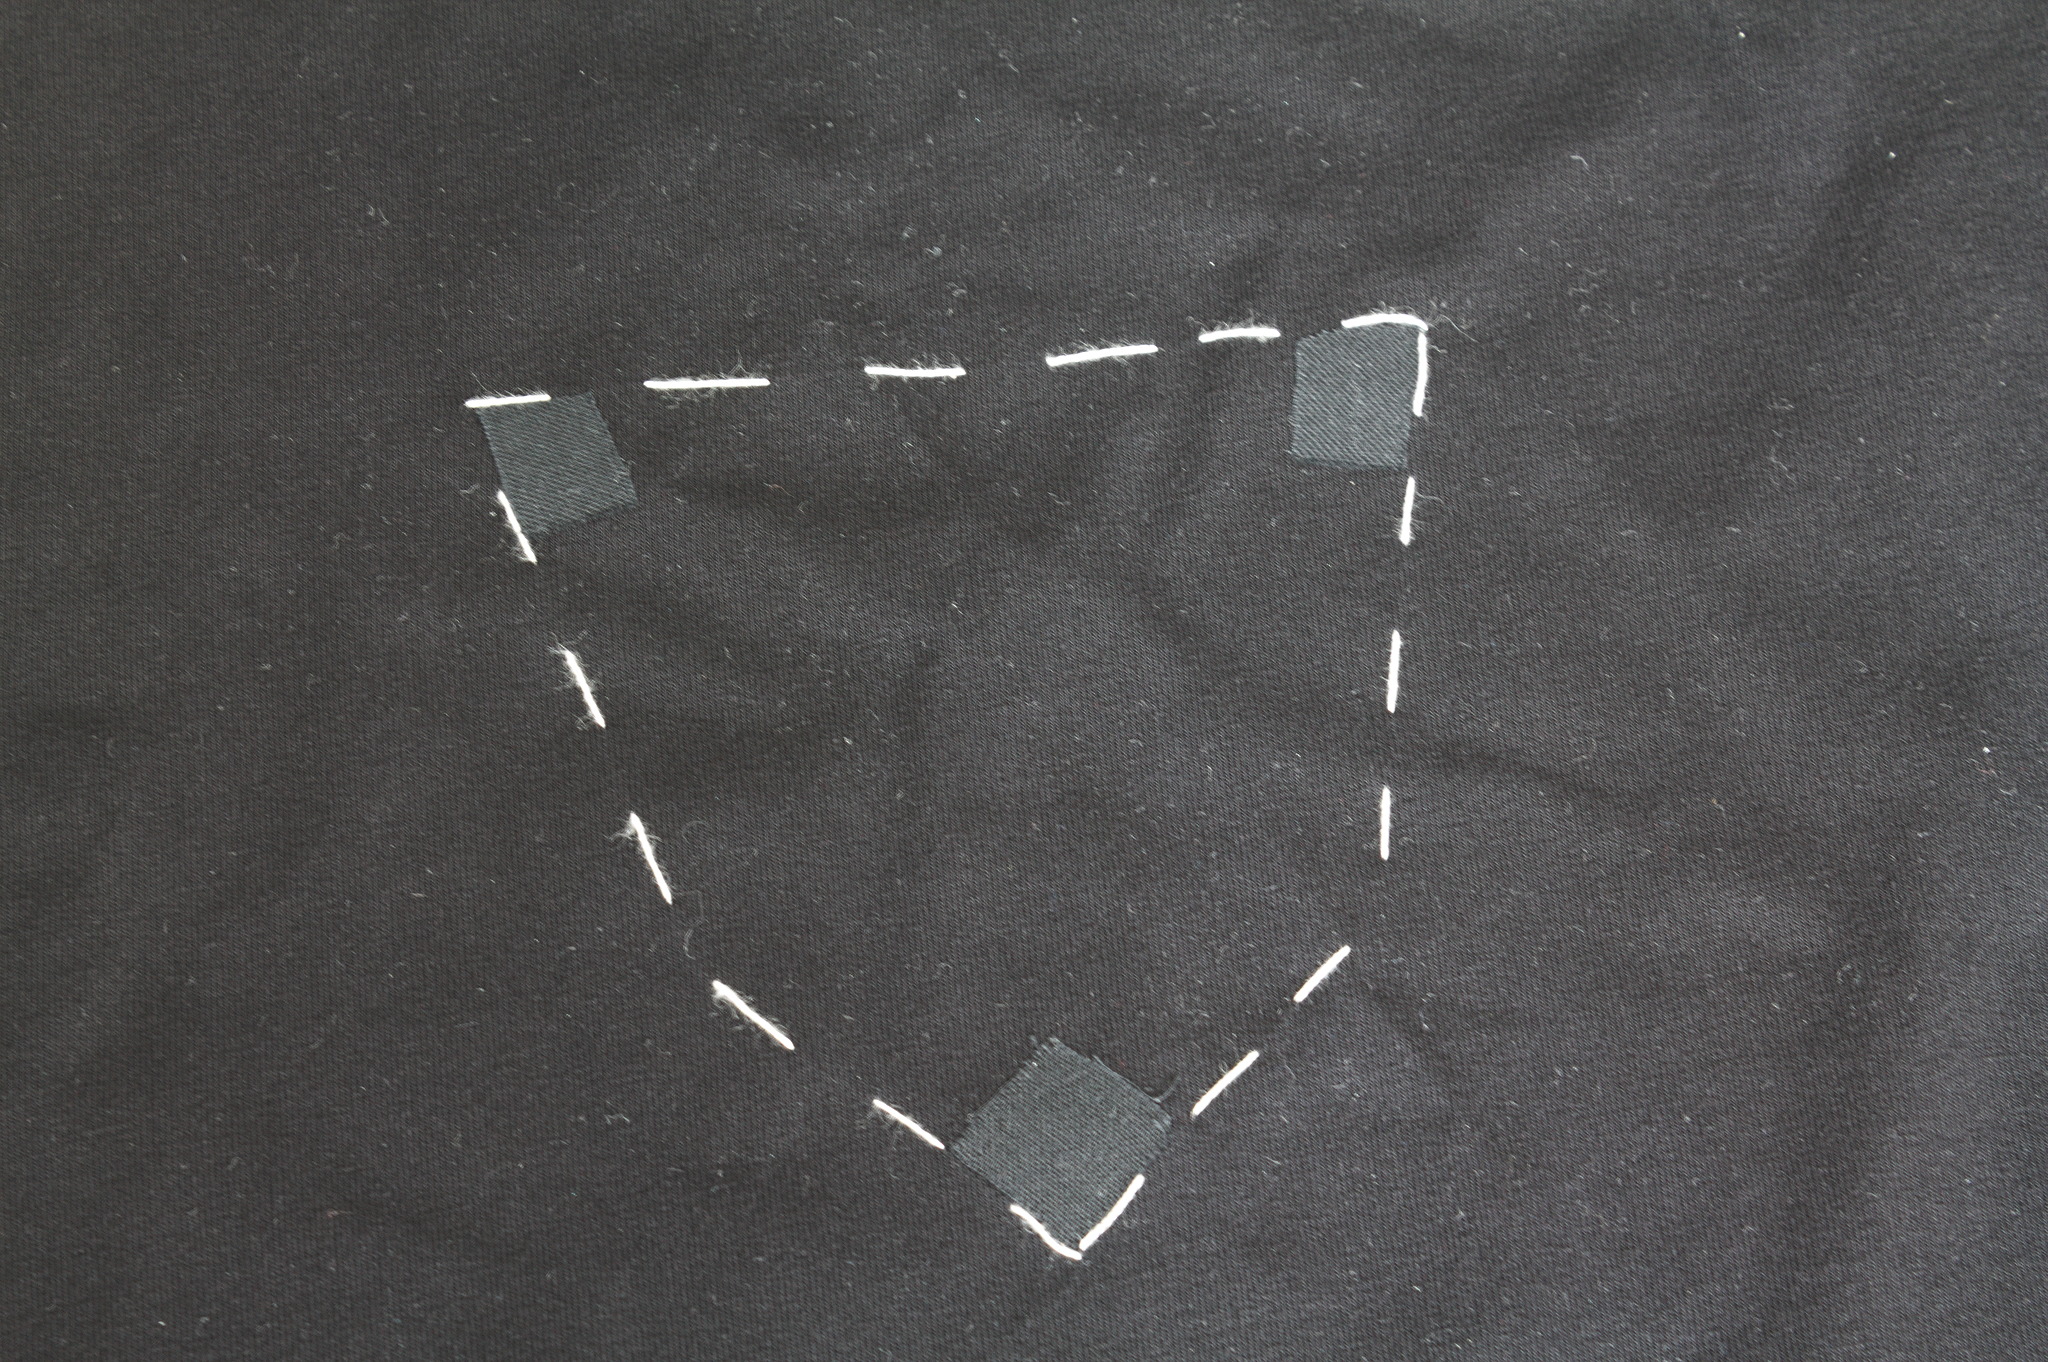
to make a clean V point in the V neck, after the binding has been sewn to the body fold it right sides together right at the point and sew with a backstitch a line 1 cm long that is about 30° from the fold. Then continue enclosing the allowances, taking care to arrange it in such a way that it opens at the seam in the front, and the back is still neat.
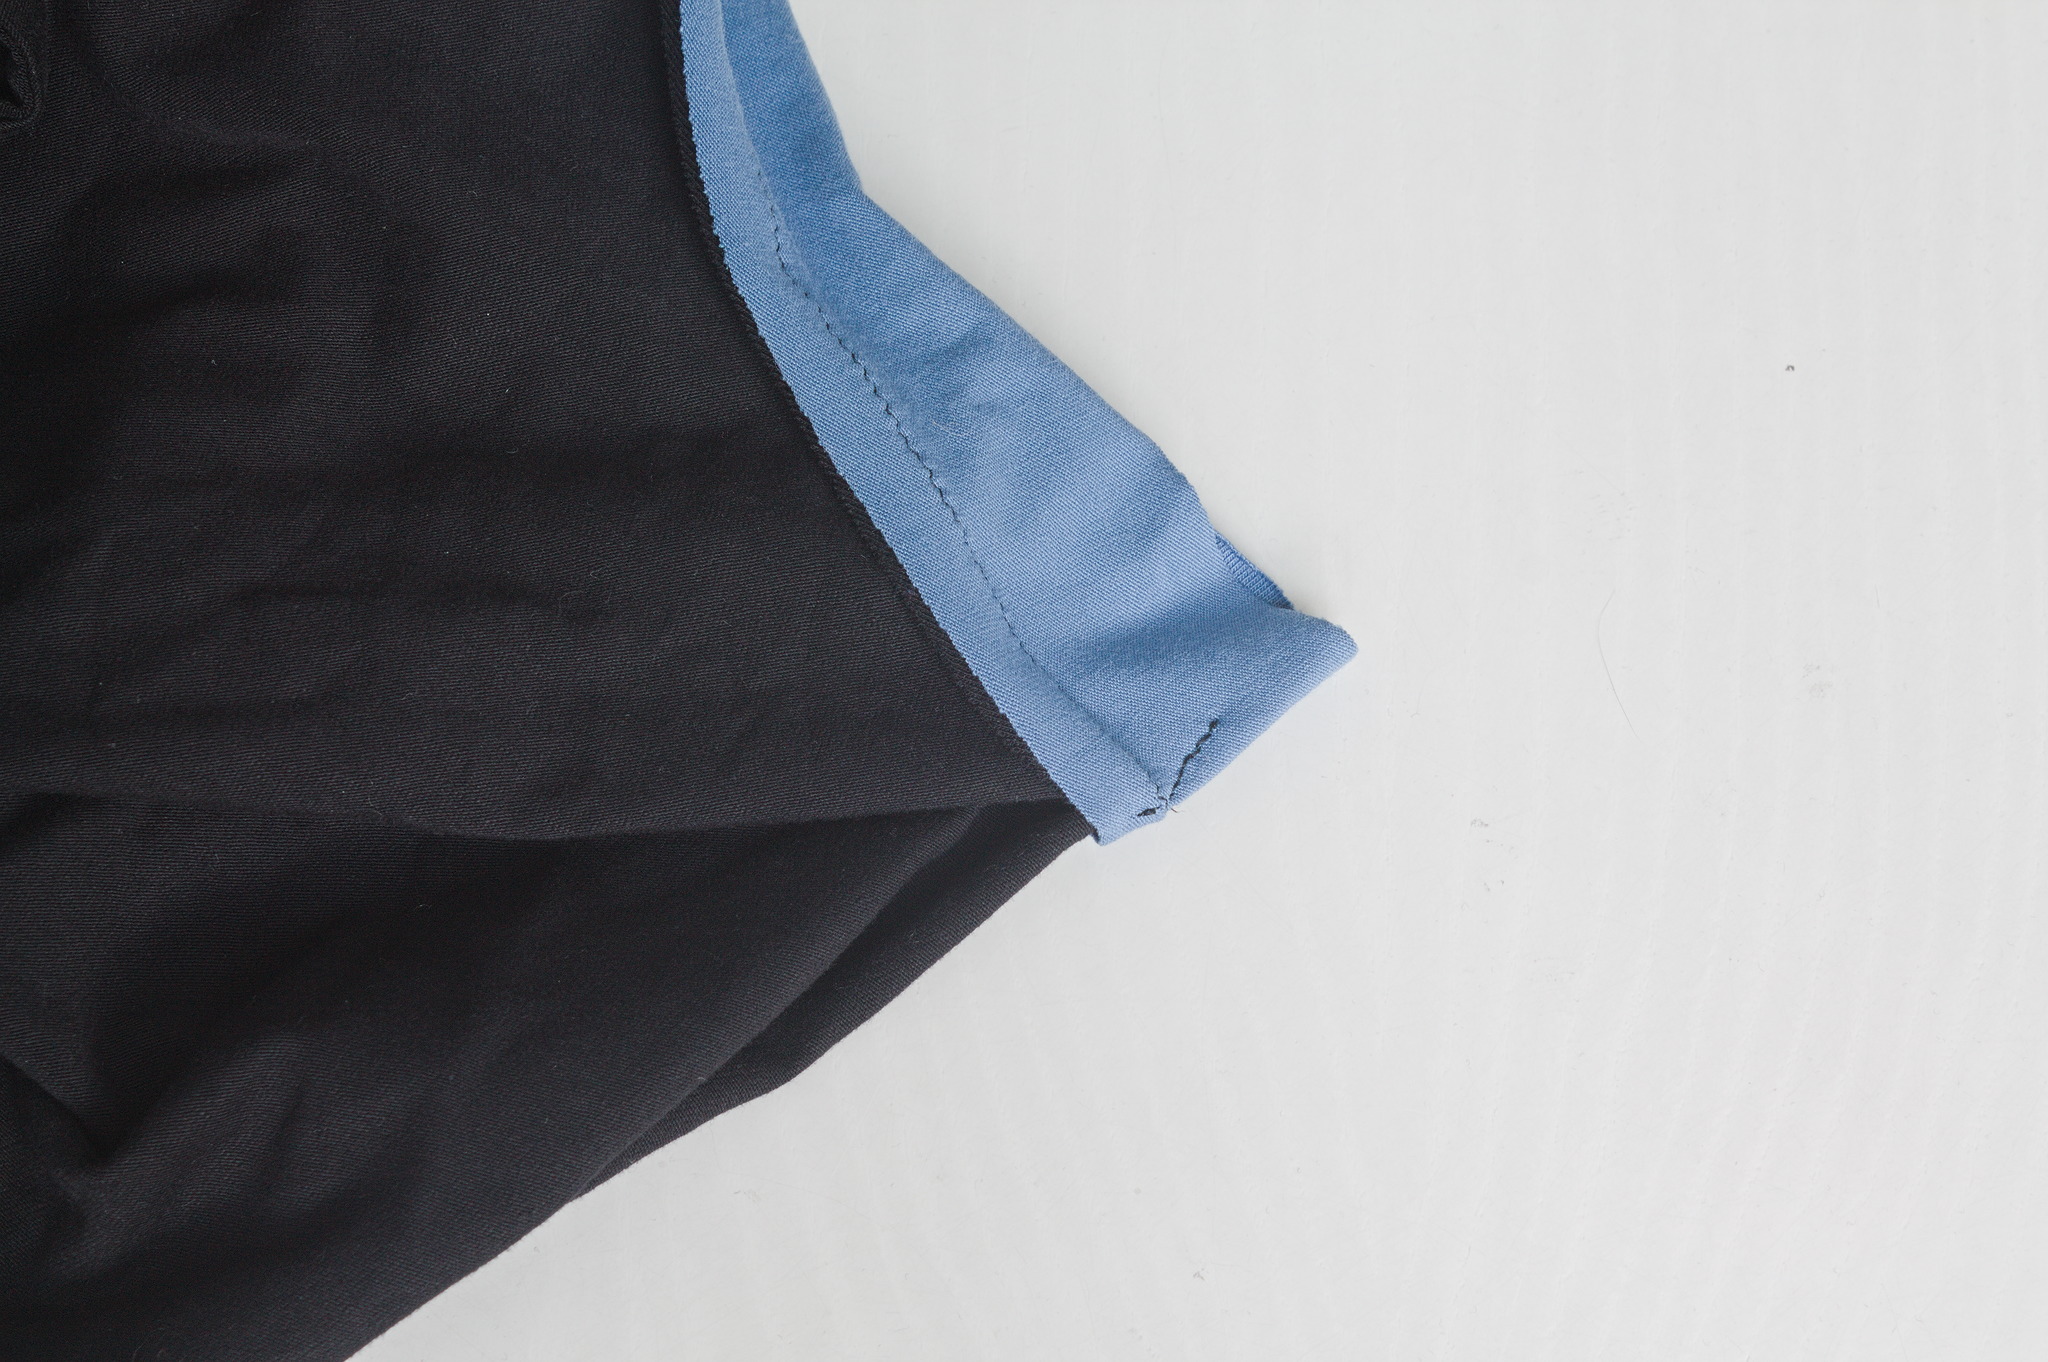
Wrong sides together, put the sleeves over the body, easing the difference near the top of the sleeve, sew with a 8 mm allowance.
Turn it so that the right sides are together, sew again with a 1 cm allowance to make a french seam.
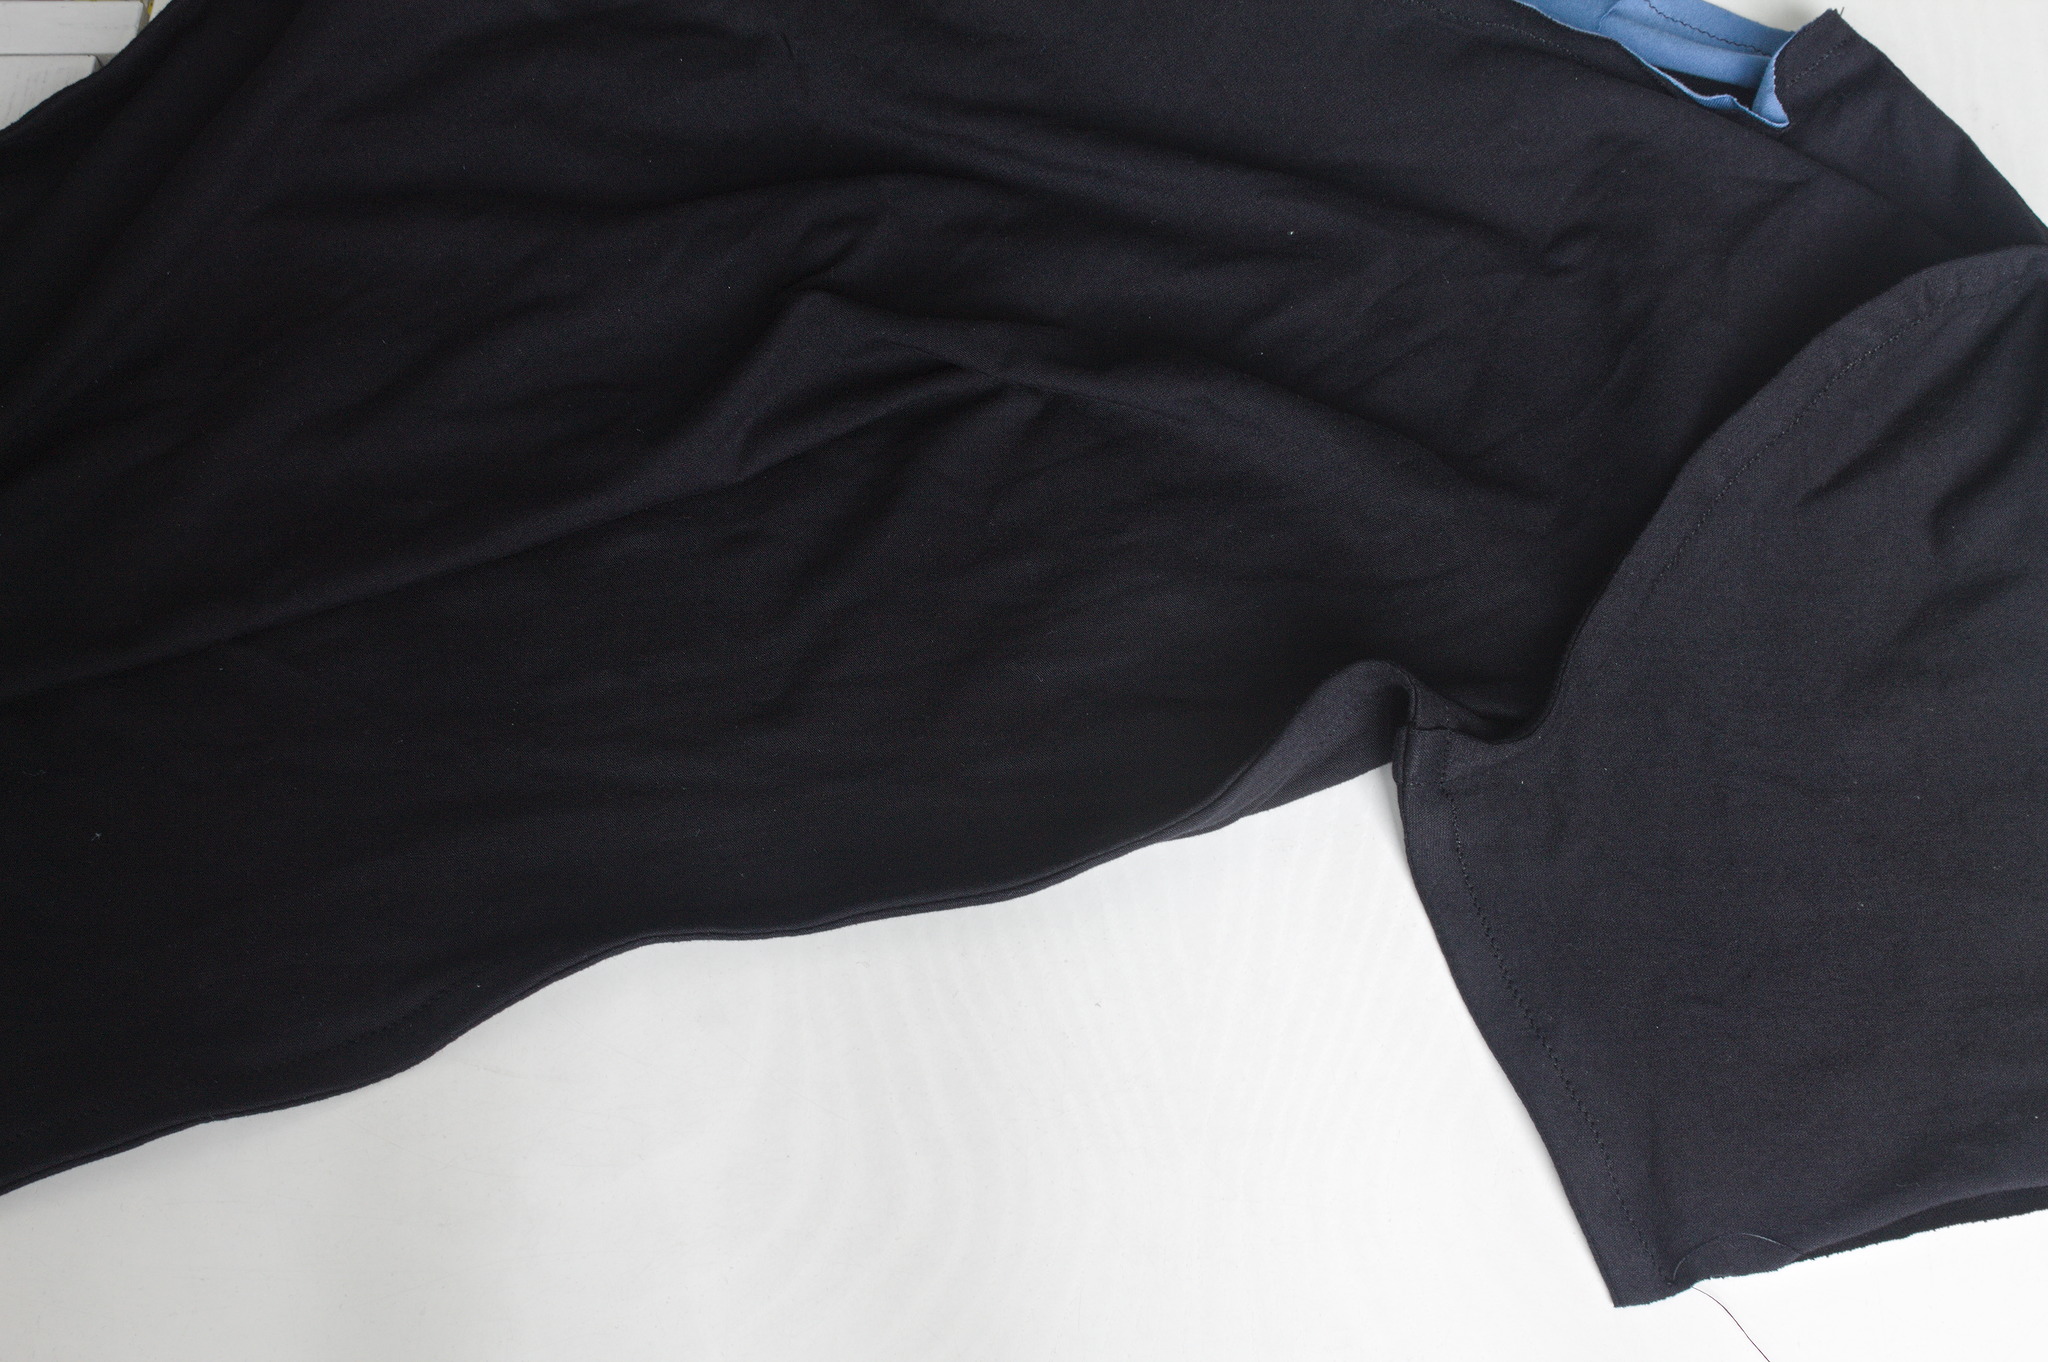
Wrong sides facing, sew the side seams, starting from the sleeve and going down to the hem, with a 8 mm allowance; turn everything so that the right sides are facing and sew again with a 1 cm allowance to make a french seam.
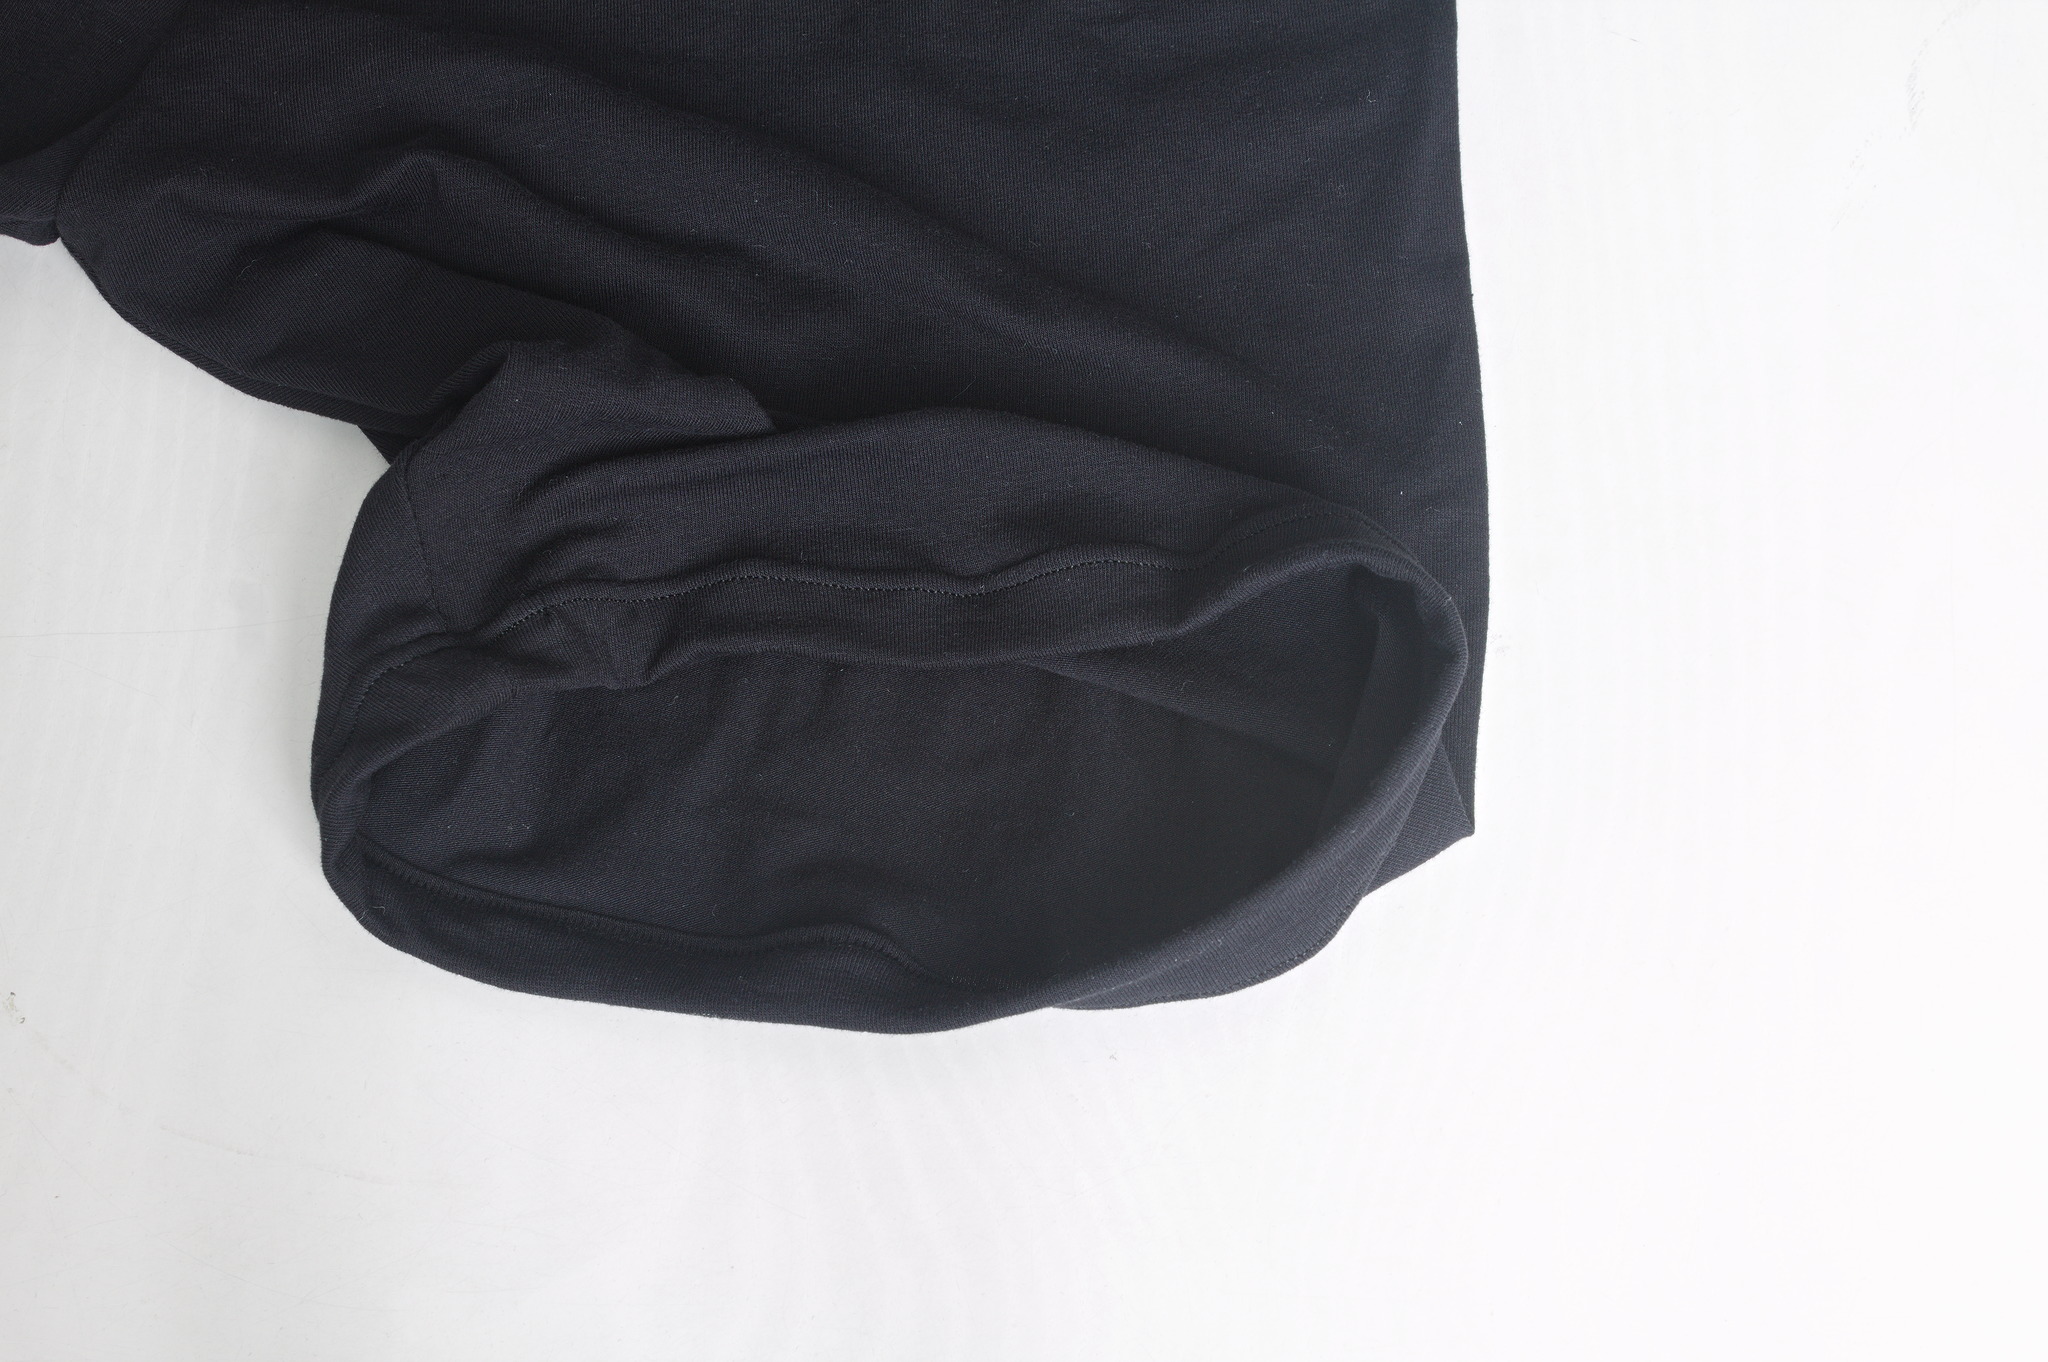
If making a long sleeve, right sides together sew the short side of the facing.
Put the facing on the sleeve, right sides together, and sew the end of the sleeve.
Fold the remaining allowance of the facing towards the wrong side, fold the facing towards the wrong side of the sleeve in such a way that it peeks out on the right side, and topstitch with an elastic stitch close to the border and close to the fold.
If making a short sleeve, fold its bottom edge twice and topstitch it (ideally with a twin needle).
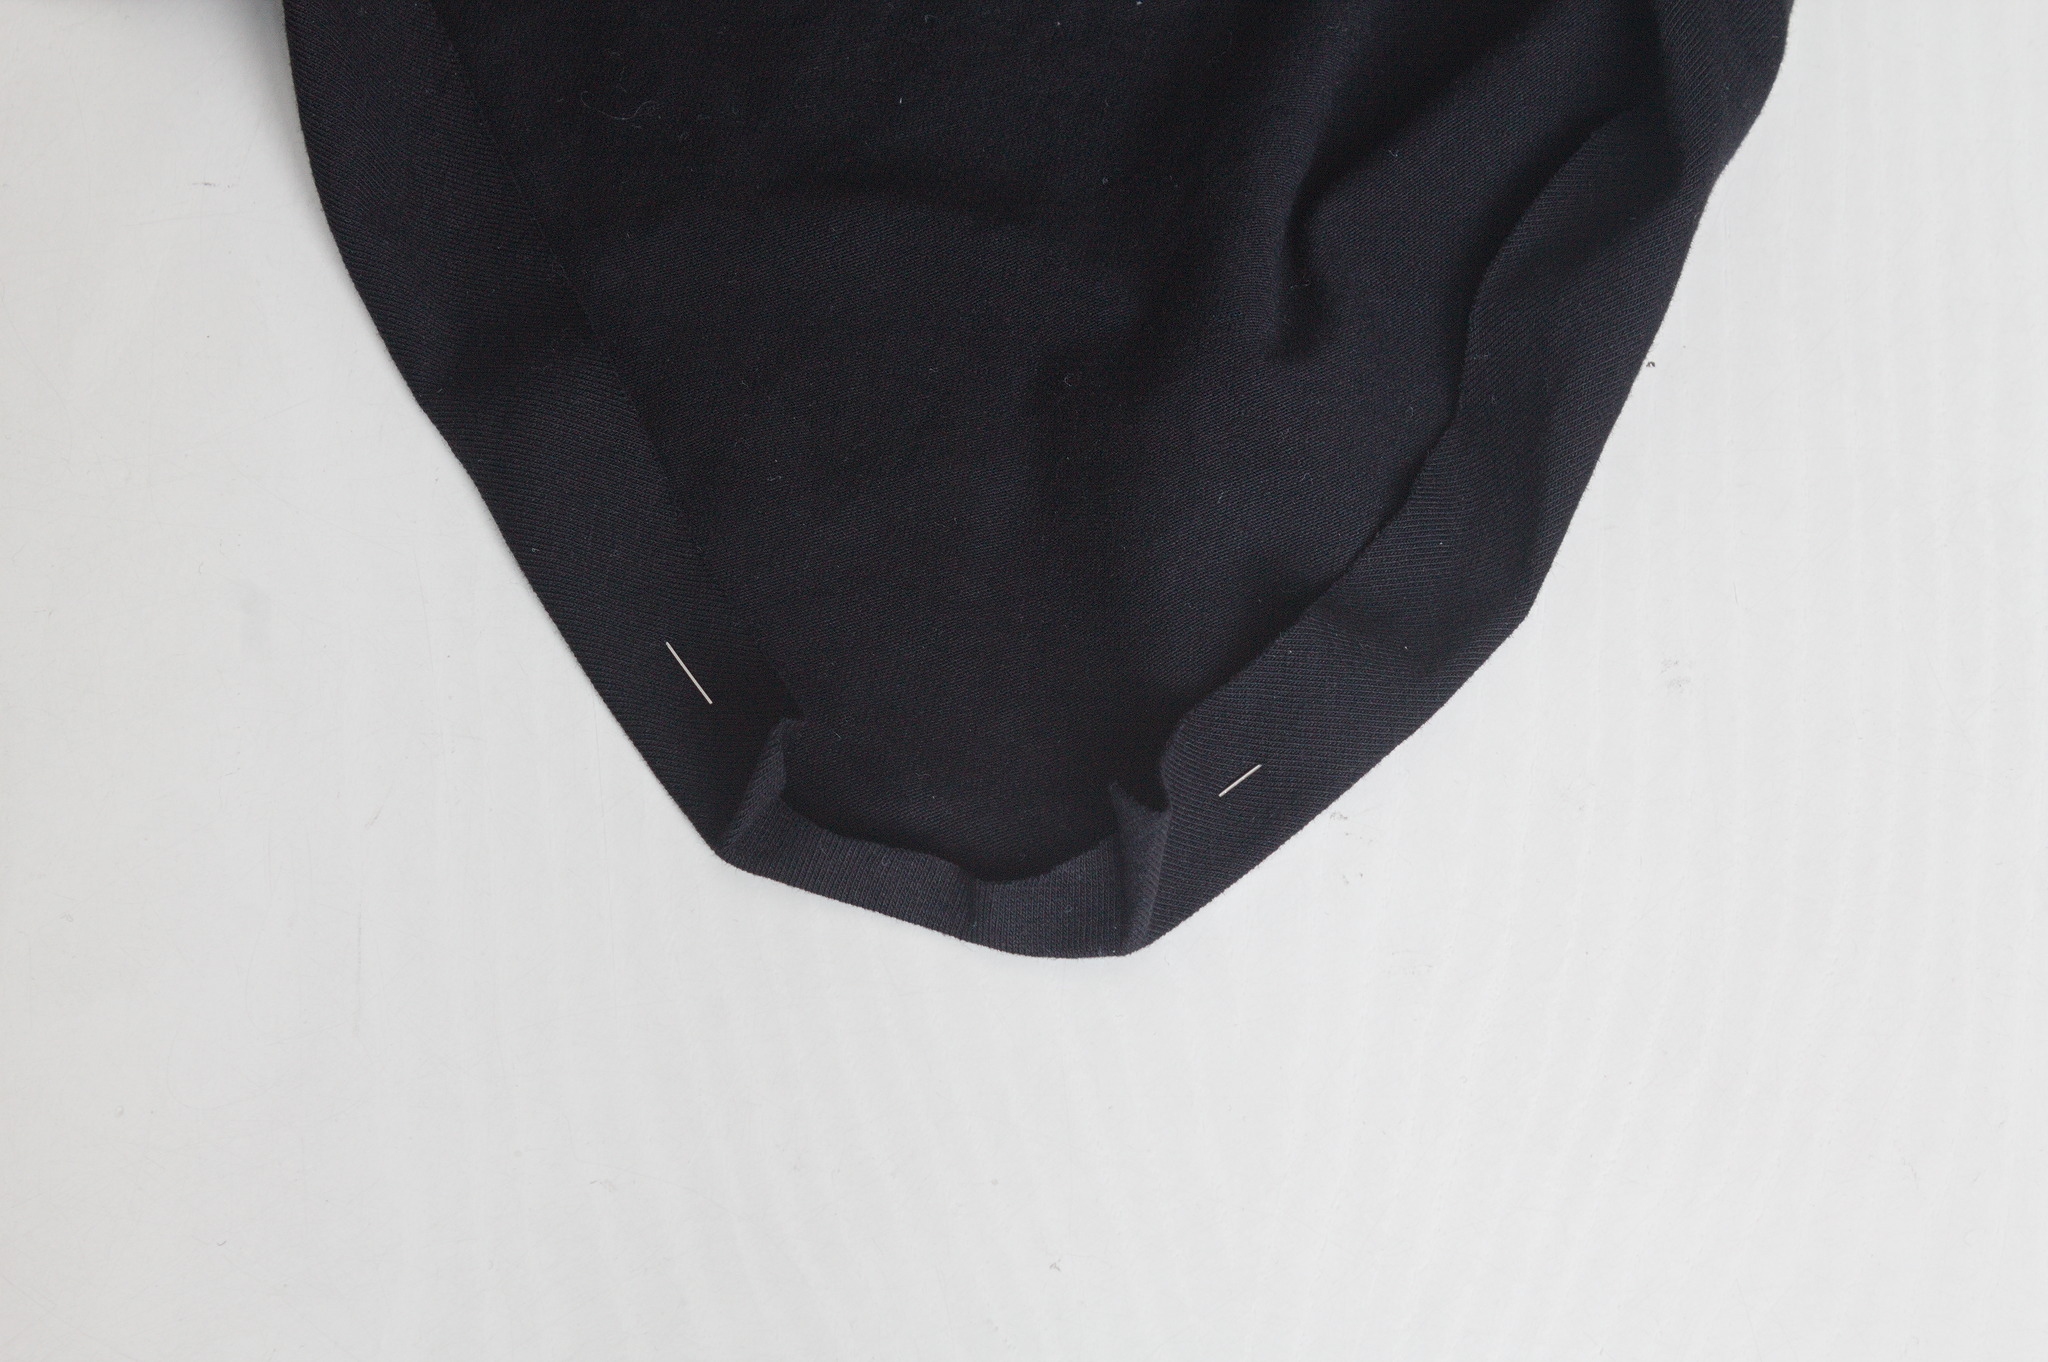
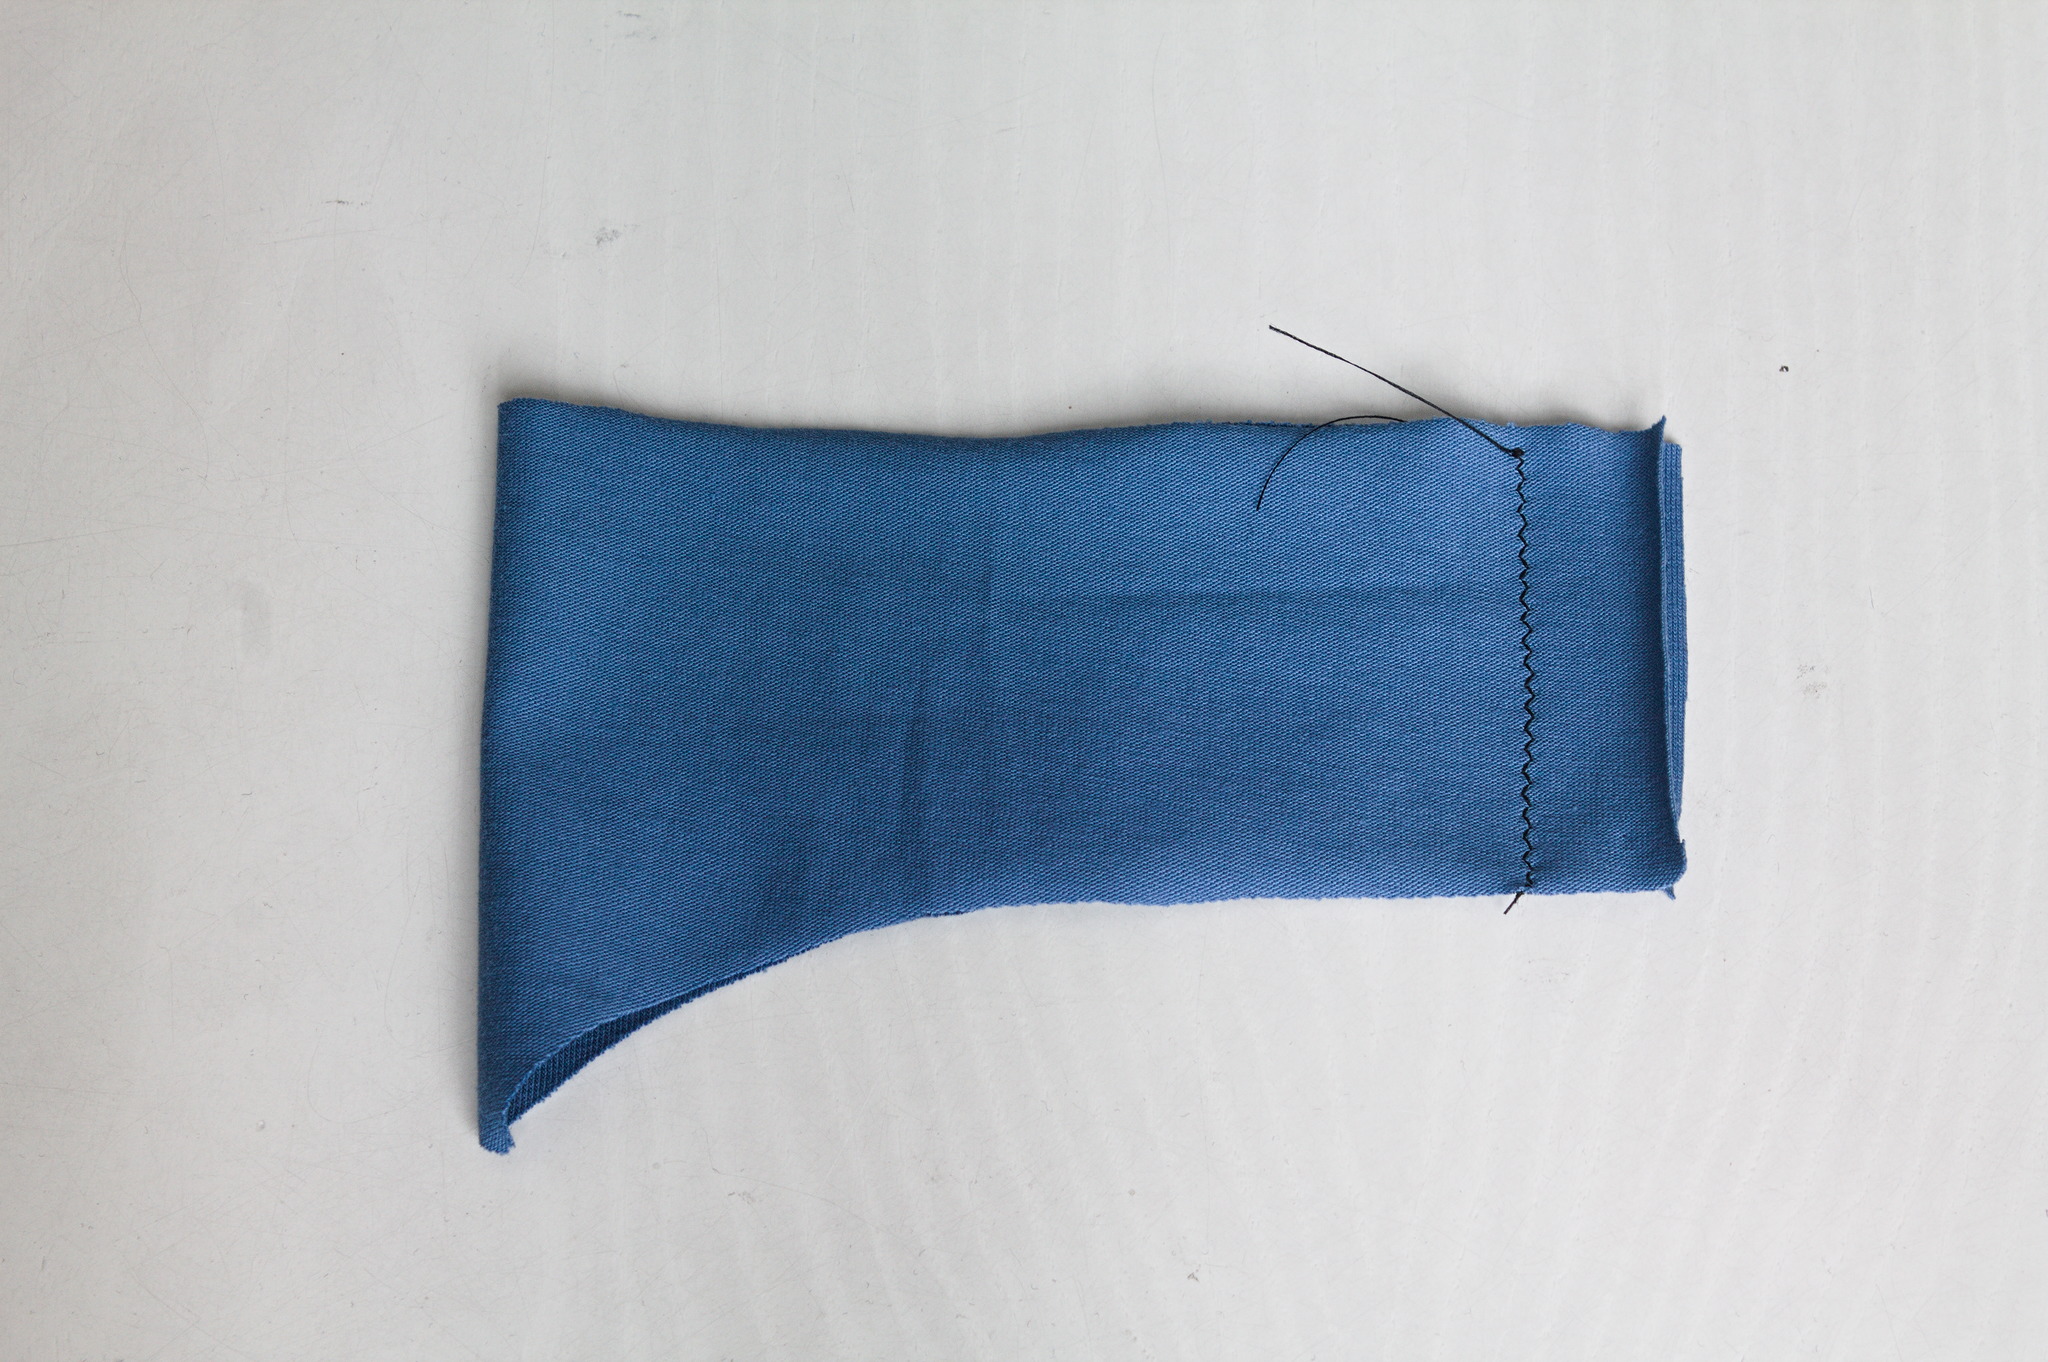
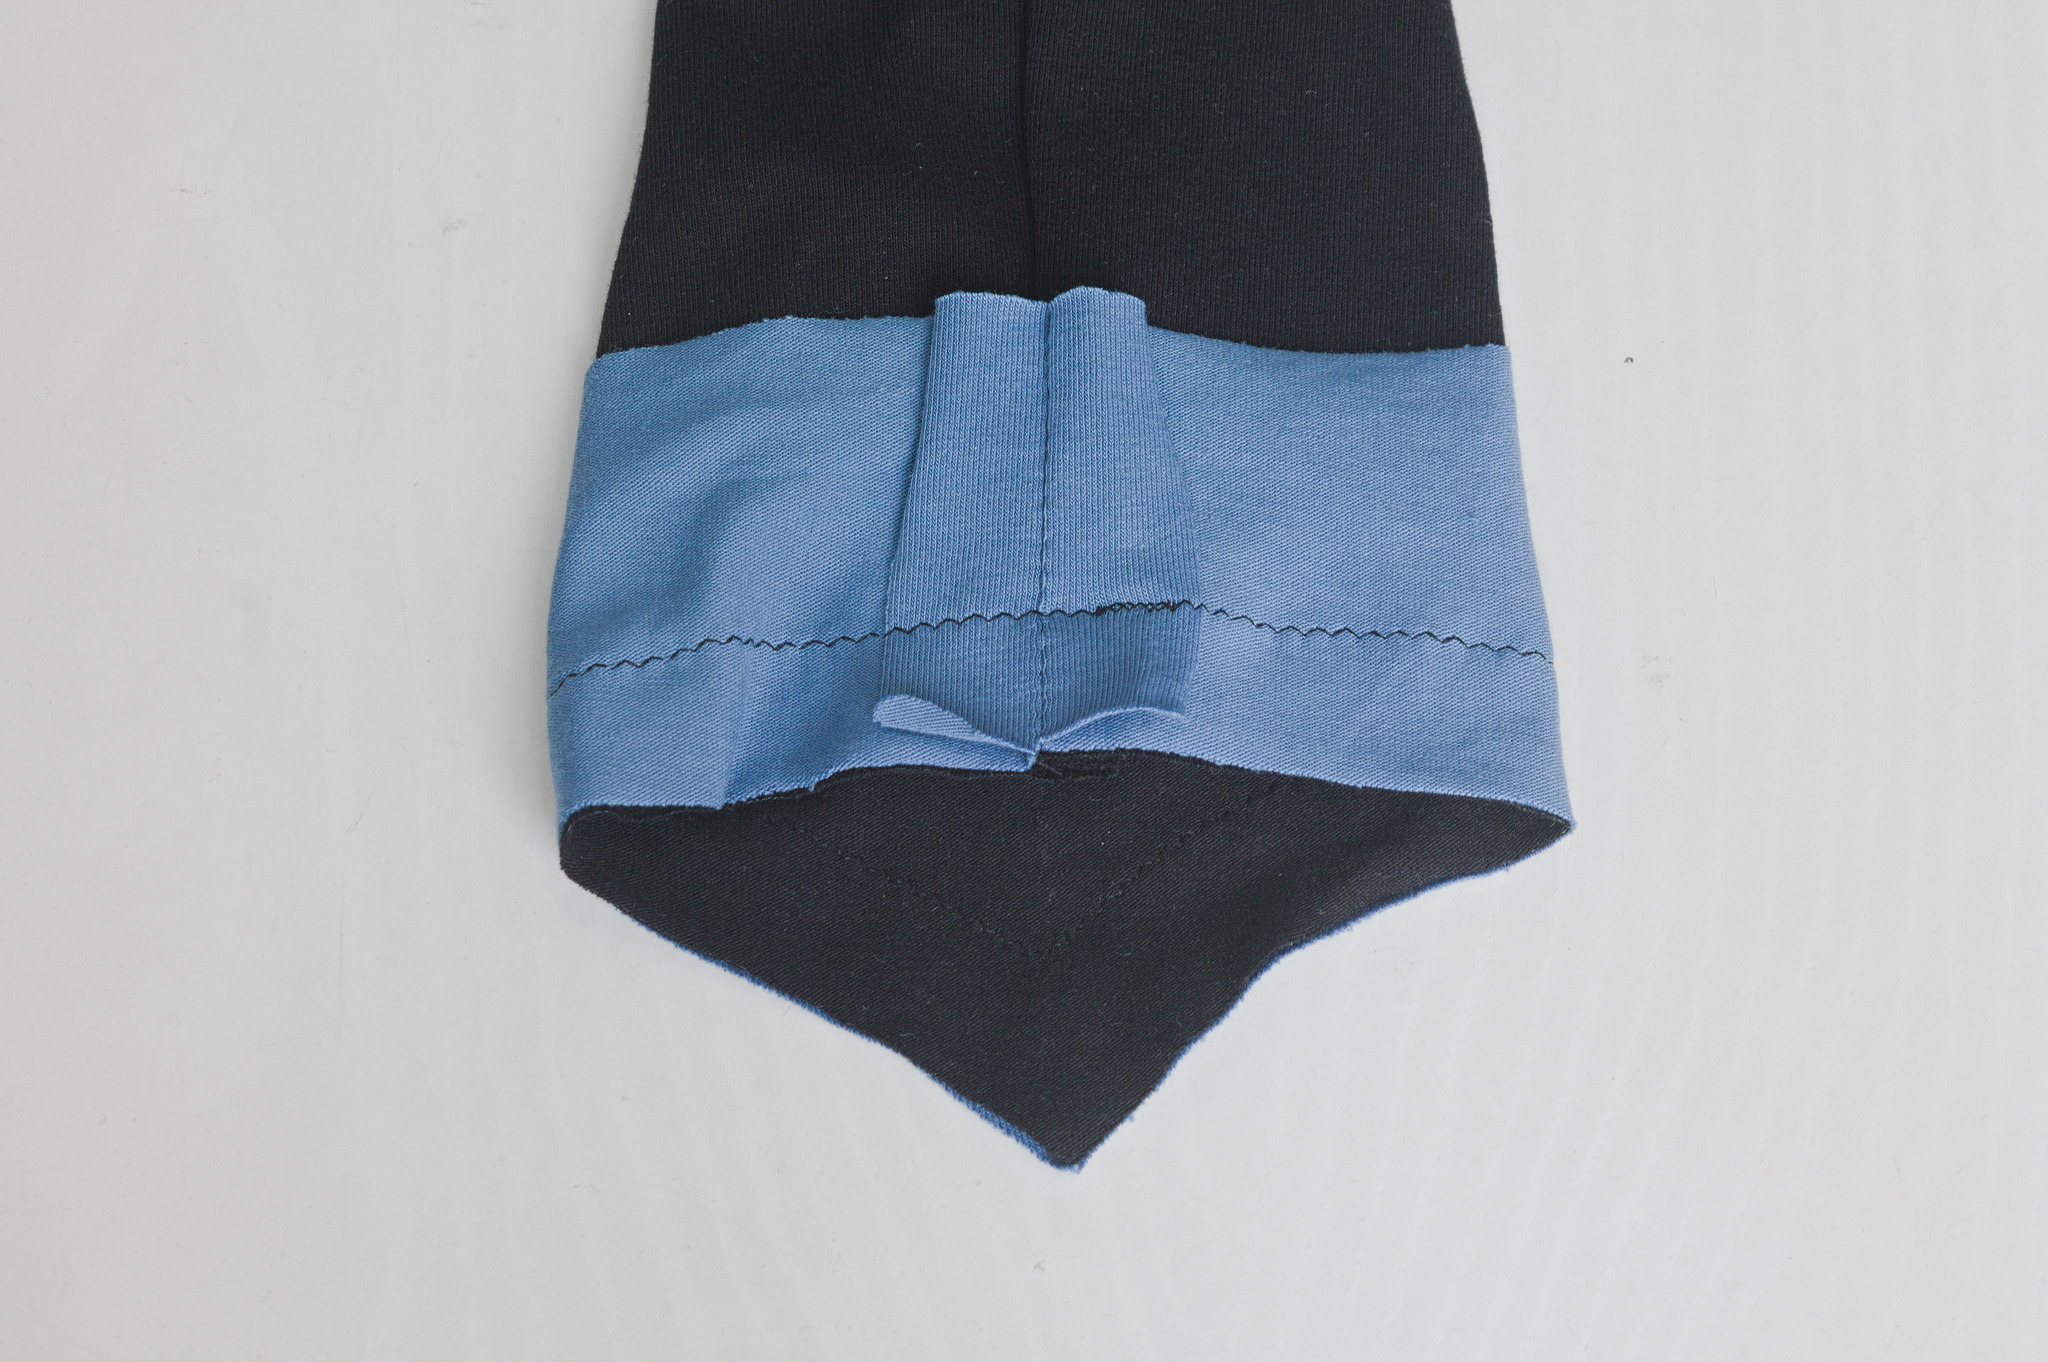
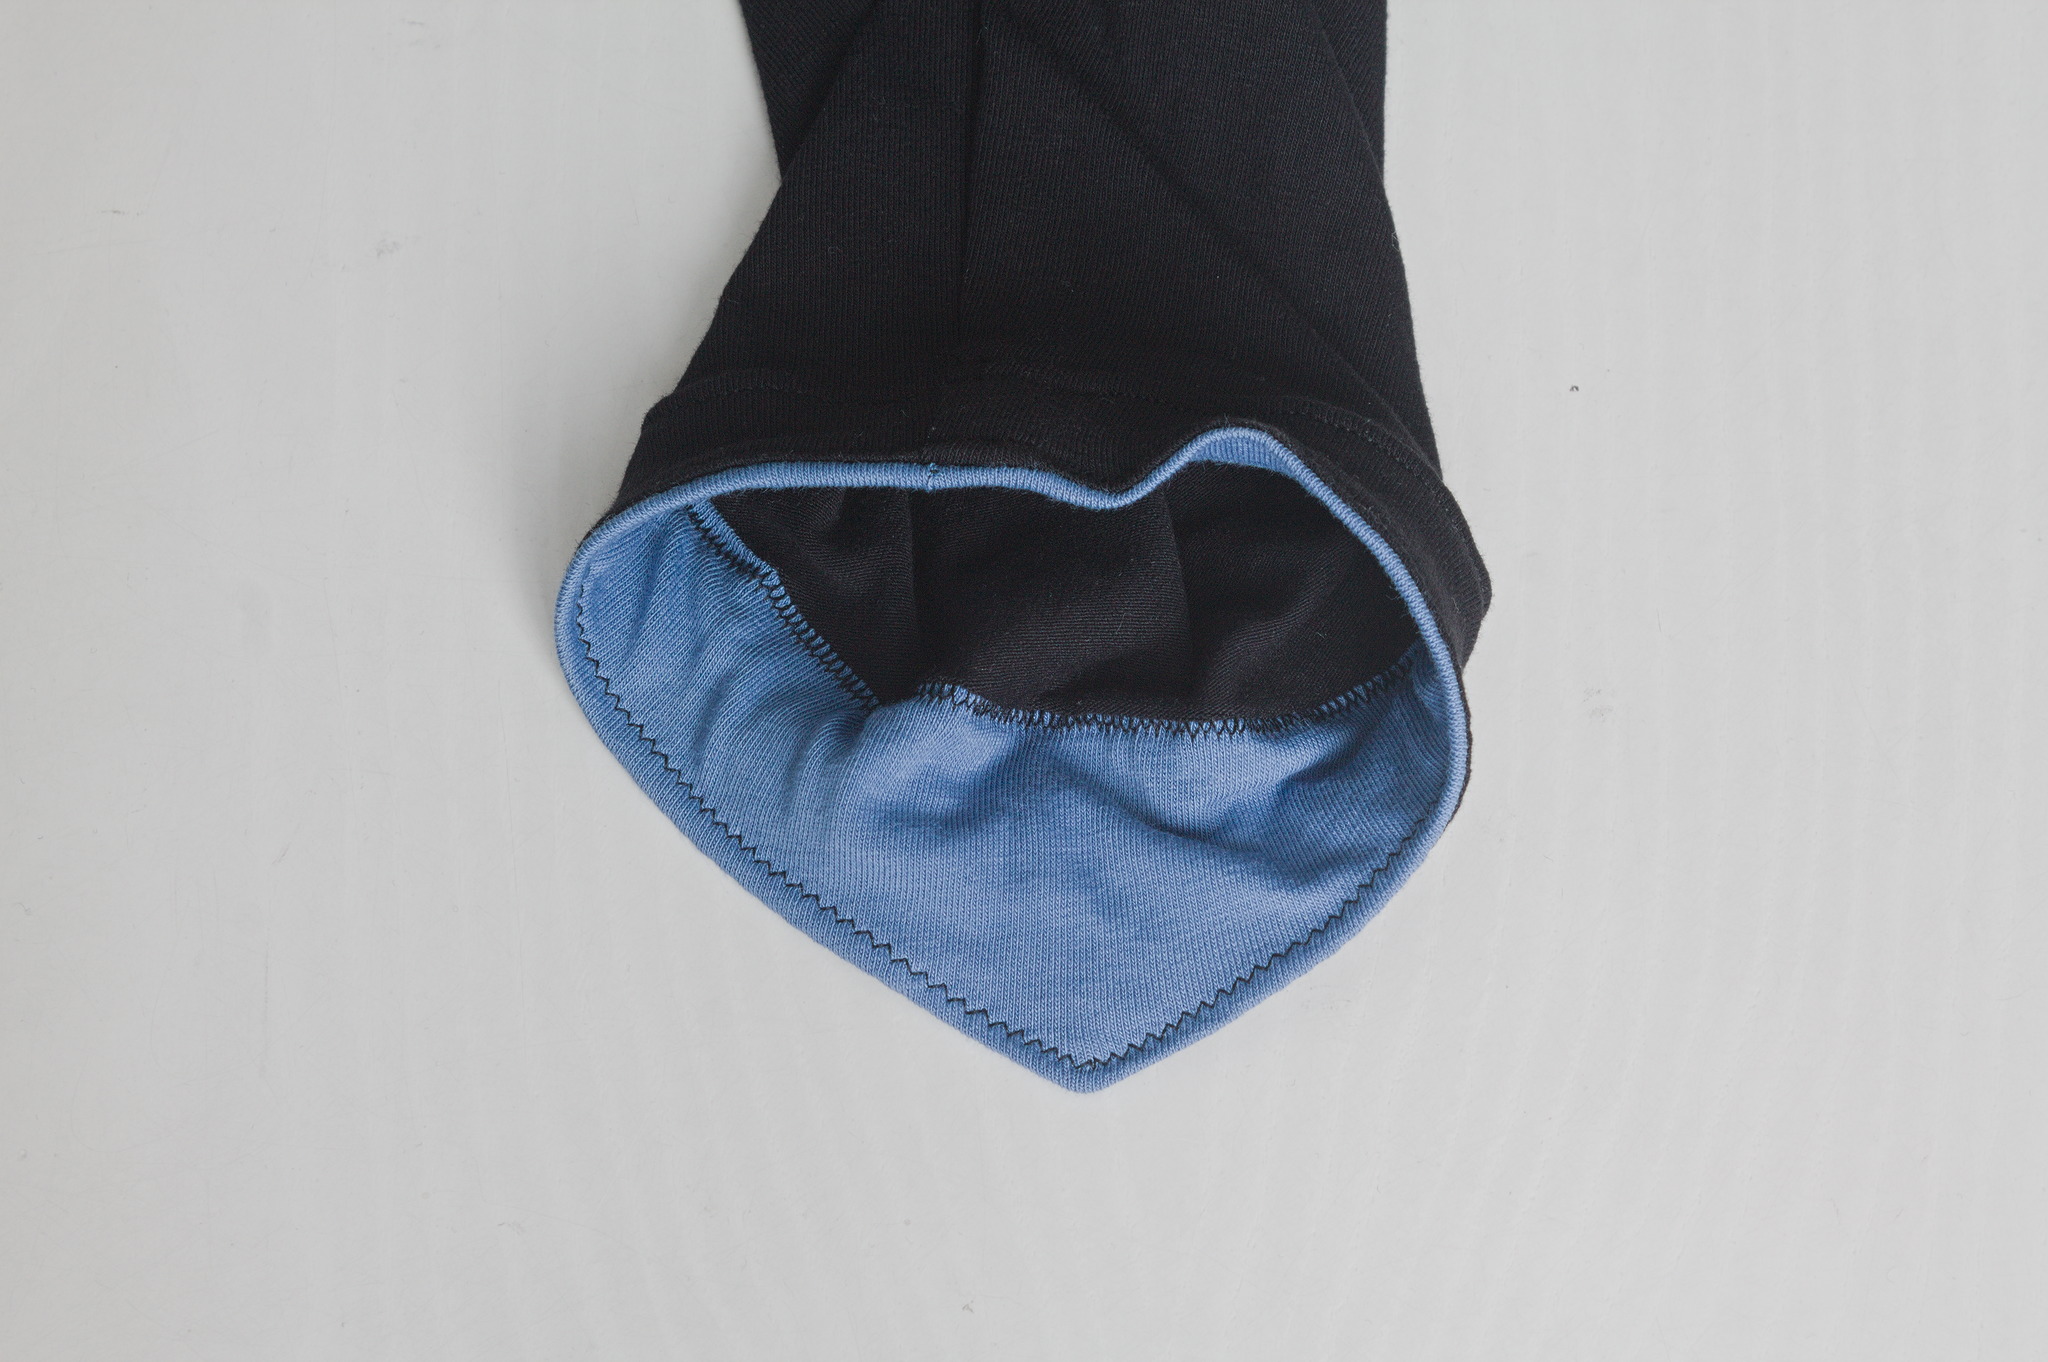
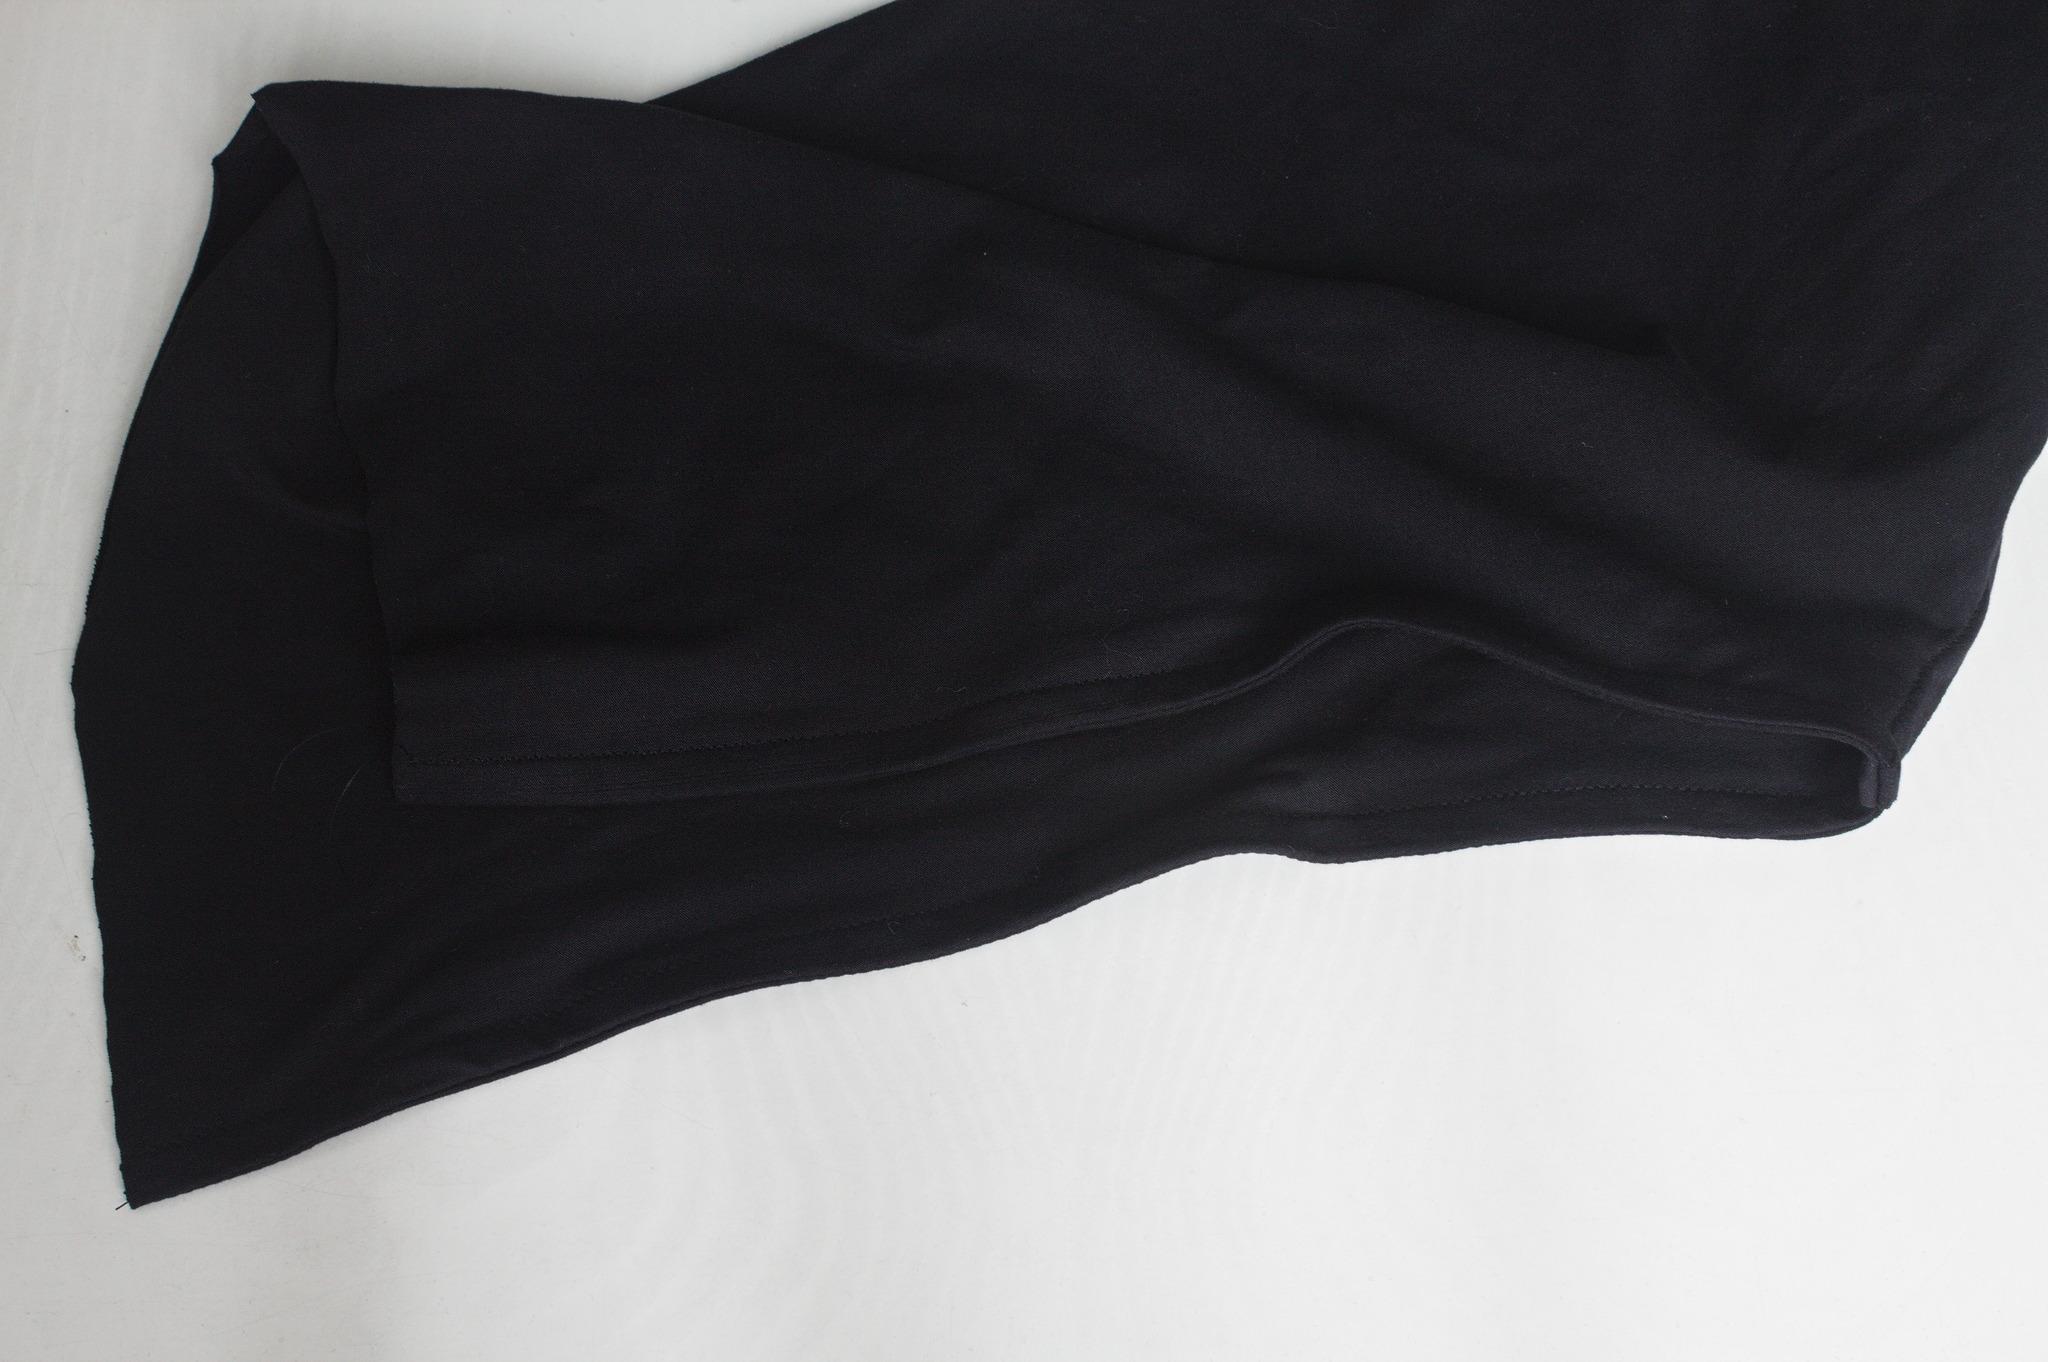
To miter the corners in the front and back of the hem, trim about 3 cm from the point, perpendicularly to the vertical axis, fold the edge close to the corner once towards the back by 2 cm.
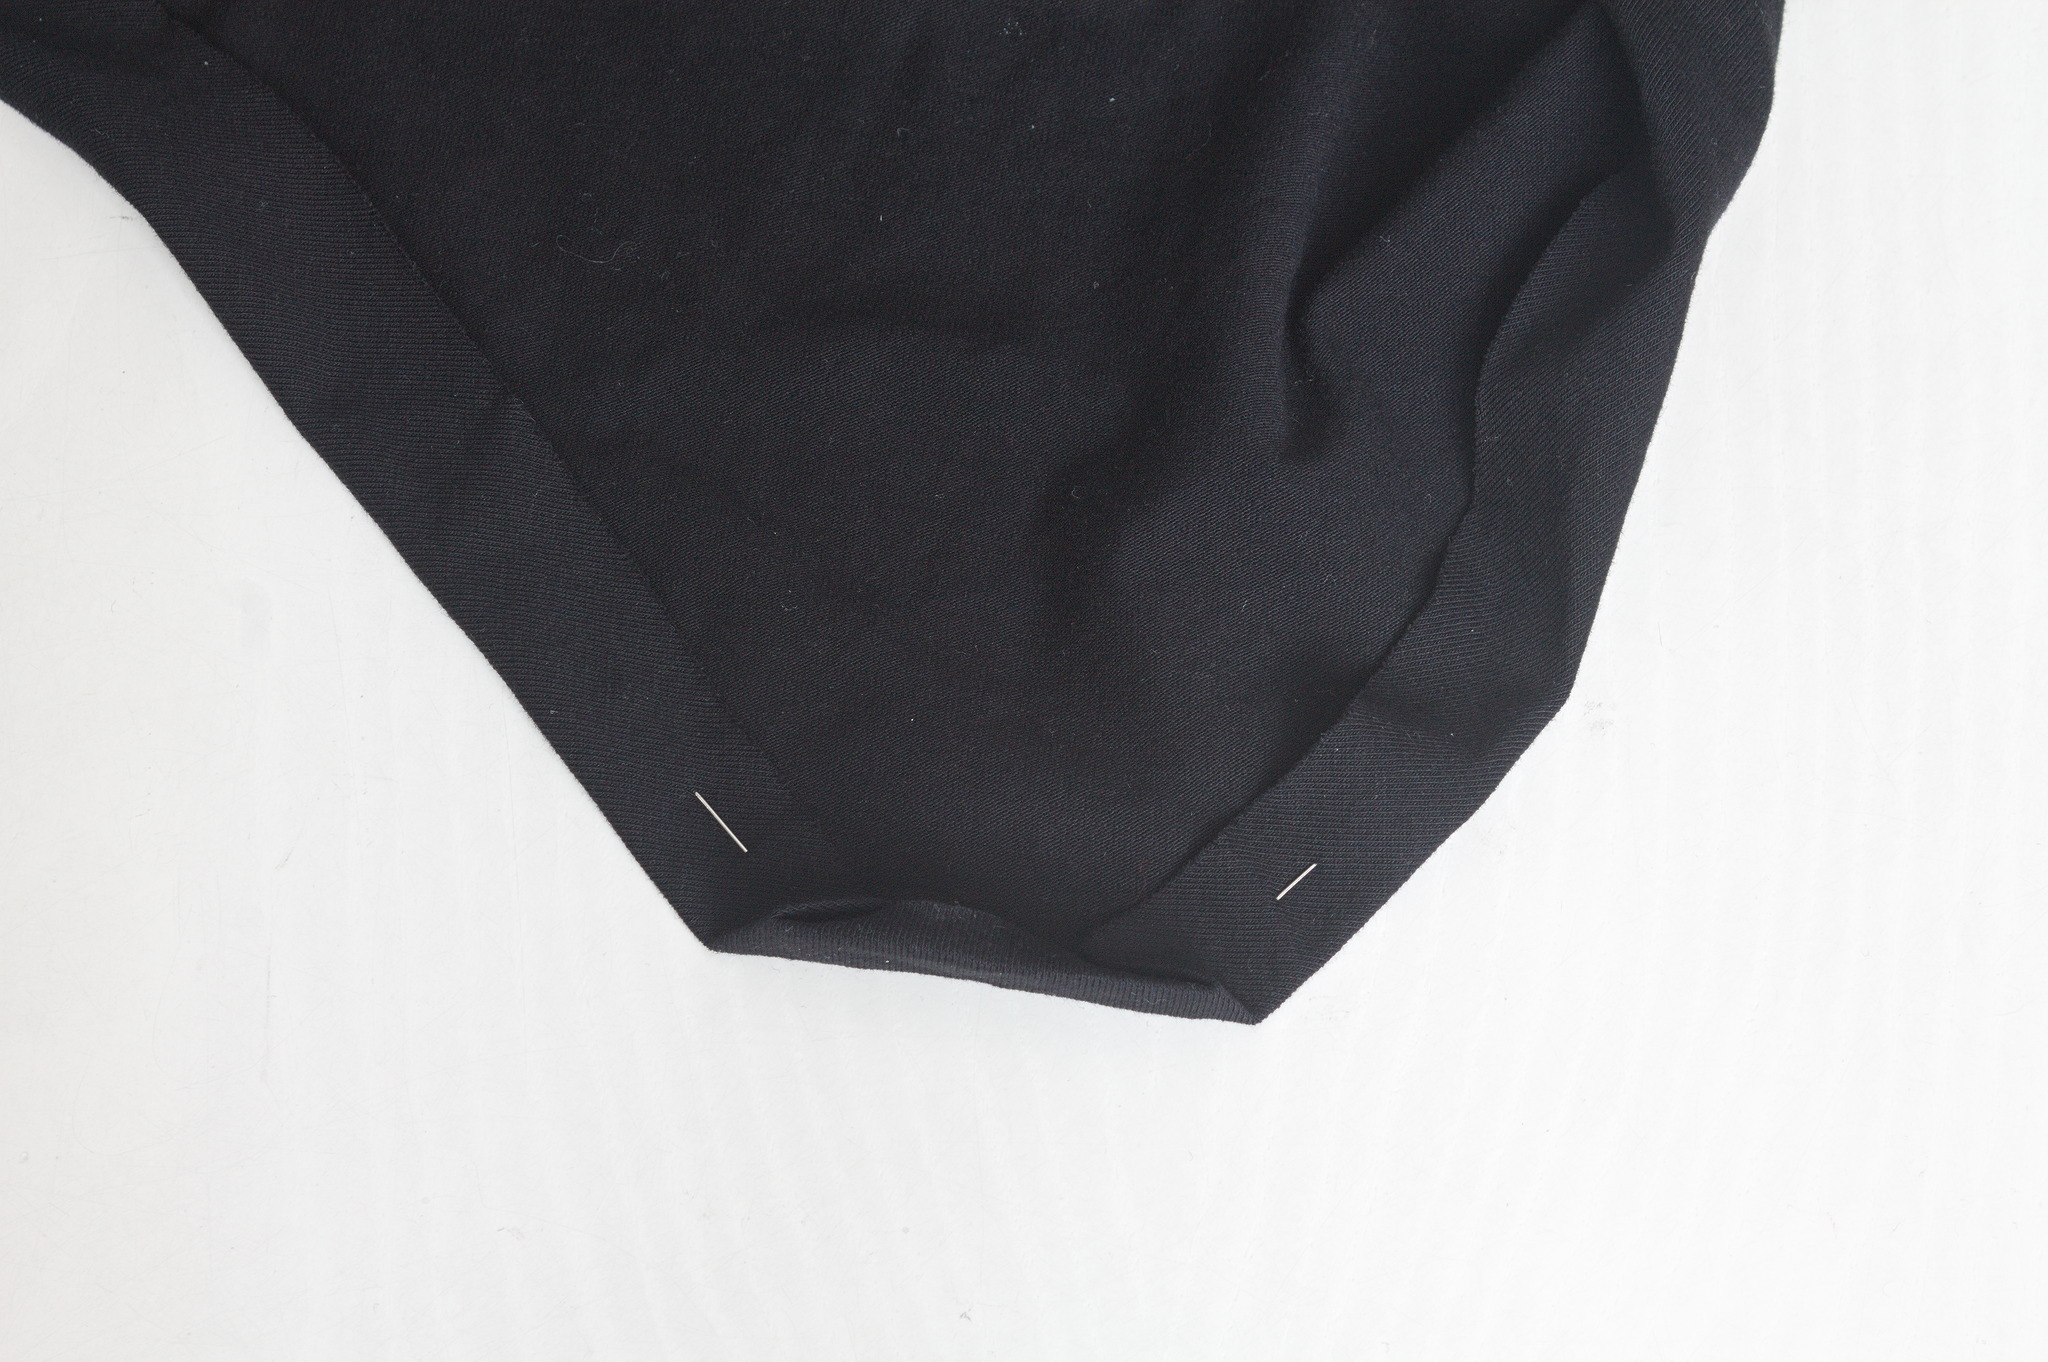
Fold the point down so that it will align to the point.
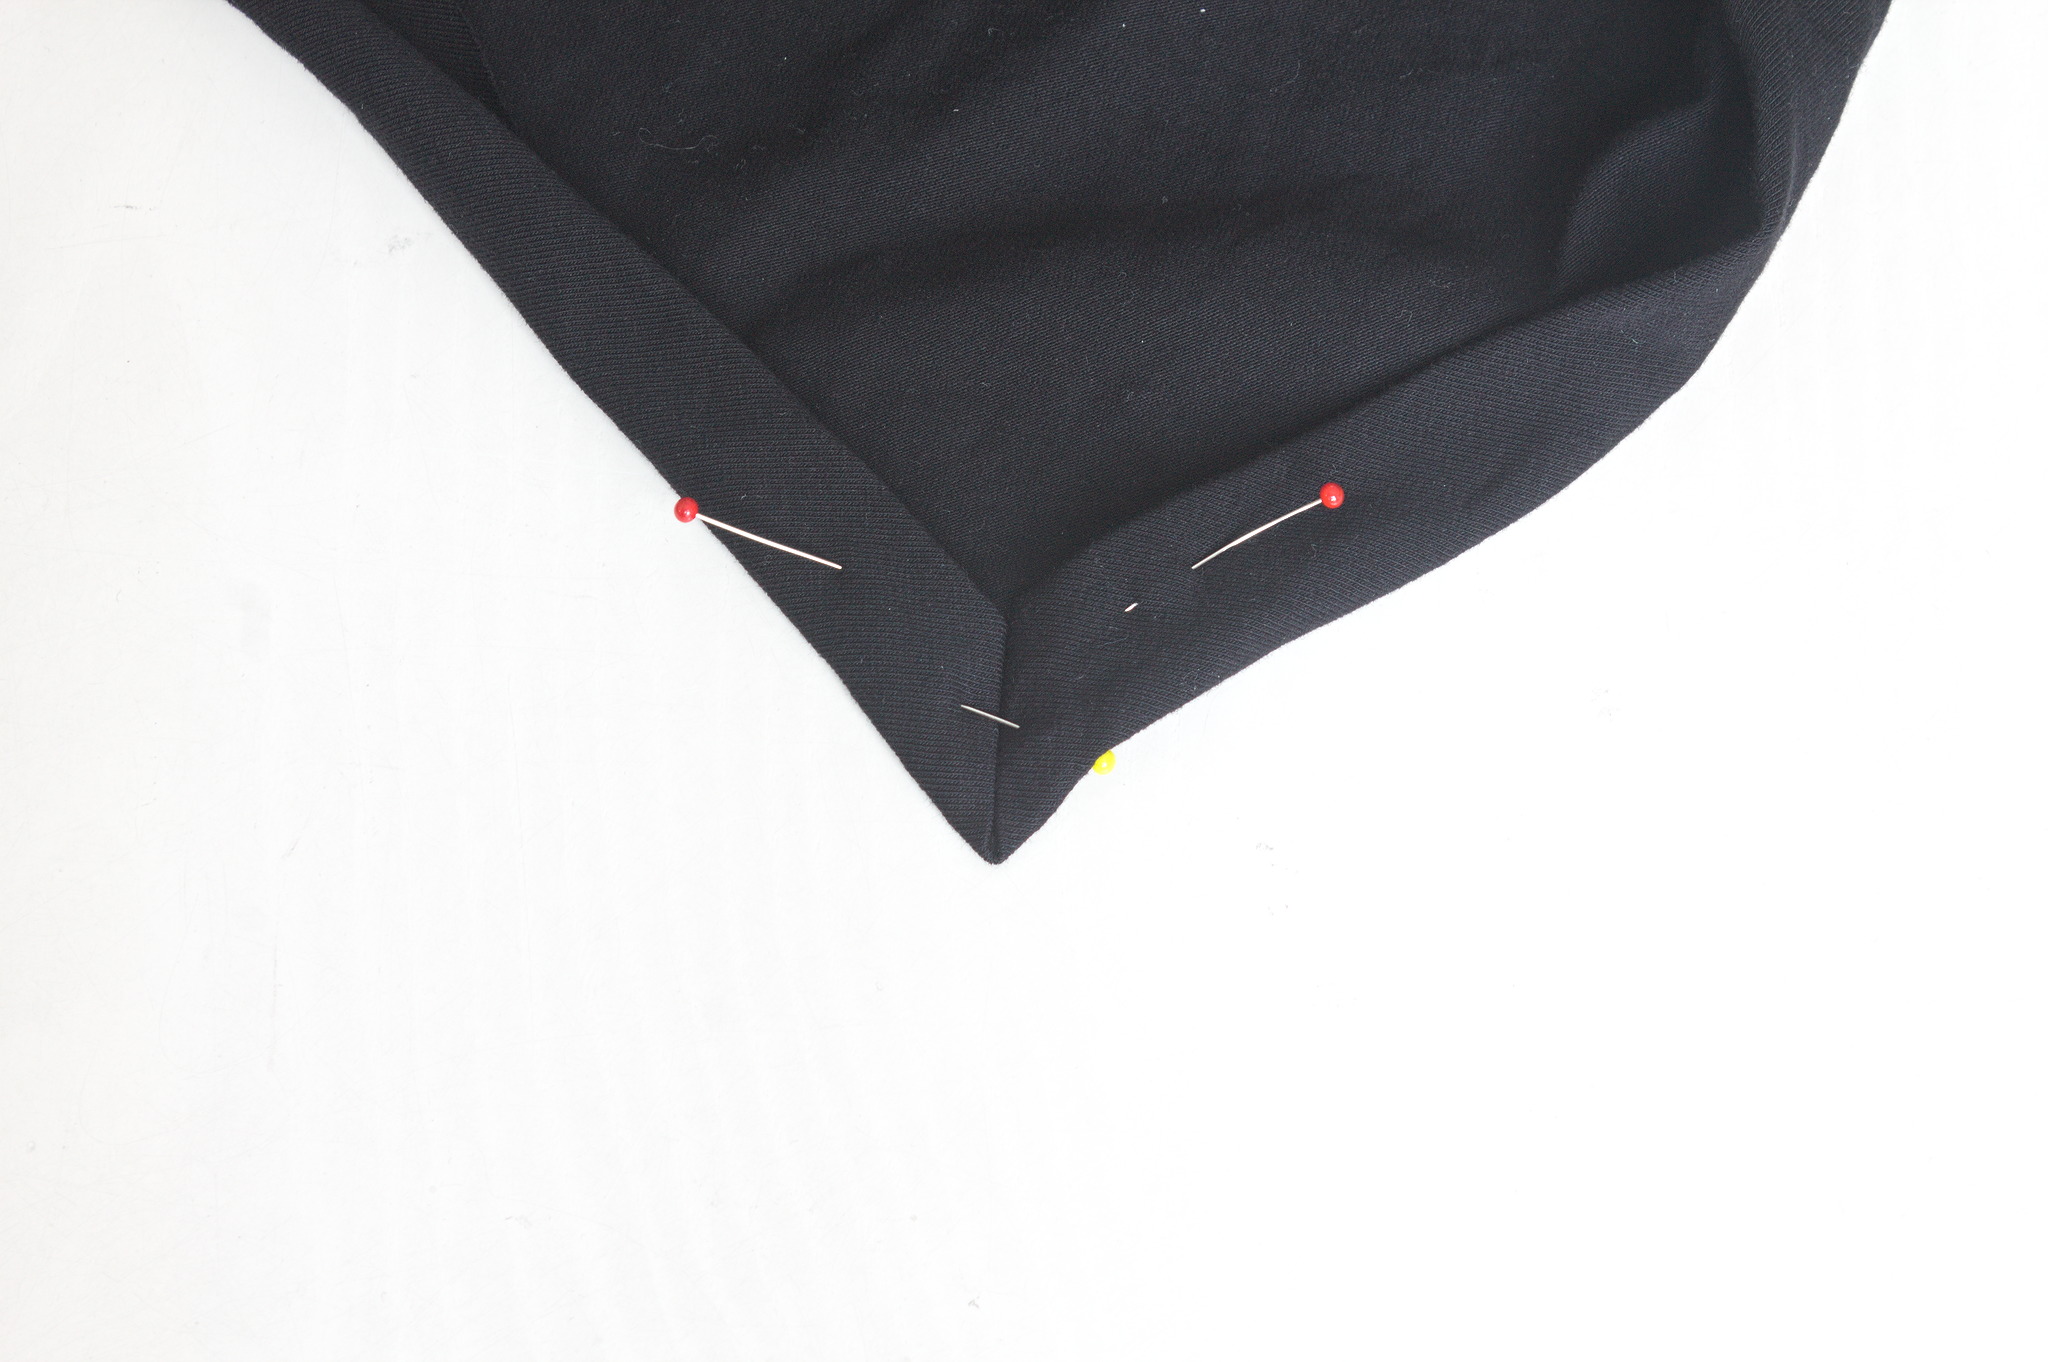
And fold the edges again by 2 cm, making sure that the point is neat.
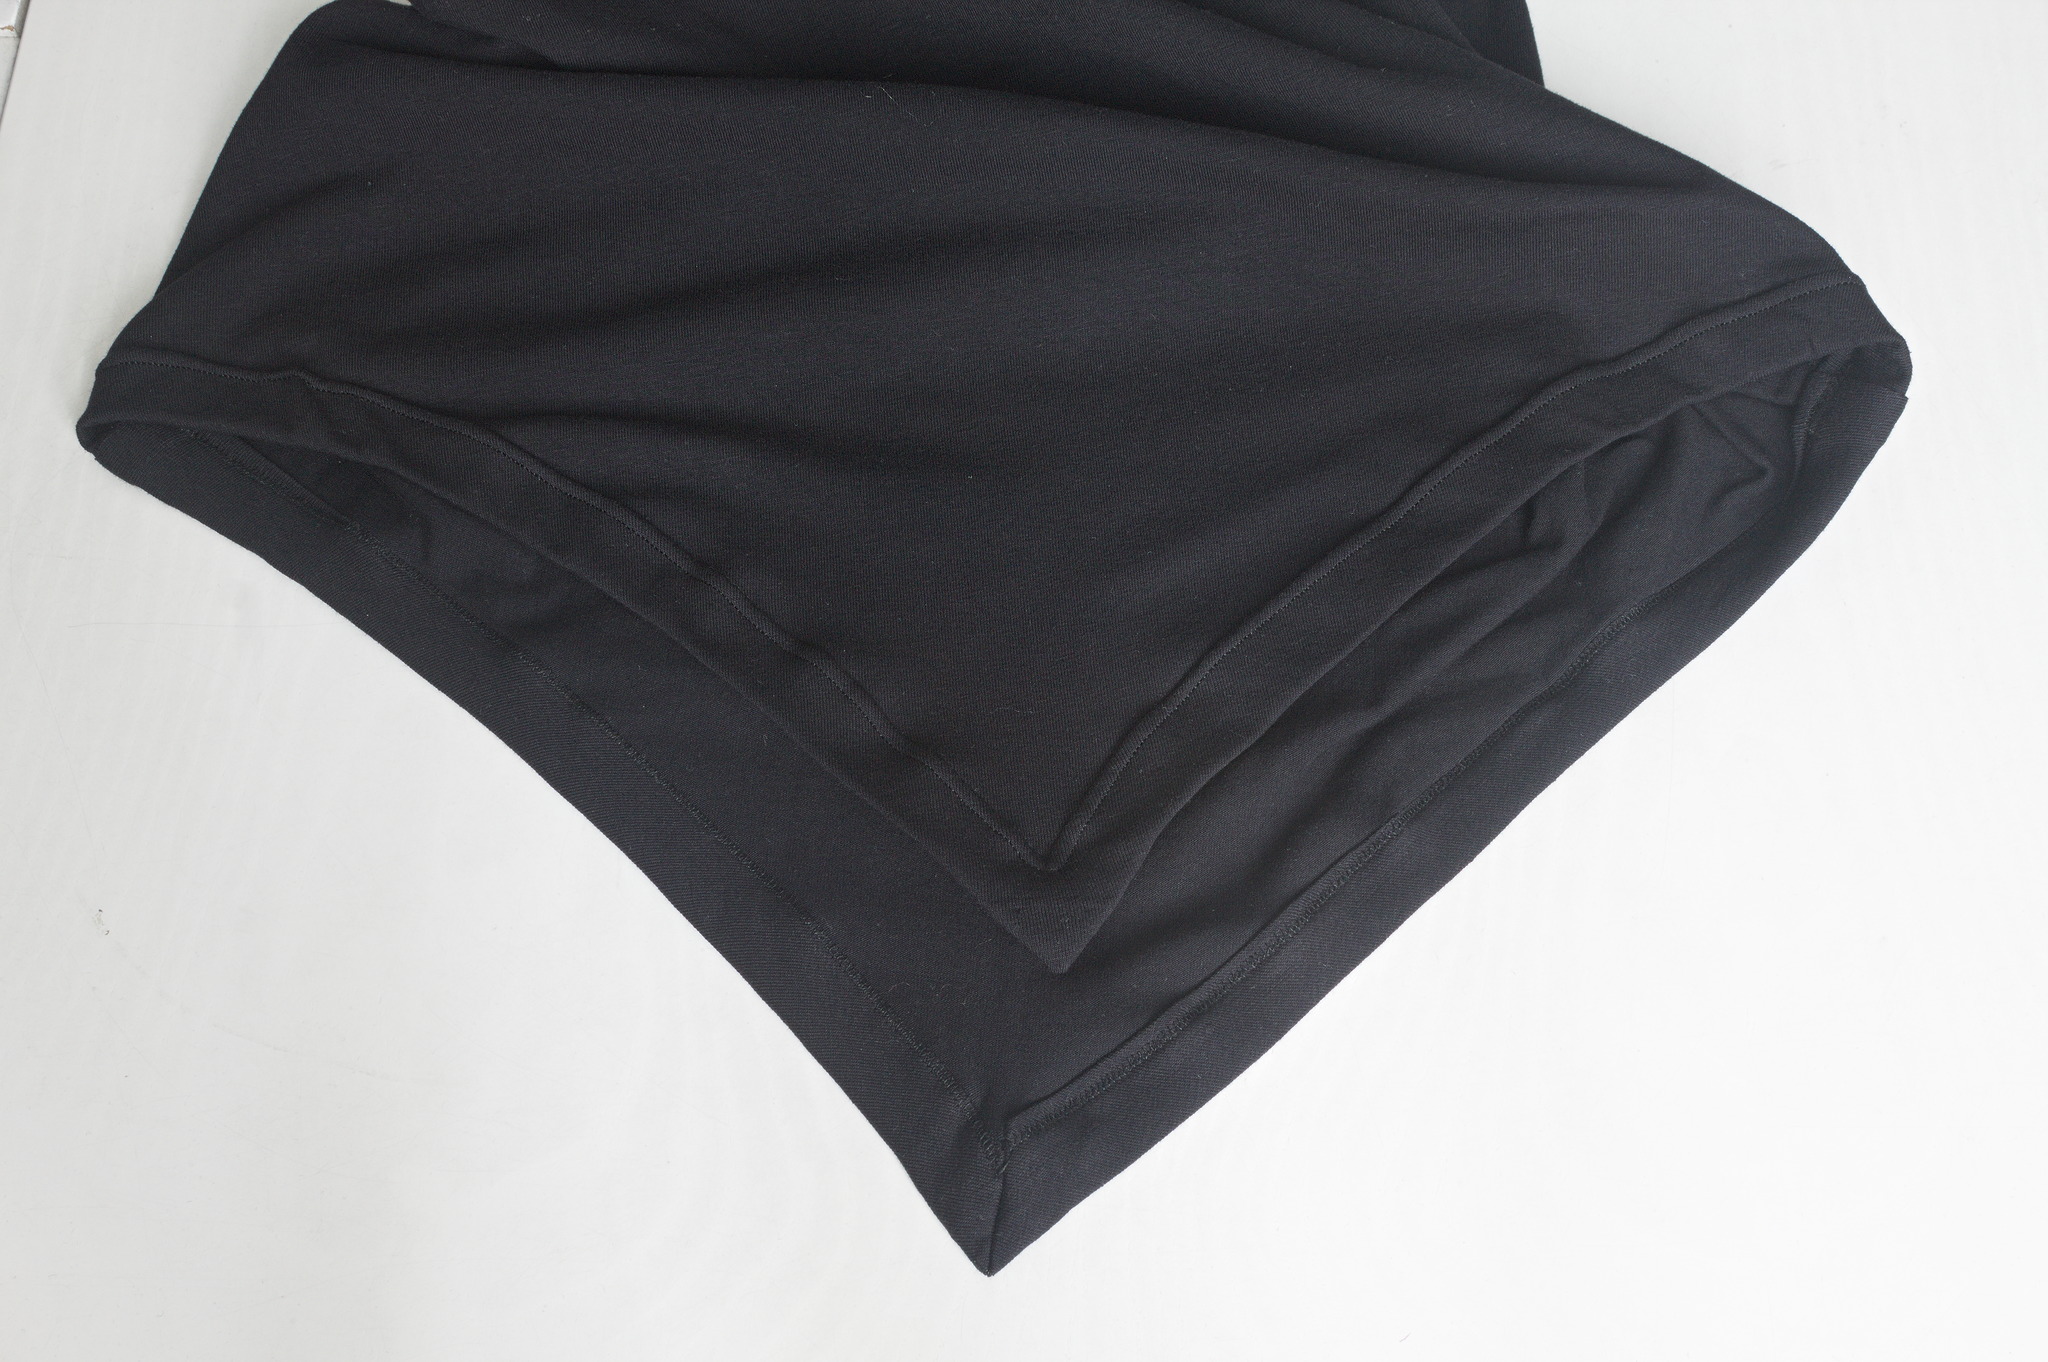
Fold the rest of the bottom edge twice towards the back and topstitch it (again ideally with a twin needle) to hem it.
Bottom
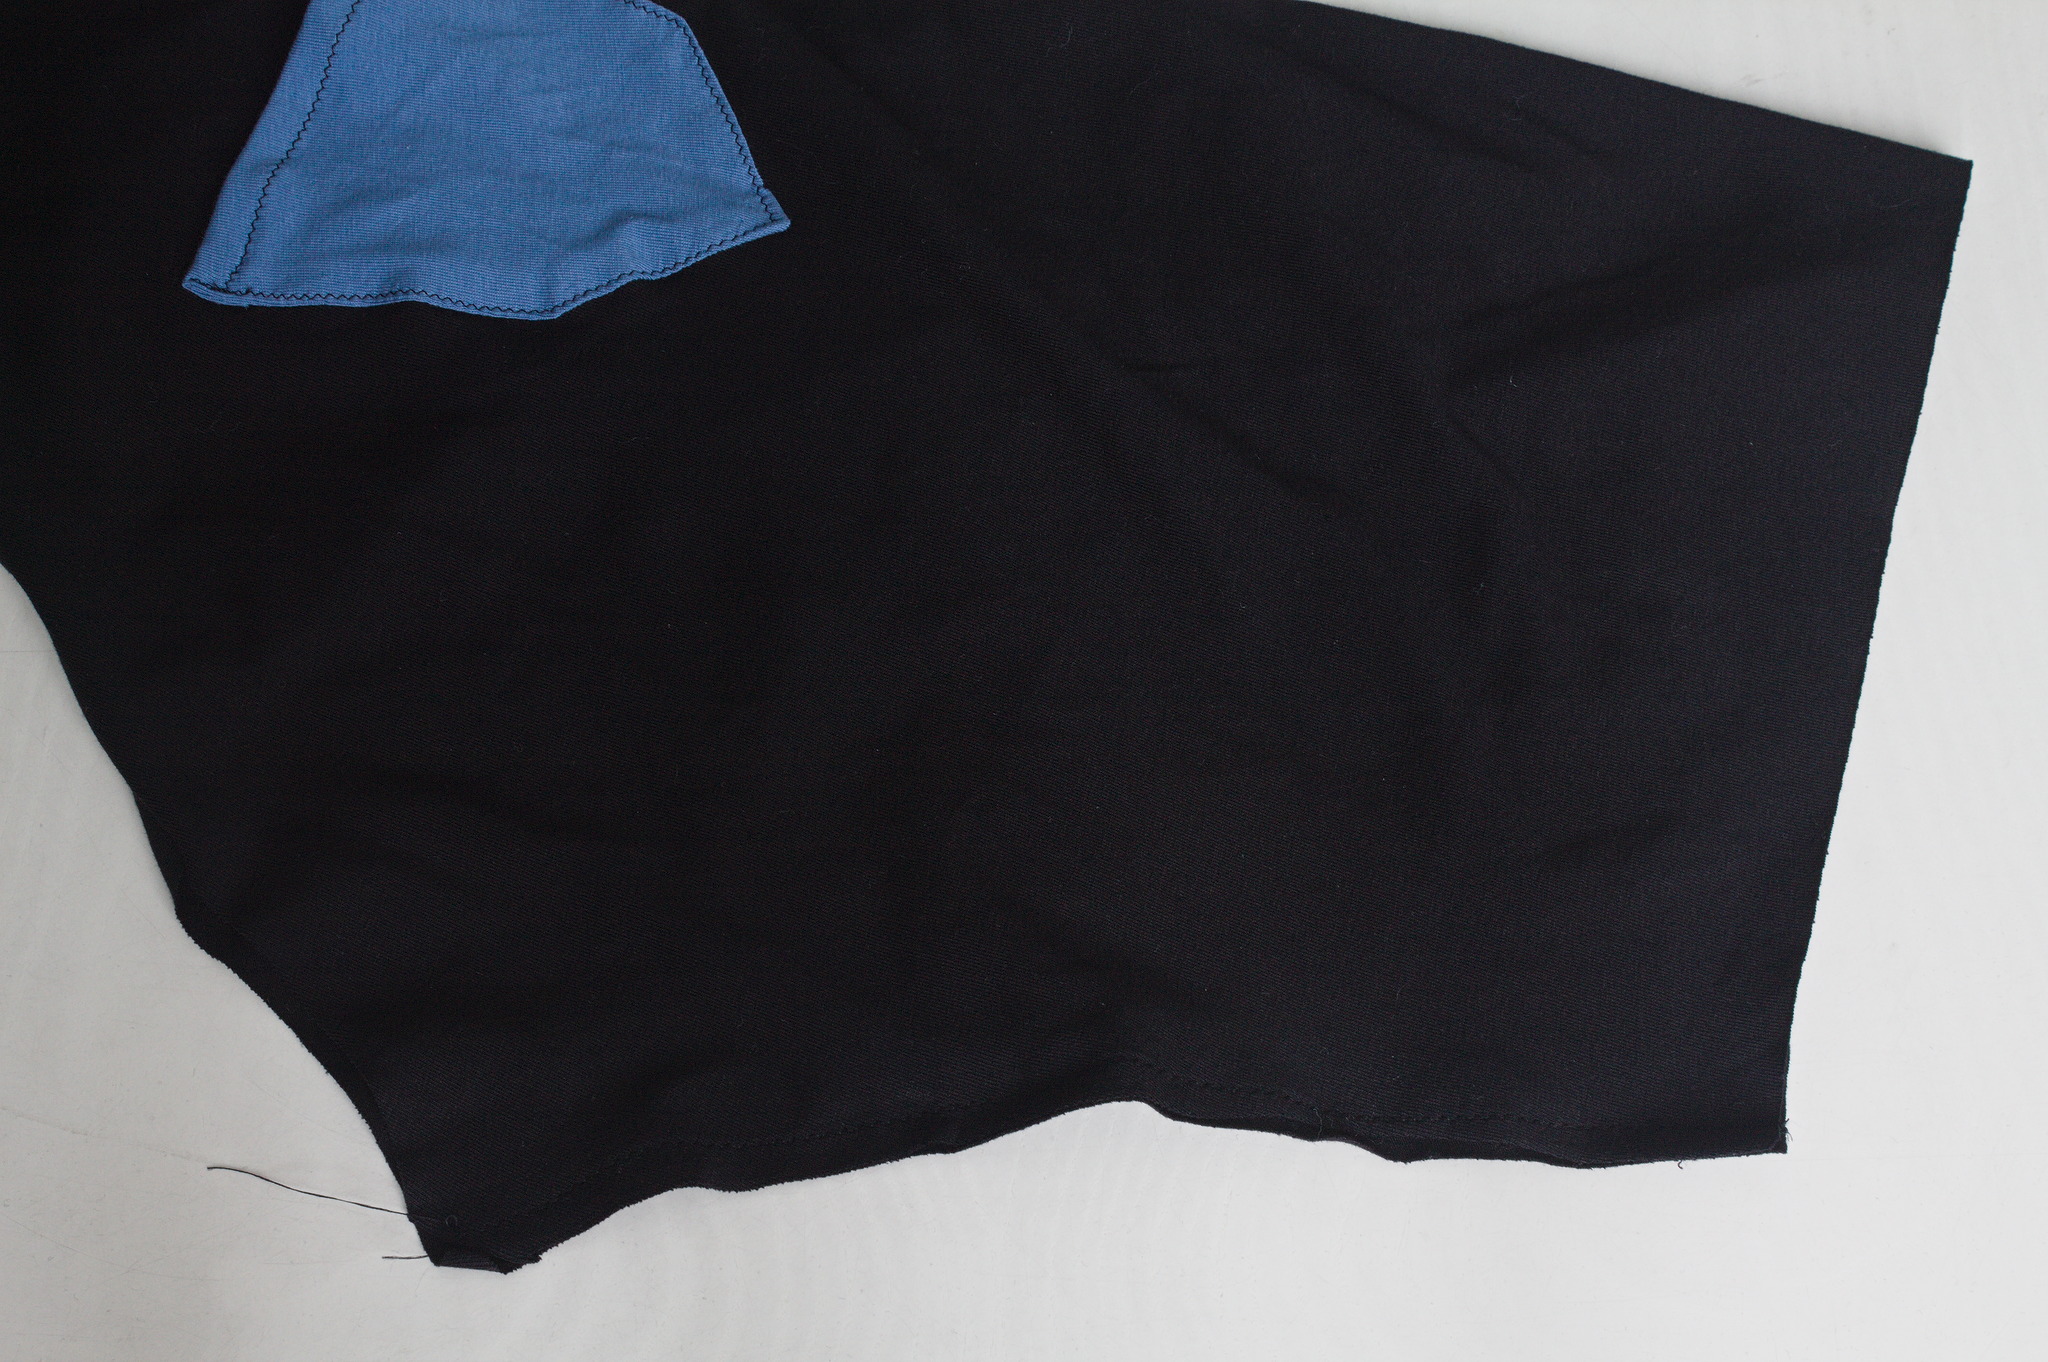
Cut two of the legs, marking the position of the pocket on the right leg. Also cut one of the pocket.
Tip
If the recipent is left-handed you may want to put the pocket on the left leg.
Optionally, put scraps of fusible interfacing on the right side of the fabric right inside the top and bottom corners of the pocket.
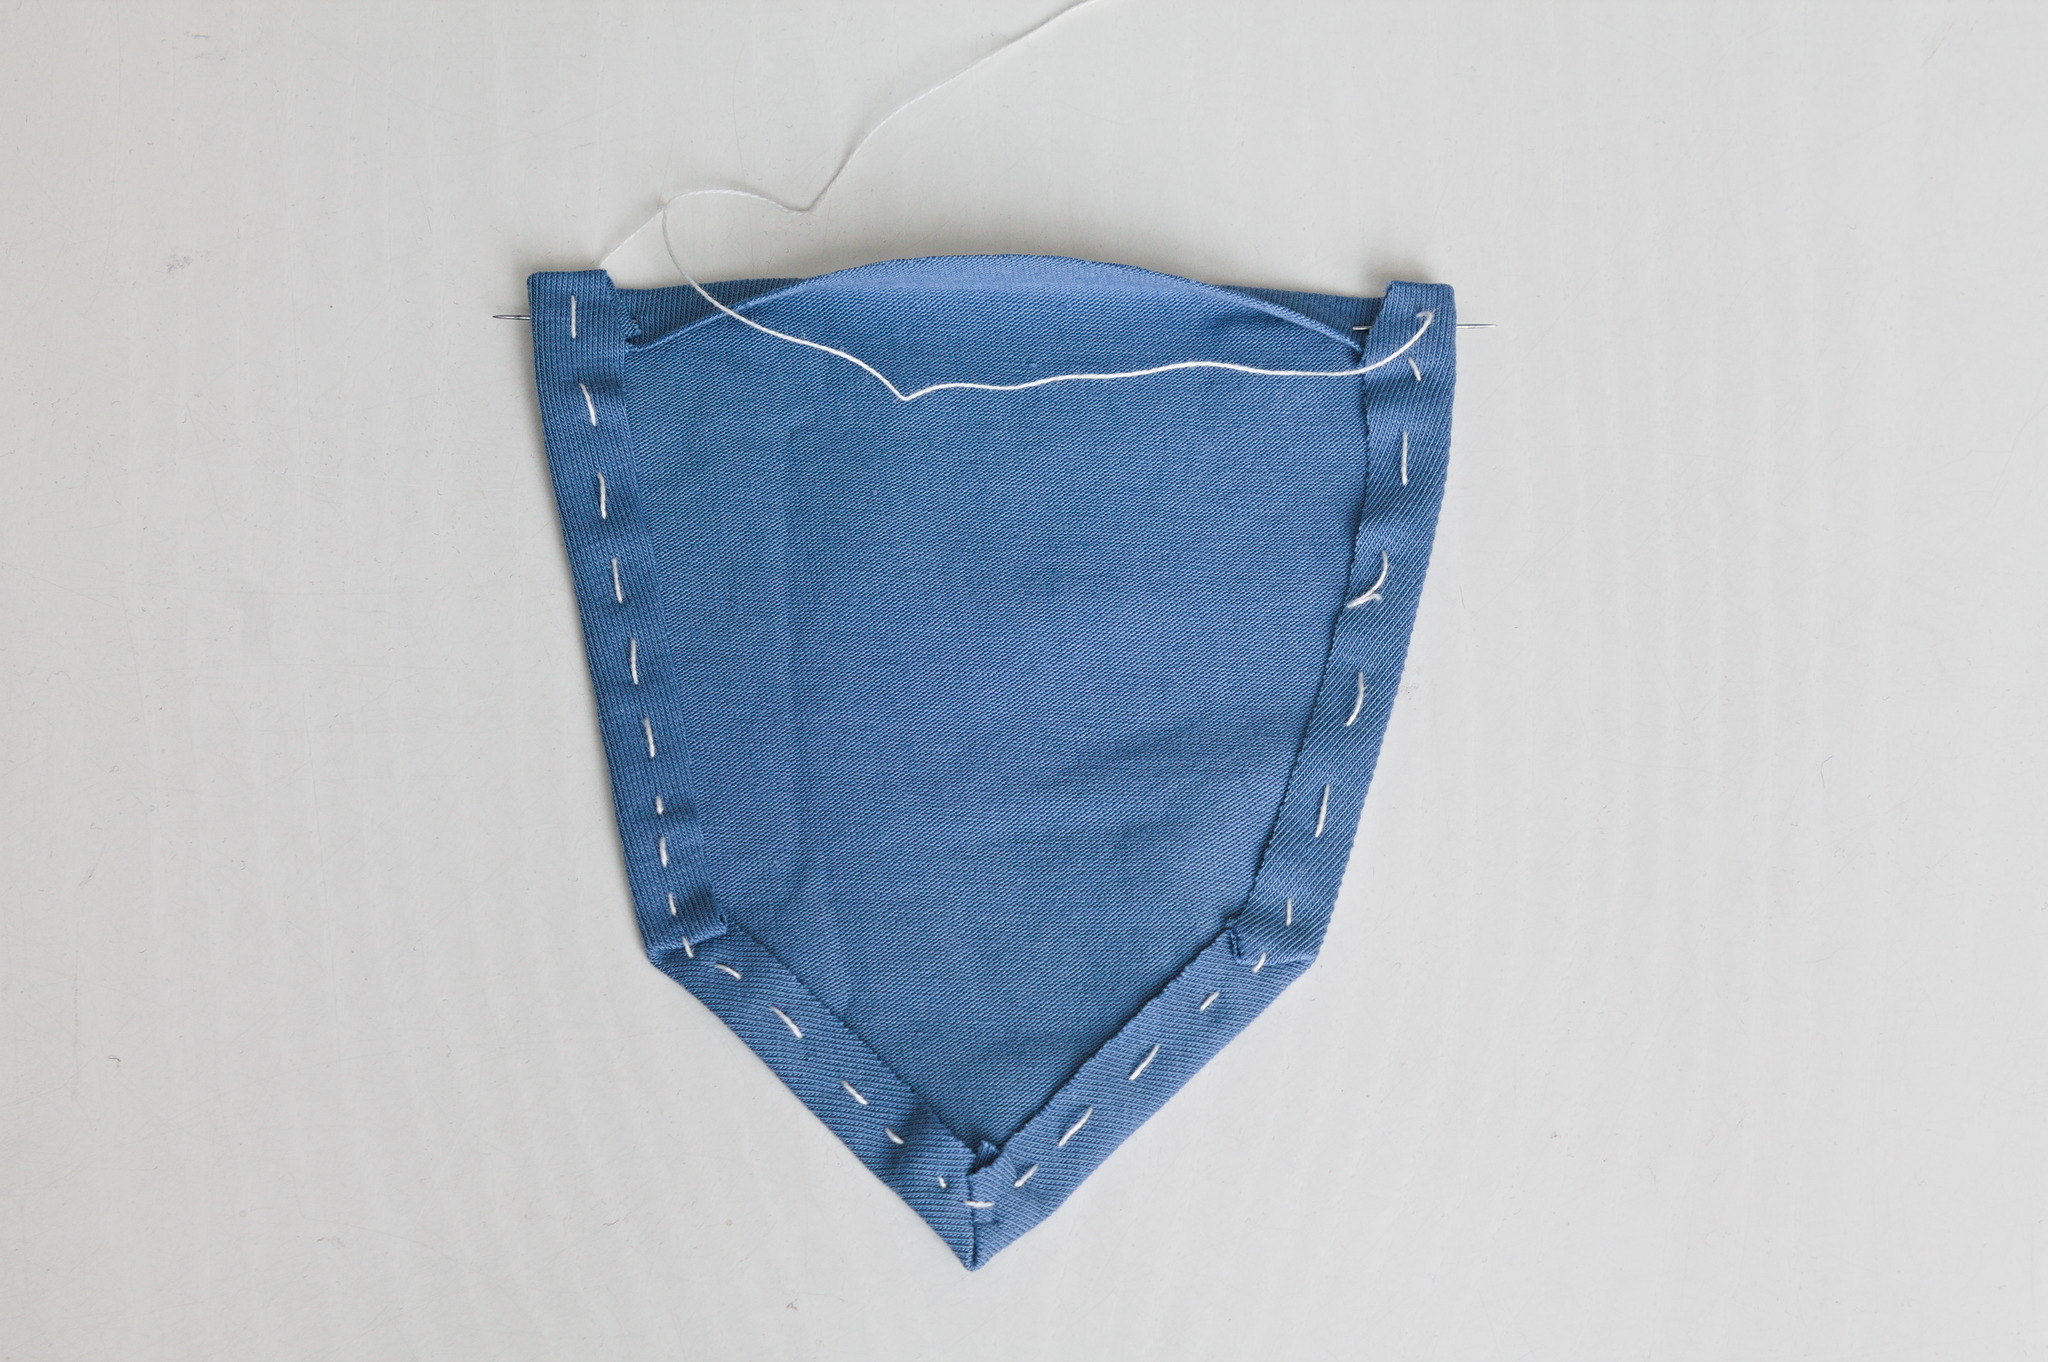
Fold down the top edge of the pocket by 1 cm (half the sewing allowance) towards the wrong side, pin it, fold also all remaining edges by 1 cm (full allowance) and baste in place.
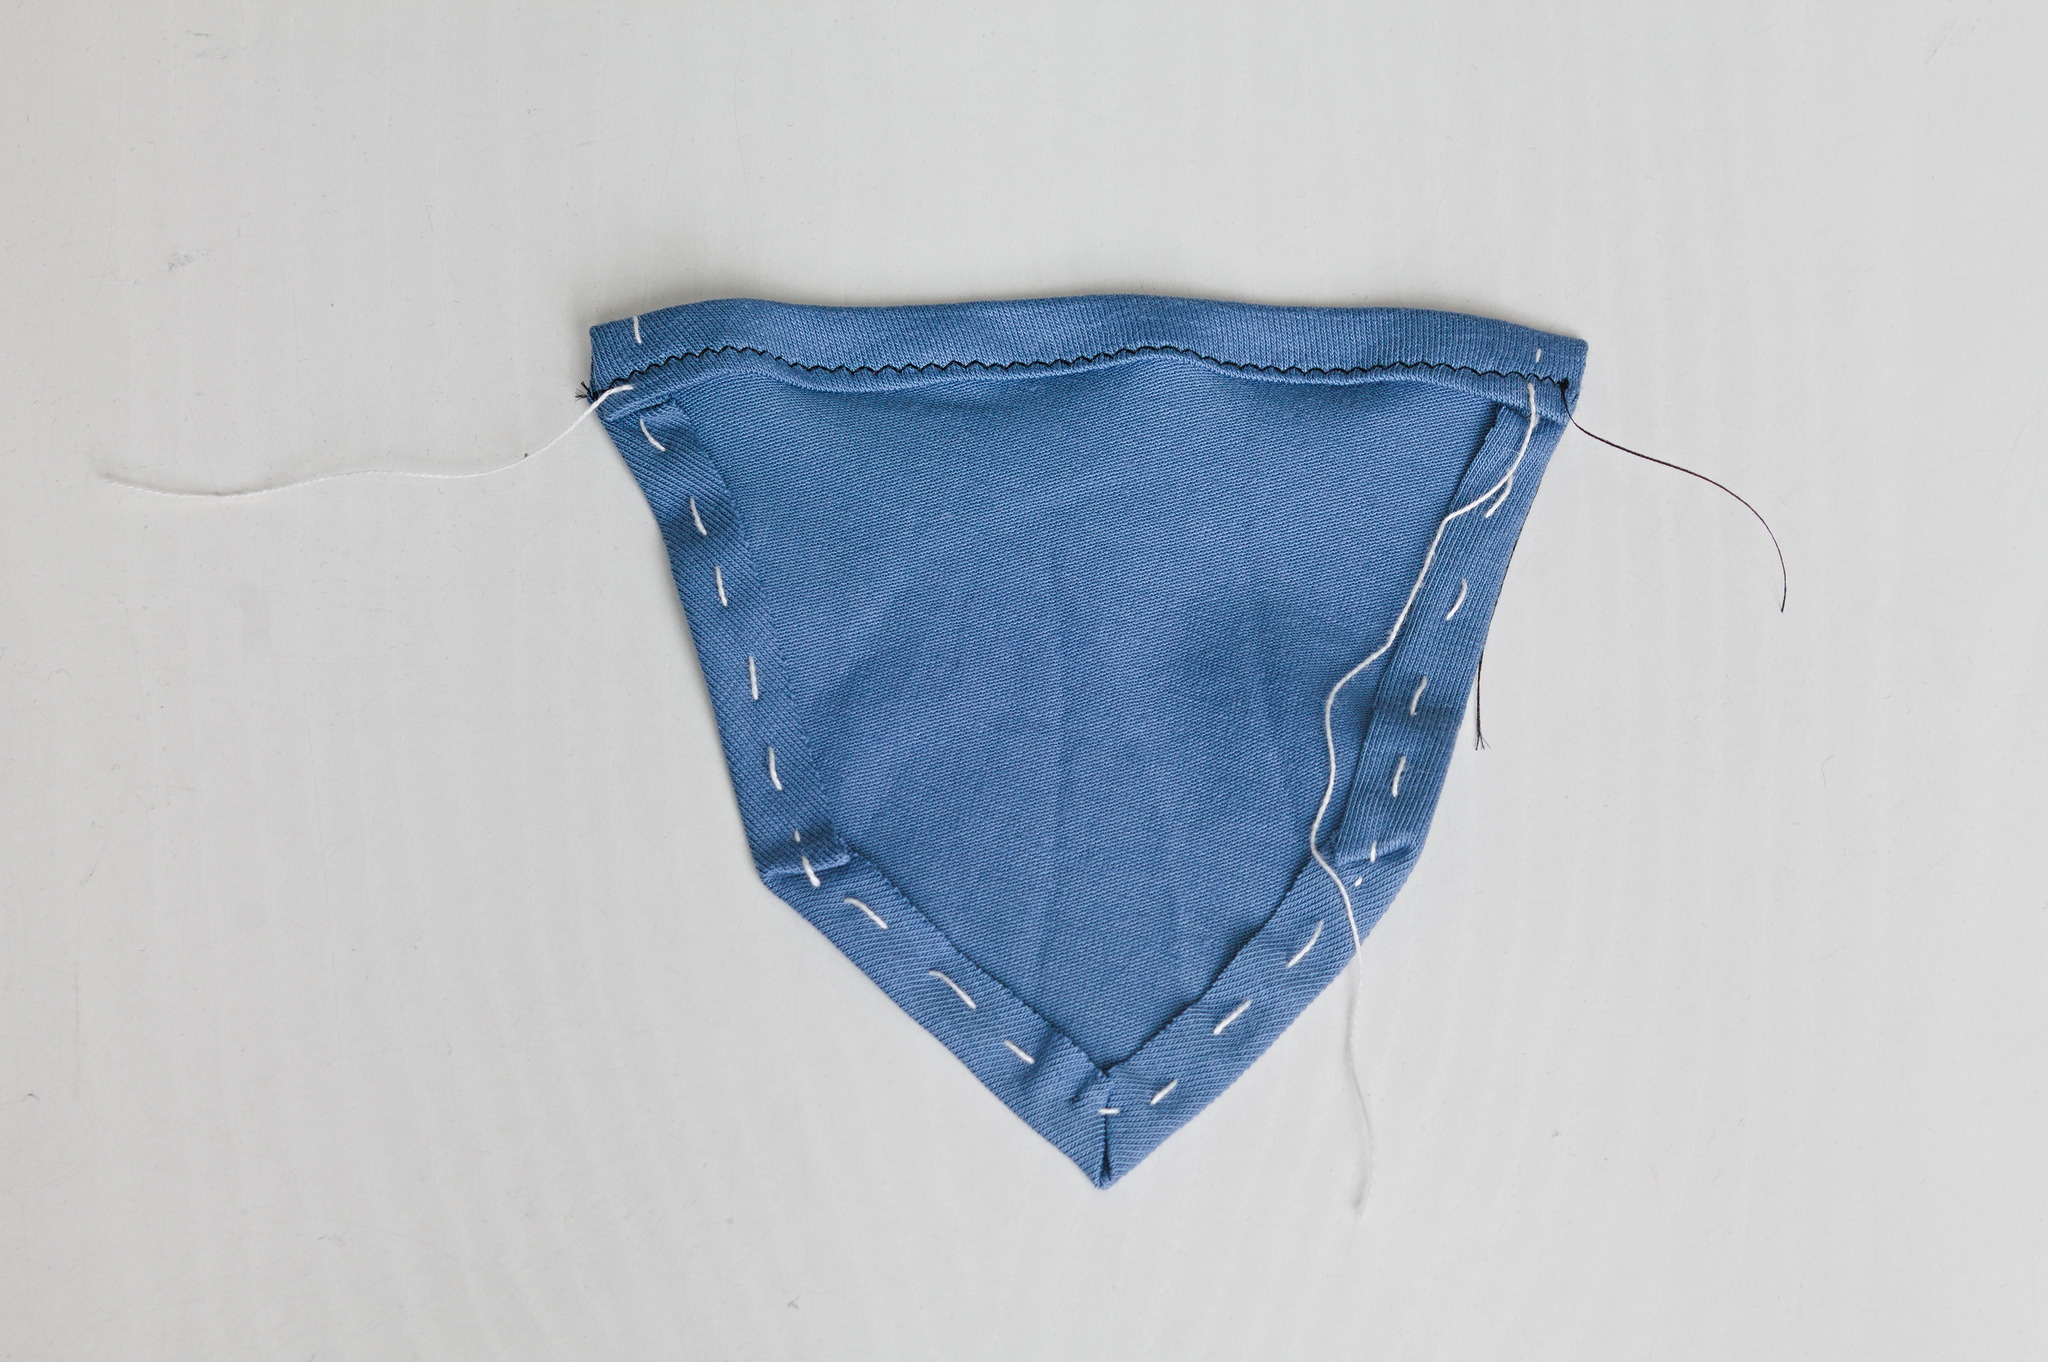
Fold down the top edge of the pocket a second time by 1 cm, topstitch at 8 mm from the edge.
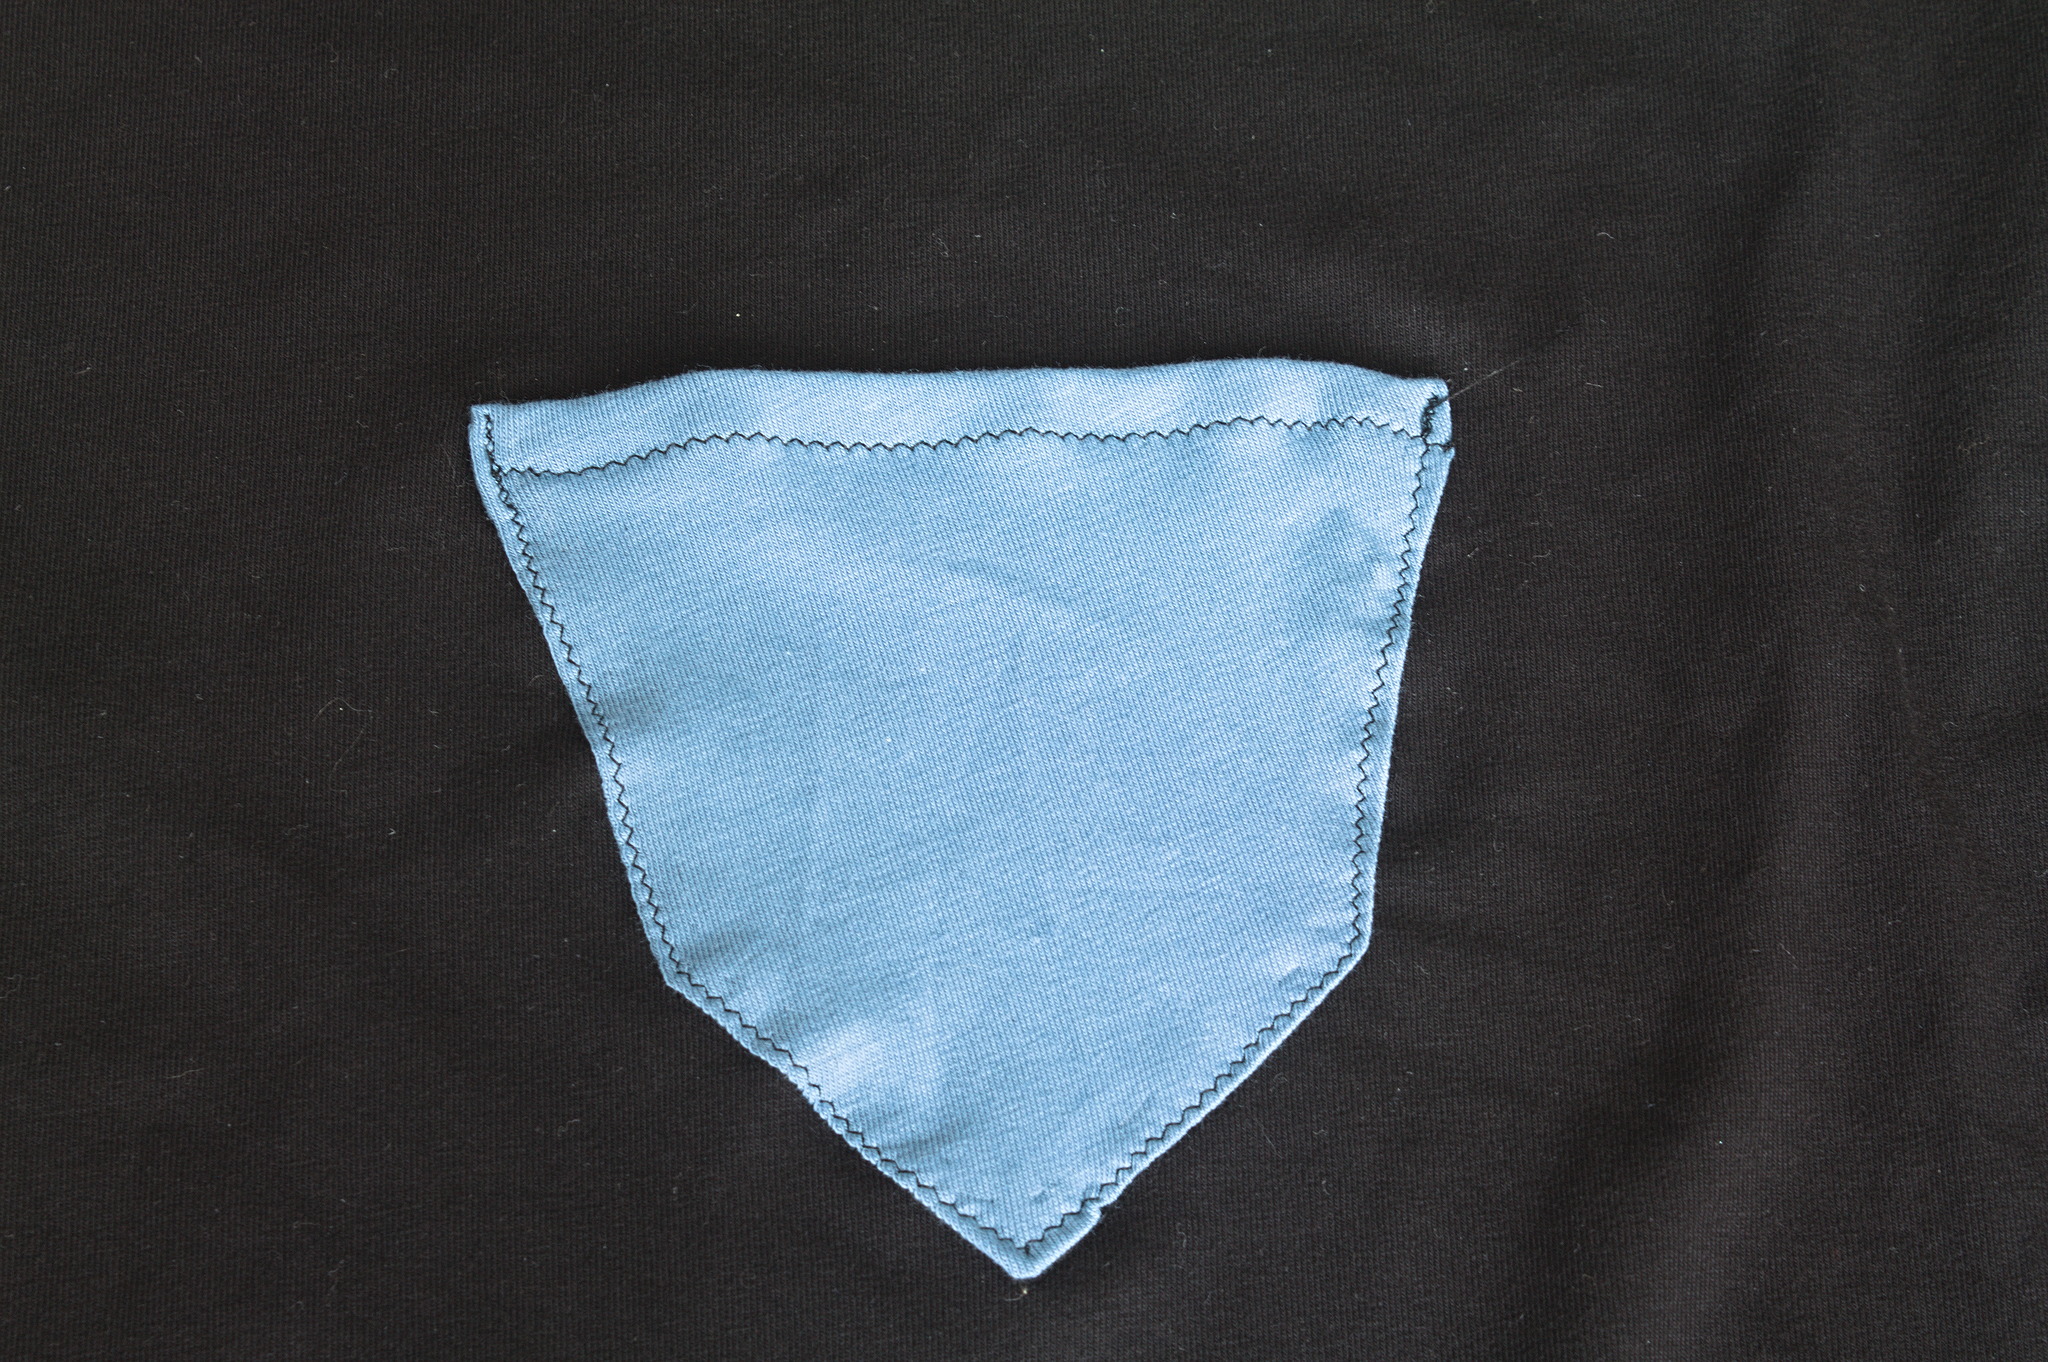
Put the pocket over the right leg, in the position marked on the pattern, topstitch in place.
Wrong sides together sew the inseam with a 8 mm allowance, turn inside out so that they are right sides together and sew with a 1 cm allowance to make a french seam. In the next steps these allowances should go towards the back.
Put one leg inside the other, wrong sides together, sew the crotch seam with a 8 mm allowance, turn right sides together and sew with a 1 cm allowance to make a french seam.
Fold down the hem twice, topstitch (ideally with a twin needle) to hem.
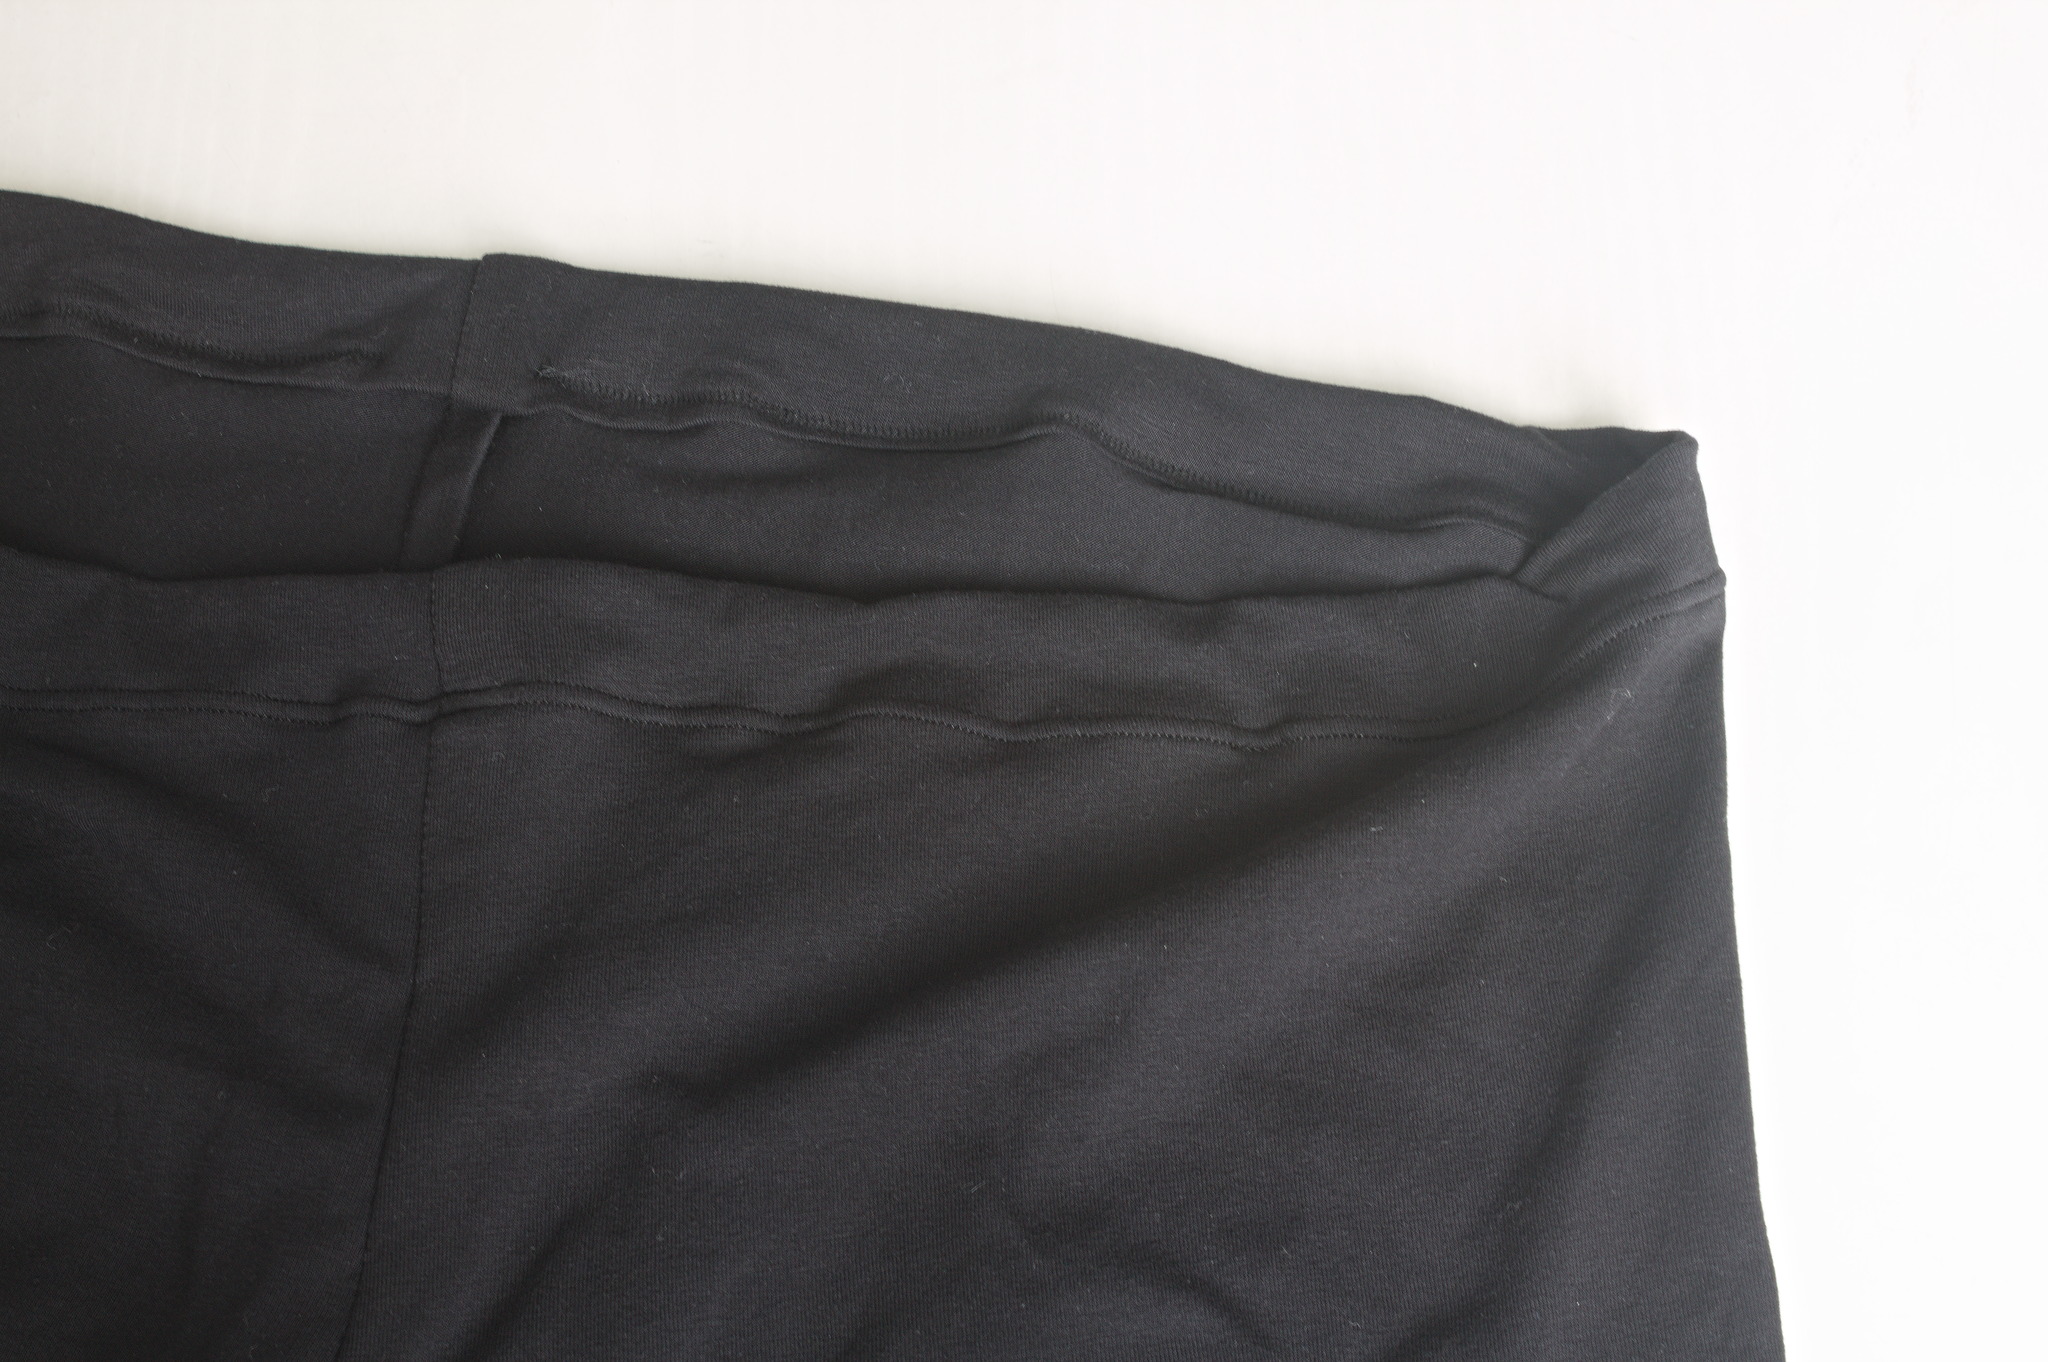
Fold down the top twice, so that the folded edge lies over the seam line, topstitch (with a twin needle) to form a casing for the elastic, leaving an opening in the center back.

Measure enough elastic to go snugly around the waist, insert it in the casing, sew it in a circle and hemstitch the casing closed by hand.