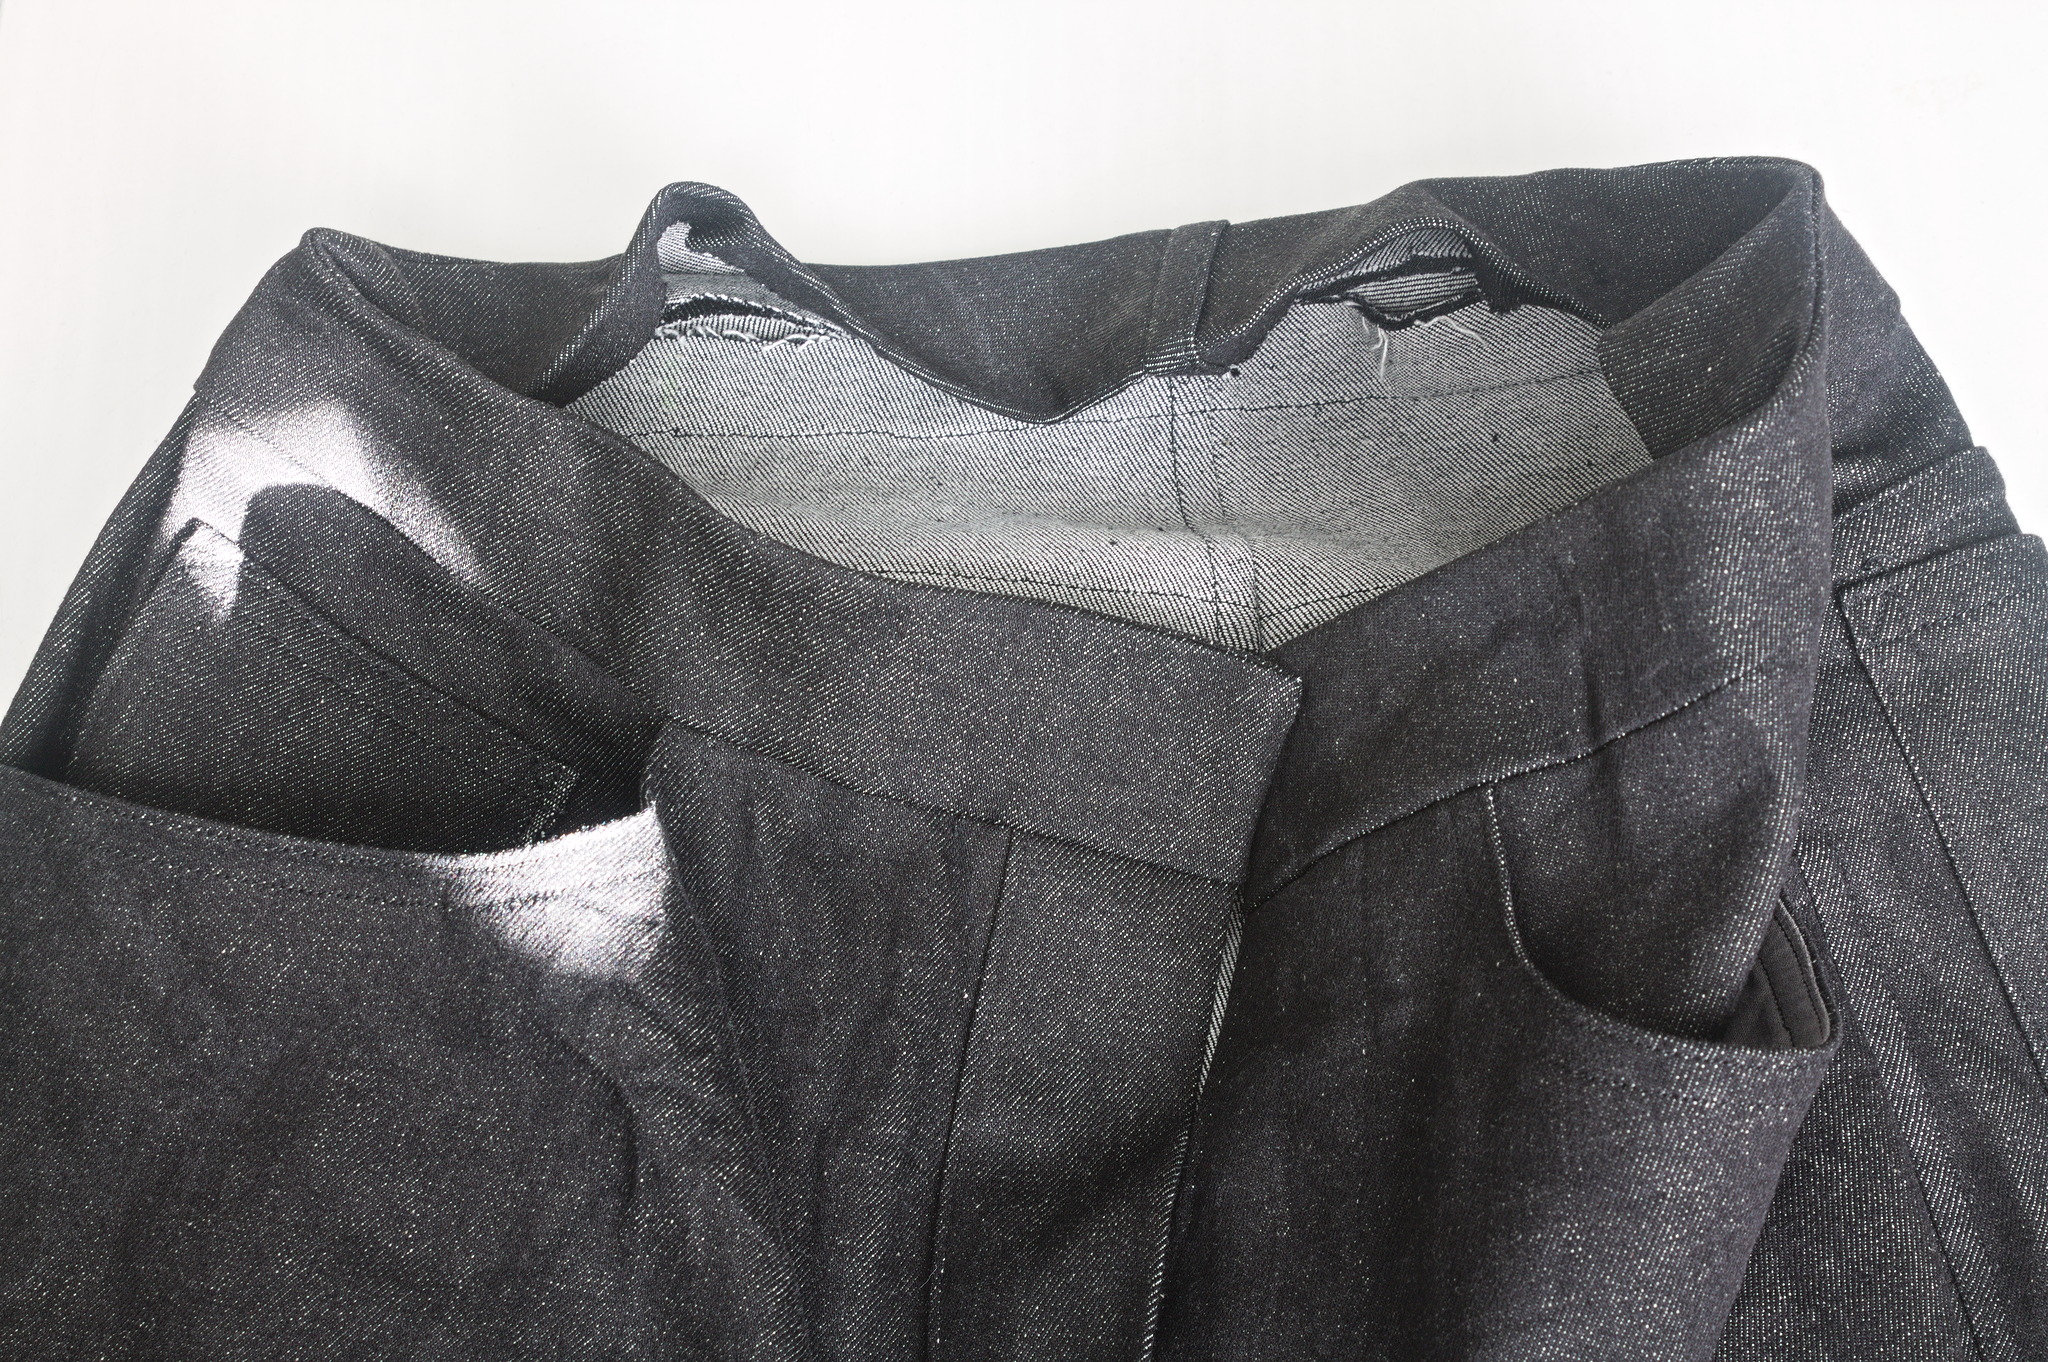
Basic Jeans
These are, construction wise, the same as the menswear Basic Jeans, drafted for a body shape that requires more space on the back than on the front.
The default setting is for the jeans to sit on the low waist, but it can be adjusted to go to the natural waist.
Materials
Fabric
Between 1 and 1.5 m of sturdy trouser fabric: denim, corduroy, heavyweight linen etc. or technical breathing and abrasion resistant 2nd layer fabric;
50 cm pocket fabric.
Notions
sewing thread to match the fabric;
zipper, as long as the fly piece from the pattern;
a suitable button;
16 cm of 2 cm wide elastic;
optional: 2.5 m bias binding to finish some raw edges (any colour, as it won’t show).
Pattern
Measurements
This pattern uses the Aldrich Drafting System.
You need to take the following measurements:
highhip_circ(G08)circumference of the low waist, where these jeans are designed to sit;
hip_circ(G09)circumference of the hips;
height_waist_side_to_hip(A.20)vertical distance from Waist to Hip;
rise_length_side(N08)vertical distance from Waist side down to Crotch level;
height_waist_back(A23)height from the waist to the ground, measured in the center back, going over the buttocks;
the file ../../drafting_methods/aldrich/aldrich.vit is used by
default by the pattern file and has the list of needed measurements.
Pattern
Get the valentina file for the pattern,
basic_jeans.val.
In the table of variables in Valentina you can also set the following
increments; for styling you probably want to change waist_position
(and the related waist_circ), jeans_bottom_width (and possibly
the related jeans_knee_width) and hips_ease; for curvier people
you may need to change front_curve_distance, back_curve_distance
and / or crutch_ease, for everything else the default should be
generally fine:
waistband_depthheight of the waistband, e.g. 4 cm;
waist_positionthe distance between the natural waist and the waist of the jeans: the drafting system suggested 5 cm;
waist_circthe circumference where the waist of the jeans will be: equals to
highip_circifwaist_positionis 5 cm;jeans_bottom_widthwidth of the legs at the hems (half the circumference), 19 cm gives a straight cut on average sizes, make sure that it is at least as wide as the diagonal circumference across the heel and ankle;
jeans_knee_widthwidth at the knee (half the circumference): 2 cm more than the hem, but it can be increased a bit for skinny jeans where the hem is quite narrow;
front_curve_distance3.25 cm if hips < 102 cm, 3.5 cm otherwise;
back_curve_distance4.5 cm if hips < 102 cm, 4.75 cm otherwise;
crutch_ease5 or 6 cm;
hips_easeadded ease at the hips, per side, e.g. 1 cm;
pocket_opening_widthhow wide the pocket should be, e.g. 12 cm;
pocket_opening_depthhow deep the pocket opening should be, e.g. 7.5 cm;
pocket_facing_widthhow much the pocket facing should overlap away from the opening, in the horizontal direction, e.g. 3 cm;
pocket_facing_depthhow much the pocket facing should overlap away from the opening, in the vertical direction, e.g. 5 cm;
pocket_depthhow deep the pocket should be, from the top, e.g. 26 cm;
pocket_depth_sidewhere the pocket should stop following the side seam, e.g. 19 cm;
pocket_depth_frontwhere the pocket should stop following the front seam, e.g. 9.5 cm;
coin_pocket_widthhow wide the coin pocket is, e.g. 8 cm;
coin_pocket_depthhow tall the coin pocket is, e.g. 10 cm;
fly_piece_widththe width of the fly piece, e.g. 4 cm;
back_pocket_widththe width of the back pocket at the top, e.g. 18 cm;
back_pocket_depththe depth of the back pocket, e.g. 18 cm;
back_pocket_point_depththe vertical distance from the tip of the pocket to where the bottom lines start at the sides, e.g. 3 cm;
back_pocket_rasterhow much the sides of the pockets should taper in before the bottom lines, e.g. 0.5 cm;
sewing_allowanceenough to be able to use french or flat felled seams.
After adding all measurements, adjust the parameters of curves A9_A6 and A24_A19 so that they about touch the cornflower blue arcs.
Instructions
Follow the instructions for the Menswear Basic Jeans.
Tip
If you want to make a quick mockup, you can do so with the block used to draft the jeans, as that only uses four pieces, but can be used to double check the measurements. Be sure to set the increments to the same values as in the jeans pattern.
When sewing the waistband you may want to add a third piece of elastic at the center back, just like the two on the side seams. Alternatively, there is a shaped waistband variant: to use that cut two pieces, right sides together sew the top seam, and then treat it as the straight waistband, skipping the elastic.
Variants
Shaped Waistband
Instead of a straight waistband shaped with elastic you can make a shaped waistband: cut two of that part instead of the straight waistband, and when you get to that stage do as follows.
Tip
If you need to piece the waistband you can do it on the center back, sew the two pieces wrong sides together and then flat fell the seam. In that case make sure to flat fell the outer waistband and the waistband facing in the opposite directions, to reduce bulk; you may also want to flat fell the outer waistband in the same direction as that of the back seam of the trousers, but this is just to make it look nicer.
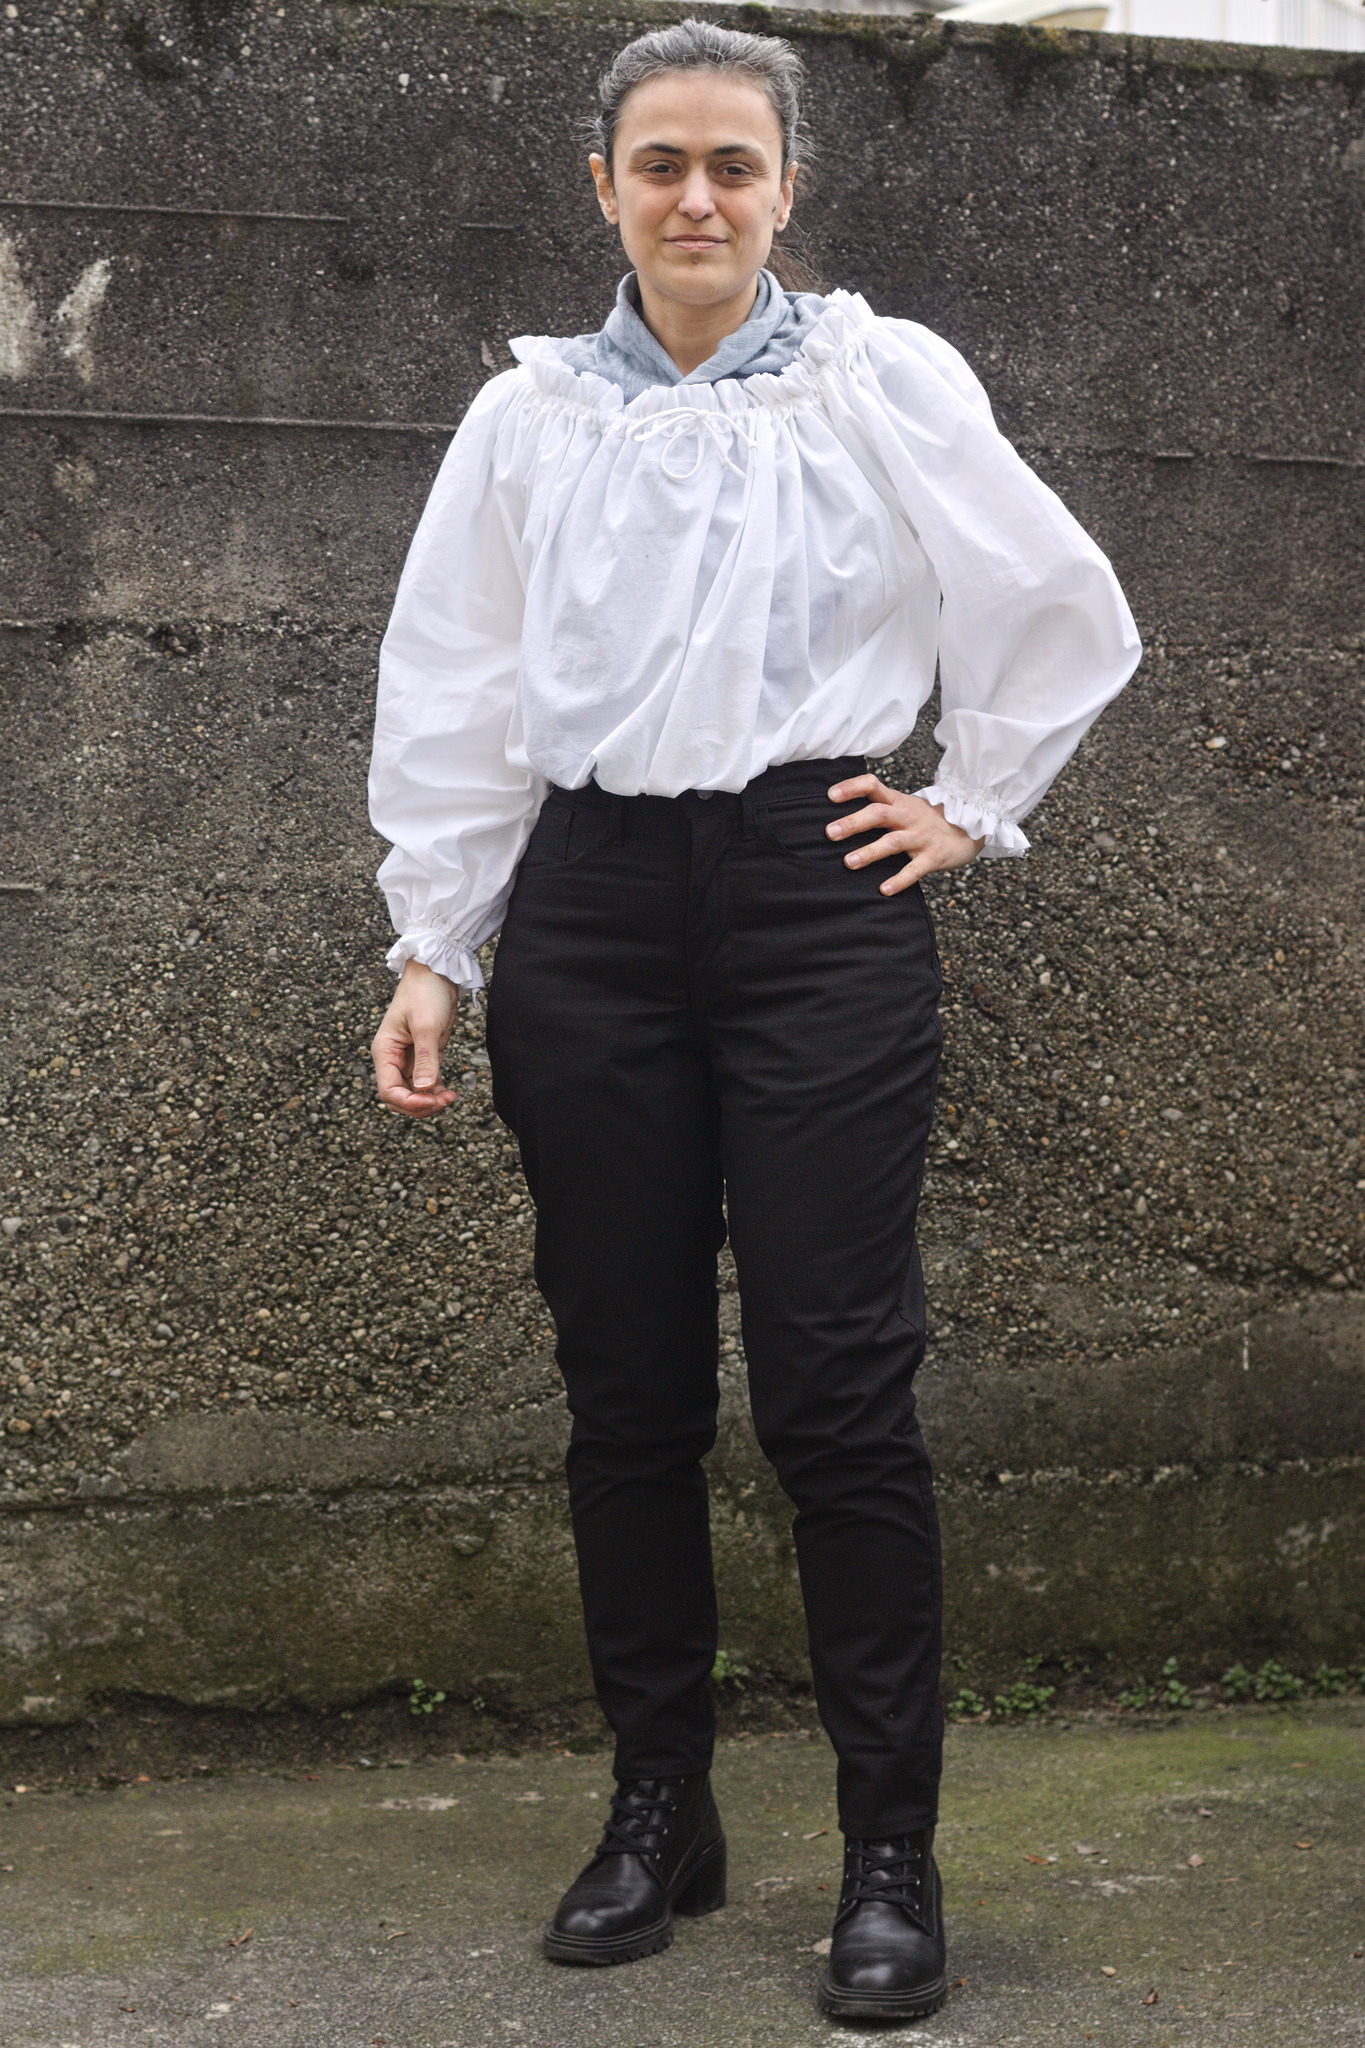
Right sides together, sew the outer waistband to the jeans, matching all notches to the seam lines. Press the allowances up.
Tip
To help with selecting the right piece: make sure that you’re sewing the widest side of the waistband, and that the side with the straight bit goes where the placket extension is. Don’t ask me how I needed this :D
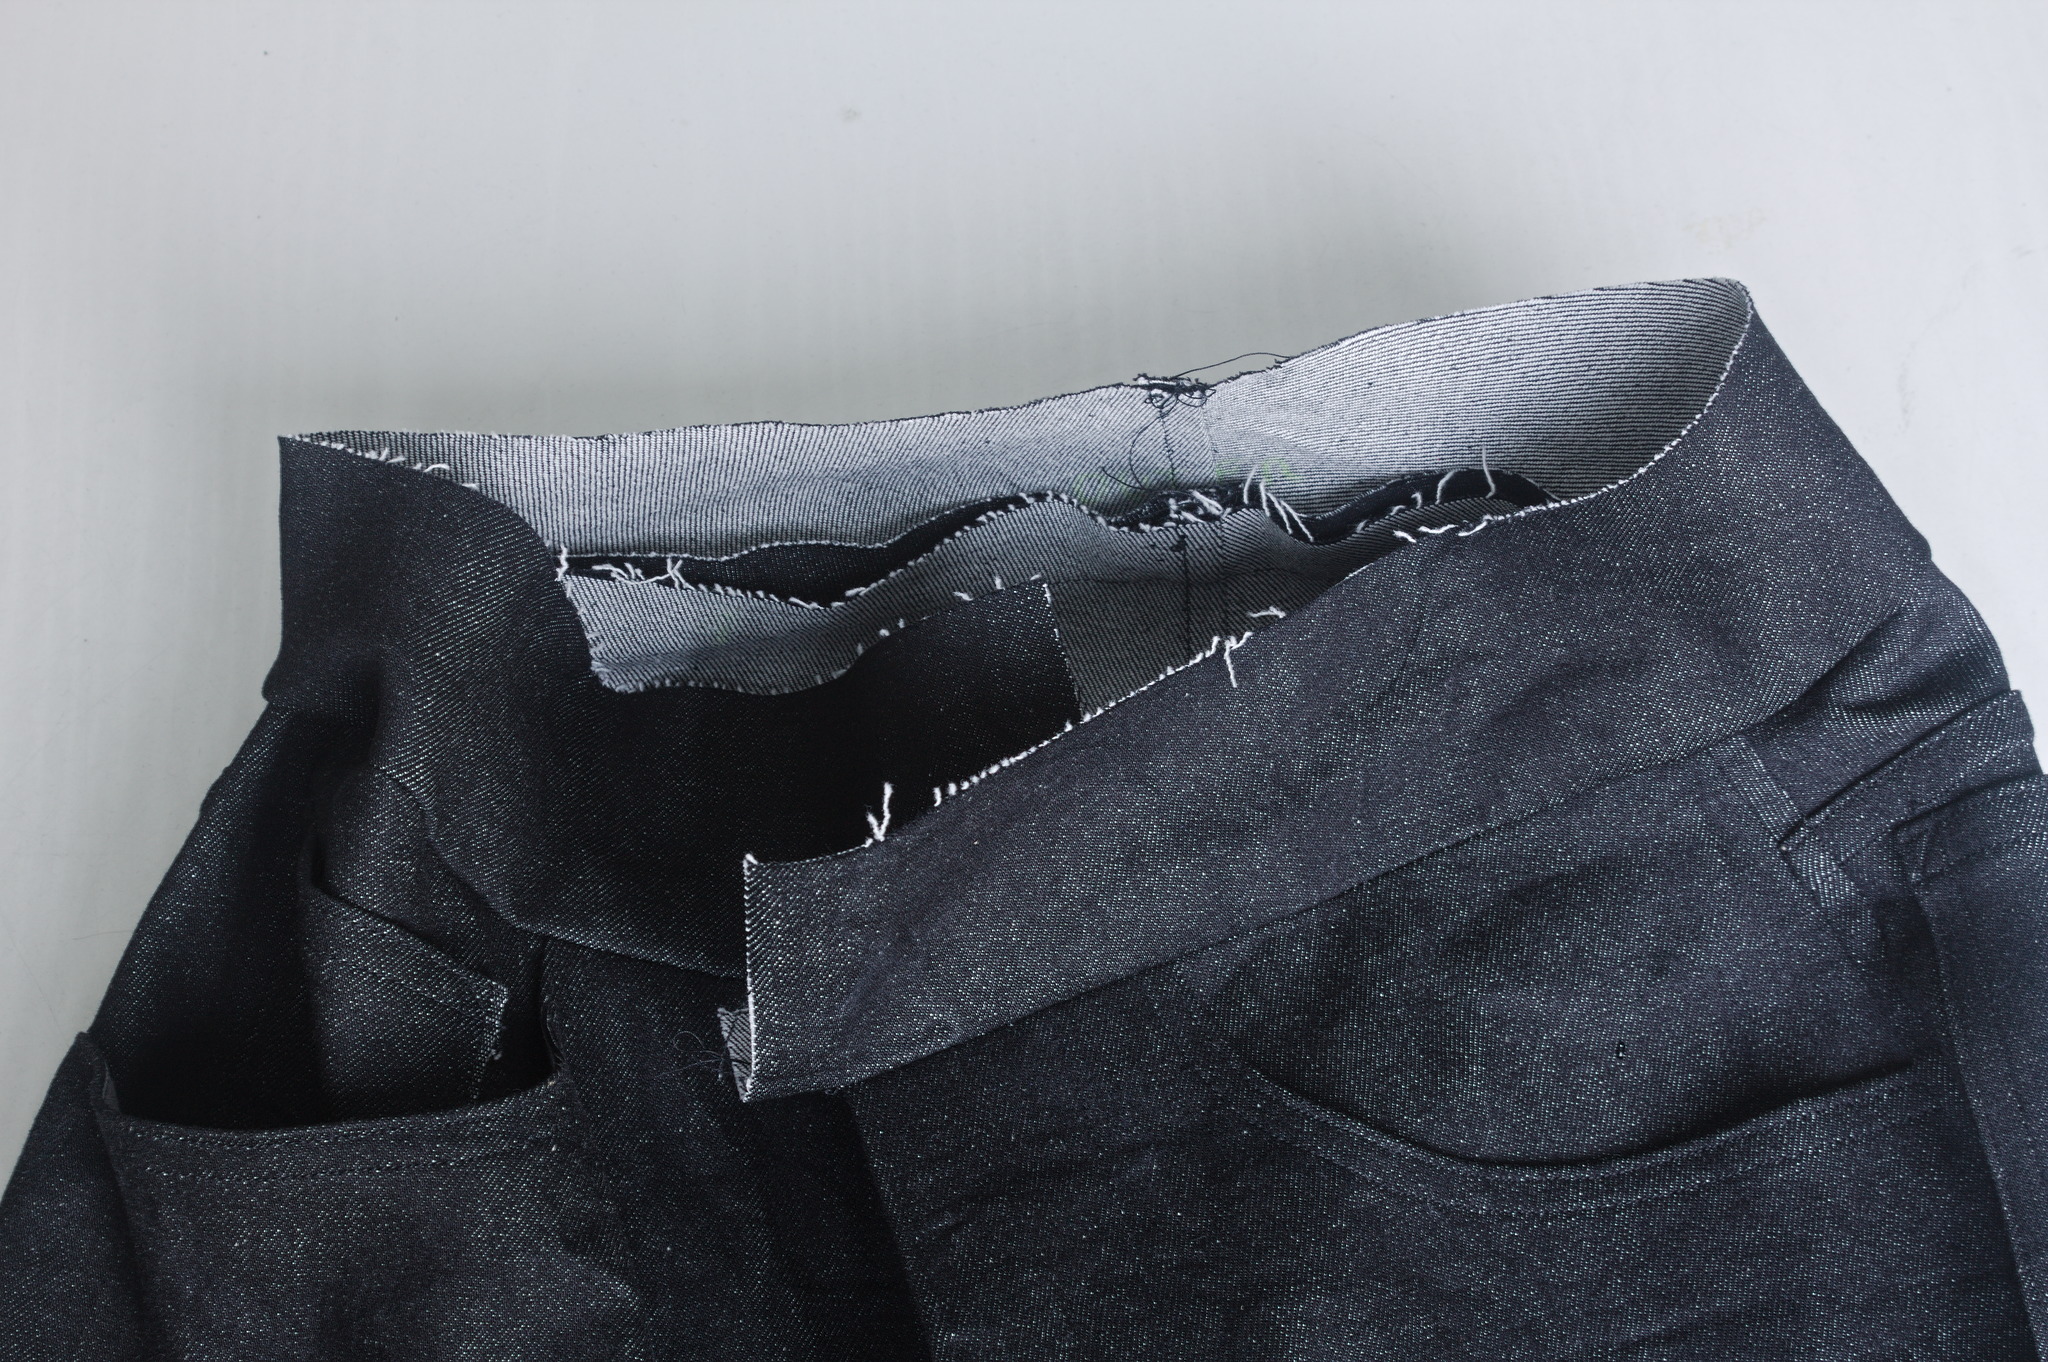
Right sides together, put the waistband facing on the outer facing and sew all 3 remaining edges.
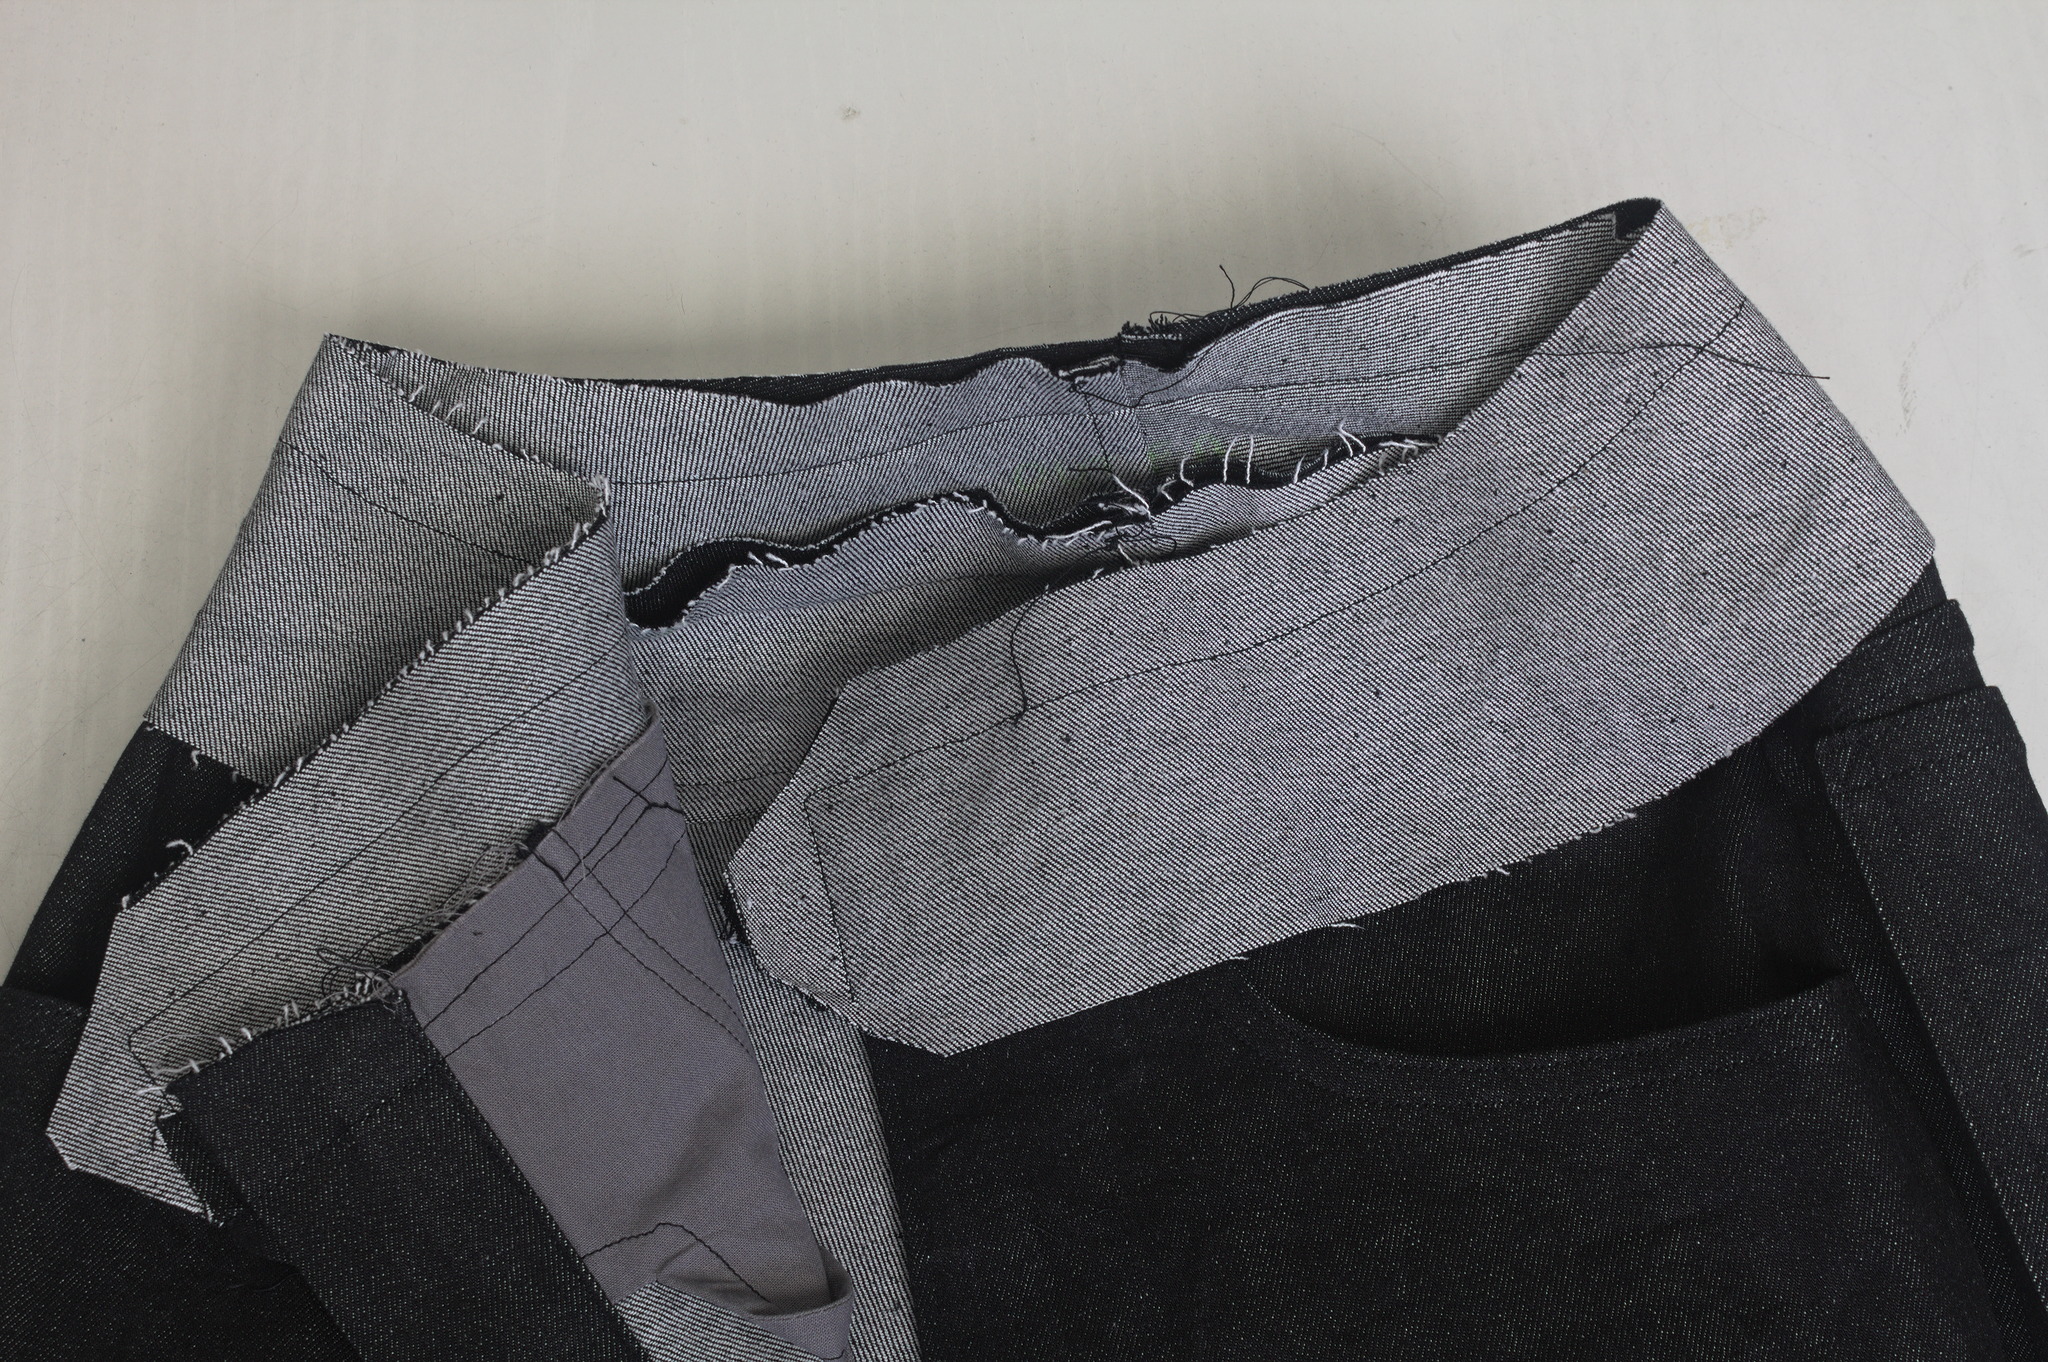
Press inside out; you may want to clip the corners, and if needed clip and notch the curved edges, but don’t trim the allowances, as they are used to give more body to the waistband.
Press the remaining edge up, enclosing all allowances, and topstitch at 2 mm and then at 1 cm from all four edges.