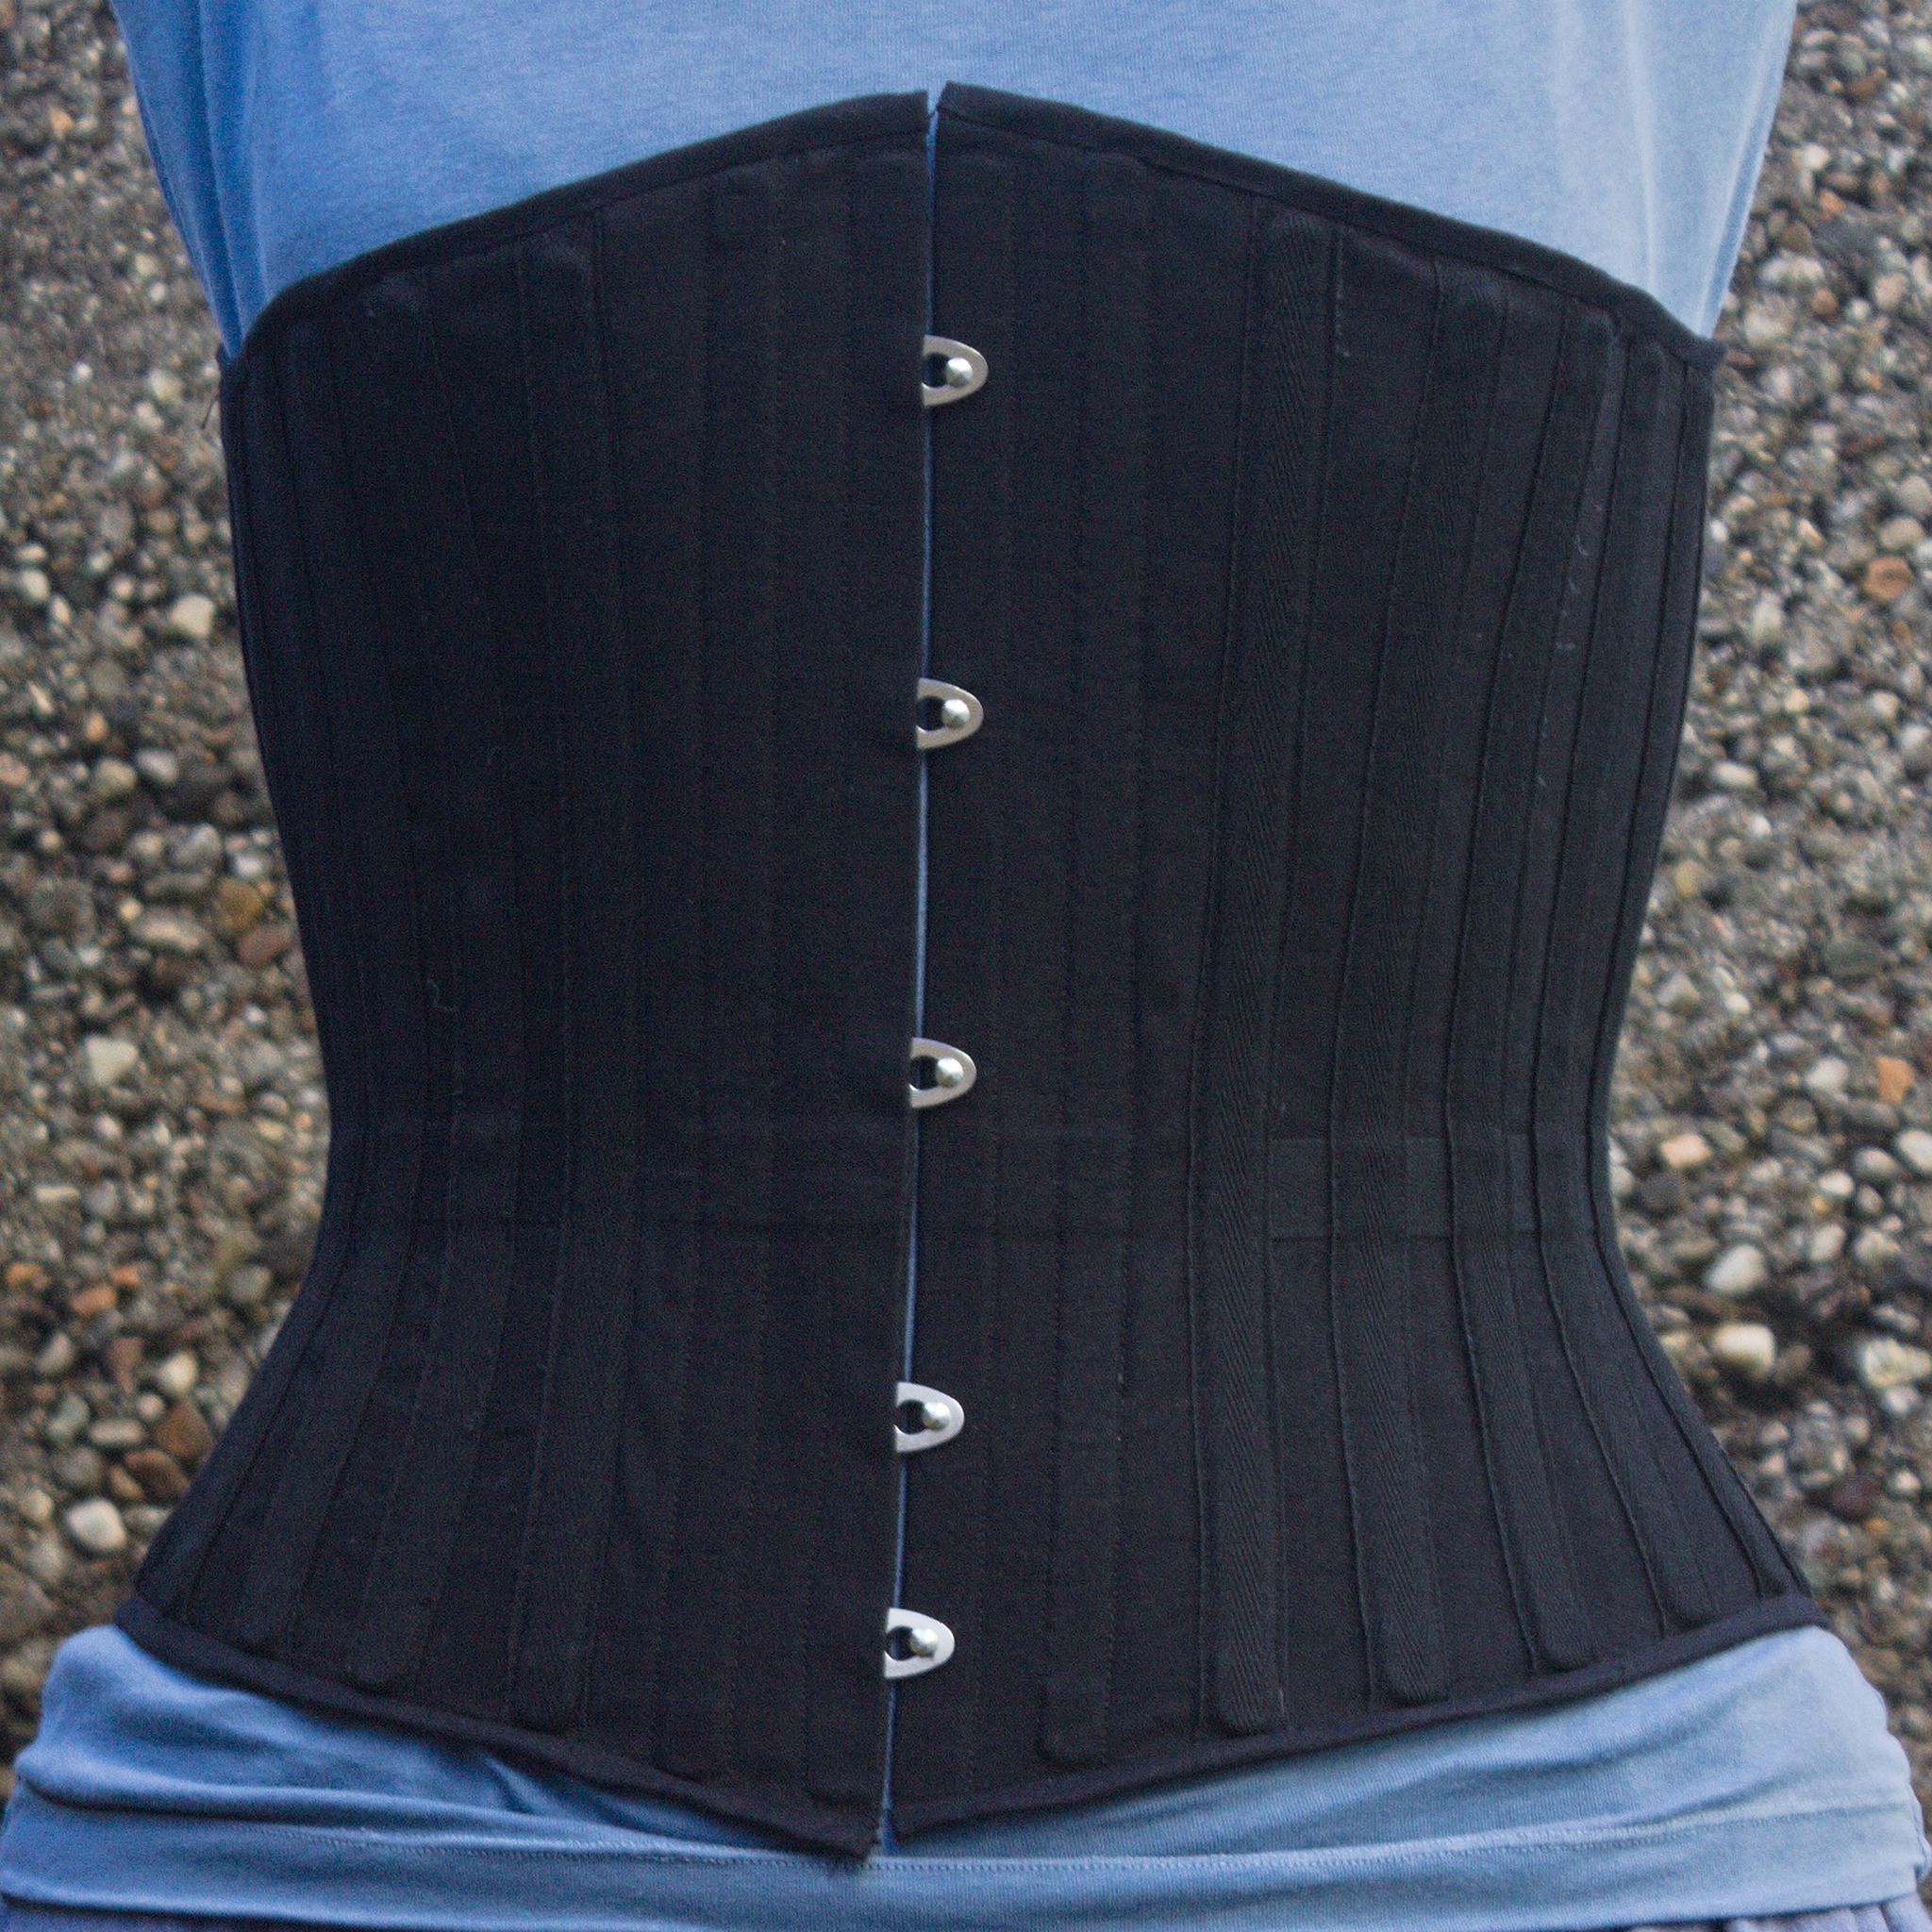
Single Layer Midbust Corset
This is a simple corset in 6 panels, non specifically based on an historical model, but with an outline that is generically suitable for a good part of the Victorian age.
It is a single layer with applied boning channels made of tape (or self fabric): a channel on each seam is used to neaten and reinforce the seam, so that it can be simply pressed flat for less bulk rather than requiring more complex finishes.
The instructions allow for boning channels on either the outside or the inside of the corset, according to taste.
Like all corsets, it’s not really suitable for beginner sewists, but the hardest part is taking good measurements, and then it requires more precision than advanced skills, so an intermediate sewist would probably be able to do it.
The instructions assume that it will be sewn by machine: sewing it by hand would be feasible, but possibly a bit hard on the hands because of the use of sturdy fabric. Compared to other corset construction methods this one may require sewing through less layers of coutil, especially if using tape rather than self fabric for the boning channels.
Materials
Fabric
less than 1 m of strong corset fabric, e.g. coutil.
Notions
strong sewing thread to match the fabric — a good brand of cotton thread or sewing silk, linen if you’re sewing by hand;
boning: ~ 6 m 6 - 10 mm spiral steel and ~ 2 m 10 mm flat steel (precise amounts will depend on the height of the corset and how many boning pieces you want to add) — you can also substitute both with ~ 8 m 6 - 10 mm synthetic whalebone;
one steel busk to fit the center front height;
~ 6 m 25-30 mm twill tape suitable for boning channels, or the same amount premade boning channel tape;
~ 1 m 15 mm twill tape suitable for a waist tape;
~ 3 m bias tape to match or contrast with the fabric, to bind the top and bottom edge;
~ 30 two-parts metal eyelets;
buttonhole twist silk for flossing,
about 6 m lacing cord.
For a double boning channel the tape should be at least double the width of the boning plus 10 mm, for a single boning channel at least the width of the boning plus 8 mm; tape that is a bit too wide is better than tape that is too narrow.
Pattern
the file measurements.vit is used by default by the pattern
file and has the list of needed measurements.
Measurements
These measurements should be taken while wearing just modern underwear (including a well fitting bra); a tight camisole with side seams can help to take the arc measurements, and it’s helpful to mark at least the waist, but ideally all of the circumferences with tape.
Full circumferences:
bust_circ(G04)Circumference around Bust;
lowbust_circ(G05)Circumference under the breasts;
waist_circ(G07)Circumference around the Waist;
highhip_circ(G08)Circumference at the hip bone level;
hip_circ(G09)Circumference around the widest part of the hips;
The same measurements, just on the front, from an ideal side seam to an ideal side seam:
bust_arc_f(G12);
lowbust_arc_f(G13);
waist_arc_f(G15);
highhip_arc_f(G16);
hip_arc_b(G17);
And the corresponding back arcs; in the valentina file these are calculated from the two measurements above (but you may want to take these measurements as a double check):
bust_arc_b(G28);
lowbust_arc_b(G29);
waist_arc_b(G31);
highhip_arc_b(G32);
hip_arc_b(G33);
Vertical measurements; except for the first one they are taken straight in the front (i.e. not following the curve of the body) between the levels where the above measurements had been taken:
armpit_to_waist_side(H03)this is used to check the height of the corset under the armpit and should follow the curve of the body;
bust_to_waist_f(H10);
lowbust_to_waist_f(H11);
waist_to_highhip_f(H30);
waist_to_hip_f(H31);
And finally, a custom measurement that is specific for corsets:
reduced_waist_circthis depends on the squishyness and taste of the person: 2-4 cm less than the natural waist is good if no waist reduction is desired (the corset should fit snugly on the waist), but more is of course a valid choice.
Tip
A waist reduction of 2-4 cm should result in a corseted waist (measured over the corset) that is about the same as the uncorseted waist, making it easier to make clothing that can be worn either with or without a corset, for maximum historybounding potential.
Pattern
Get the valentina file for the pattern,
midbust_corset.val.
You also need to decide the following measurements and set them in the table of variables:
waist_to_top_ffrom the waist to the top of the corset in the front: around the measurement of
bust_to_waistis usually good;waist_to_top_sidefrom the waist to the top of the corset under the armpit: this should be less than
armpit_to_waist_side;waist_to_top_bfrom the waist to the top of the corset on the back: often, but not always, the same as
waist_to_top_f;waist_to_bottom_ffrom the waist to the bottom of the corset in the center front;
waist_to_bottom_sidefrom the waist to the bottom of the corset on the side;
waist_to_bottom_bfrom the waist to the bottom of the corset in the center back: often, but not always, the same as
waist_to_bottom_f;lacing_gapusually 5 - 10 cm;
sewing_allowance2 cm will allow for easy adjustments of the pattern.
Instructions
Mockup
If this is the first time you’re making a corset from this pattern it’s strongly recommended that you start by making a mockup from a sturdy but cheap fabric: some cotton canvas or duck is often a good idea, but avoid anything that is elastic.
When cutting the panels mark the line of the waist in a way that will be visible when trying on the mock-up.
If this is also the first corset you’re making you may want to use it as practice to insert the busk, otherwise you can cheat and simply baste it to the edge of the front panel with stripes of scrap fabric.
Assemble the mock up following the instructions for the corset, keeping the seam allowances towards the outside, but don’t add a waist tape, nor boning channels over the seams; for better results you may want to add a boning channel to the middle of each panel (it can just be a strip of scrap fabric).
It is also convenient to have a set of lacing stripes: two stripes of sturdy fabric folded in half with a boning channel near the fold, a line of closely spaced grommets and another boning channel, pre-laced with cotton lace, to be basted to the folded back panels with a line of stitching just outside the boning channel further from the folded edge.
If you don’t have one yet you can fully finish panel 6 with boning channels and grommets, and then reuse it for your next corset.
Once the mockup is assembled, try it on when standing up and check:
that the size is precisely correct;
that the seams lie vertically on the body;
that the waist line correspond to the position of your waist;
that there are no significant wrinkles (you do need the corset to be boned to be able to check this);
then sit down and check that you’re not being poked in the legs by the busk or any other boning.
If you find that you need to adjust the size, or the position of the seam between panels 3 and 4, I’d recommend changing the measurements in the valentina tape file, and generating a new pattern: this way the same measurement file can be used again for different patterns.
If you had to do significant changes you may now want to make a second (and third, and…) mockup, or you can start cutting into the real fabric, as the wide allowance will still allow for minor adjustments.
Cutting
Making sure to follow the grainline, cut 2 each of panels 2-6, 1 each of panels 1 left, right and right facing (both the center front and the center back panels will have two layers, everything else will be single layer).
Note that, assuming that you’re marking the fabric from the wrong side, the pattern is for a corset with external boning channels: if making internal boning channels you will have to mirror all panel 1 pieces.
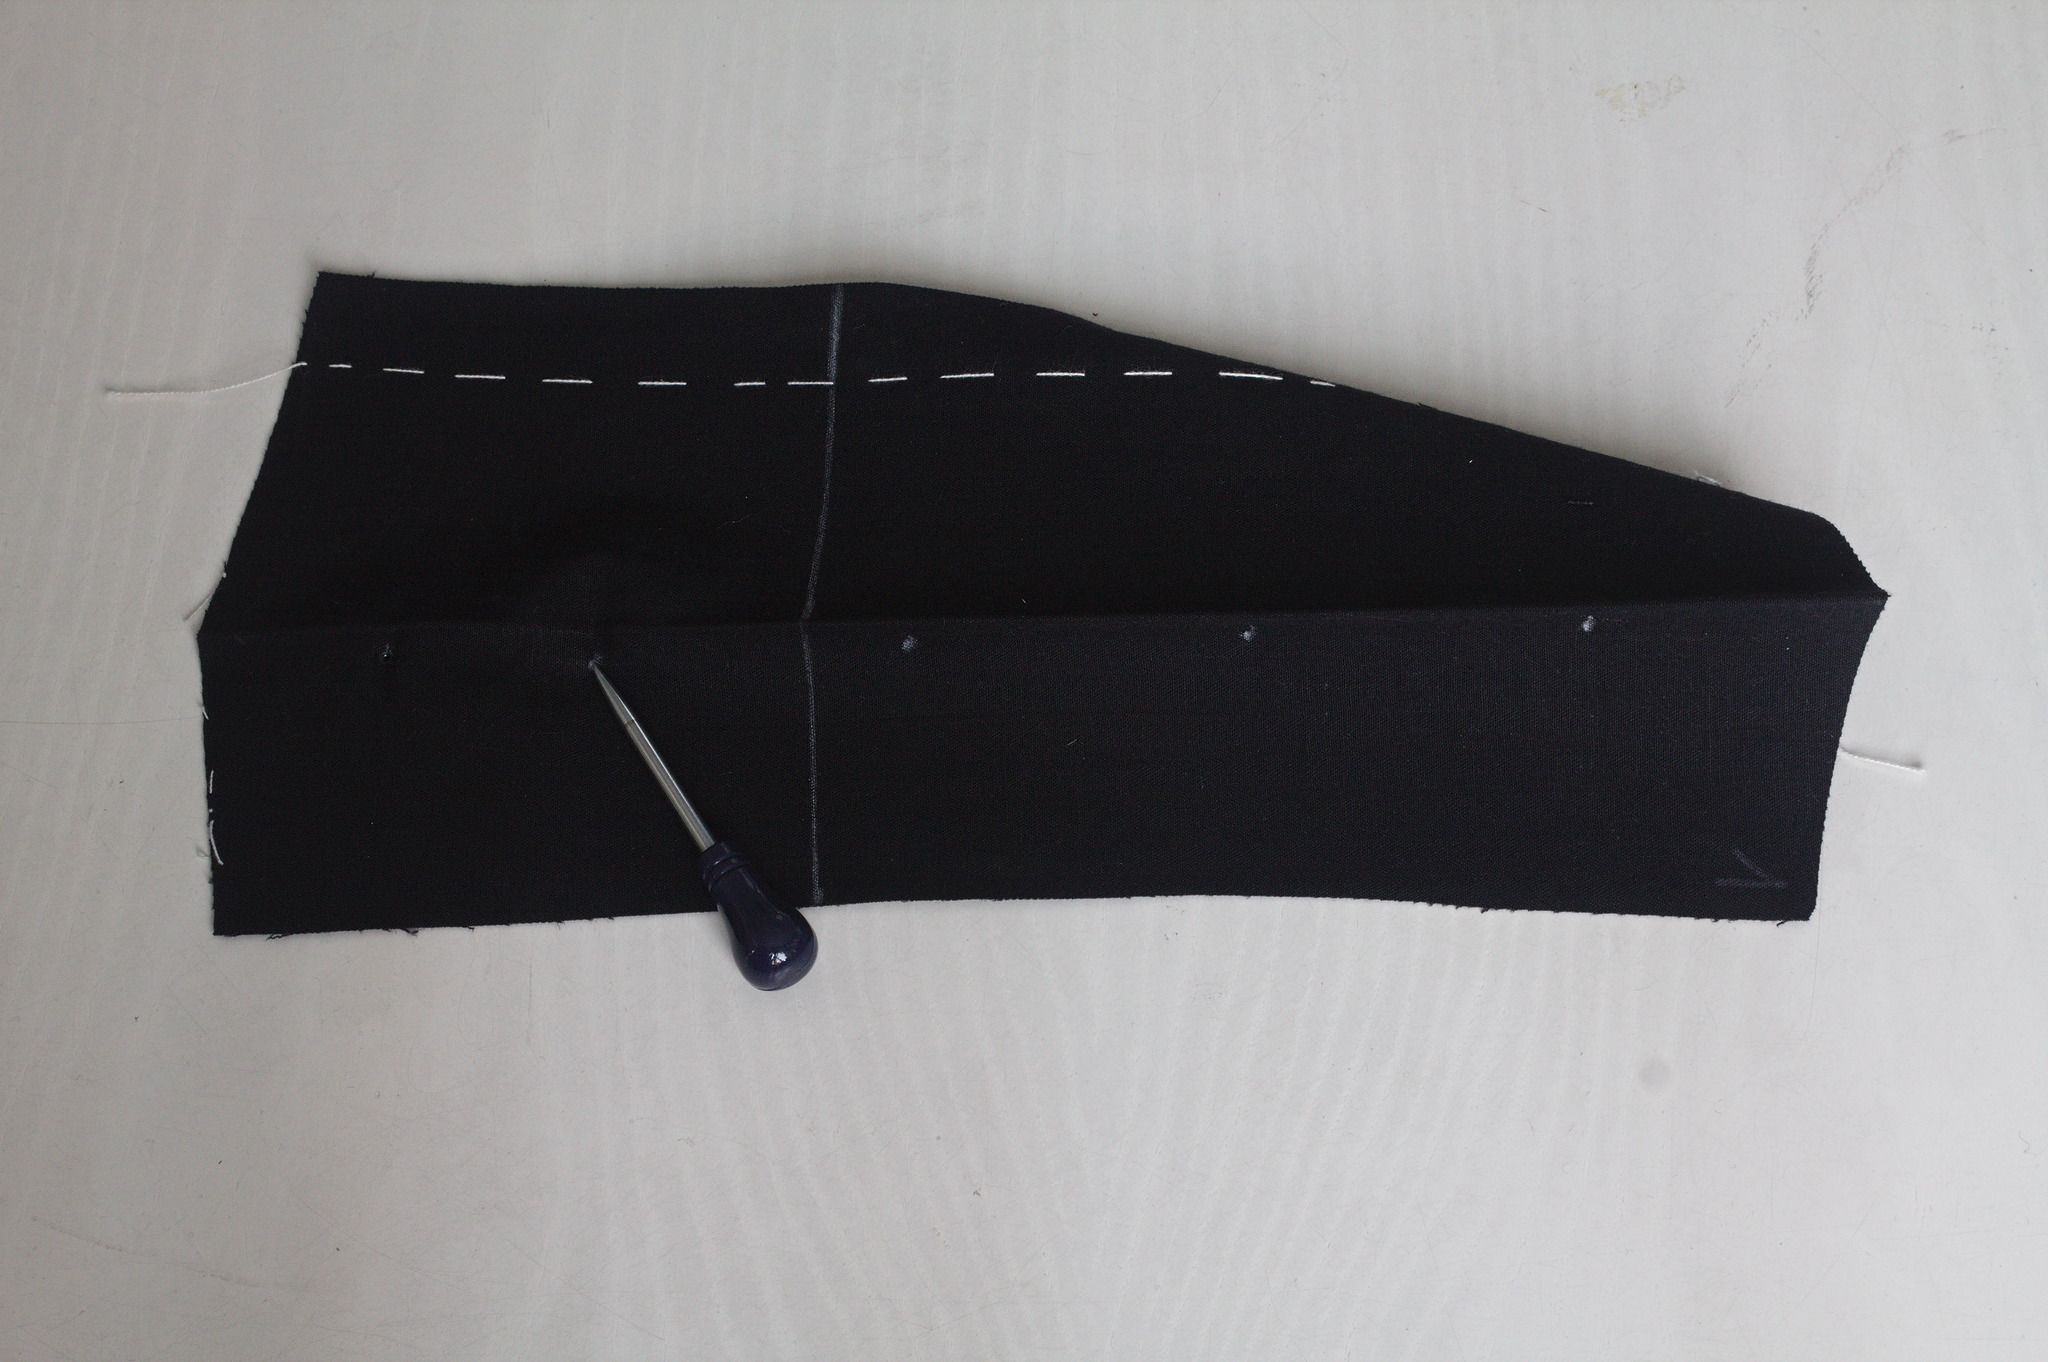
Carefully mark all sewing lines as well as the waistline. Optionally mark also the center panel line (grainline) if you want to add boning on it.
I’d also recommend marking each panel with its number, whether it’s the right or left panel, and possibly the vertical direction to avoid mistakes when assembling.
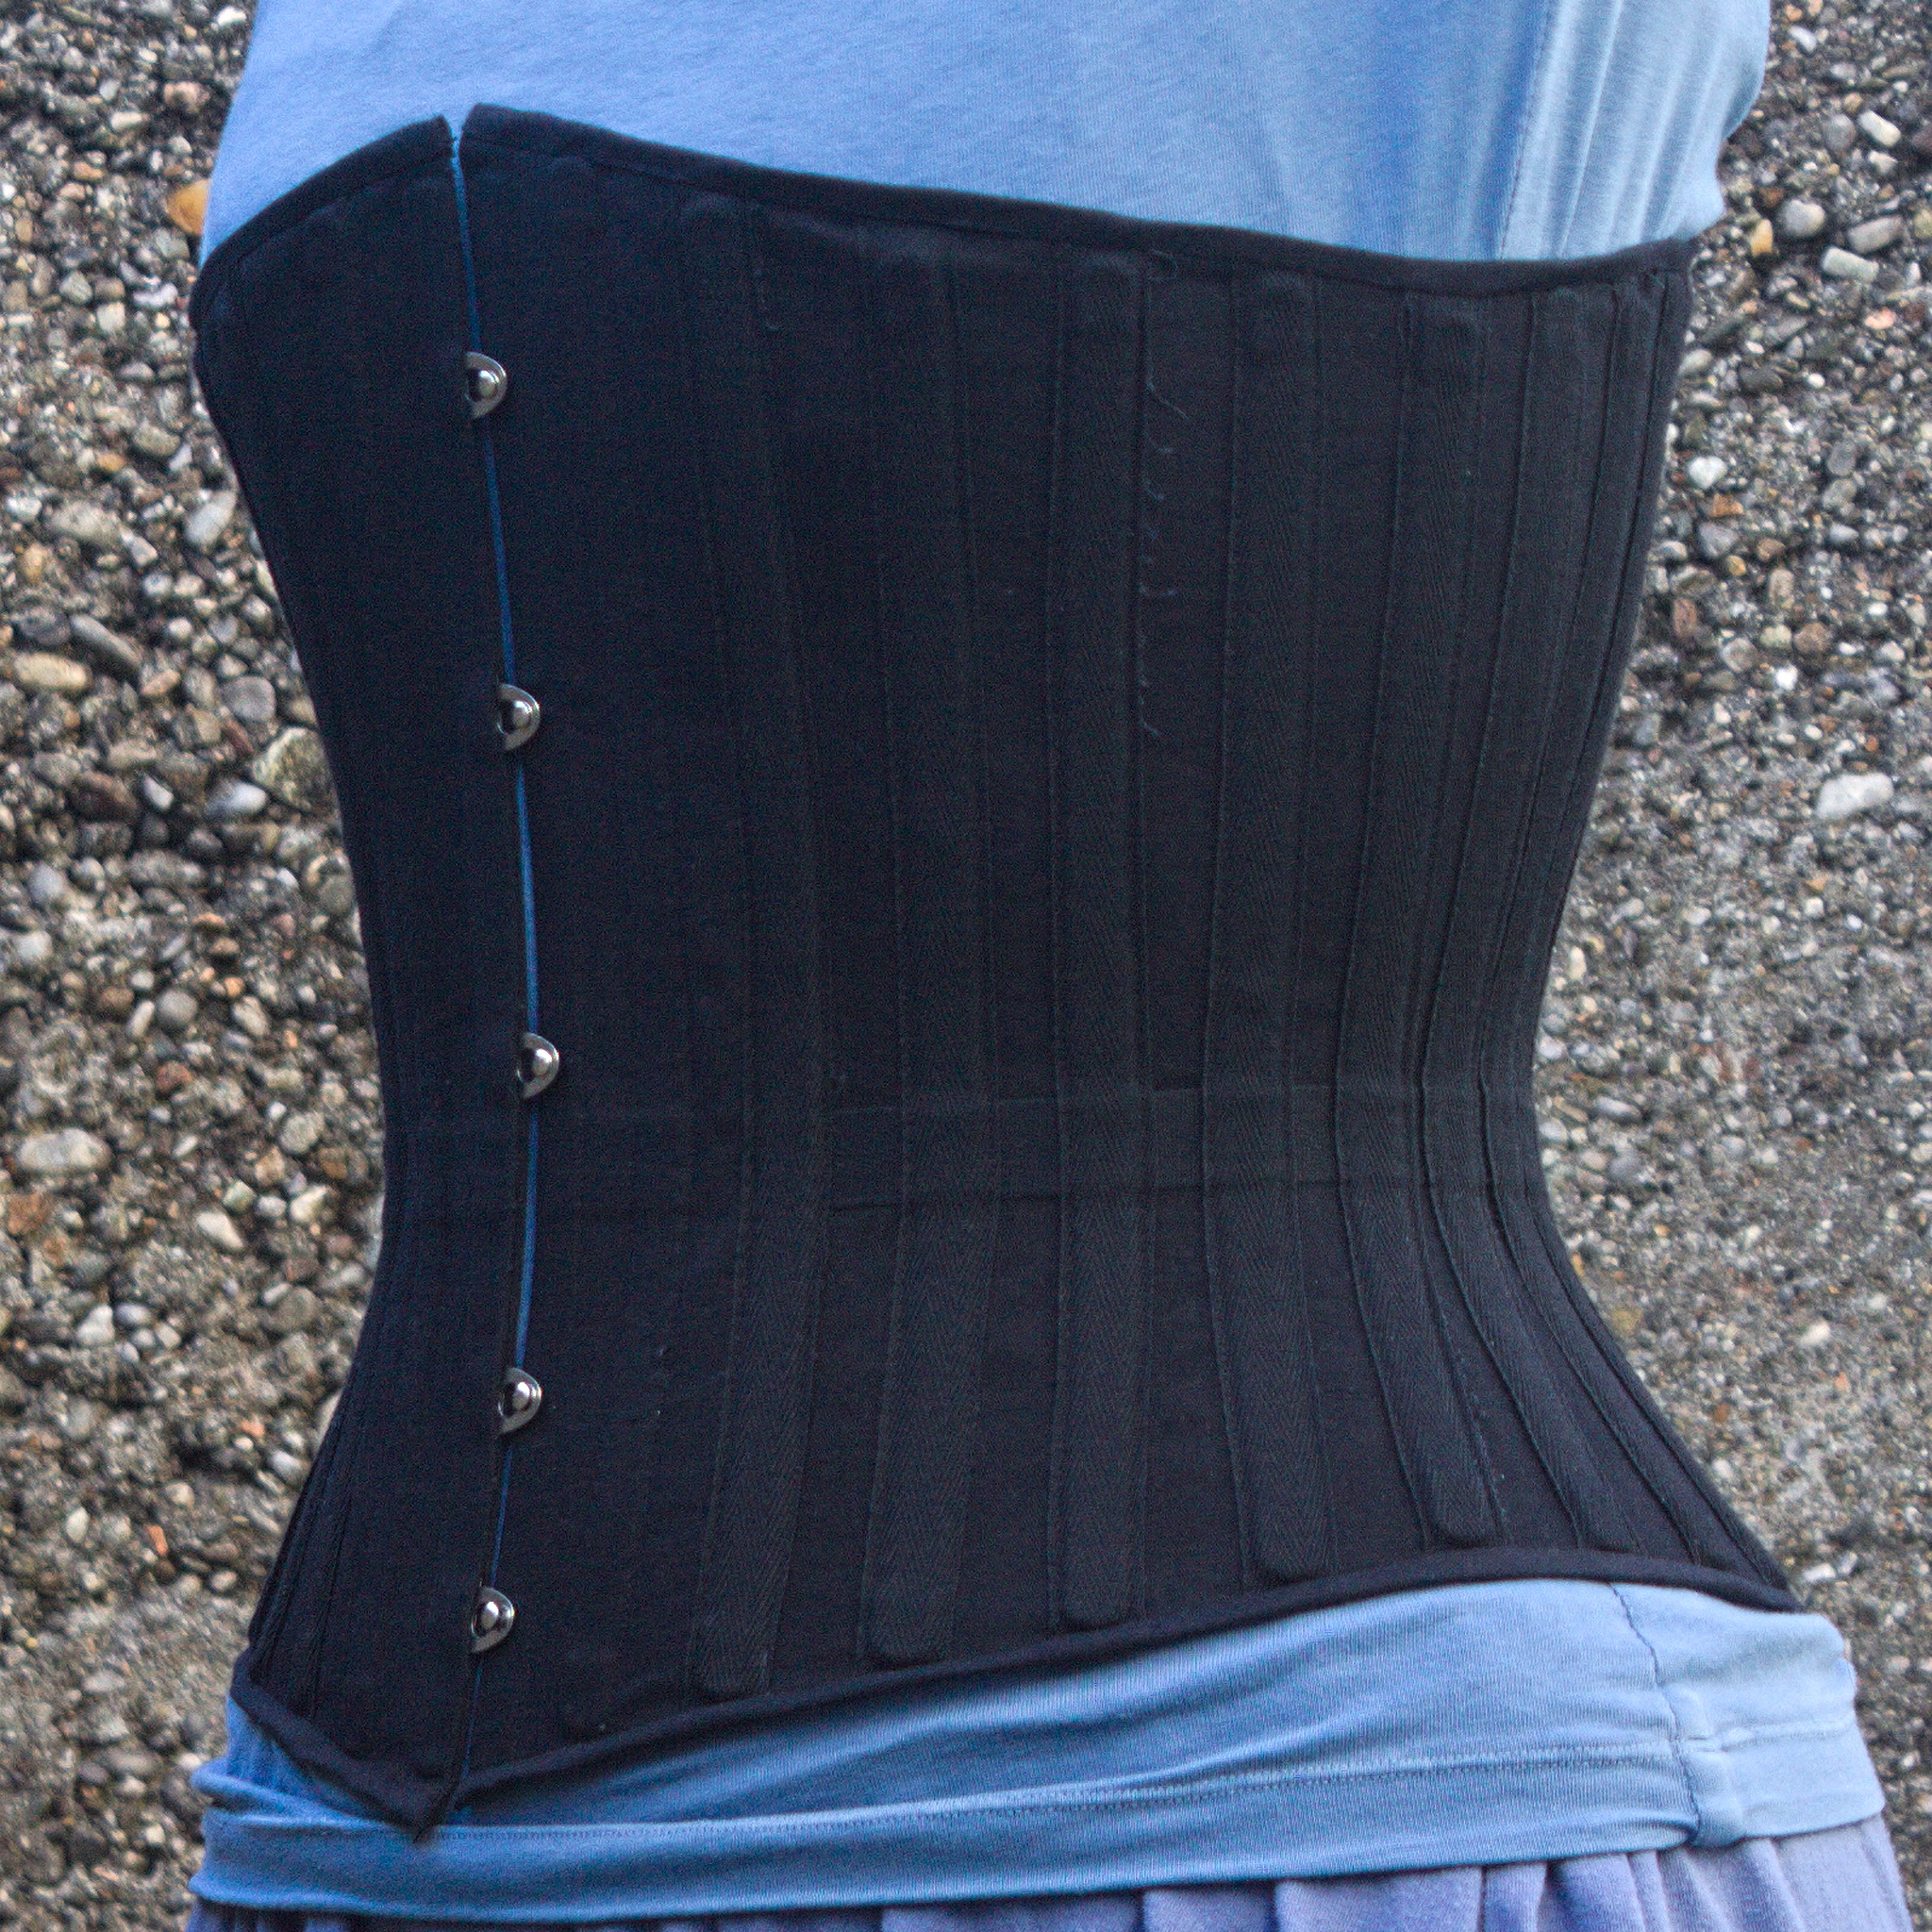
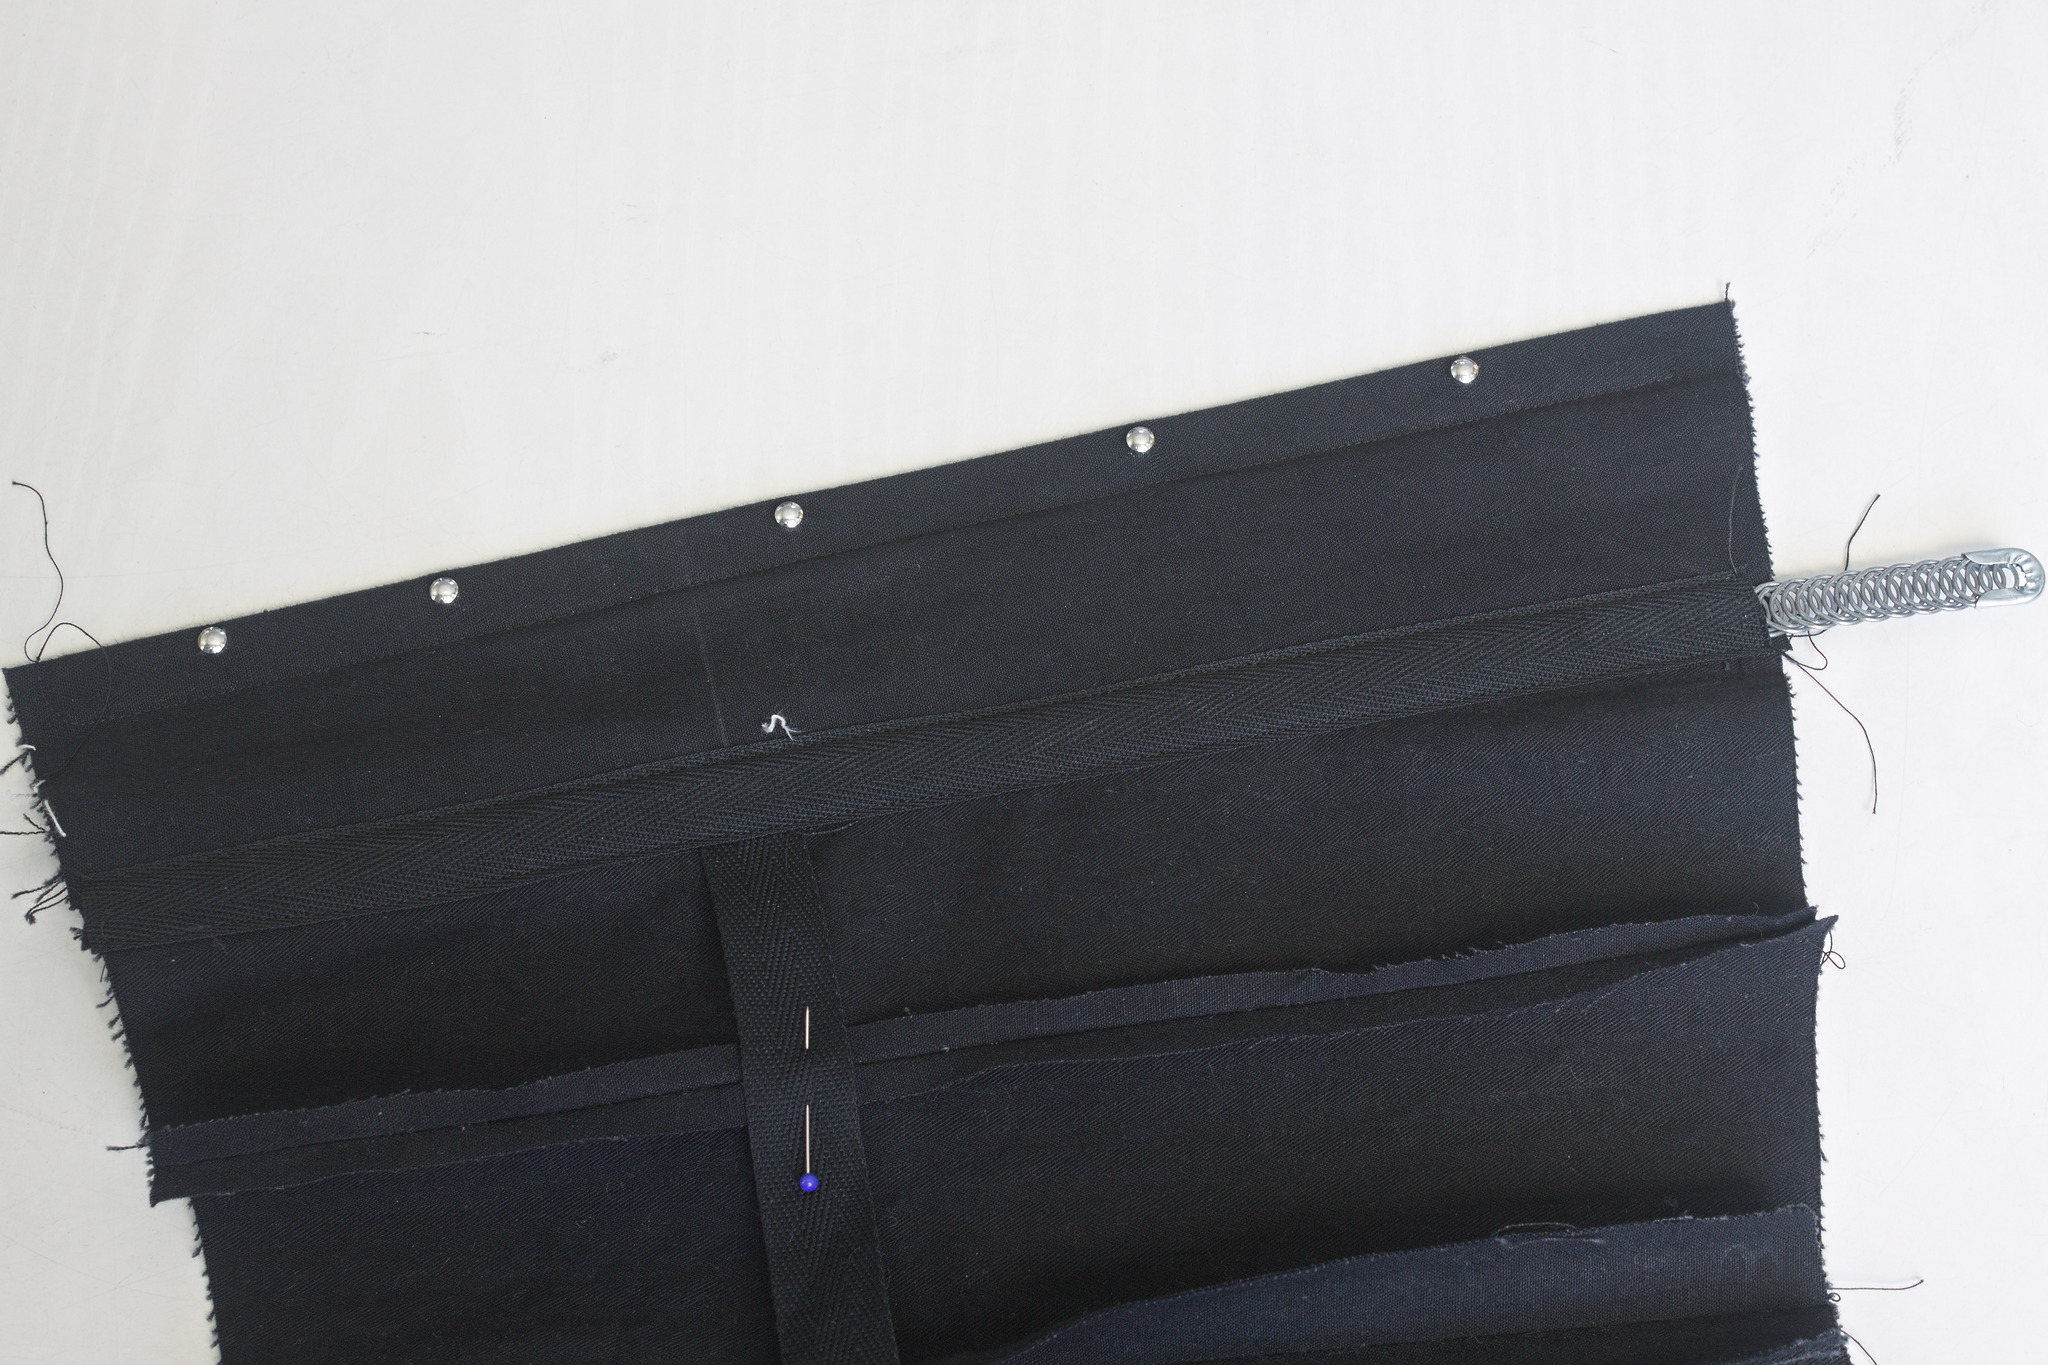
Busk Insertion
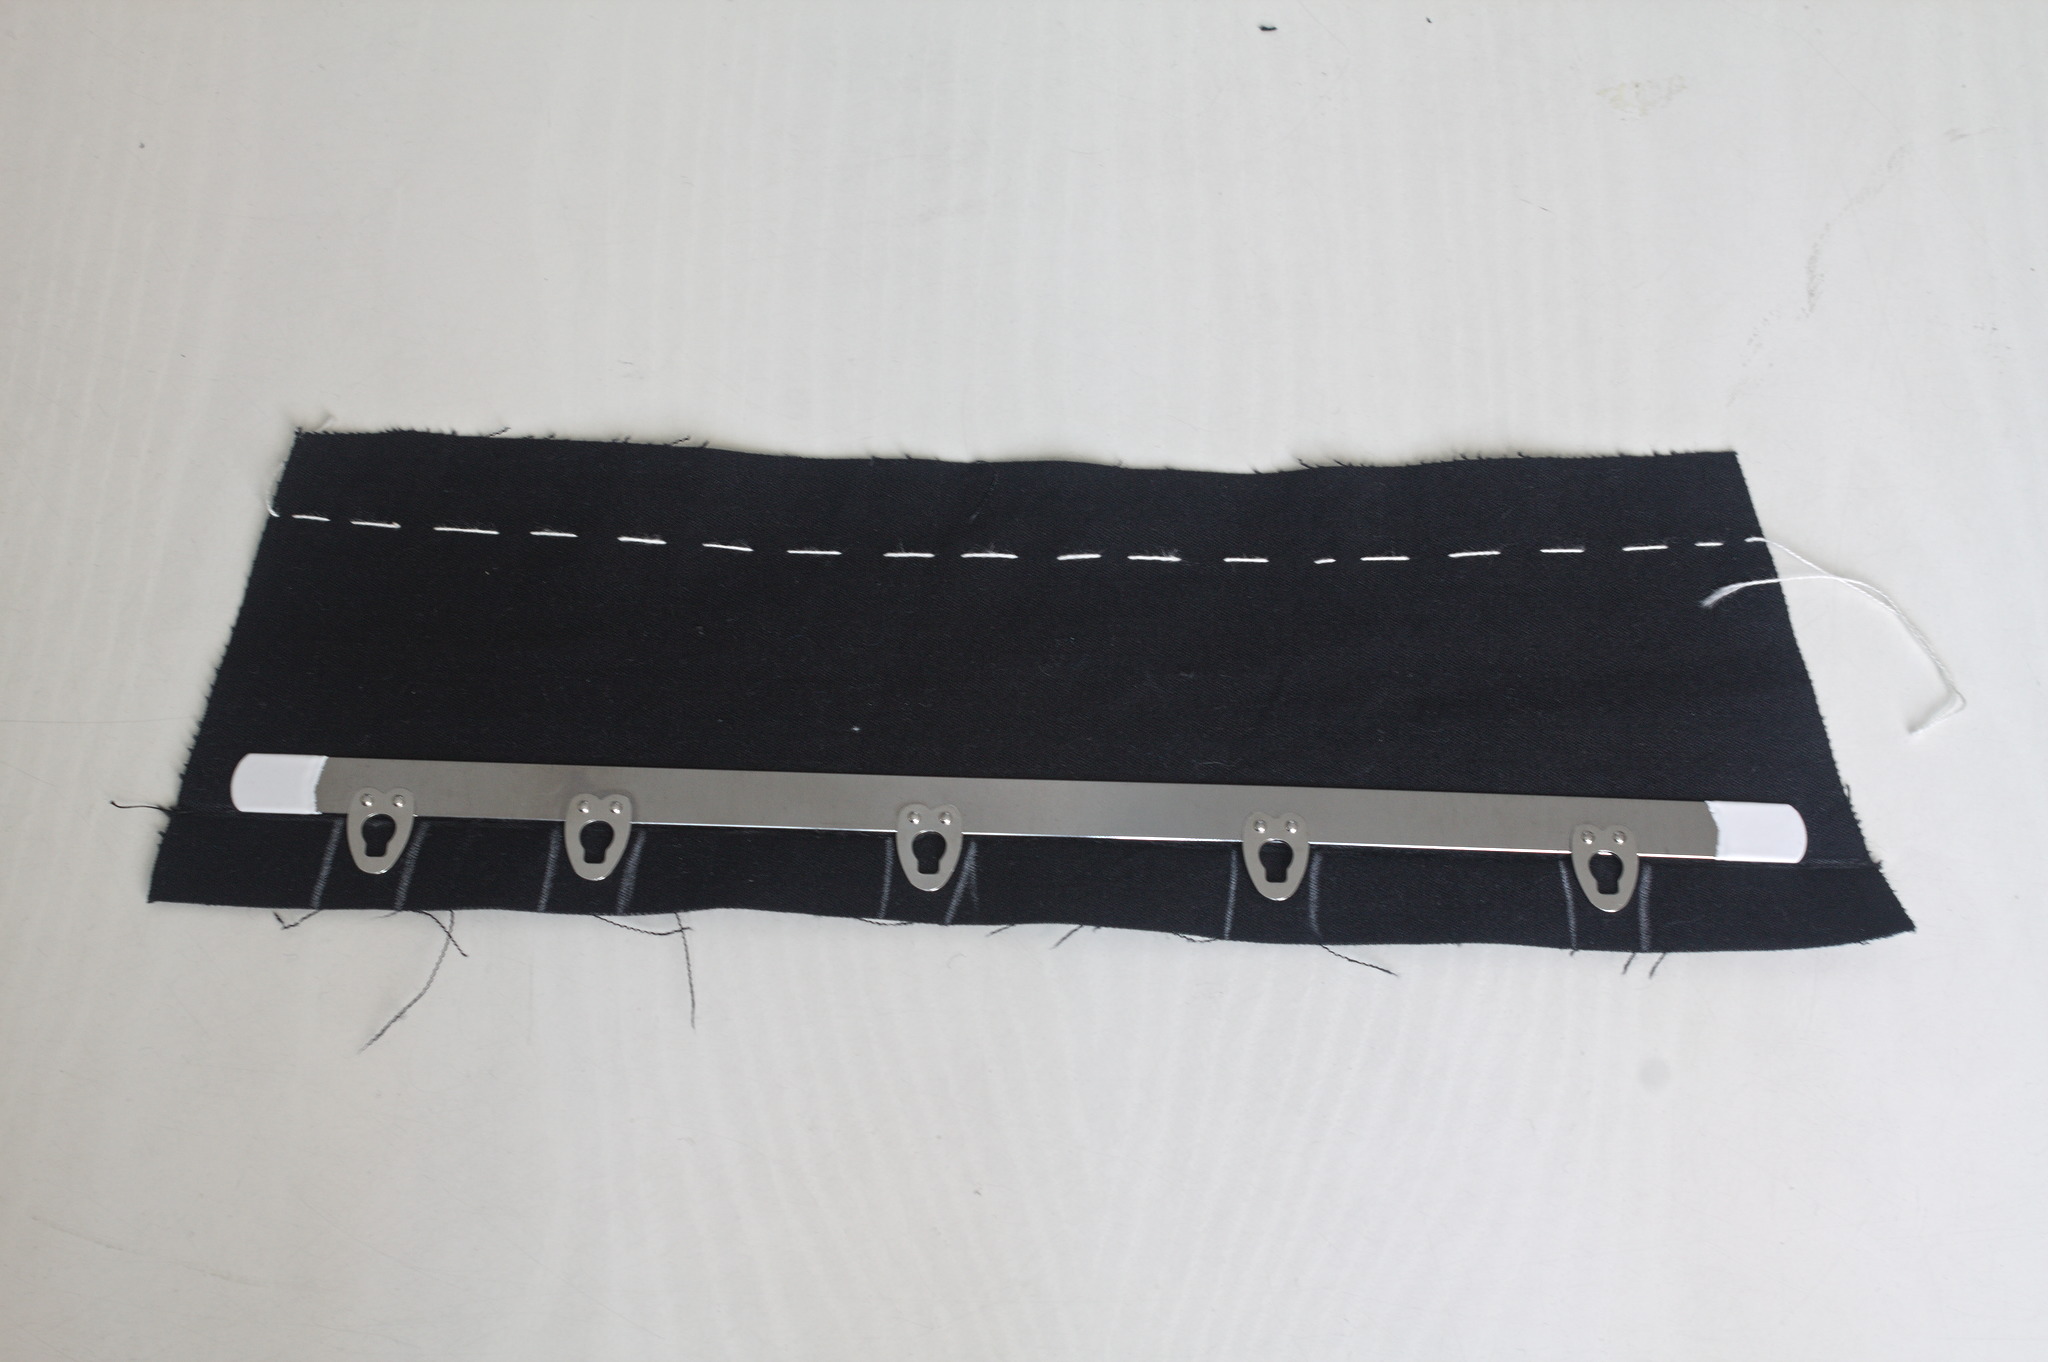
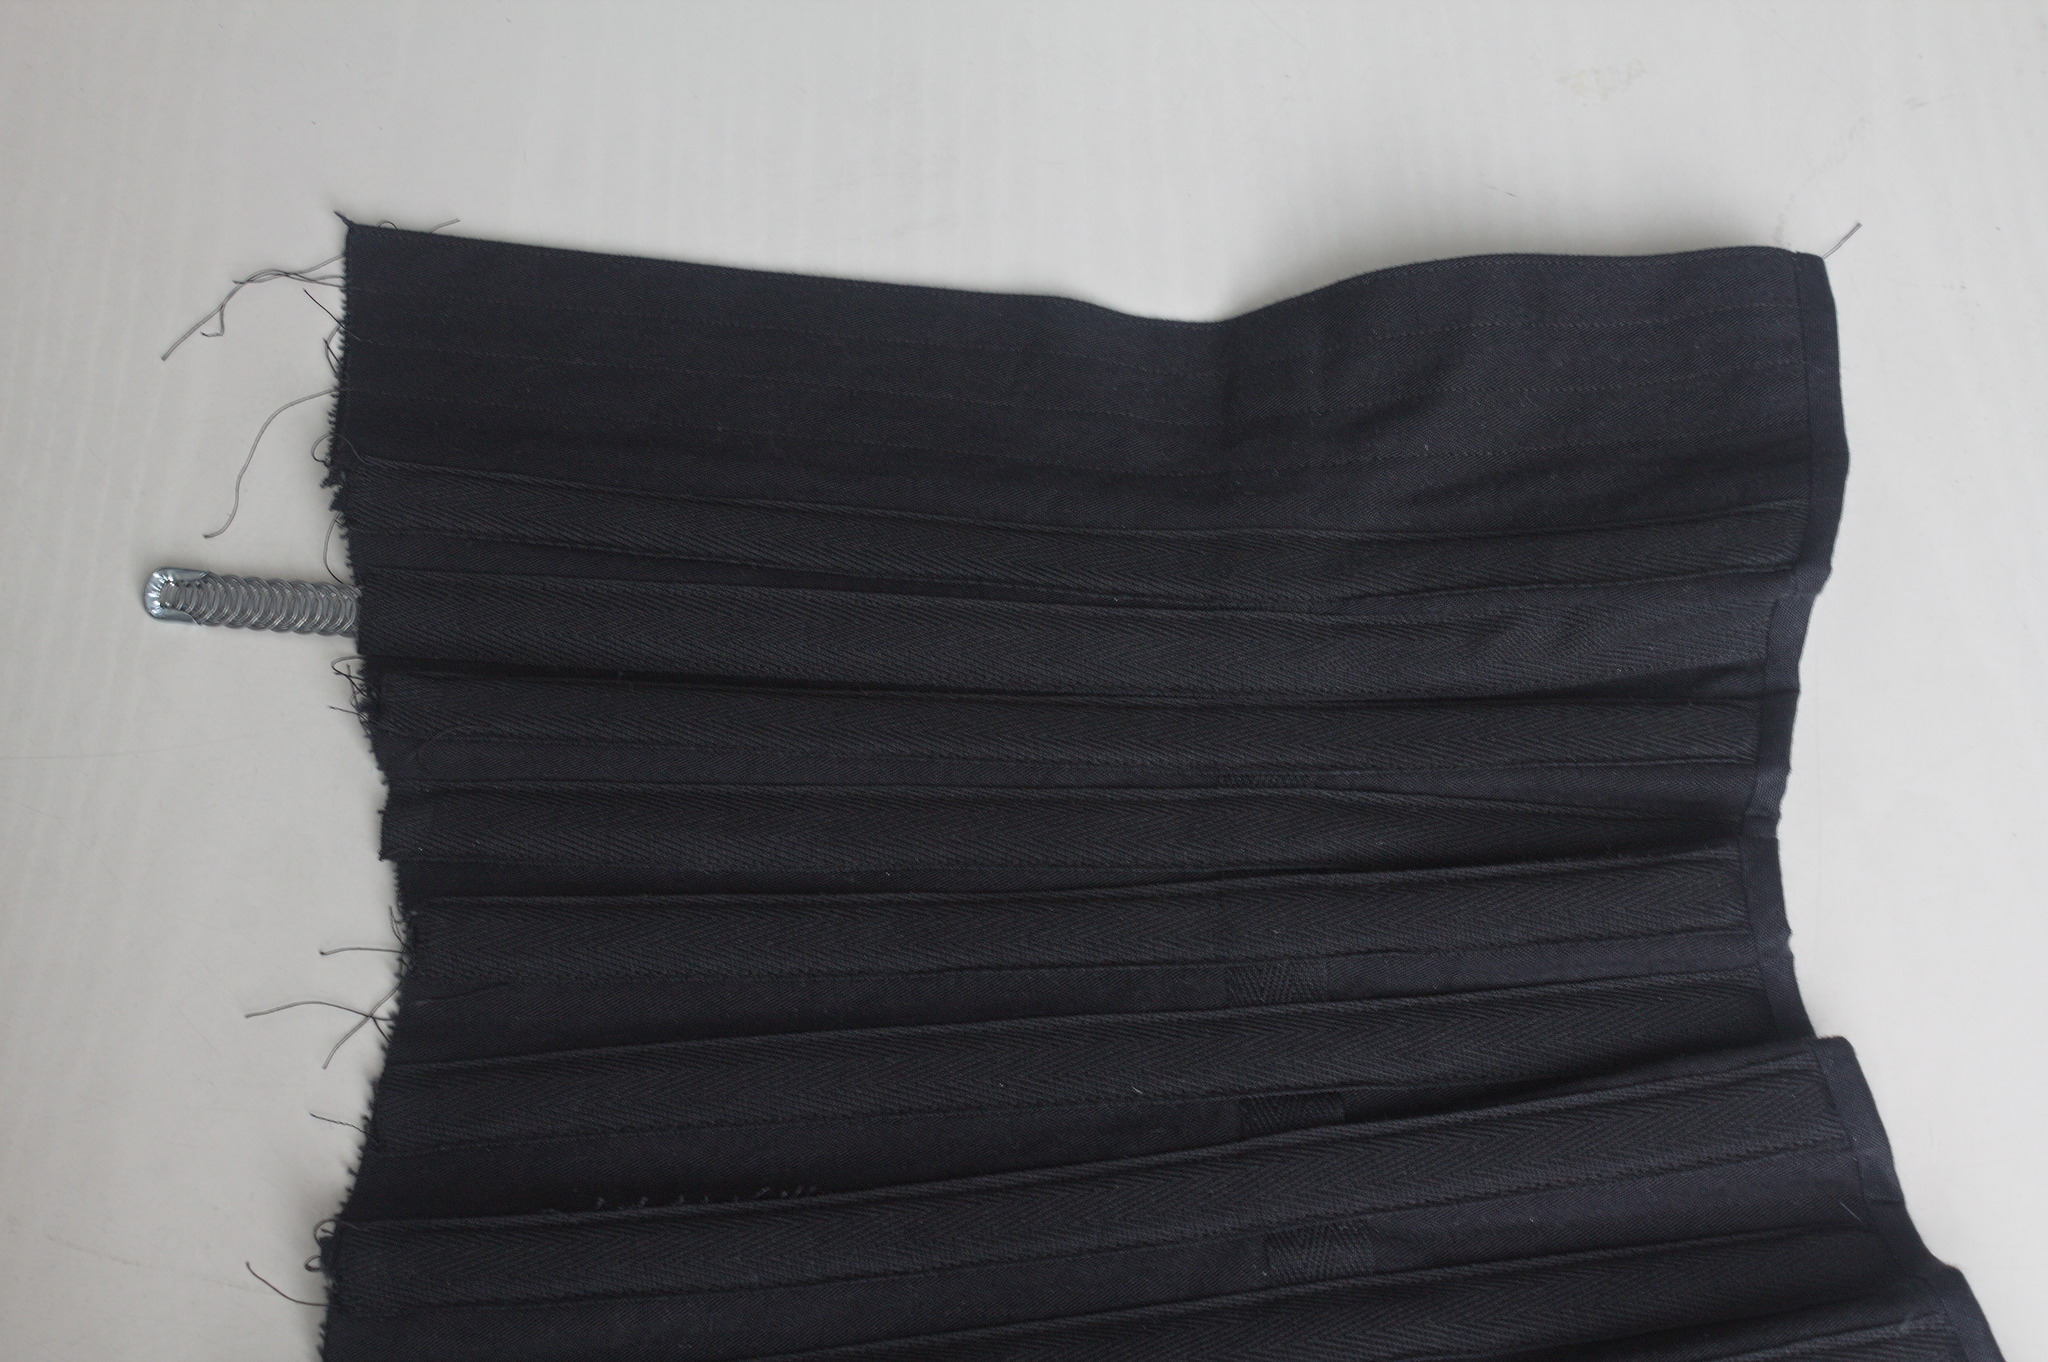
Put the eye side of the busk on the wrong side of panel 1 right, aligned with the center front seam: the eyes that are set closer to each other than the rest should be at the bottom; mark the position of each eye.
Put panel 1 right over panel 1 right facing, right sides together, and sew the center front seam starting from the top and leaving a gap for every eye. Press flat, press with right sides out.
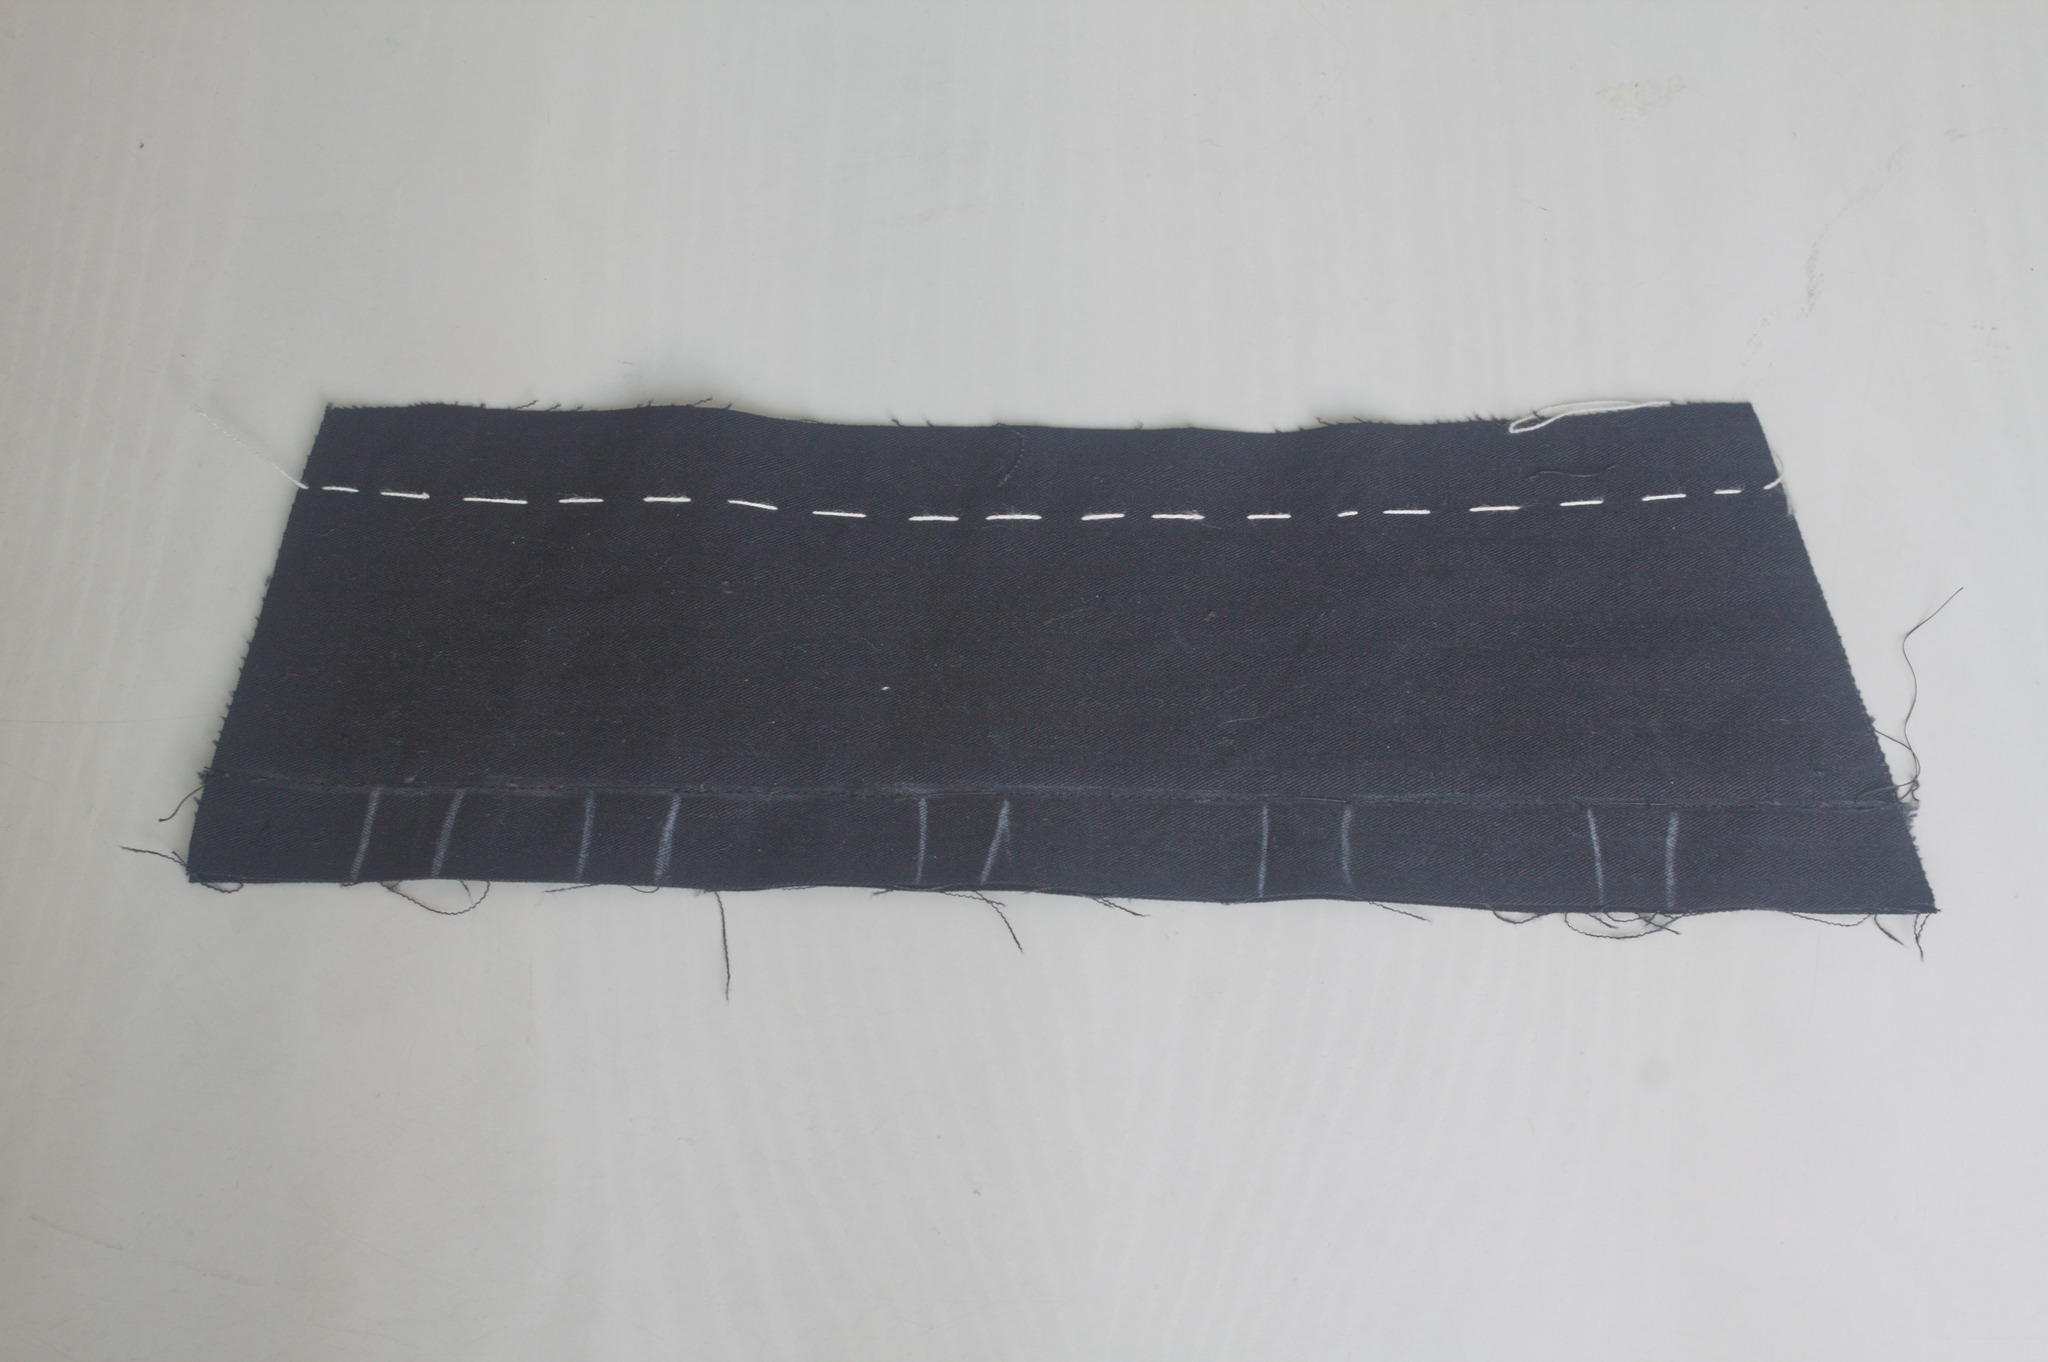
Cut two pieces of waist tape as long as half the circumference of the waist plus the (finished) width of panels 1 and 6 at the waist.
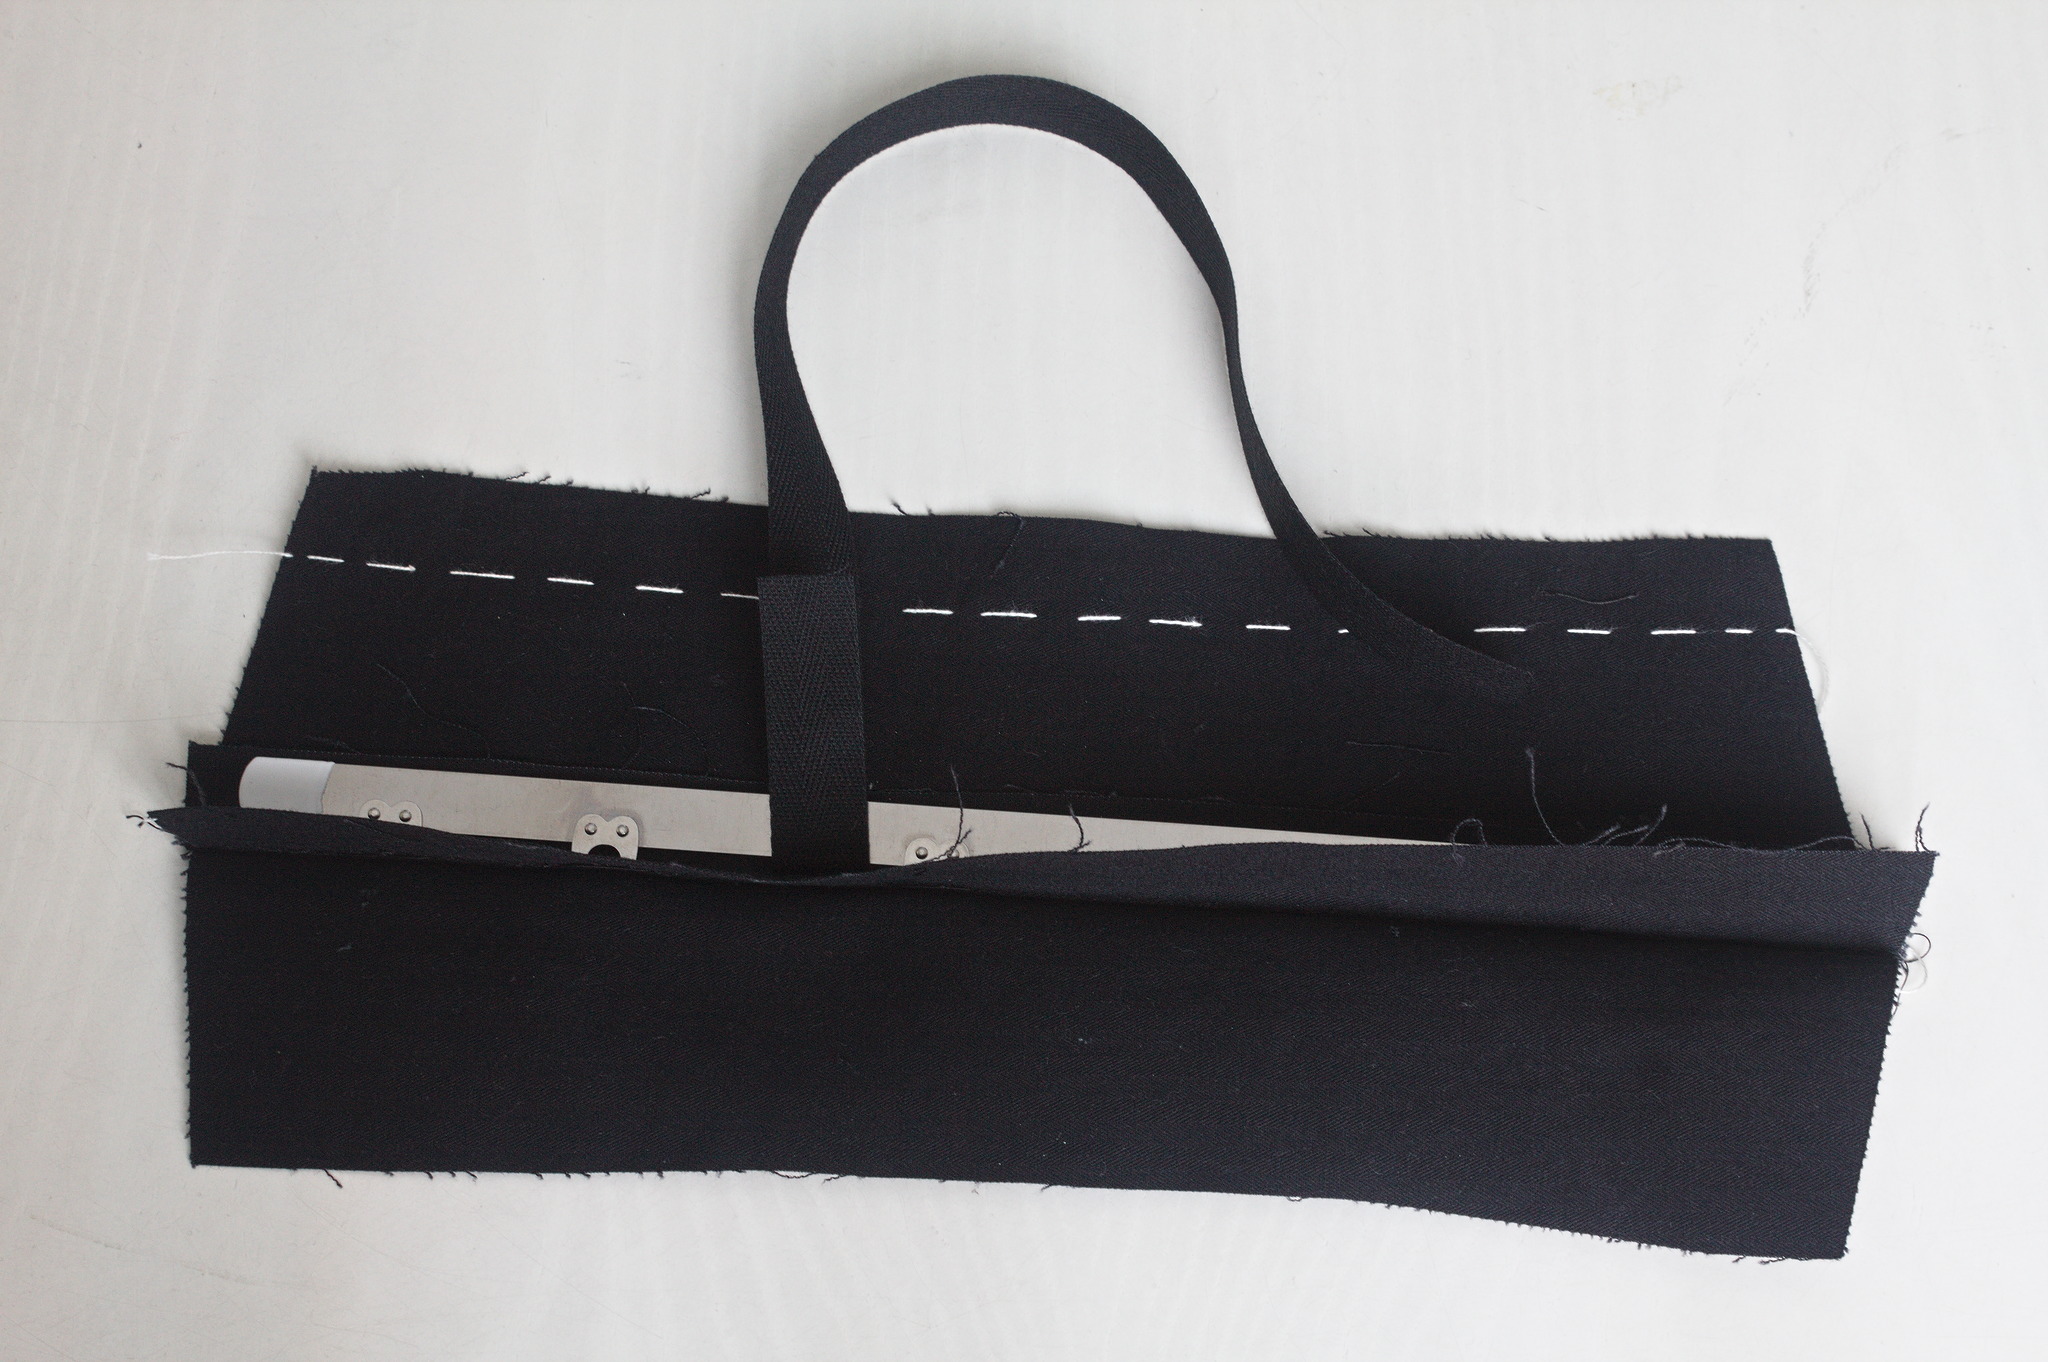
Insert the eye side of the busk between the layers, making sure that the eyes stick out of the openings, wrap one waist tape around it so that the short end will reach just before the seam between panels 1 and 2, and carefully pin everything in place.
Topstitch from the right side of the corset, using a zipper foot and sewing as close as possible to the busk.

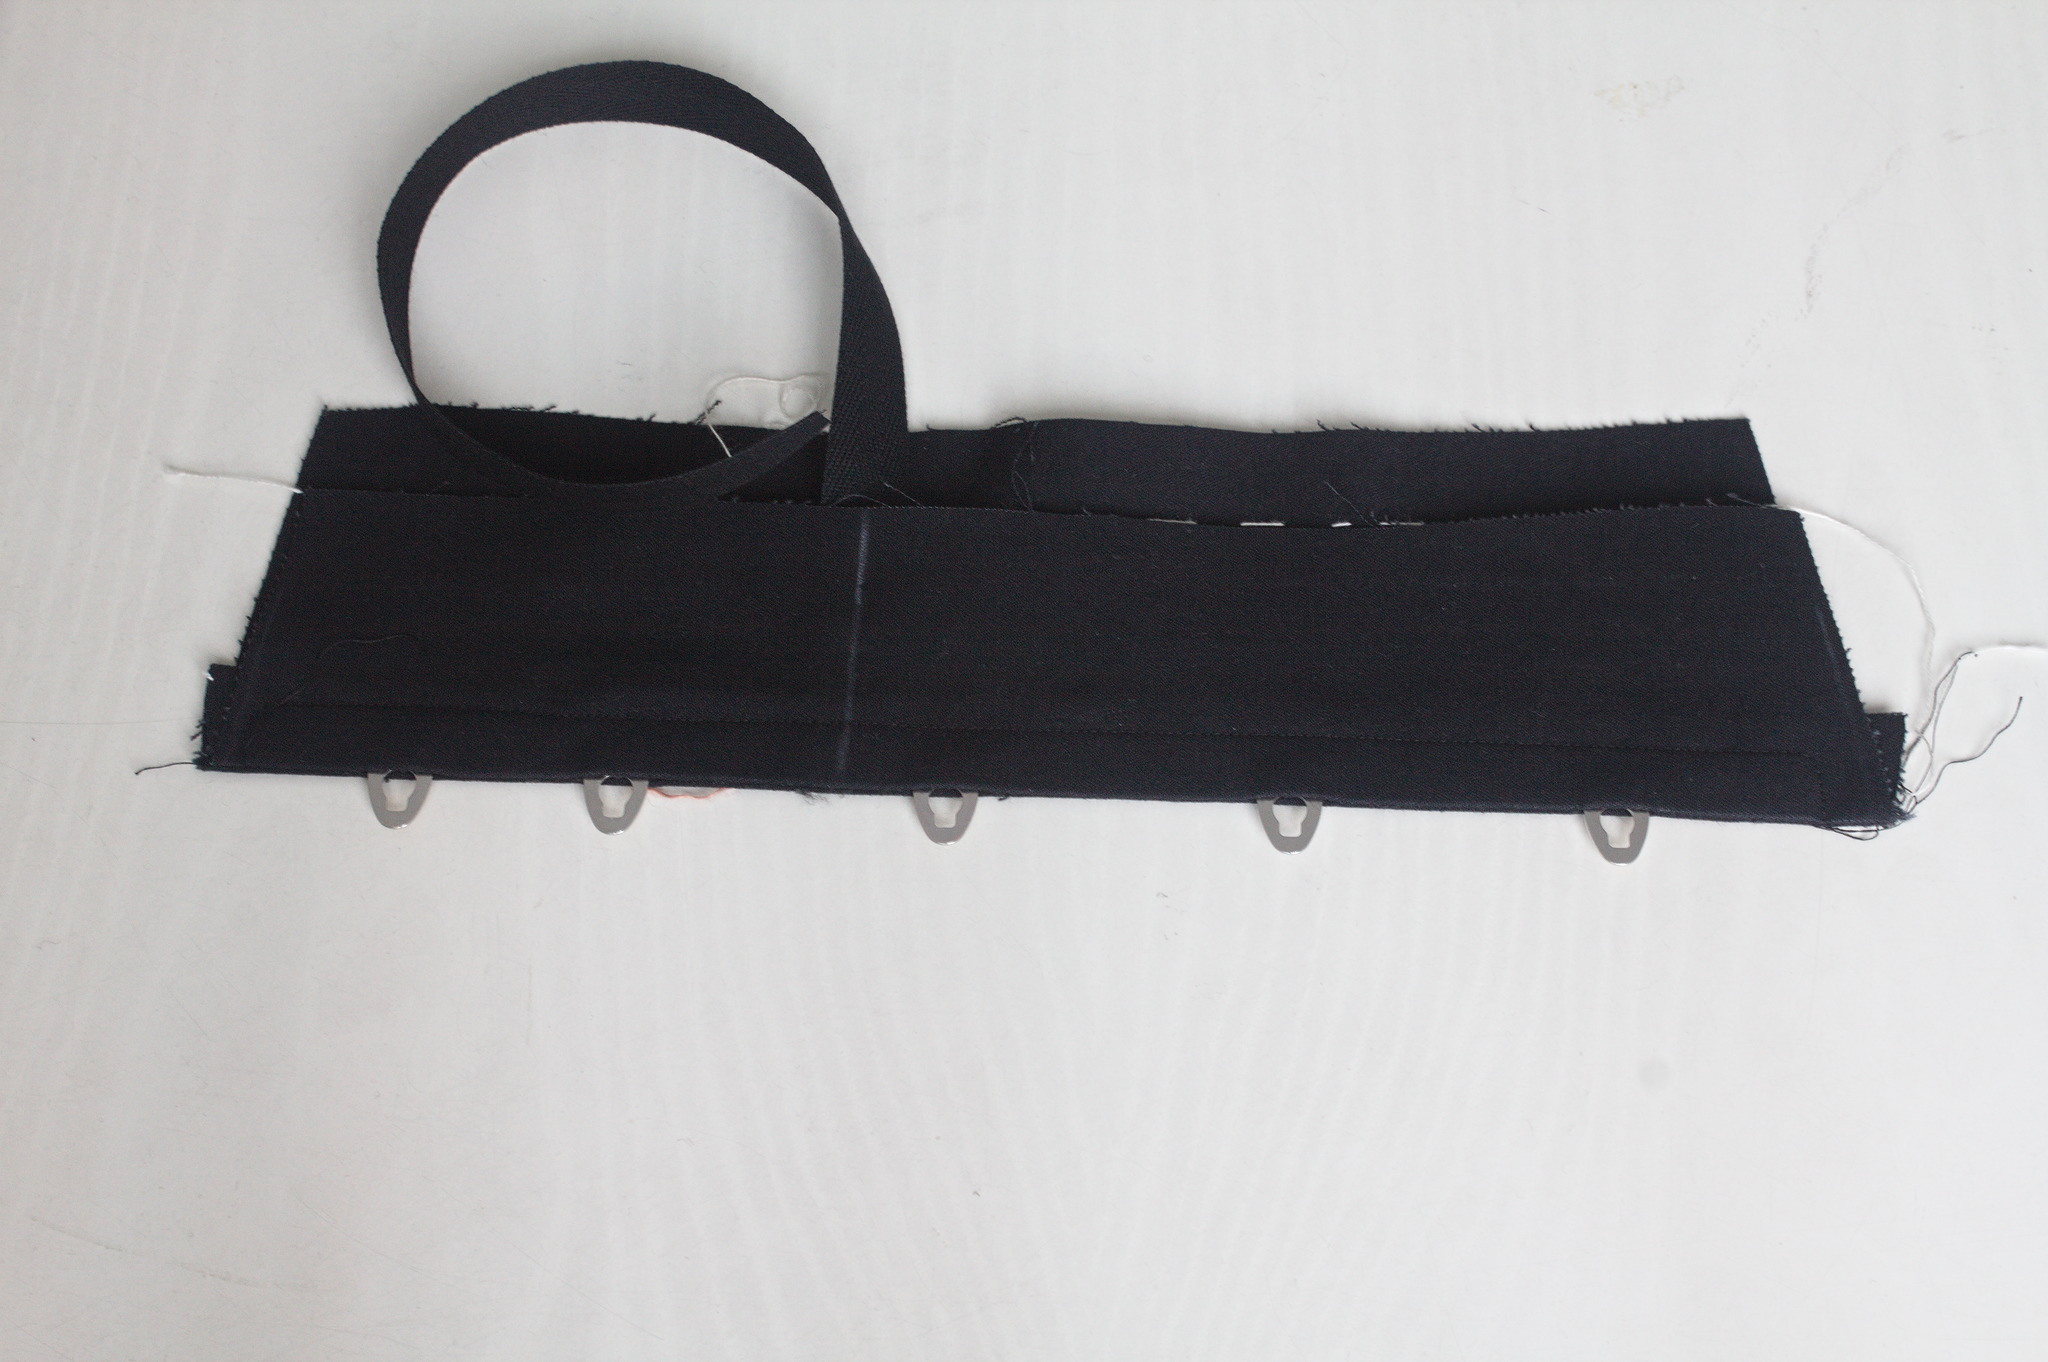
Fold panel 1 left wrong sides together, align it carefully with the assembled panel 1 right and mark the position where the eyes of the busk are.
With an awl open holes on each marked position, just as big as necessary to let the studs of the busk pass through.

Insert the stud side of the busk, wrap the other waist tape around it as before and carefully pin in place.
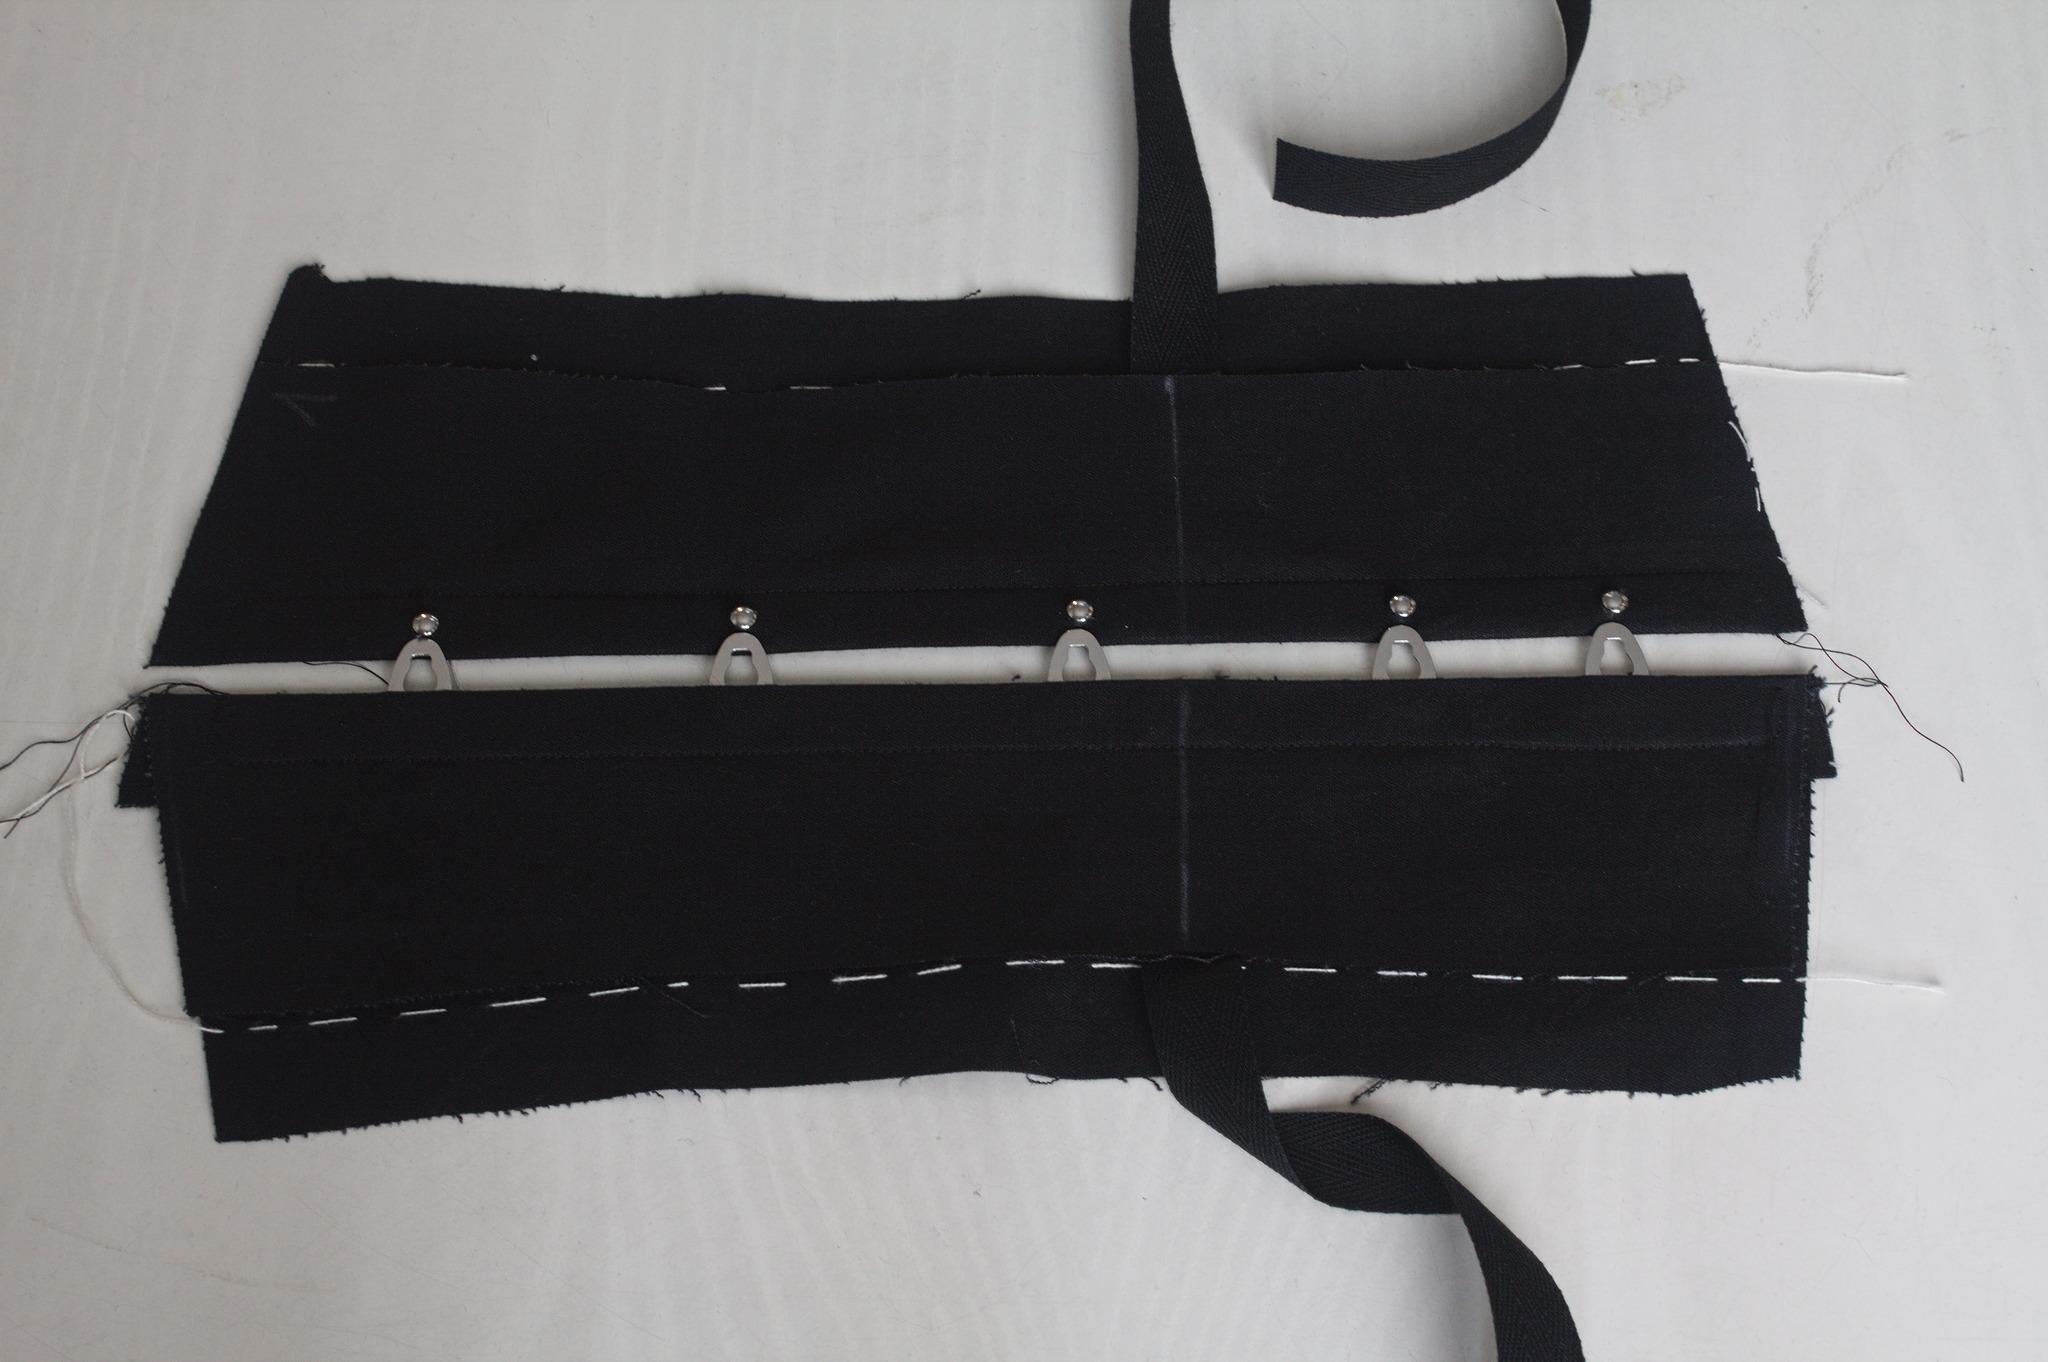
Topstitch also this panel from the right side of the corset, using a zipper foot and sewing as close as possible to the busk.
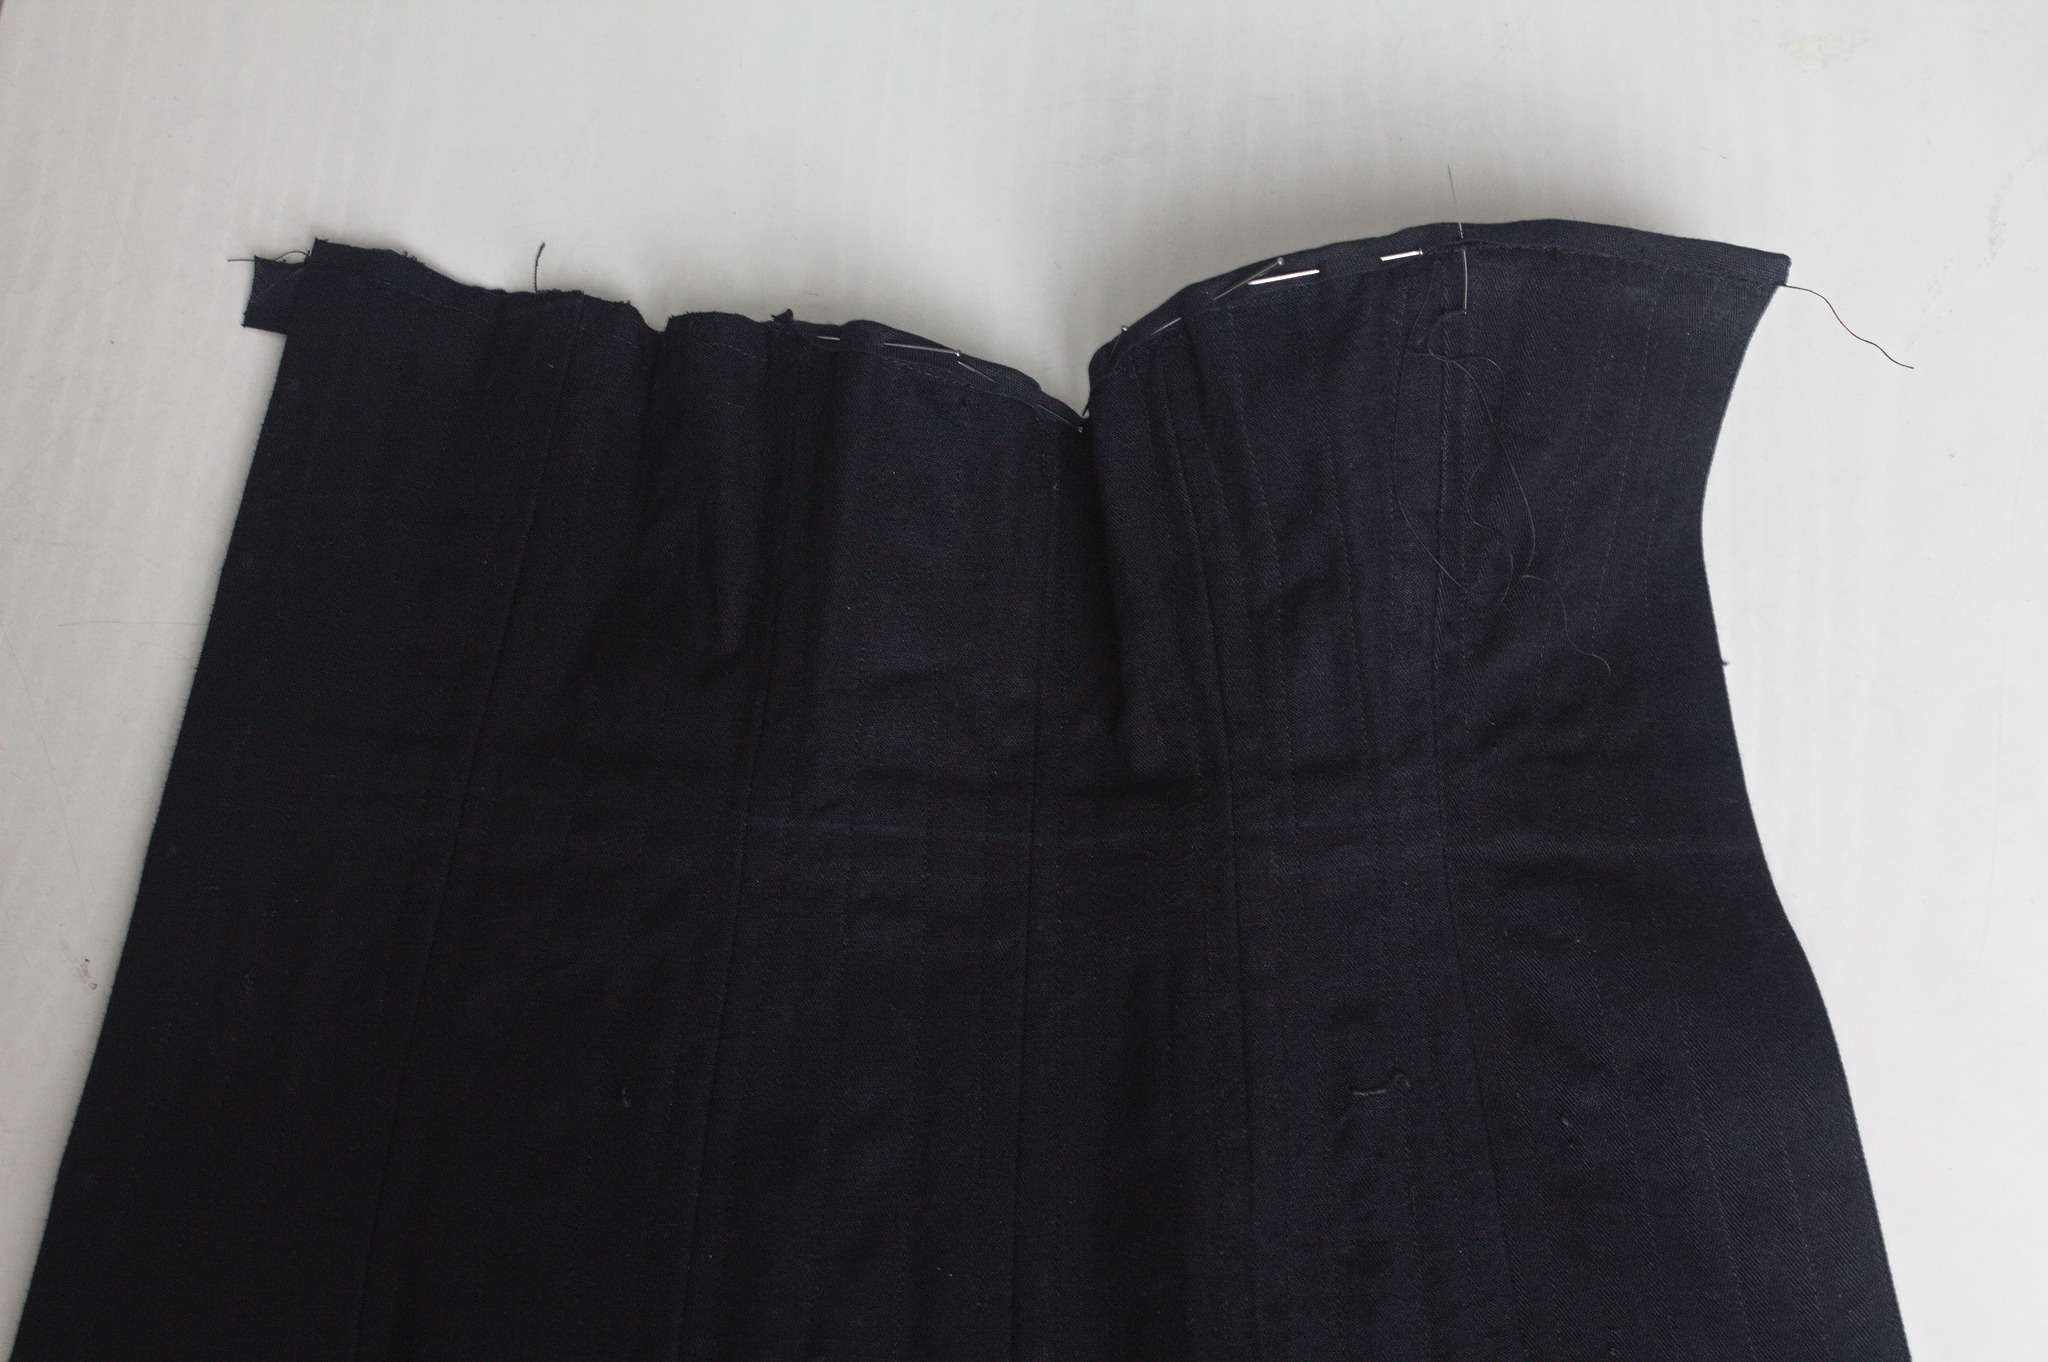
Panels
Attach the panels to each other, starting from the just finished panel 1 and panel 2, and continuing until panel 6.
If you want your boning channels inside the corset put each panel on the next right side together, if you are making external boning channels put the panels wrong side together, so that the allowances will be on the outside of the corset.
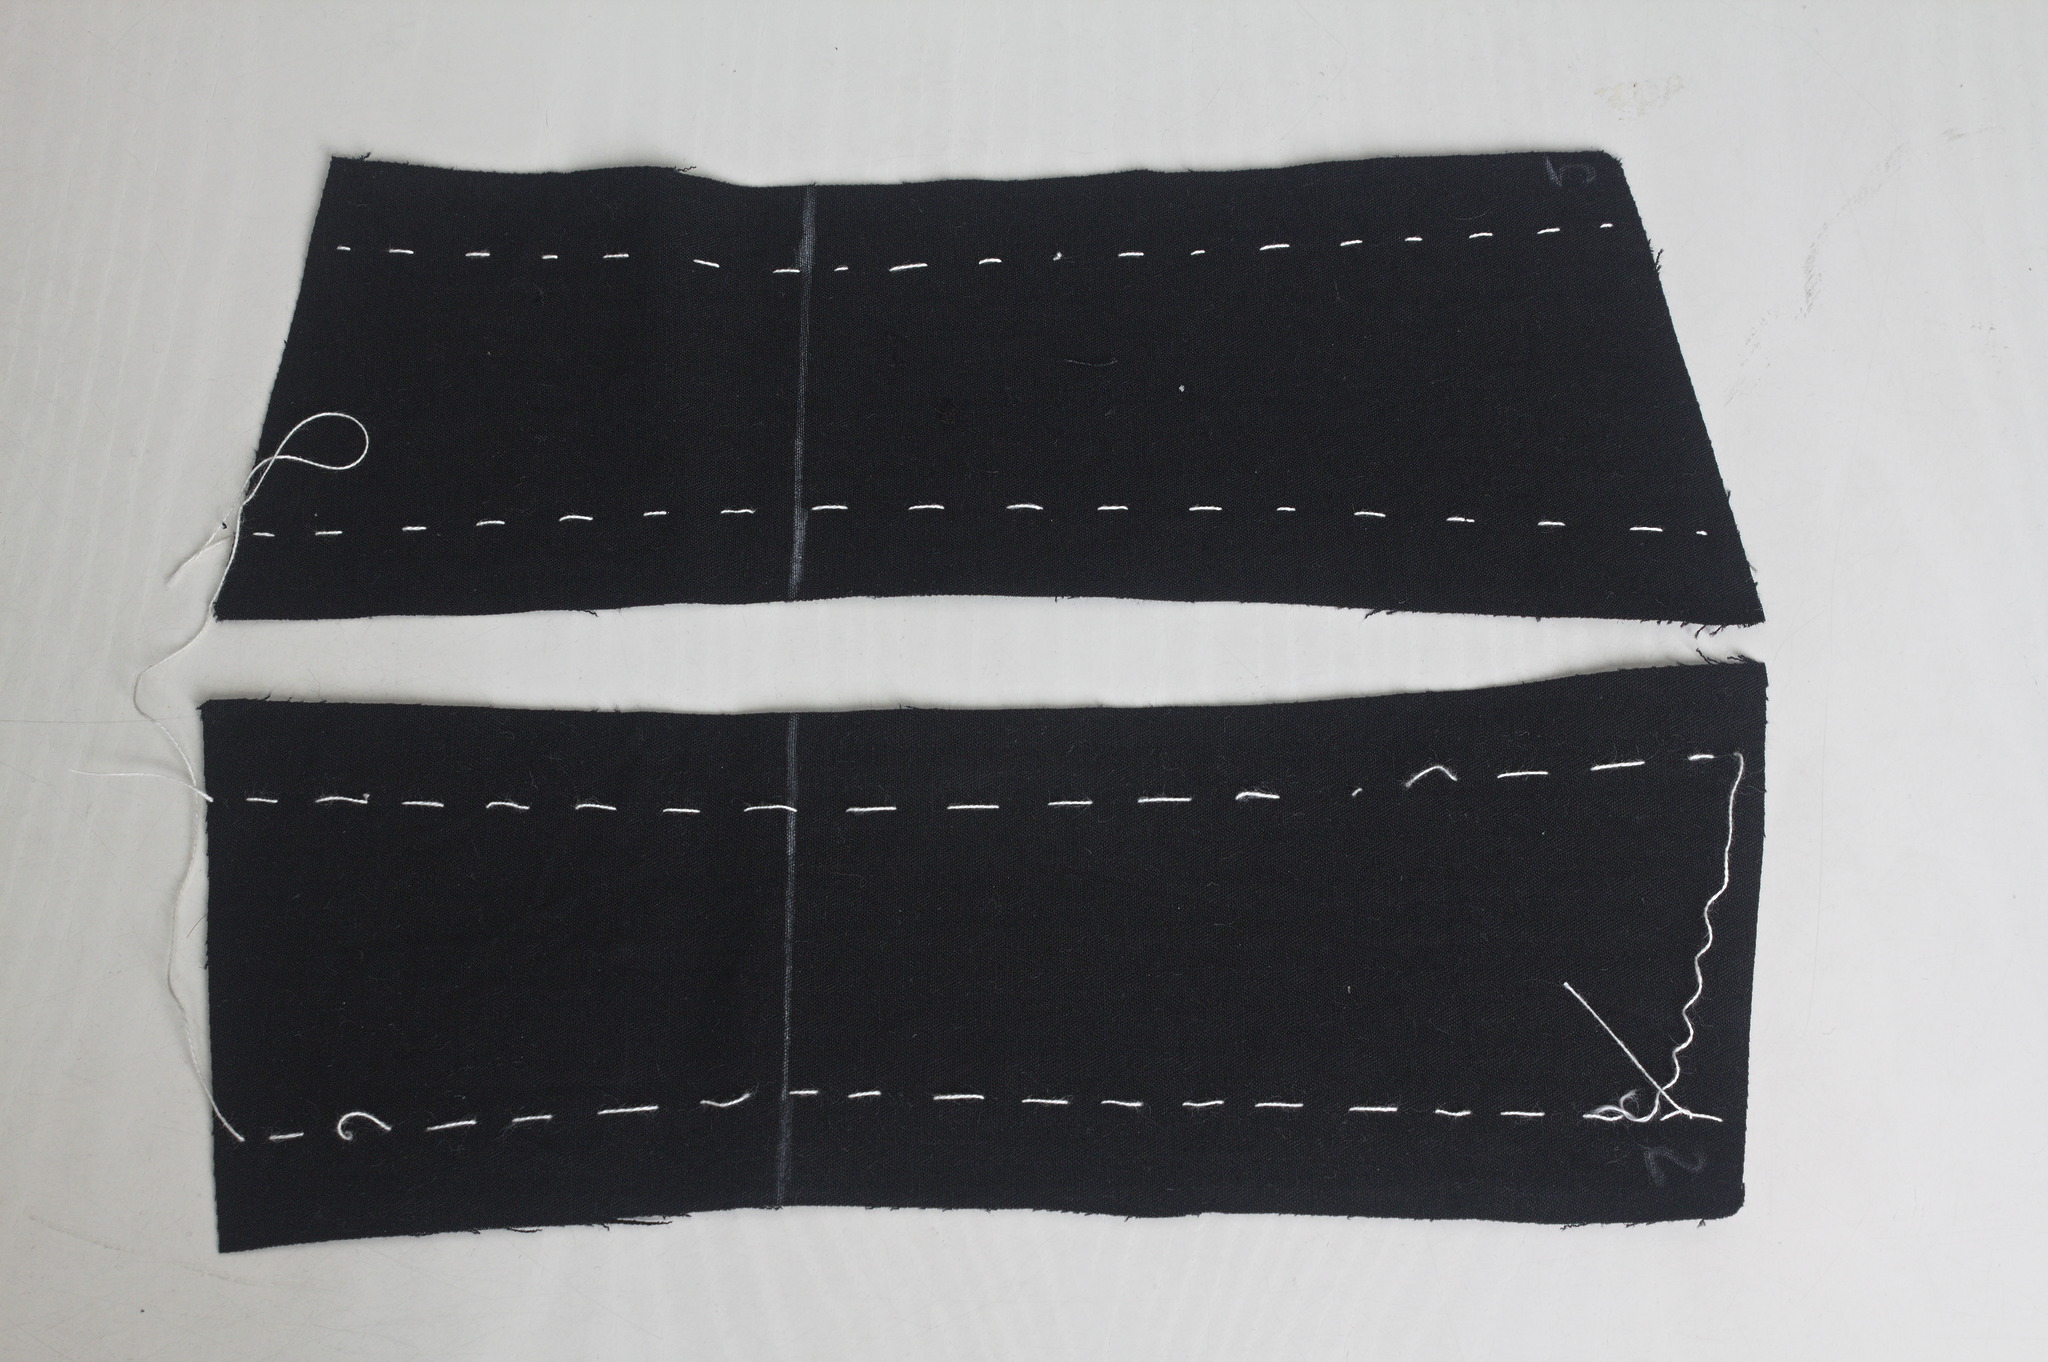
Using relatively short (~ 1 cm) running stitches baste just outside of the marked line; if you used tailor’s tacks remove them so that they won’t get stuck in the seam.
Sew each seam, press open.
Fitting
Fold panel 6, wrong sides together, so that the cut edge aligns with the seam line with panel 5, press. Machine baste a premade eyelet strip.
Ideally also baste premade boning channels in the middle of most panels, and add some boning (temporary boning such as zip ties are fine).
Try the corset on, check the fit and do any required last minute adjustment.
Unpick the eyelet strip and temporary boning channels.
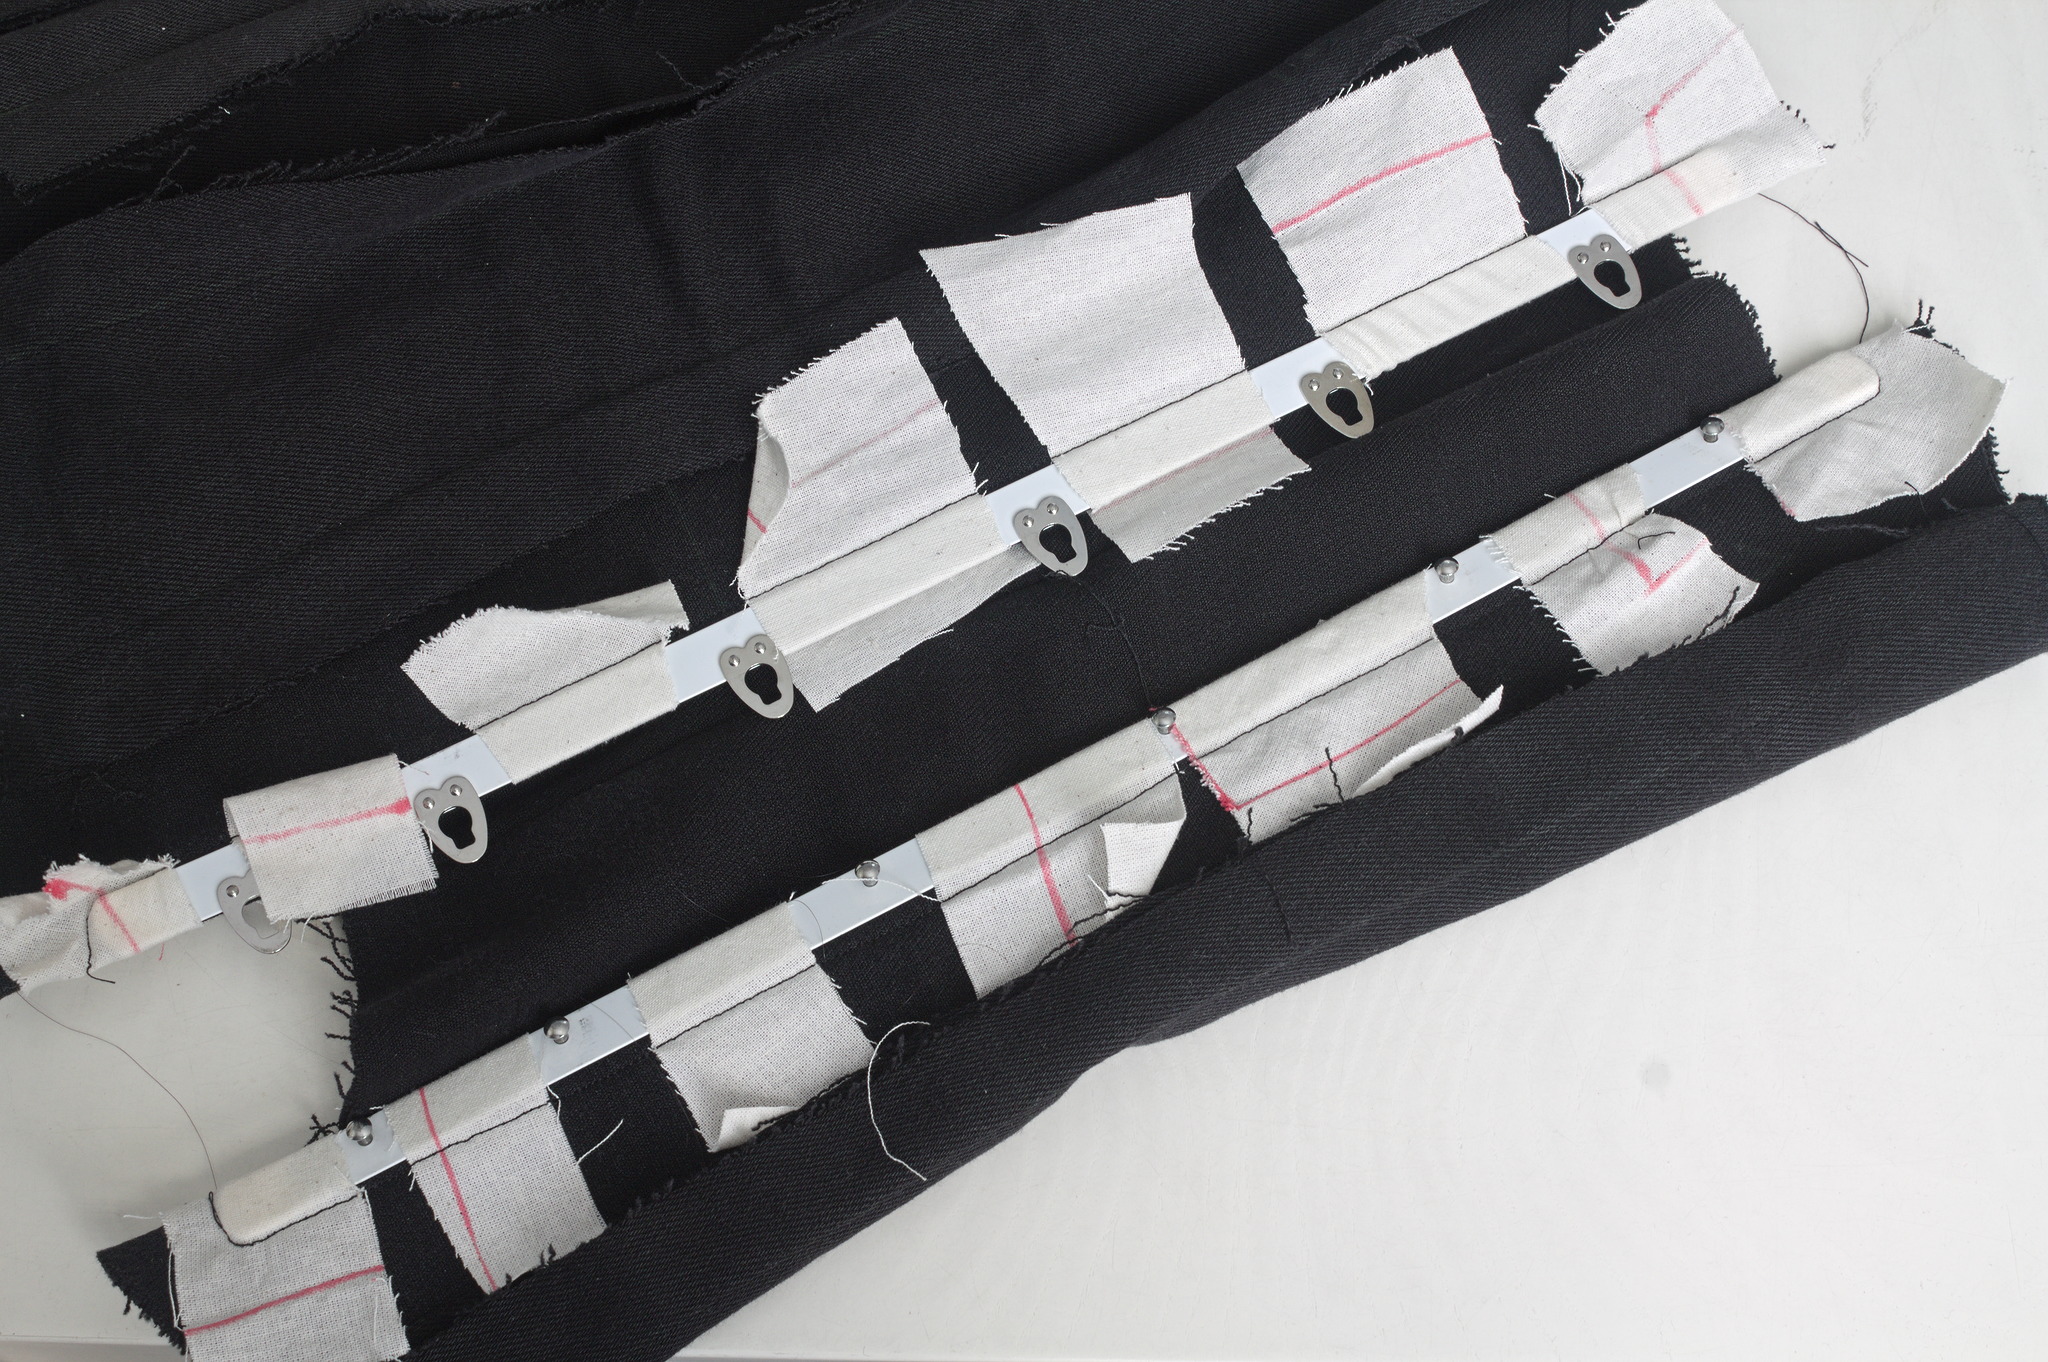
Boning Channels
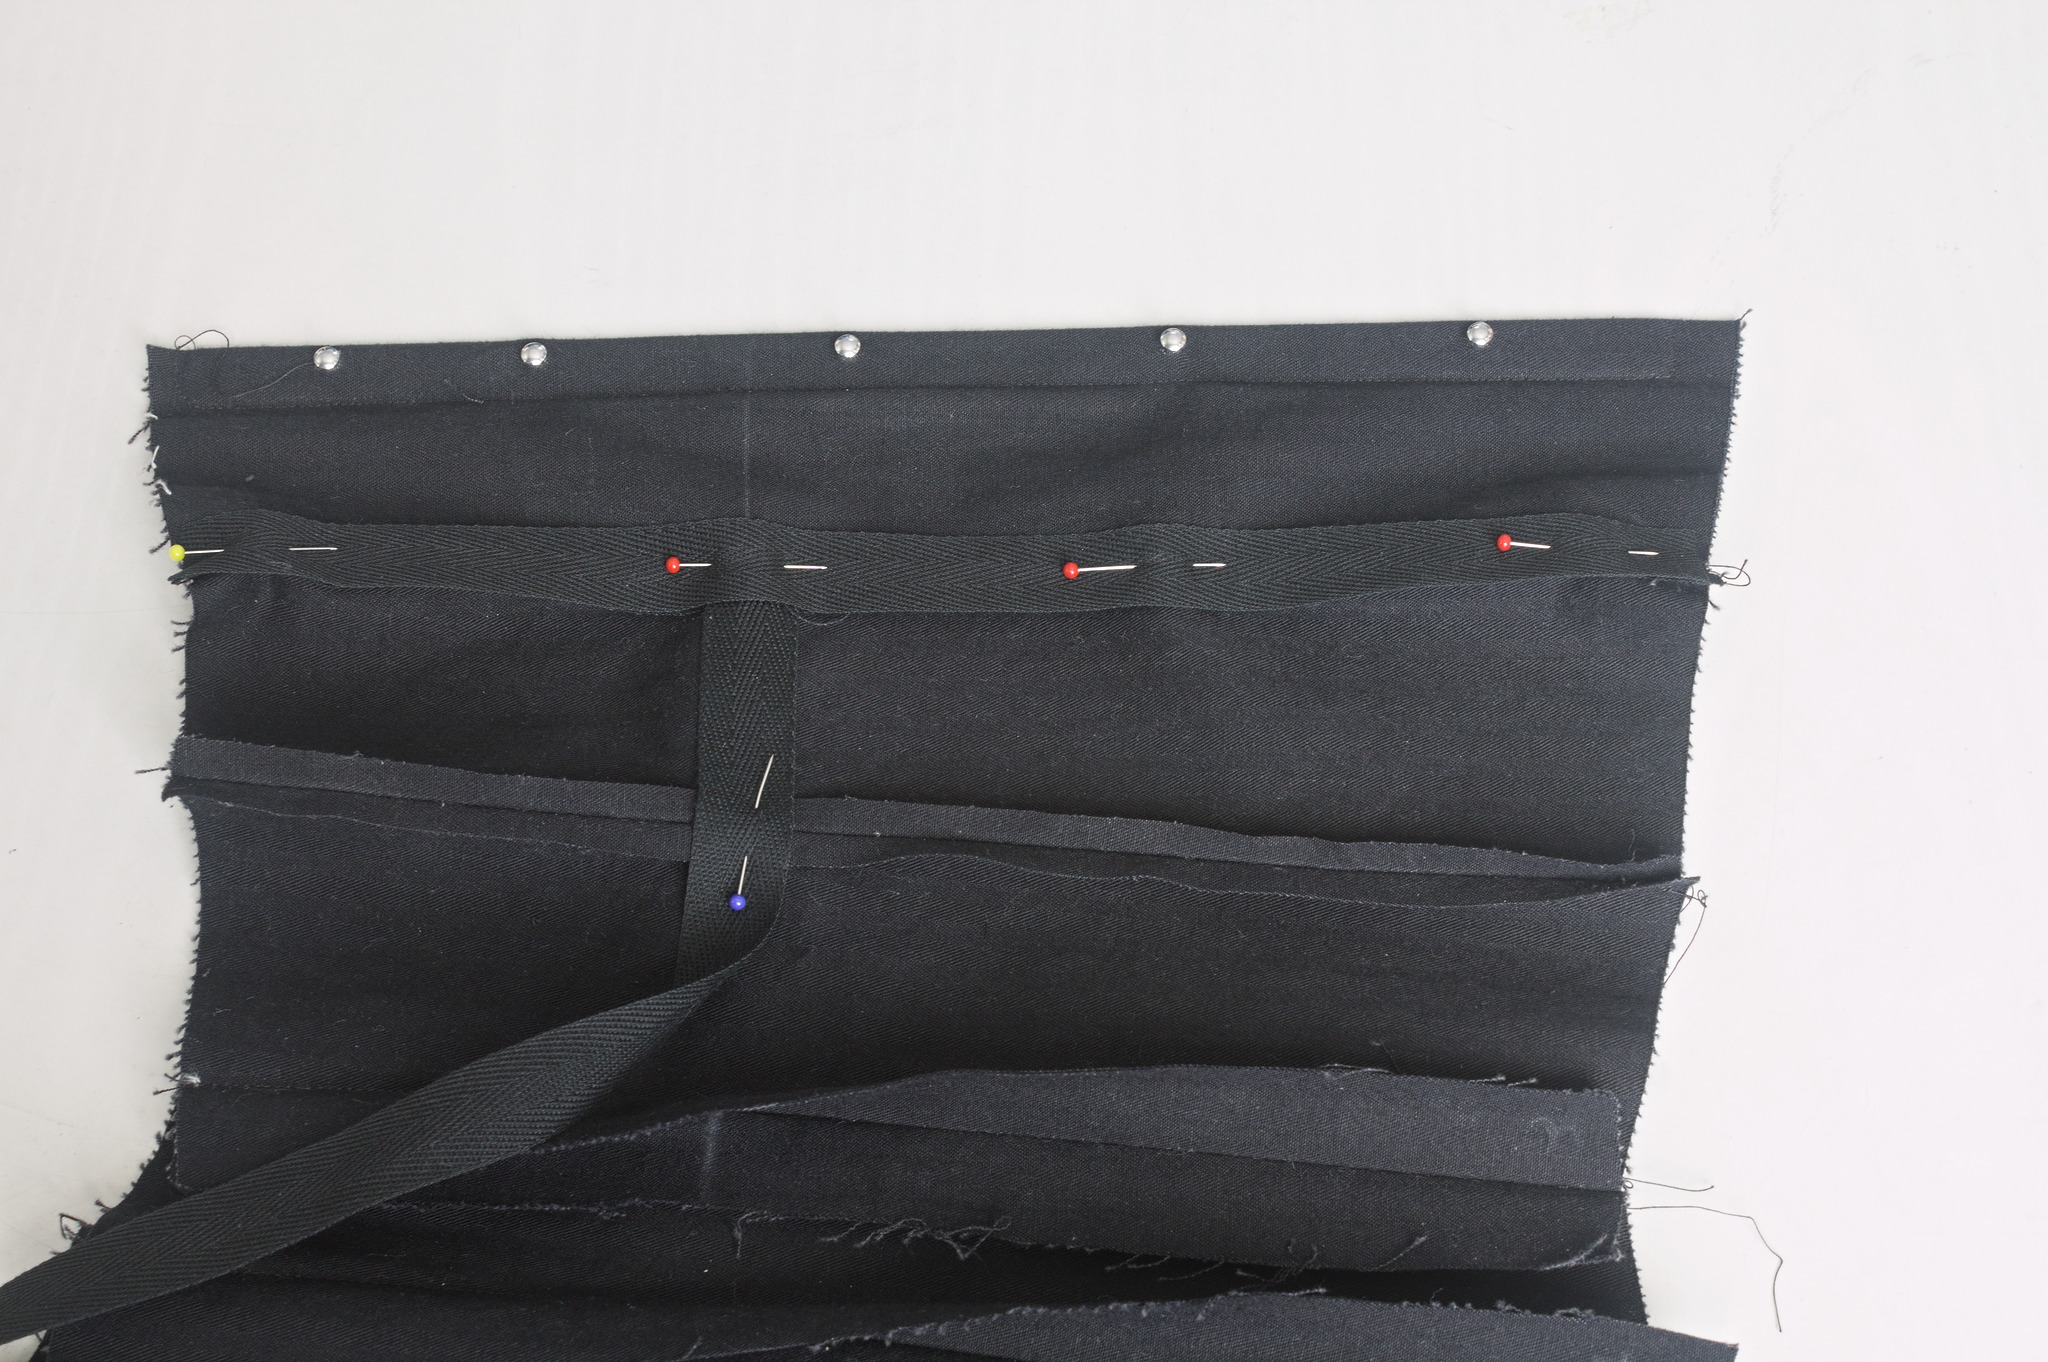
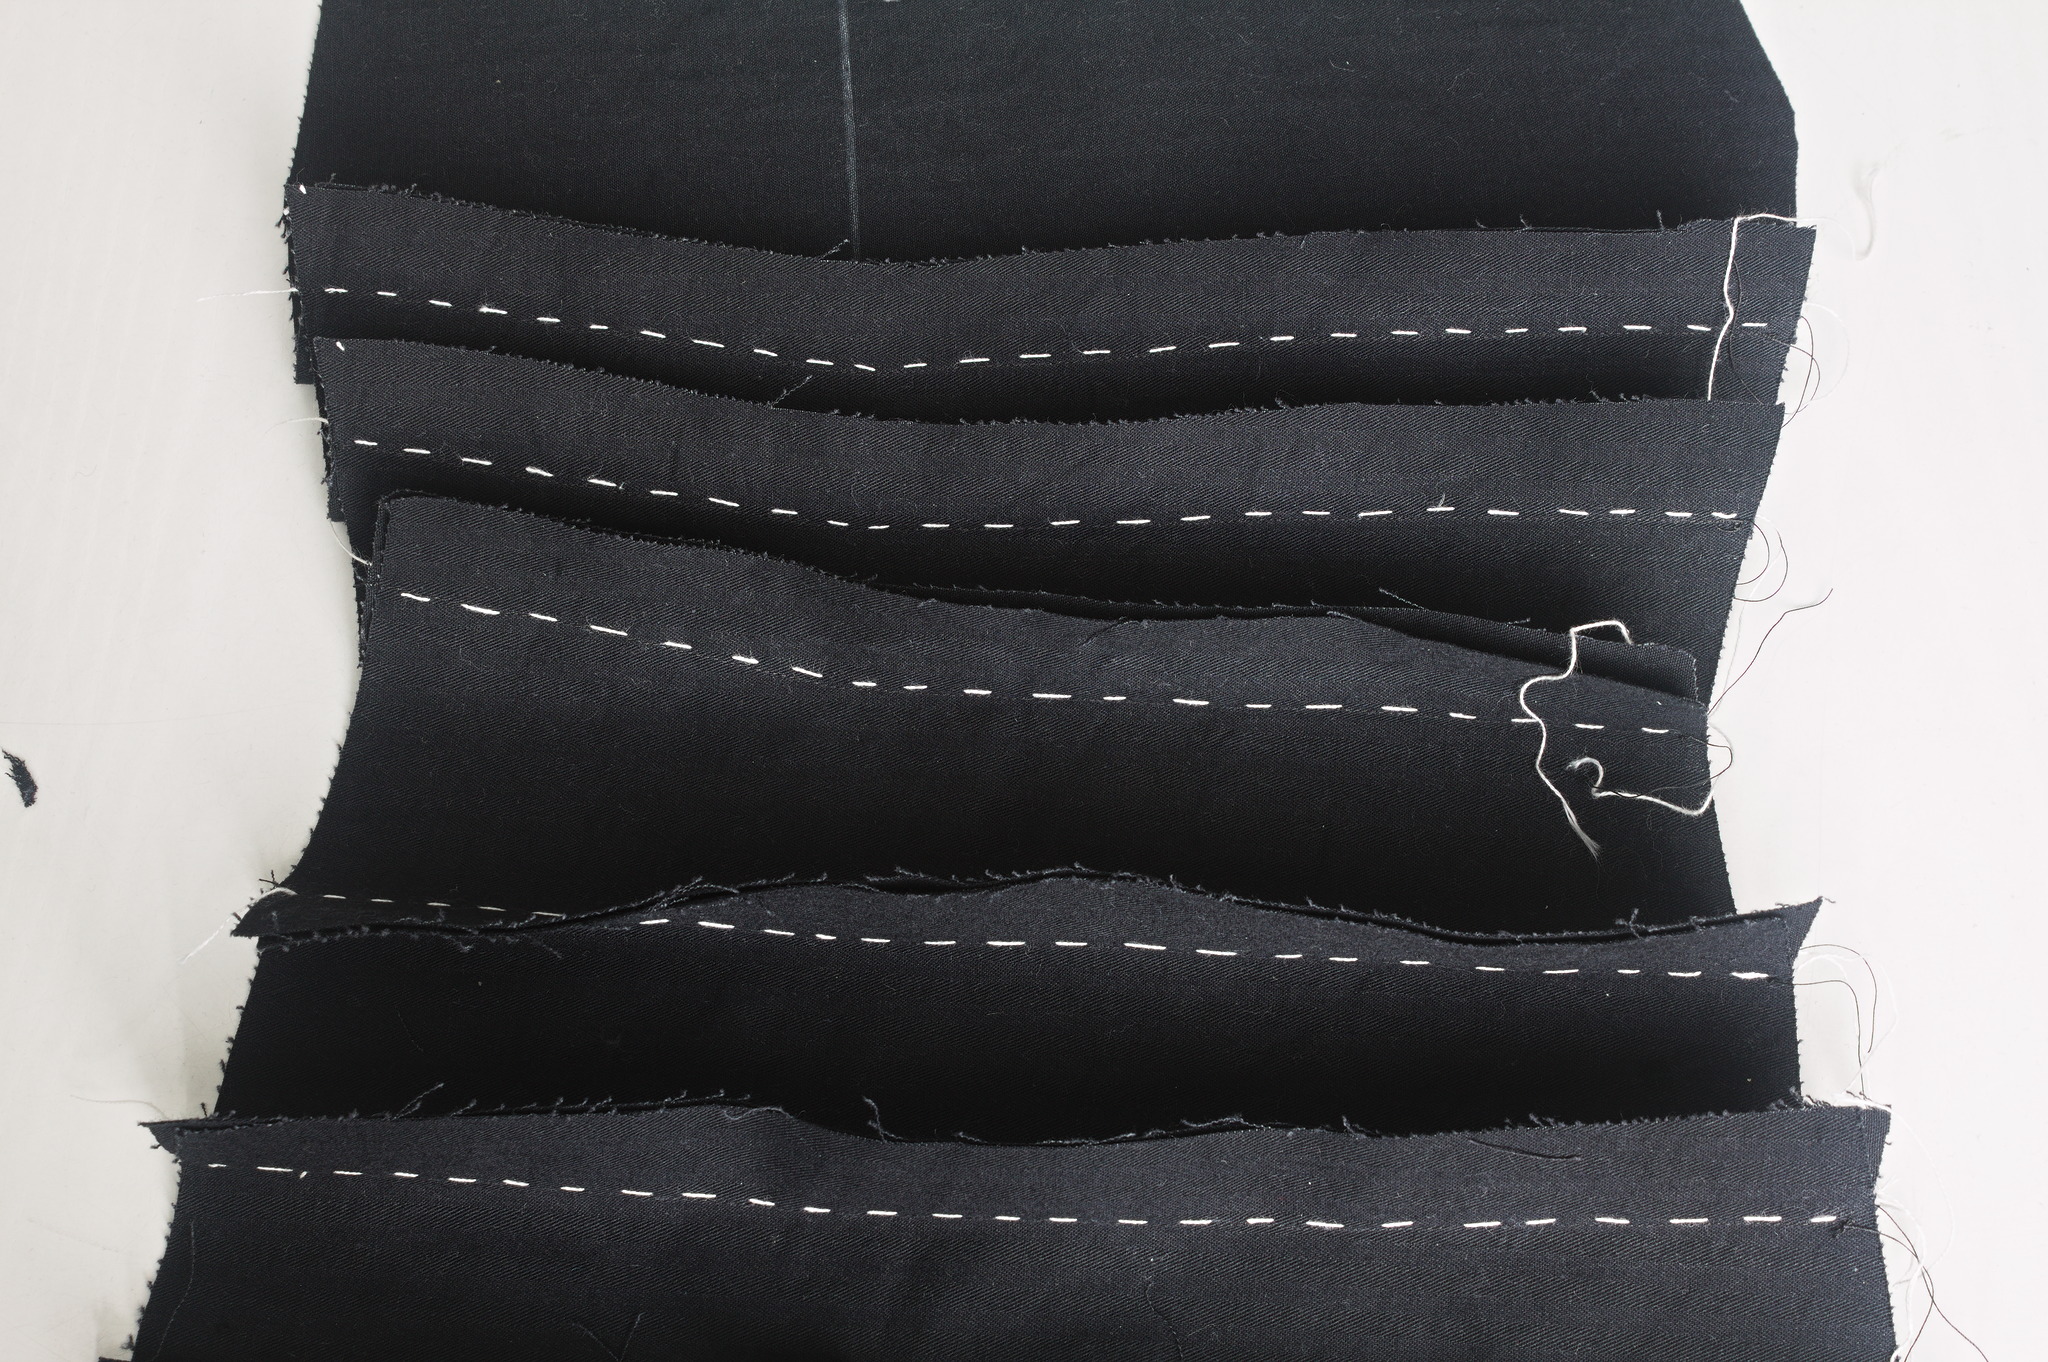
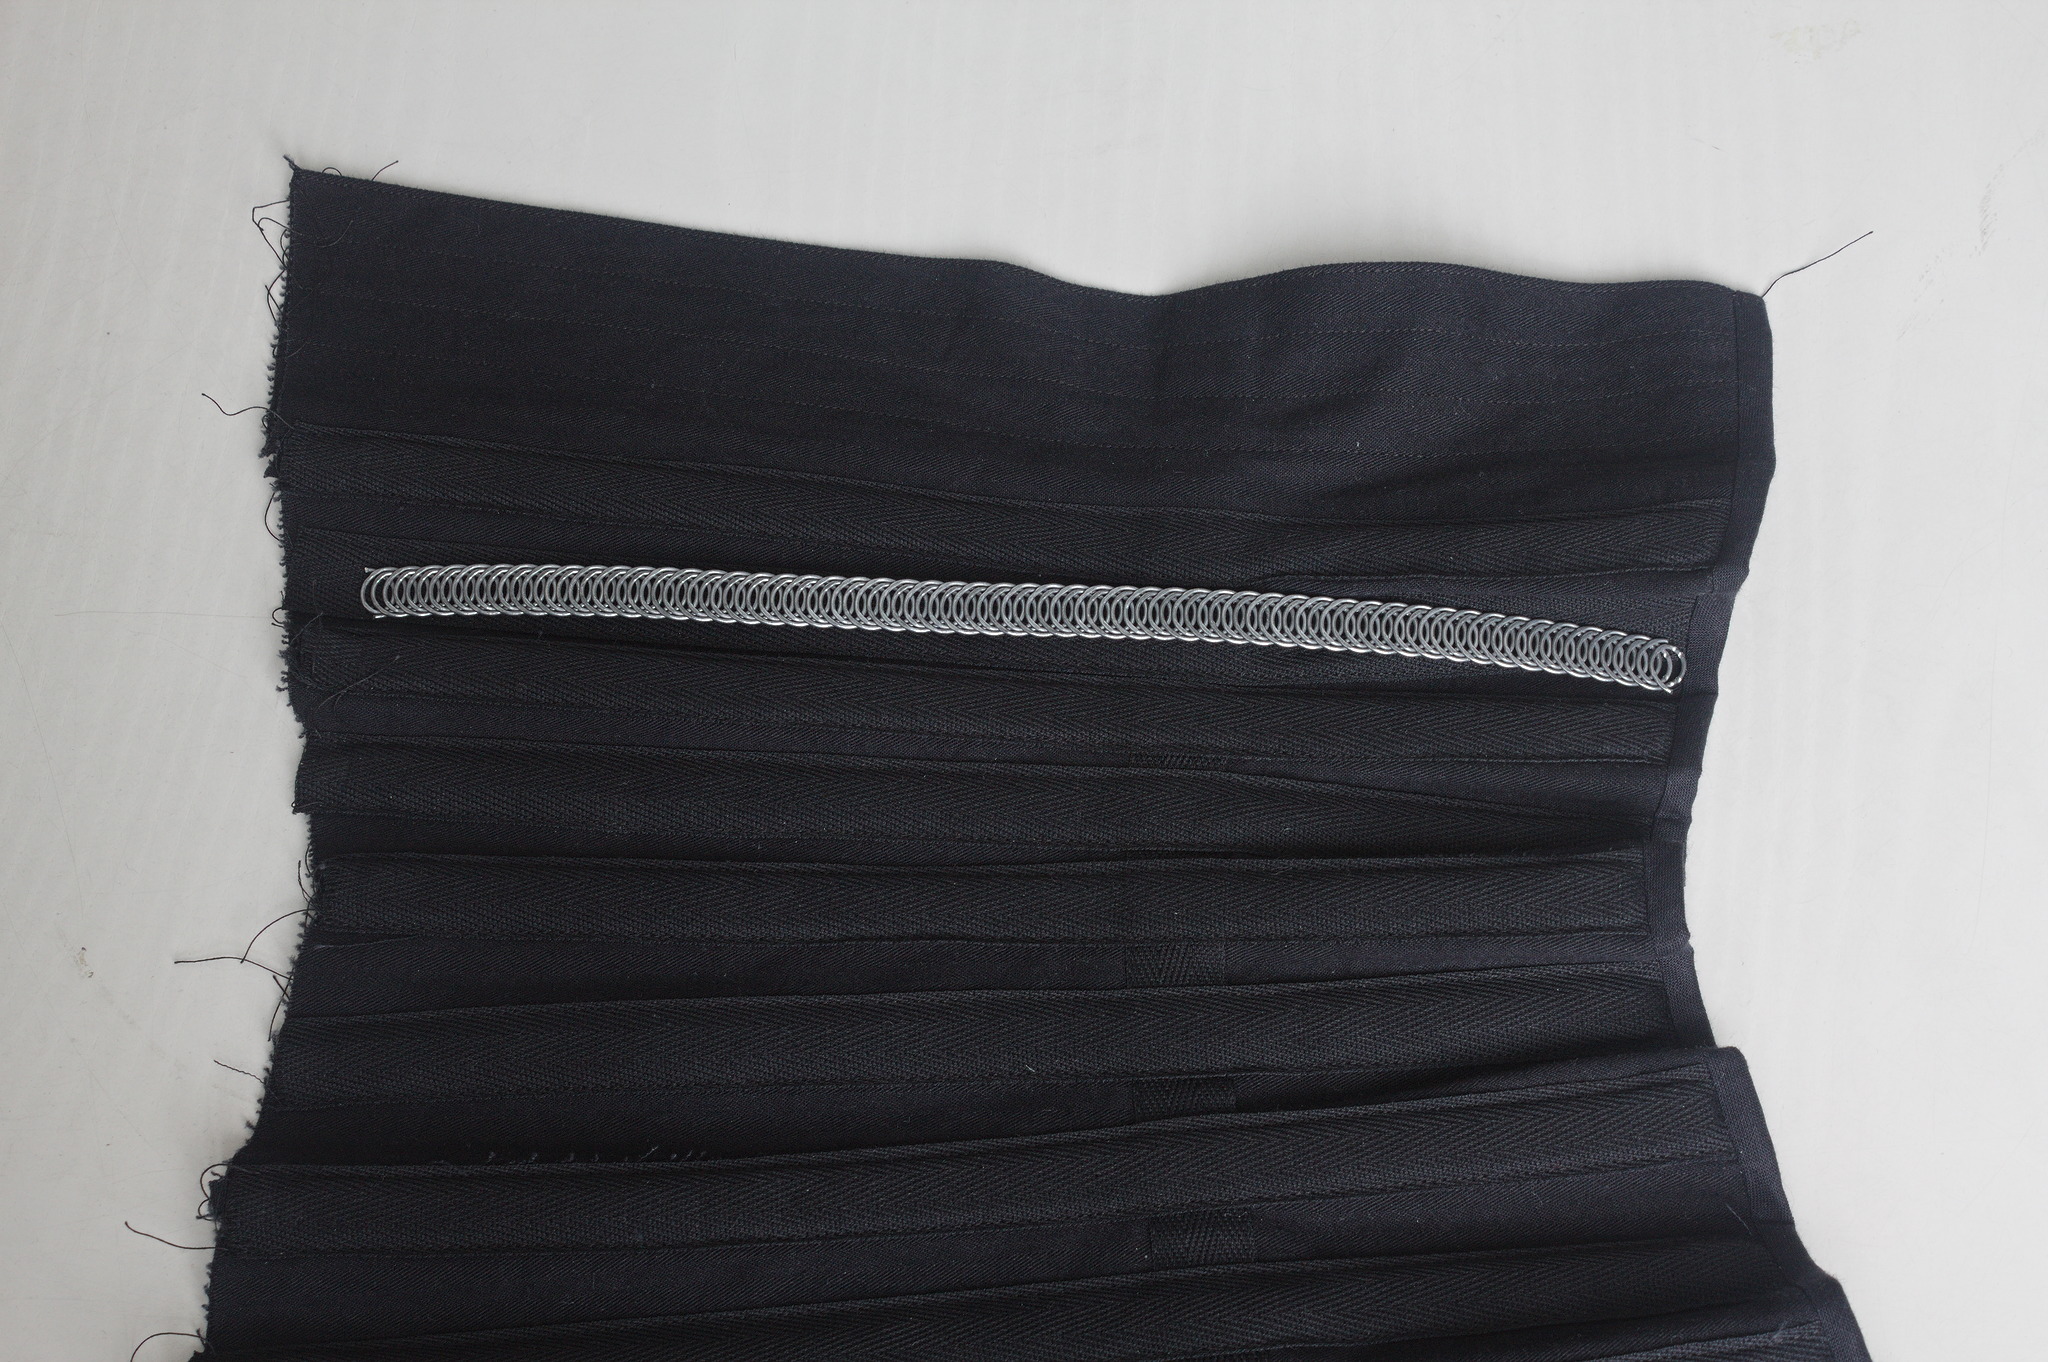
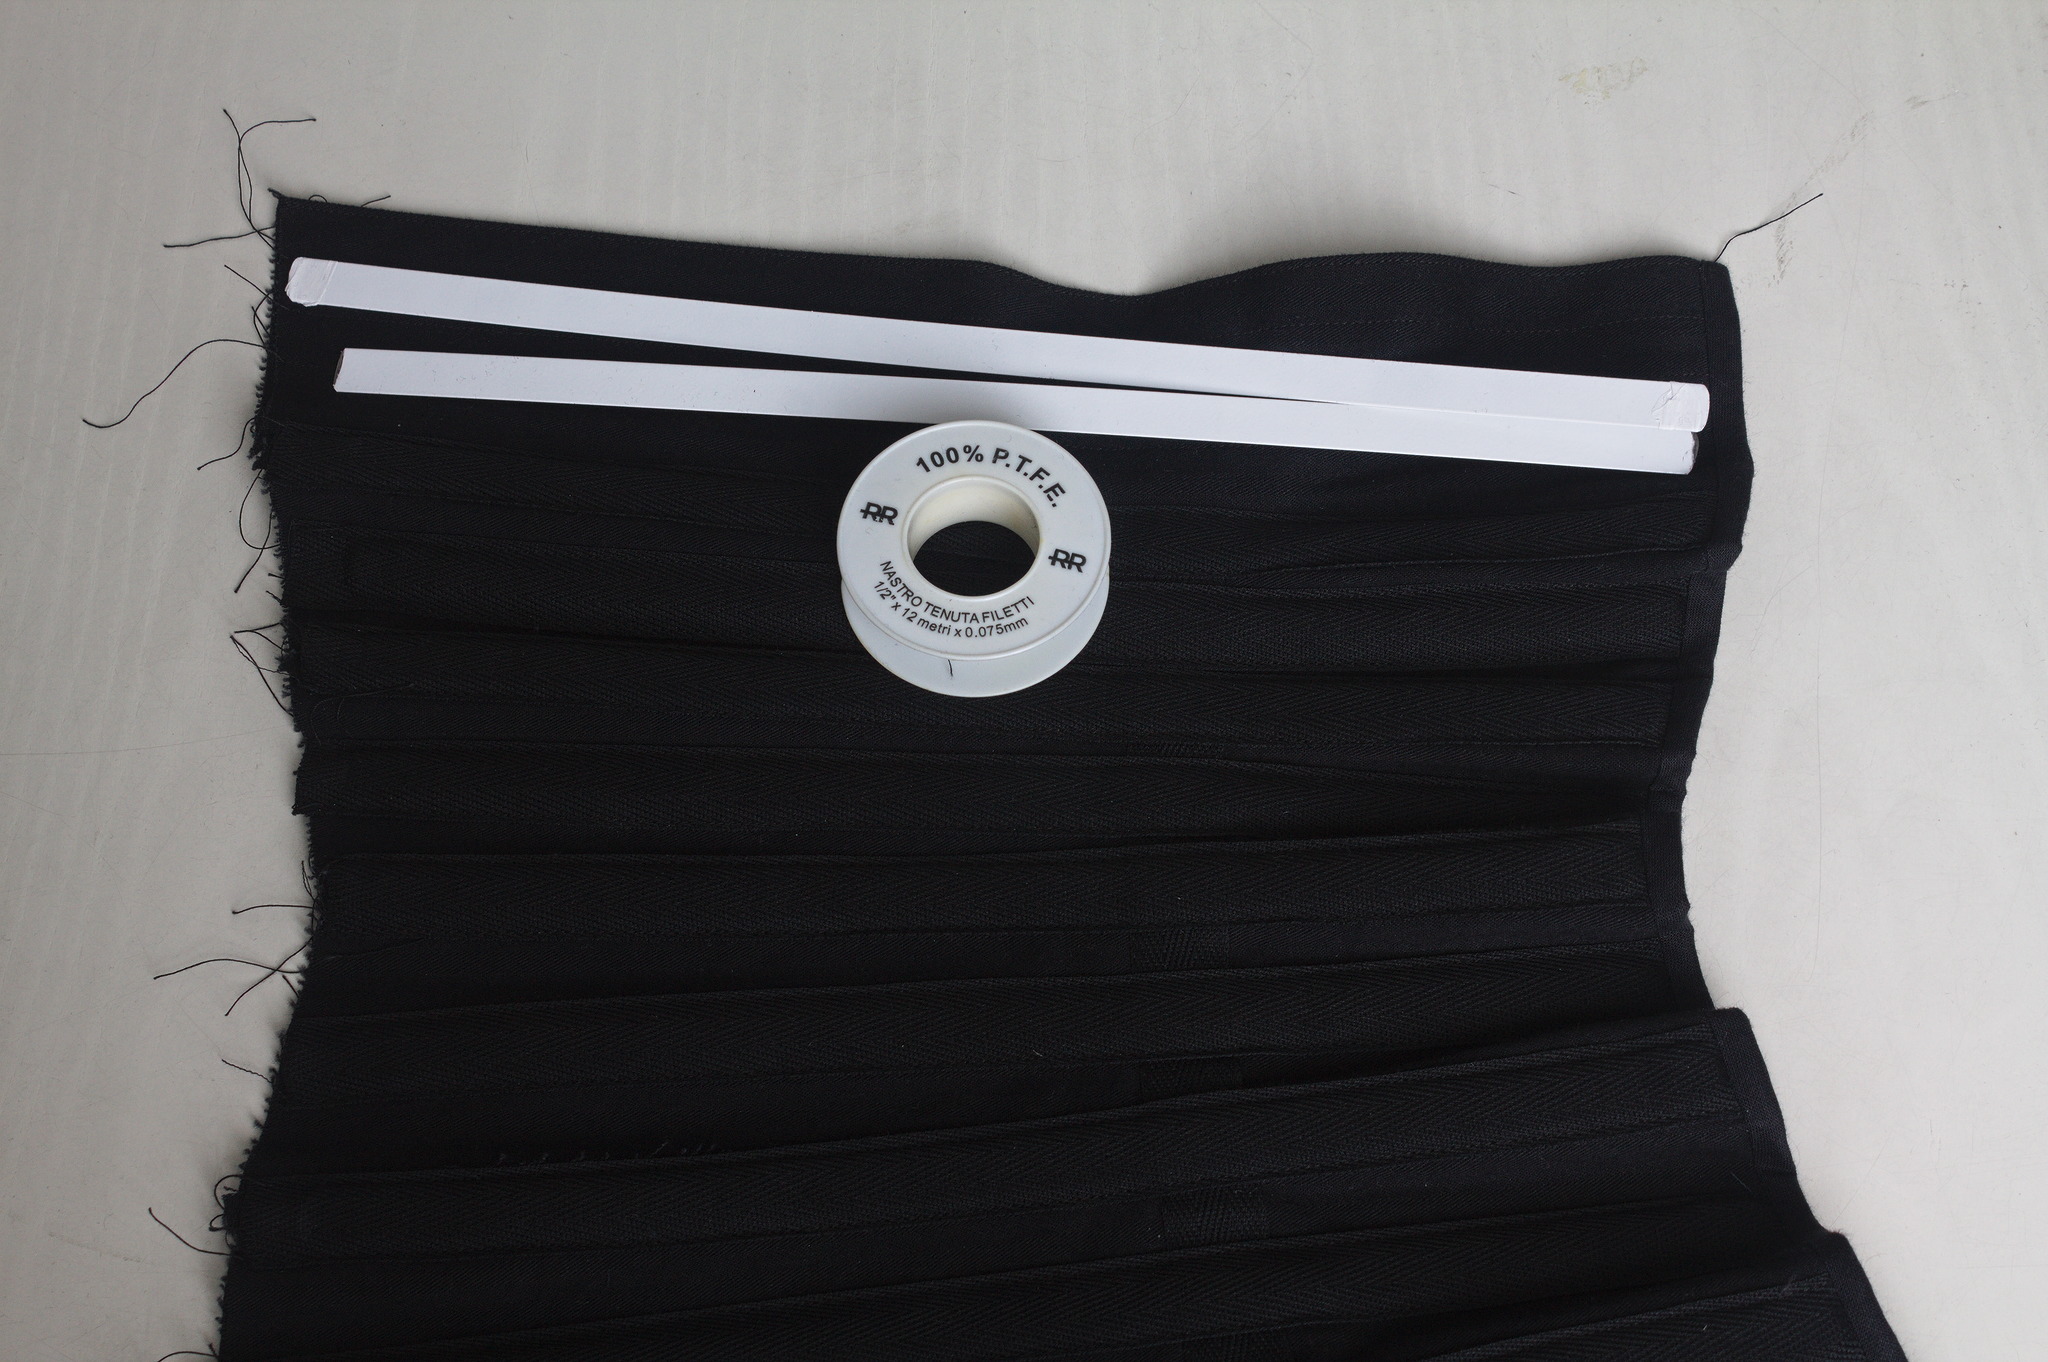
Starting from the center front, sew a boning channel on each seam: trim the sewing allowances so that they are narrower than the tape, center a piece of tape on the seam so that it covers the waist tape precisely at waist level, pin it, possibly baste it.
Sew the boning channel from the front of the corset at 2 mm from each edge and, if it is going to be a double channel, in the middle. After sewing each channel test it with a piece of boning to check that it fits; otherwise unpick it and sew it again.
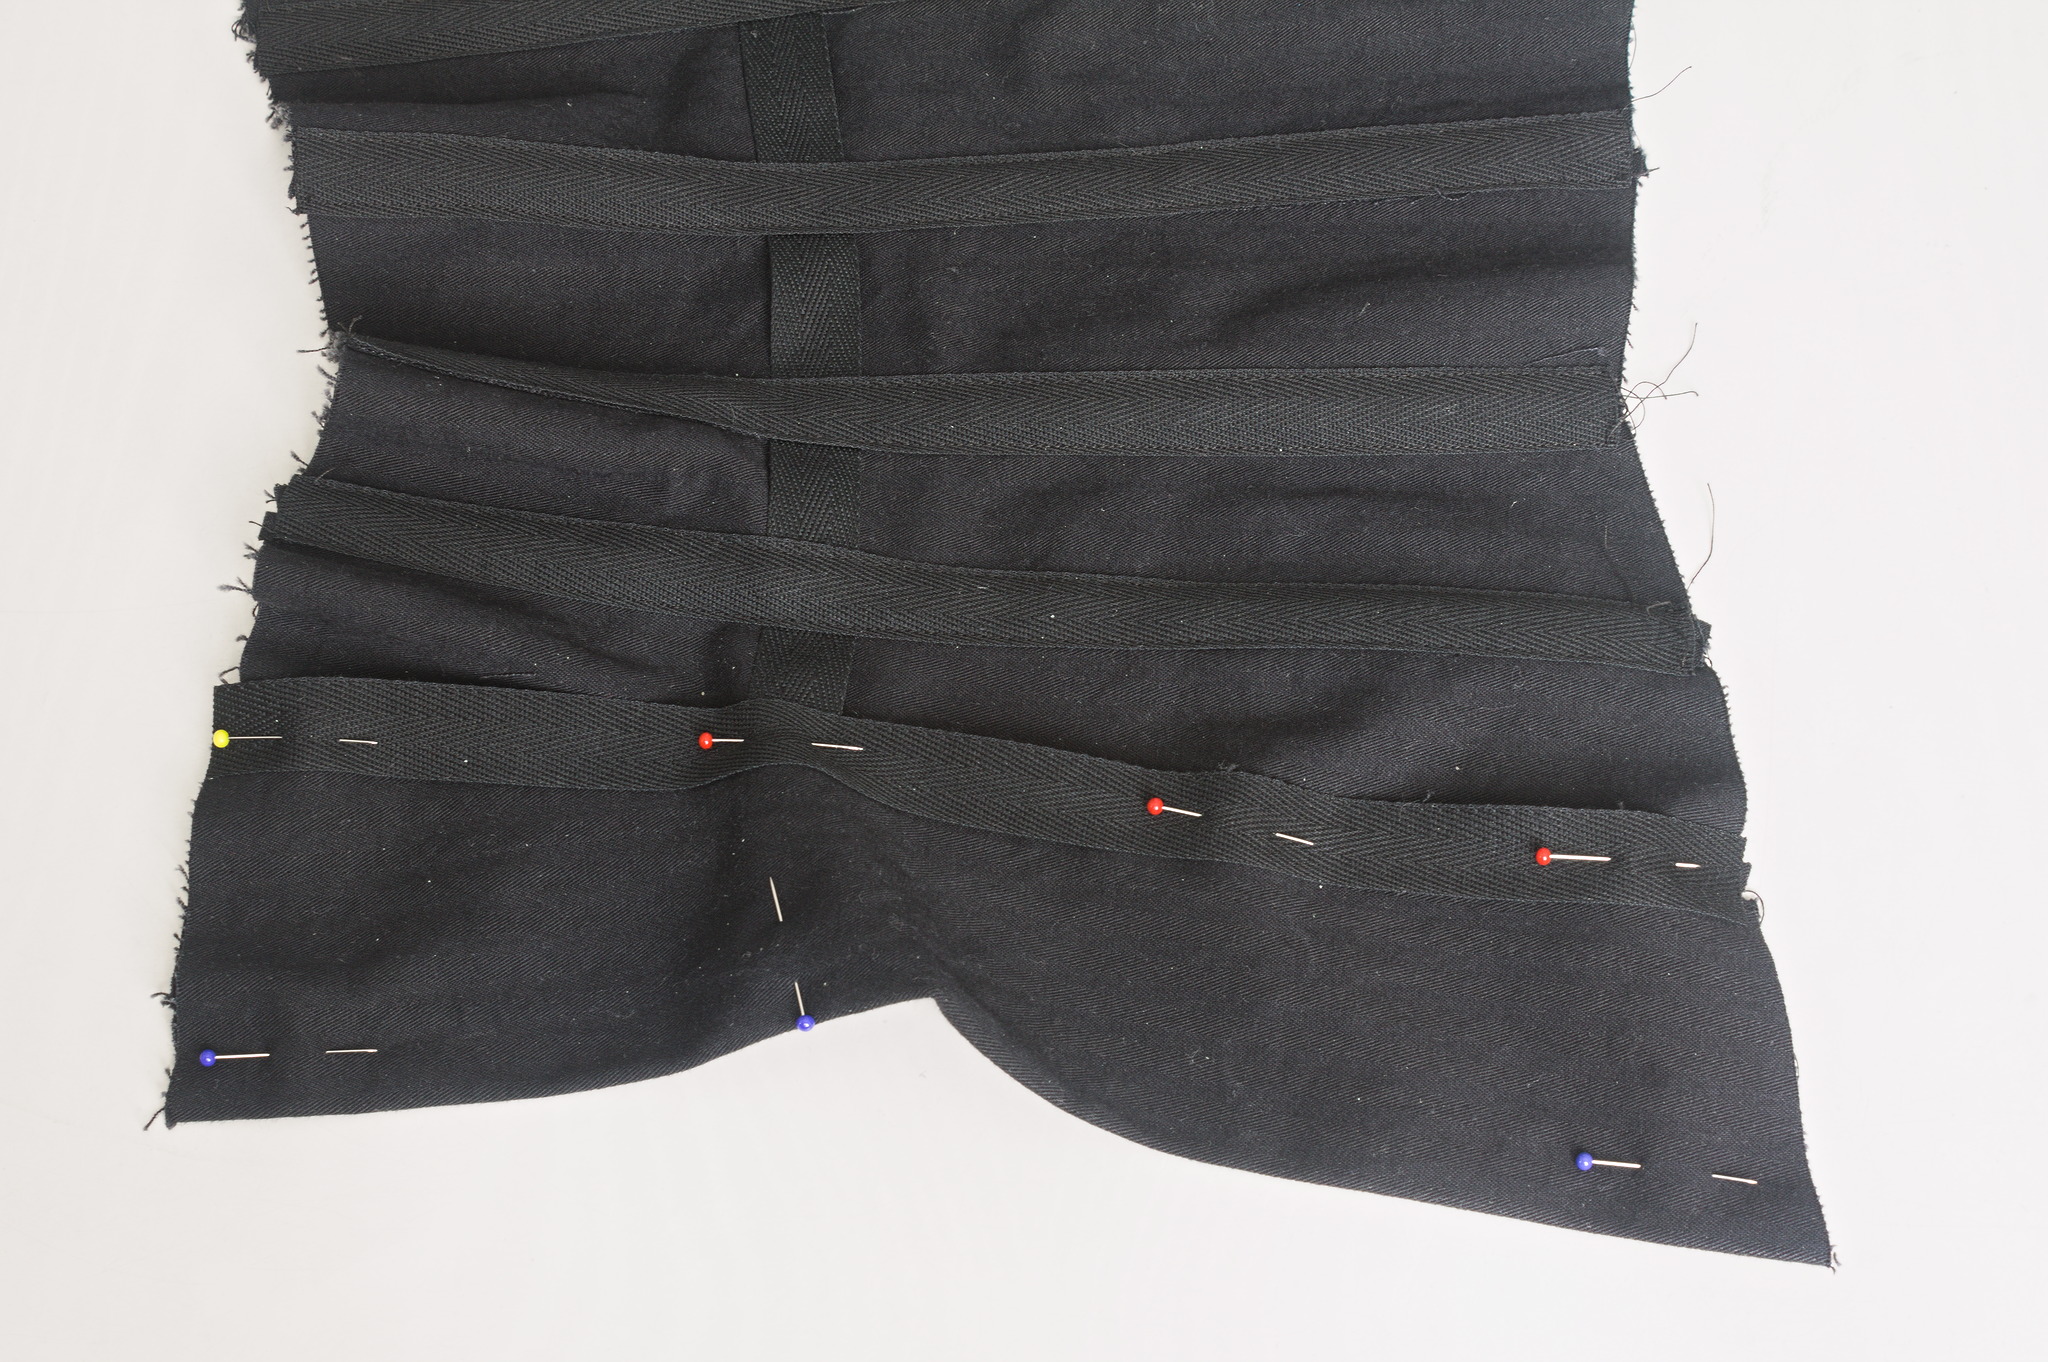
Before sewing the channel between panels 5 and 6 make sure to let the waist tape reach to the fold in panel 6 and go back to the seam, leave it pinned in place.
Note
Sewing from the right side of the corset will result in a neater seam; for internal boning channels aligning precisely the seam may be a bit fiddly, and this is where basting will help, to have a precise reference.
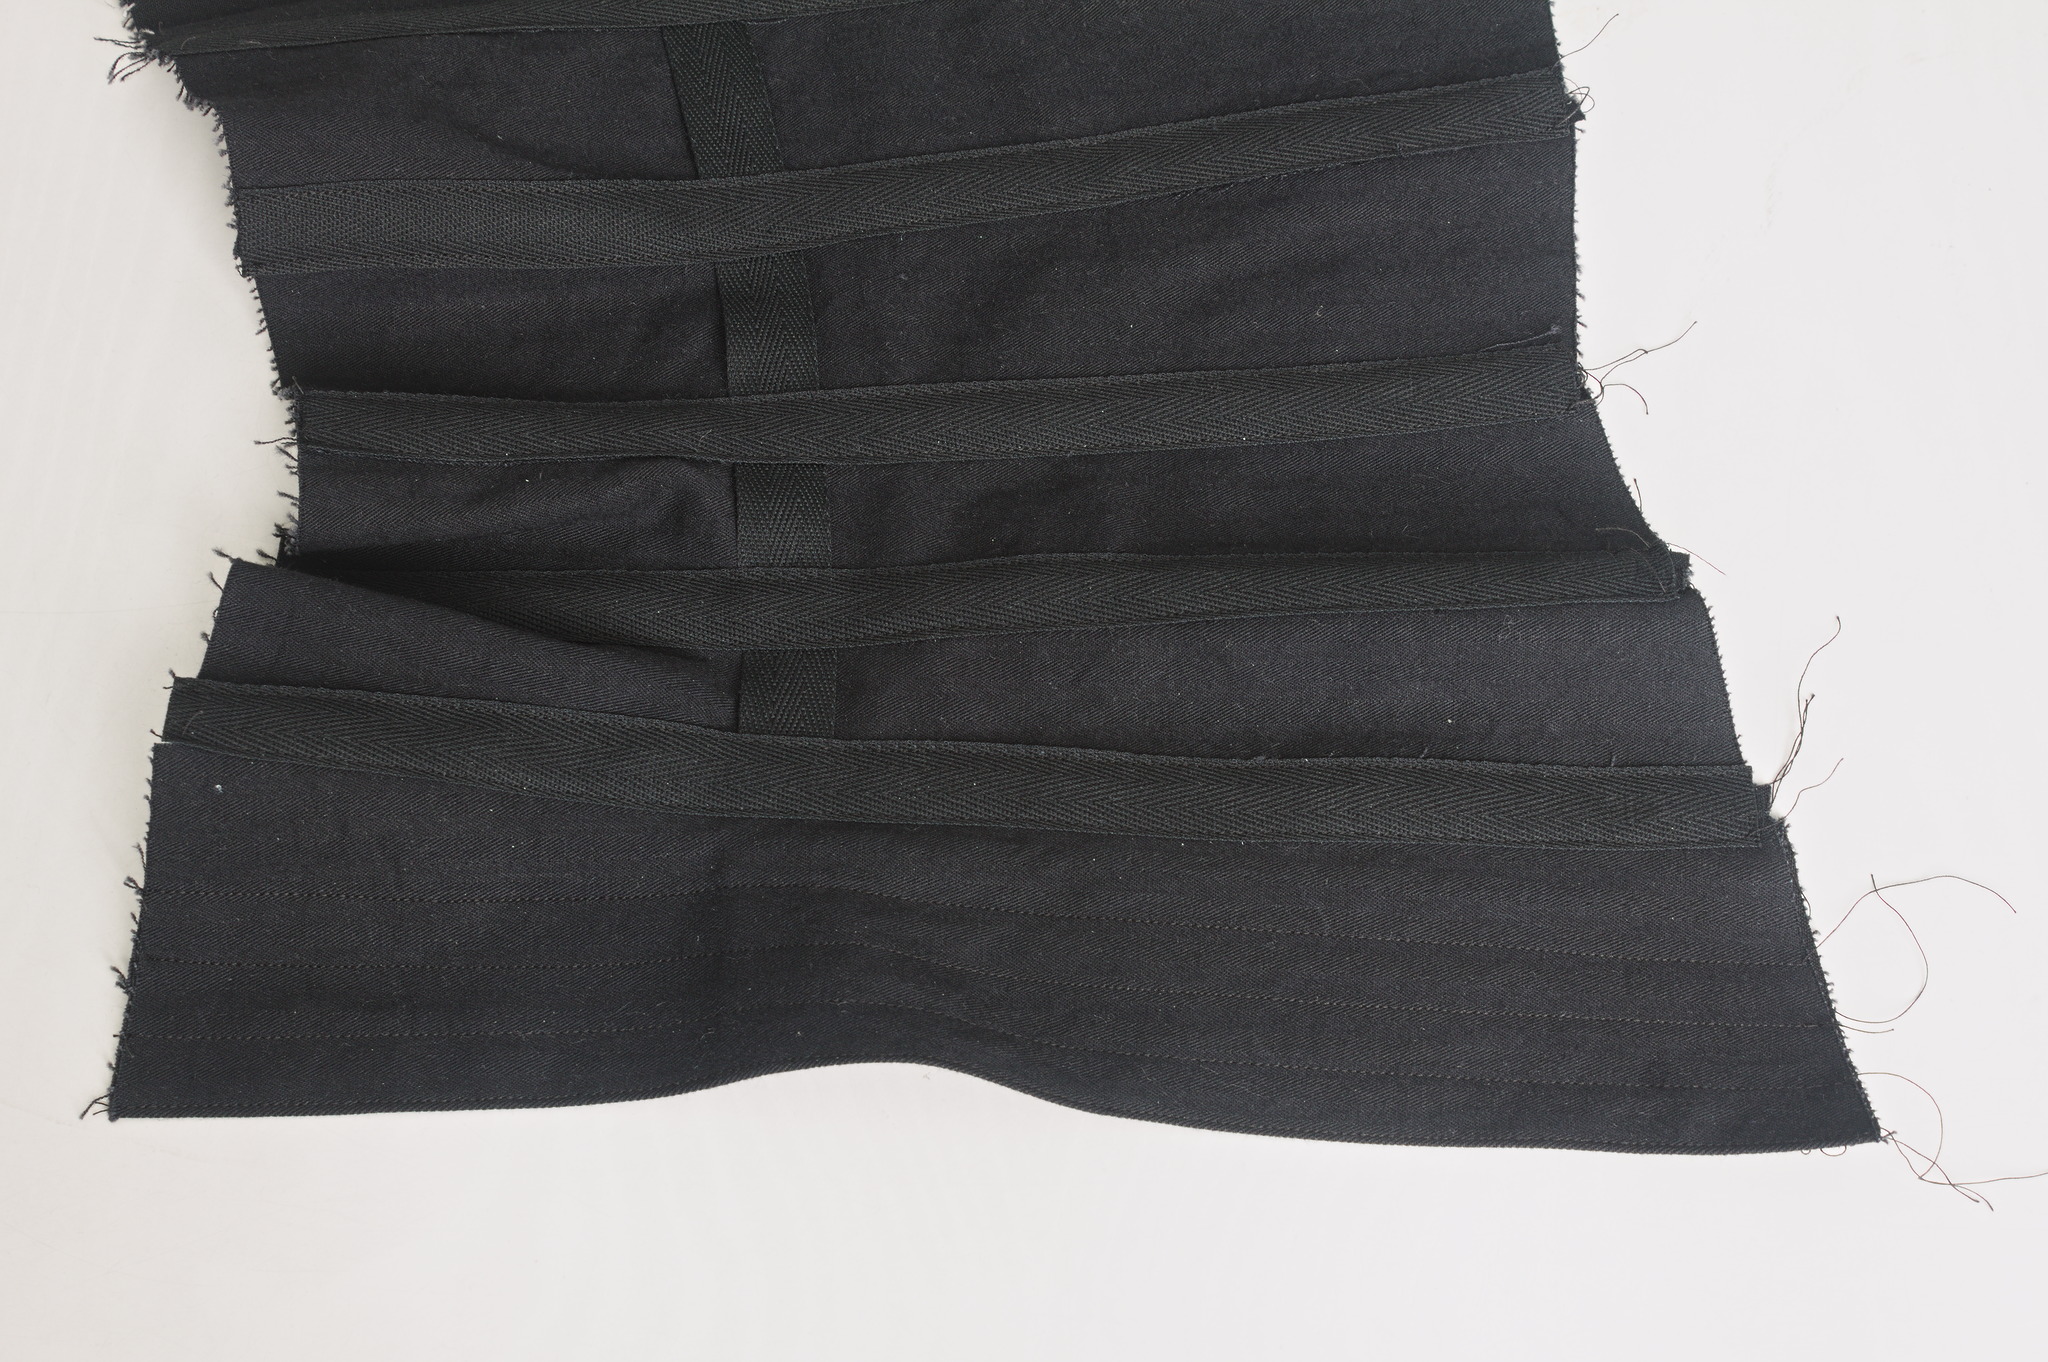
On panel 6 also sew channels for the flat steels between the two layers of coutil: sew a line 1-2 mm from the fold of the panel, and then 3 more lines at a distance of 1 mm more than the width of the flat steel boning from each other.
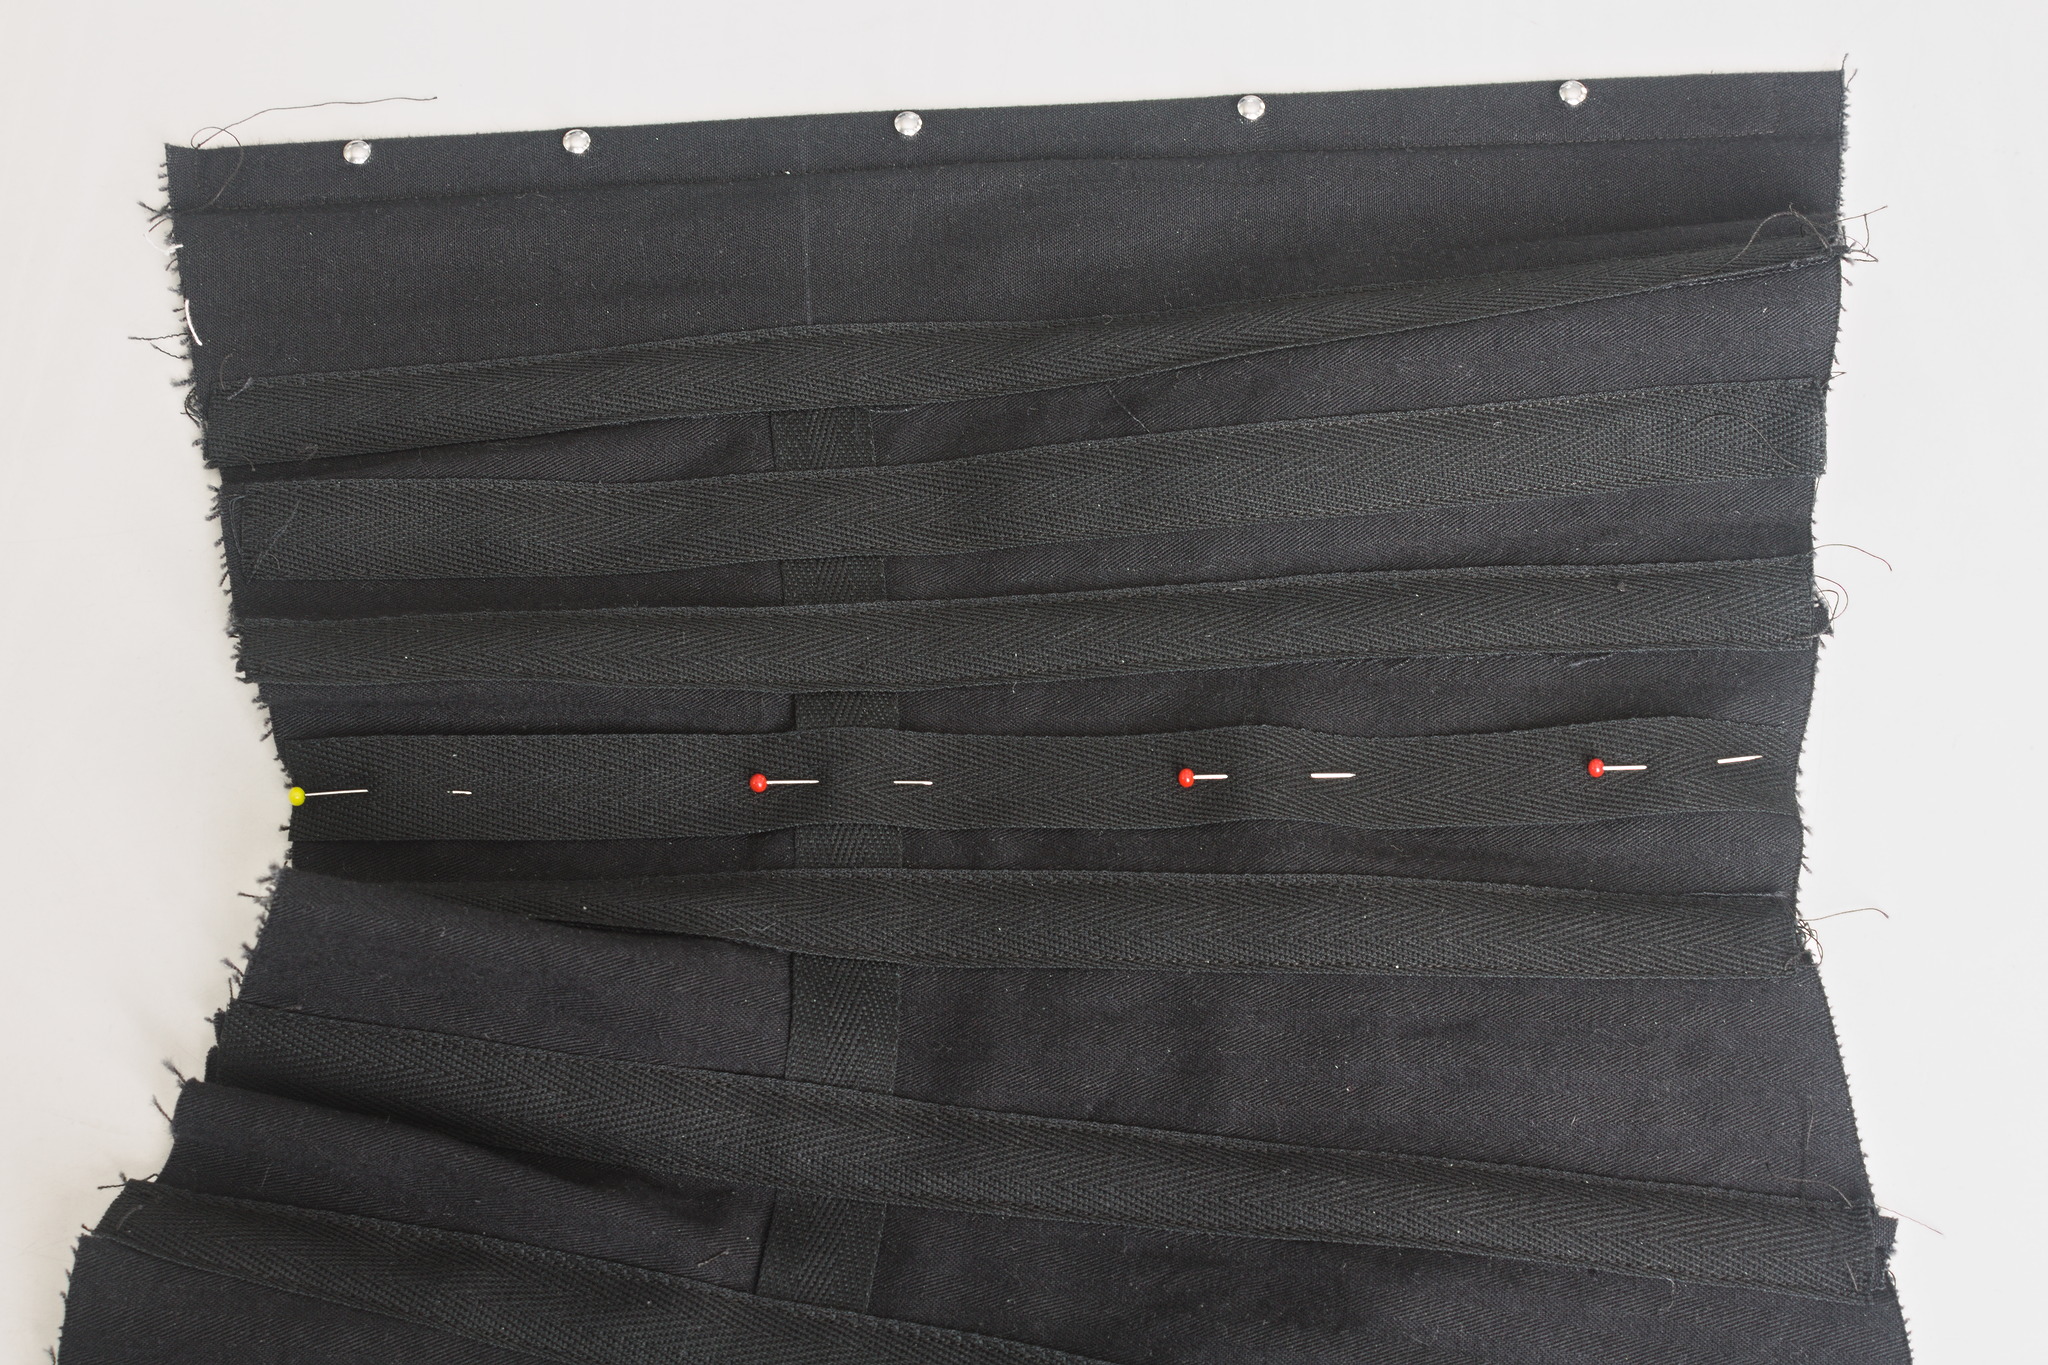
Optionally, sew an additional boning channel to the middle of panels 2-5: pin the tape vertically in the middle of the panel and sew at 2 mm from each side.
Binding and Boning
Tip
If you want to add loops for garter tabs, do it now by sewing them to the bottom edge of the corset near the front, side and back.
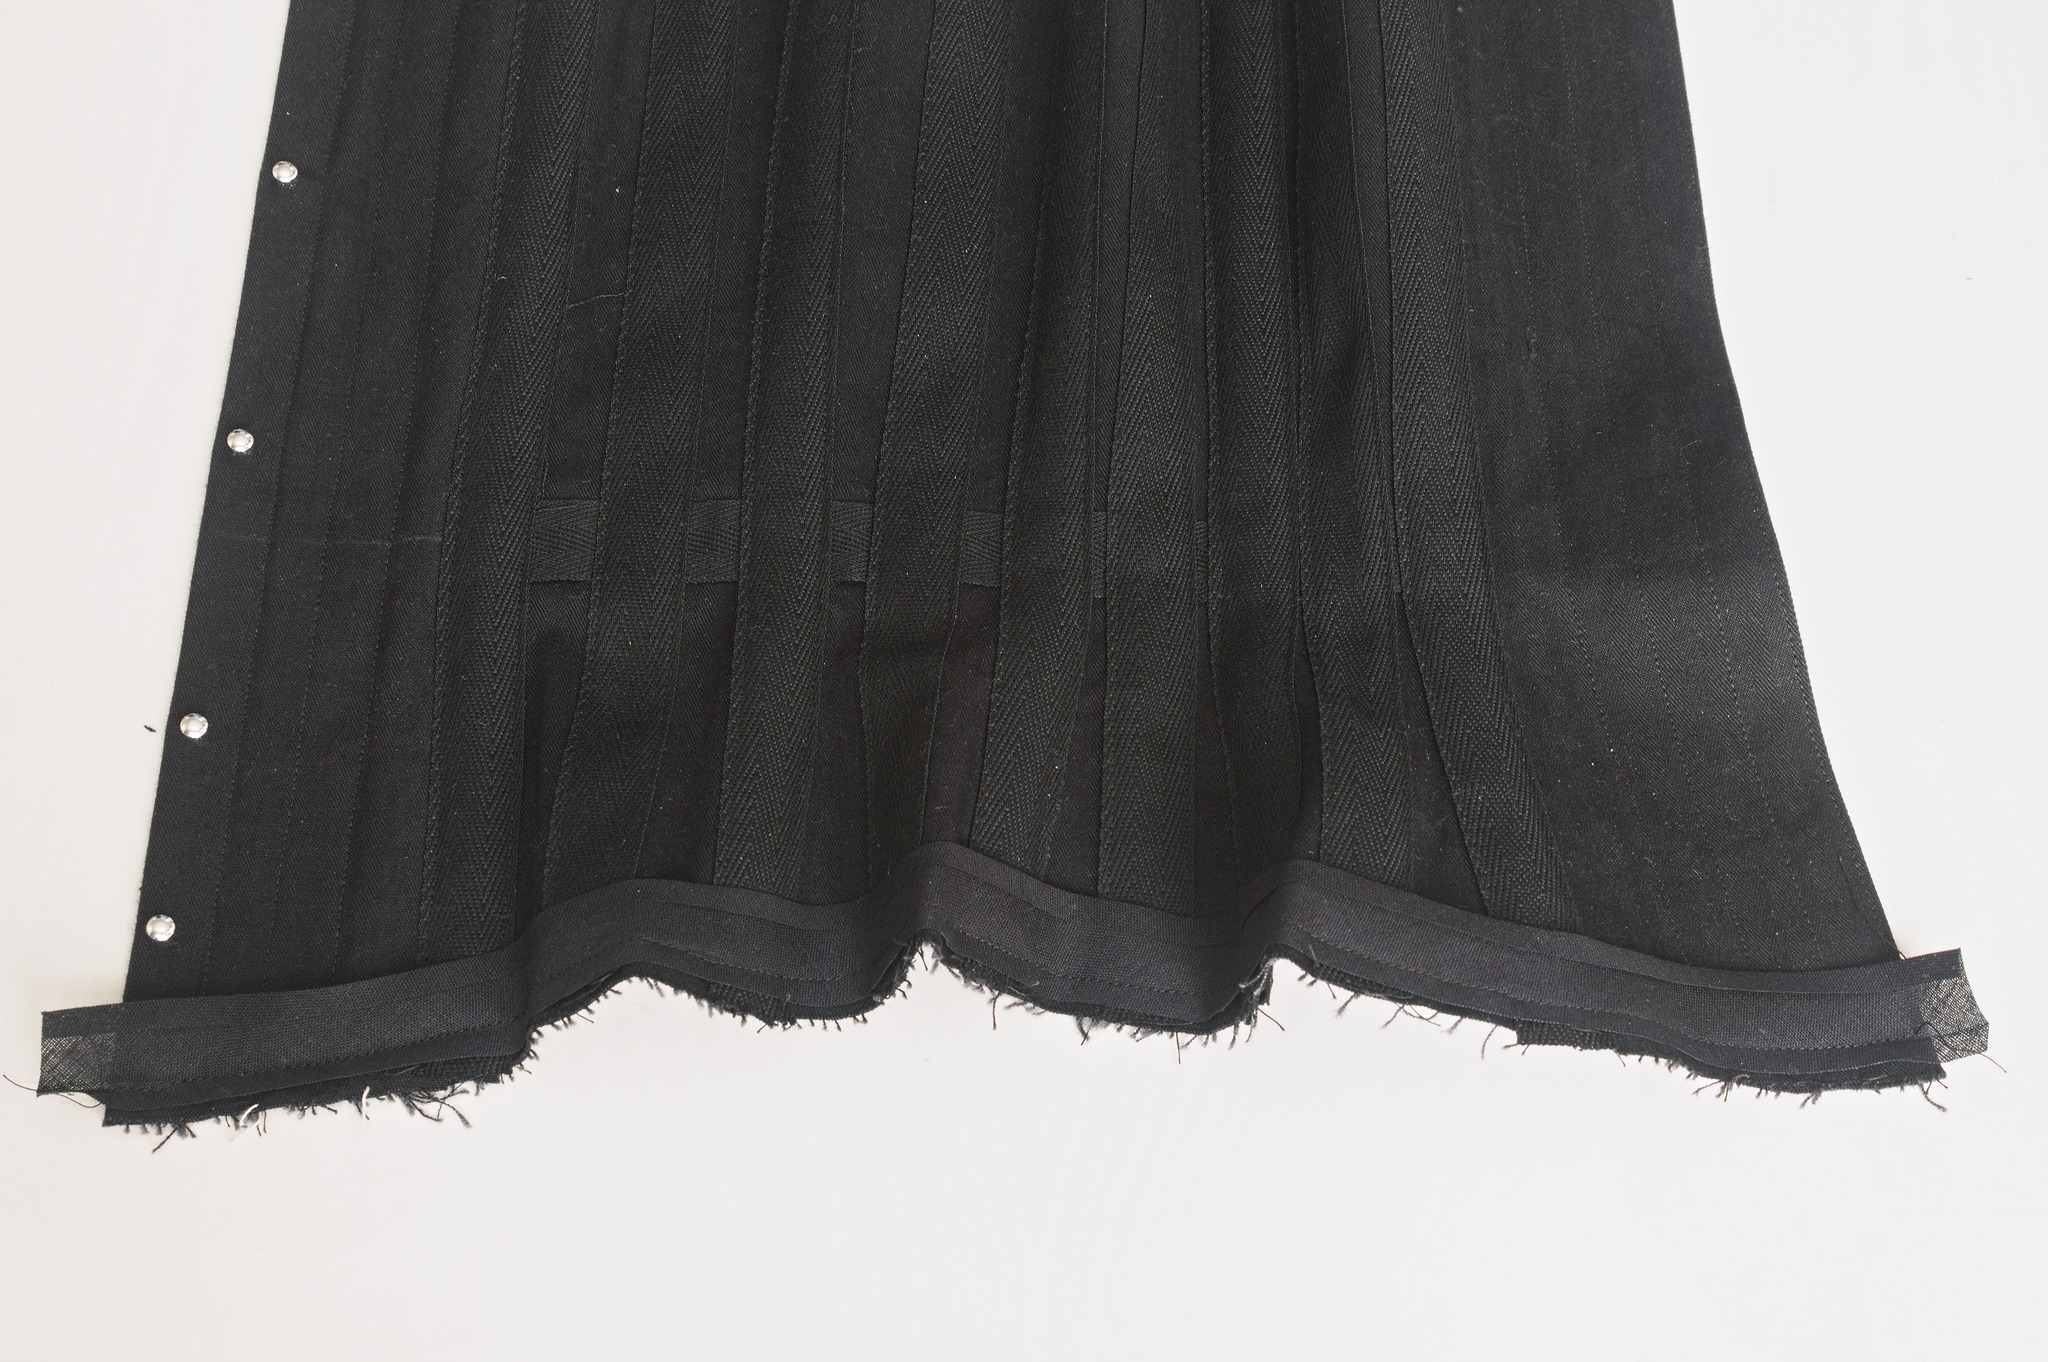
Right sides together, sew bias tape to the bottom edge of the corset, leaving an excess at the center front and back.
Press towards the inside, folding the excess so that all raw edges are covered, and hemstitch it closed.
For each boning channel except those in panel 6, cut a piece of spiral steel 2 cm shorter than the channel,
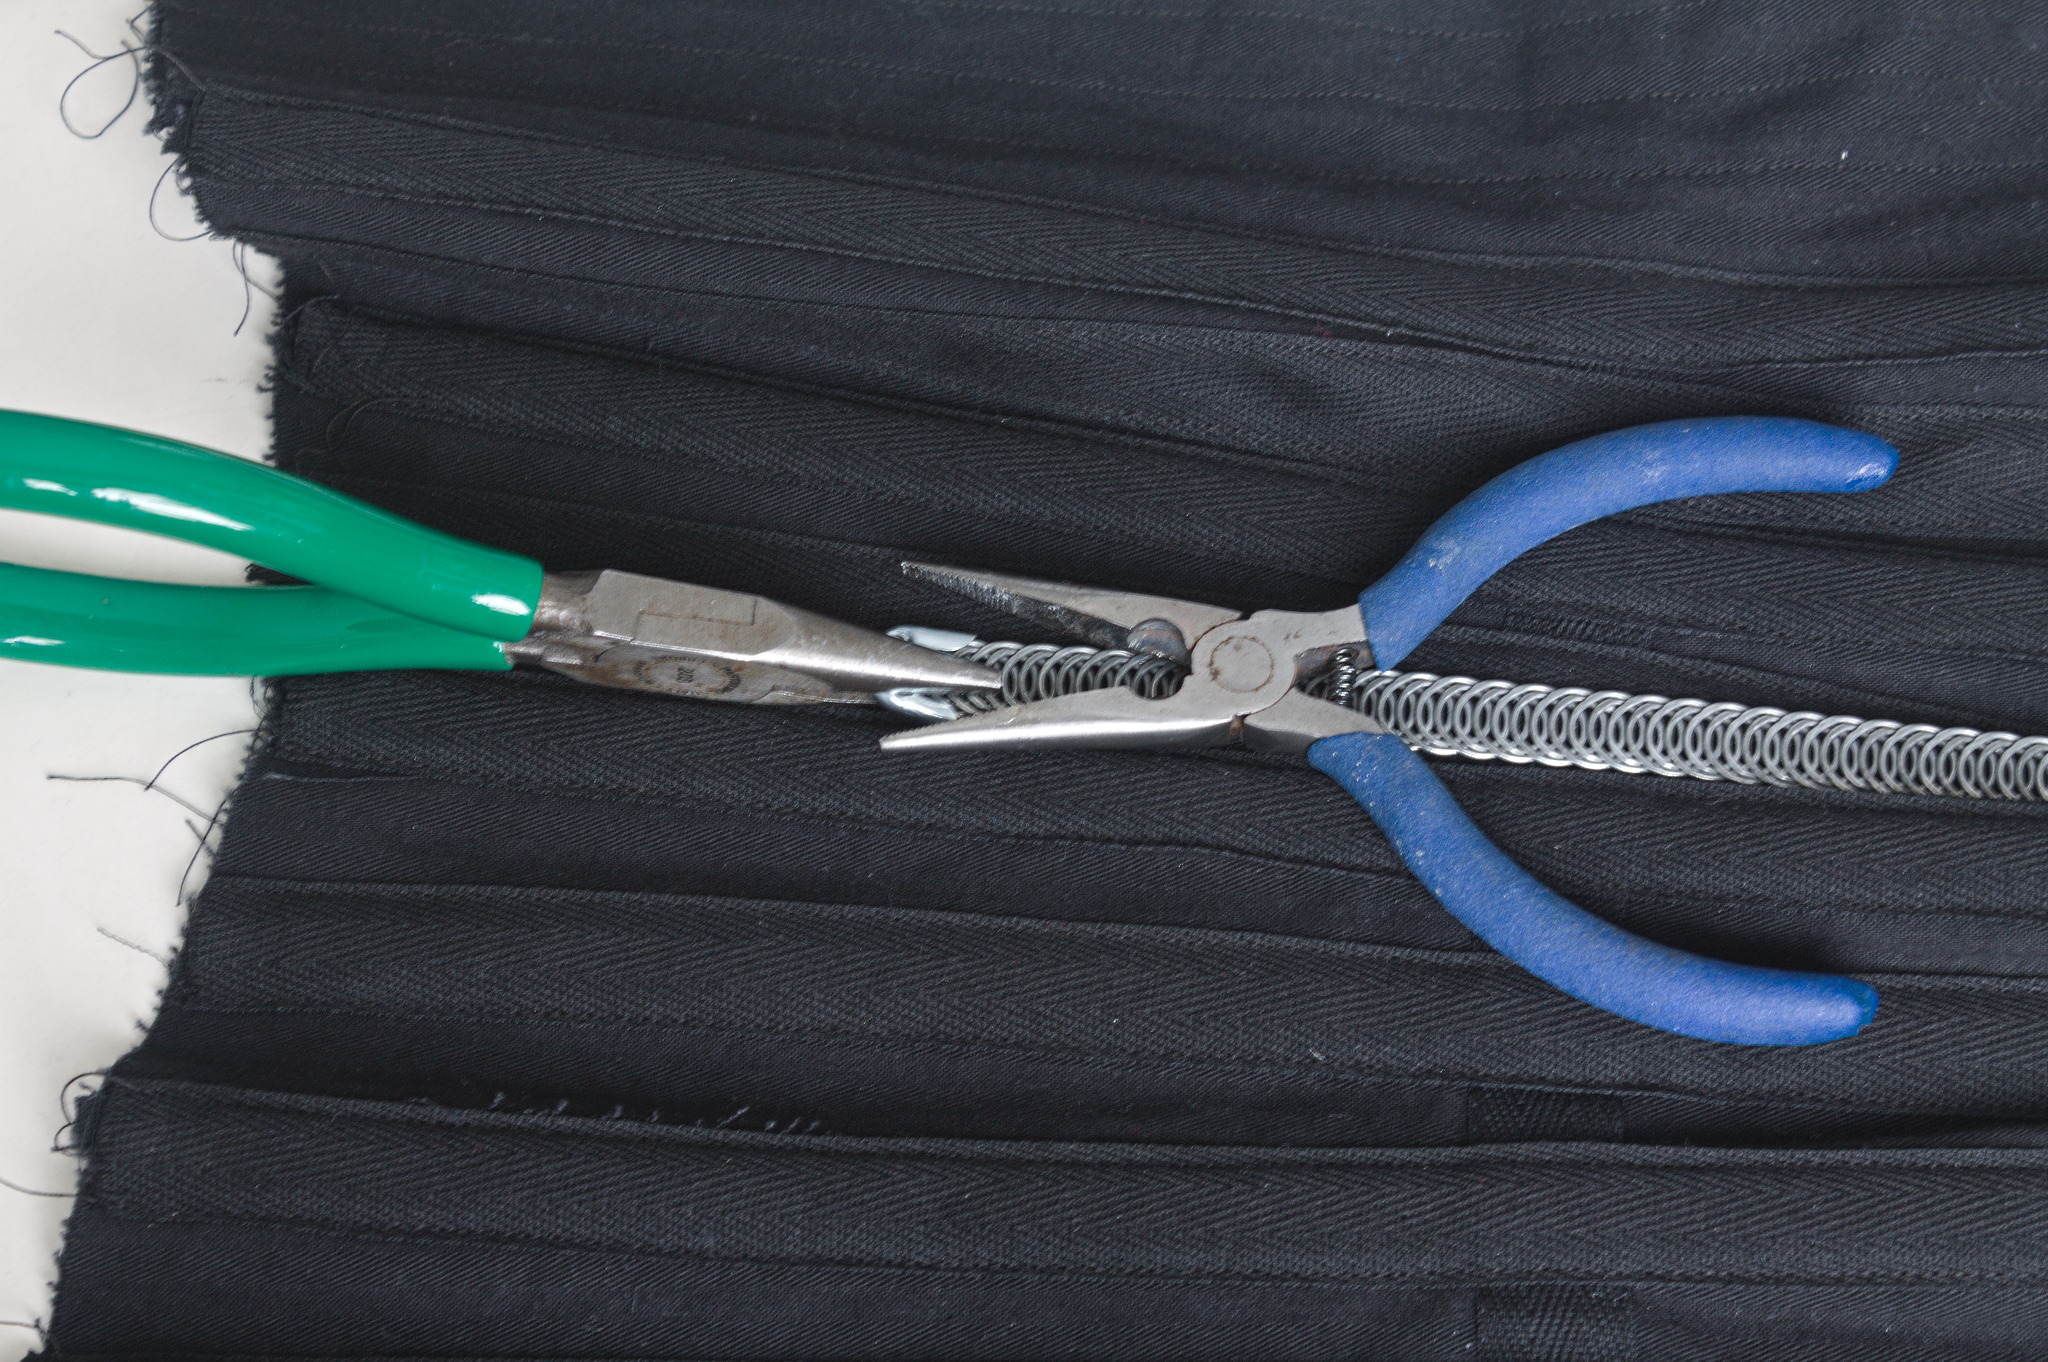
finish the ends with end caps
and insert the boning in the channel.
For panel 6, cut pieces of flat steel boning 2 cm shorter than the boning channels, sand the ends, wrap them in teflon tape or dip them in plastic and insert them in the channels.
Add binding also to the top edge, closing the channels: right sides together, sew bias tape also to the top edge of the corset, being careful not to sew over the boning; press it towards the back and hemstitch it closed.
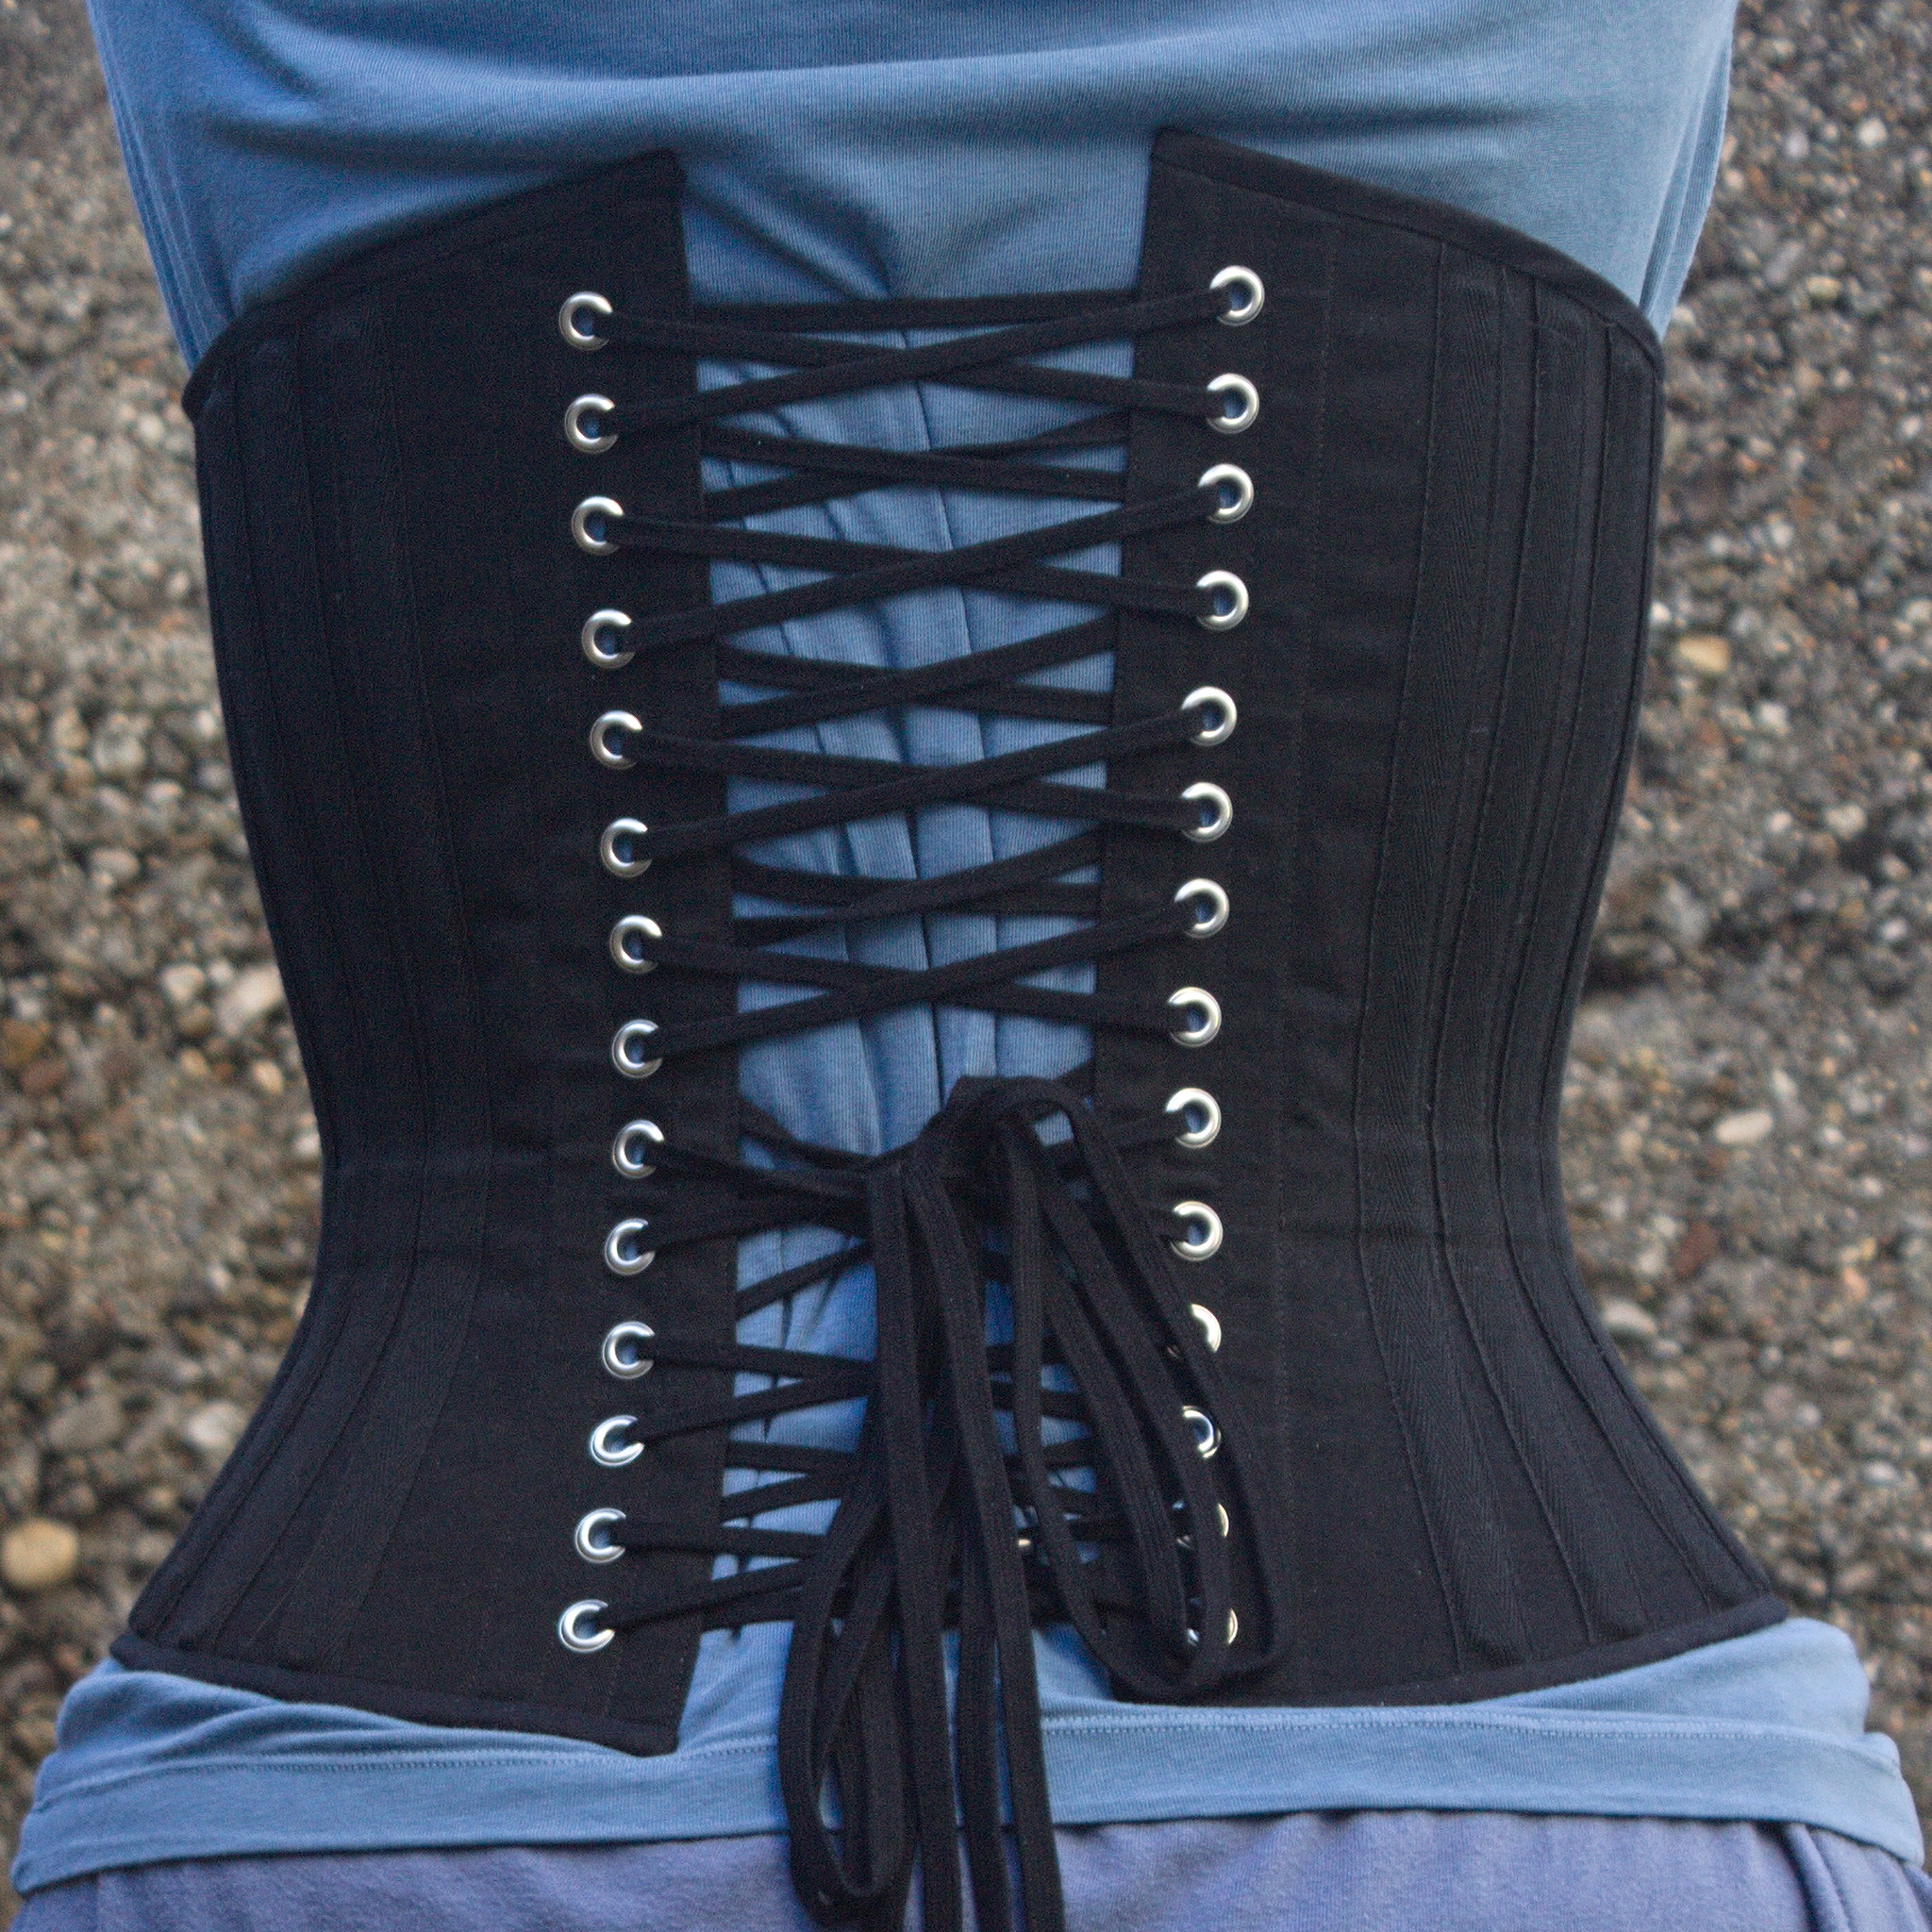
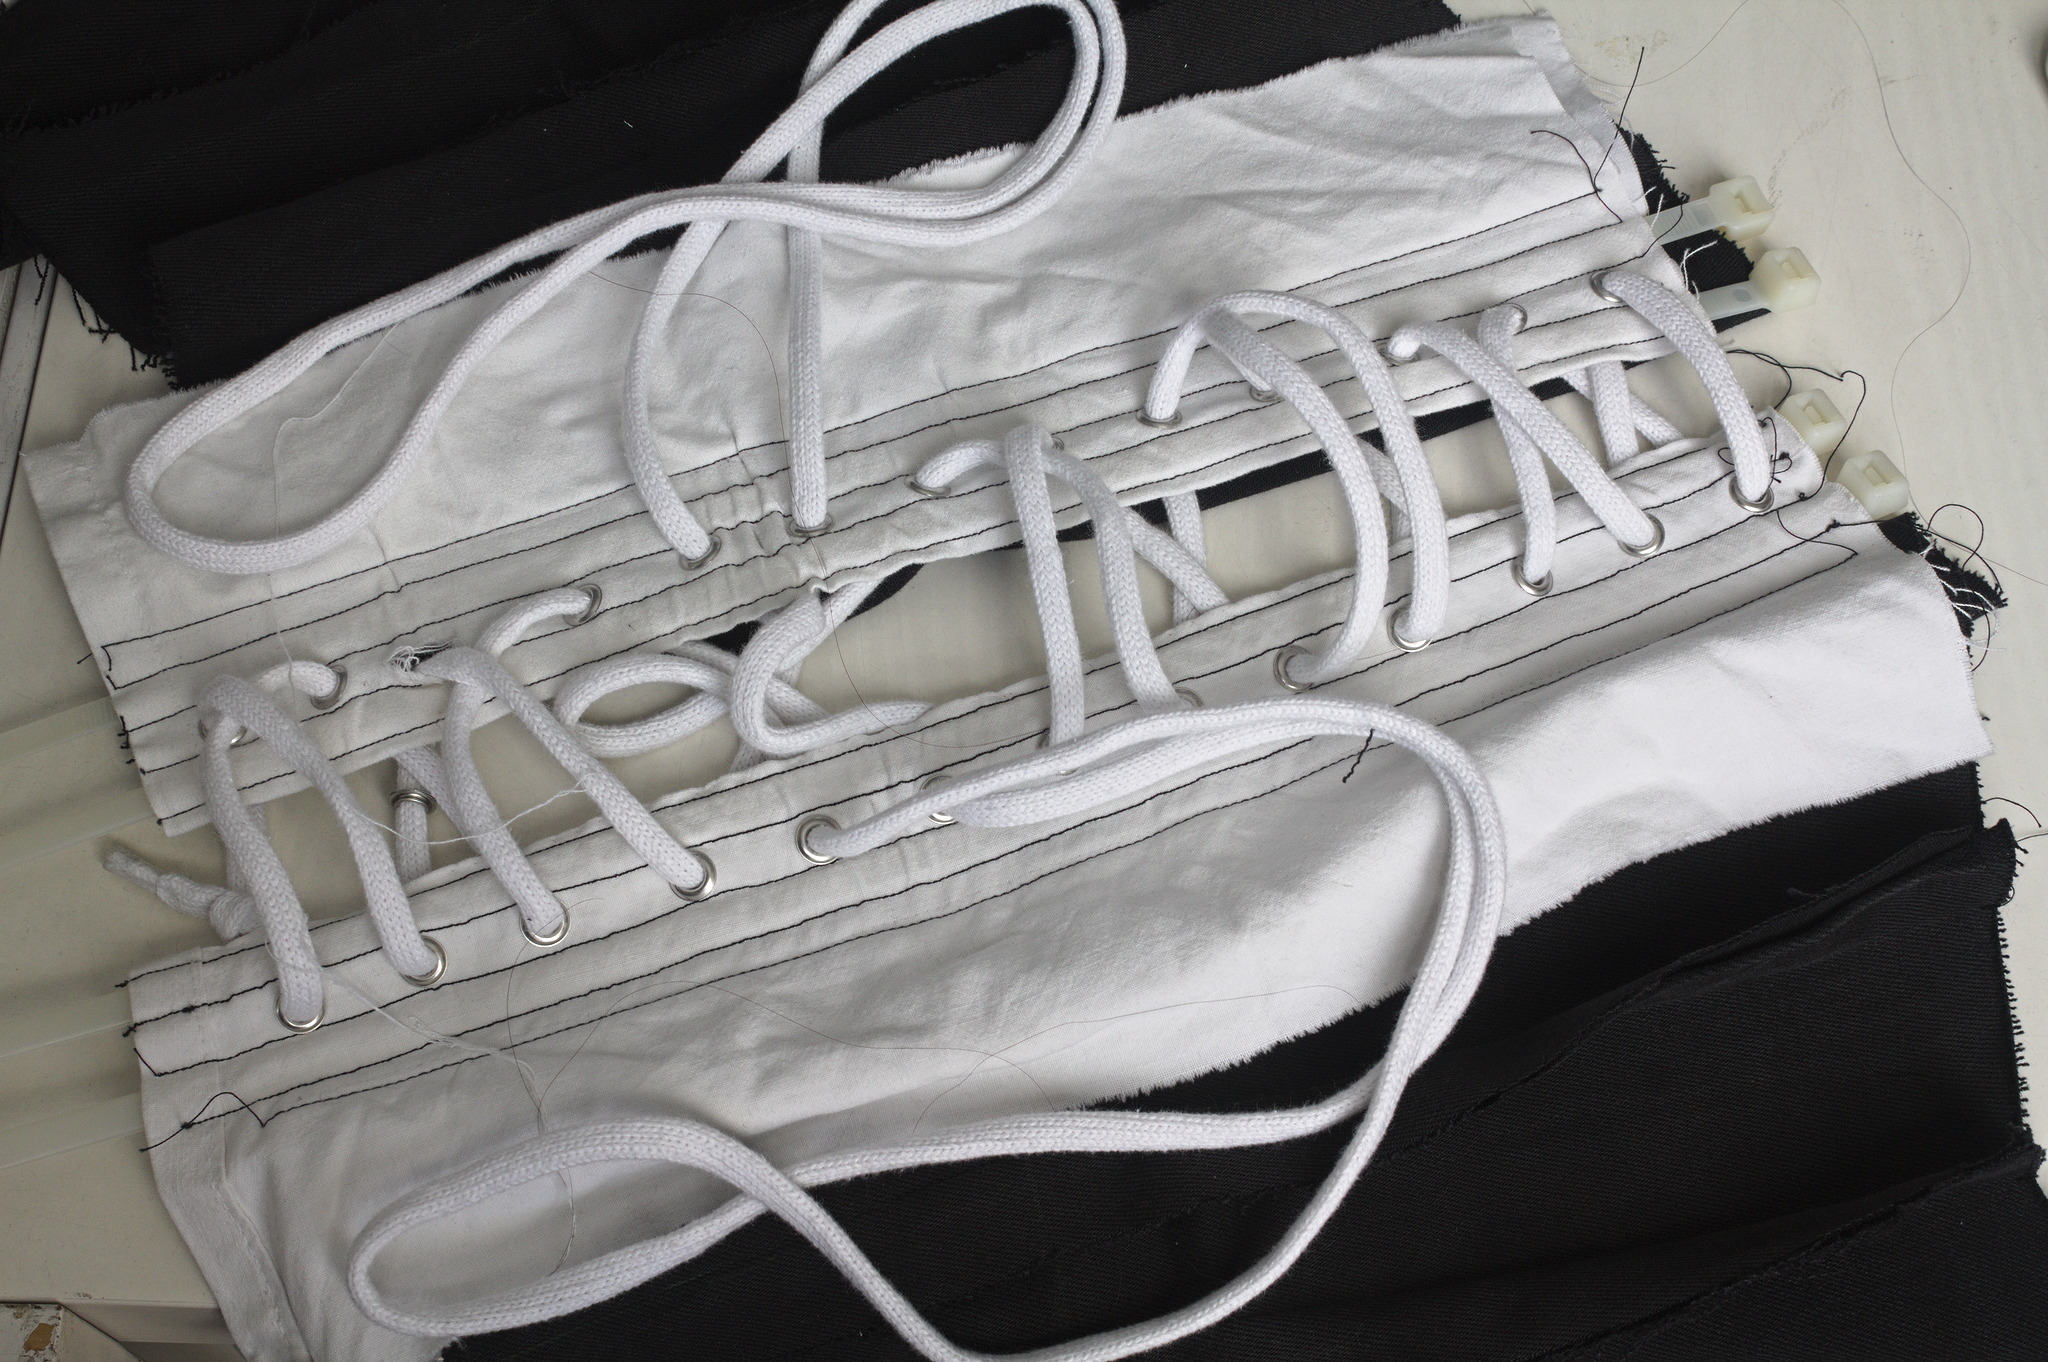
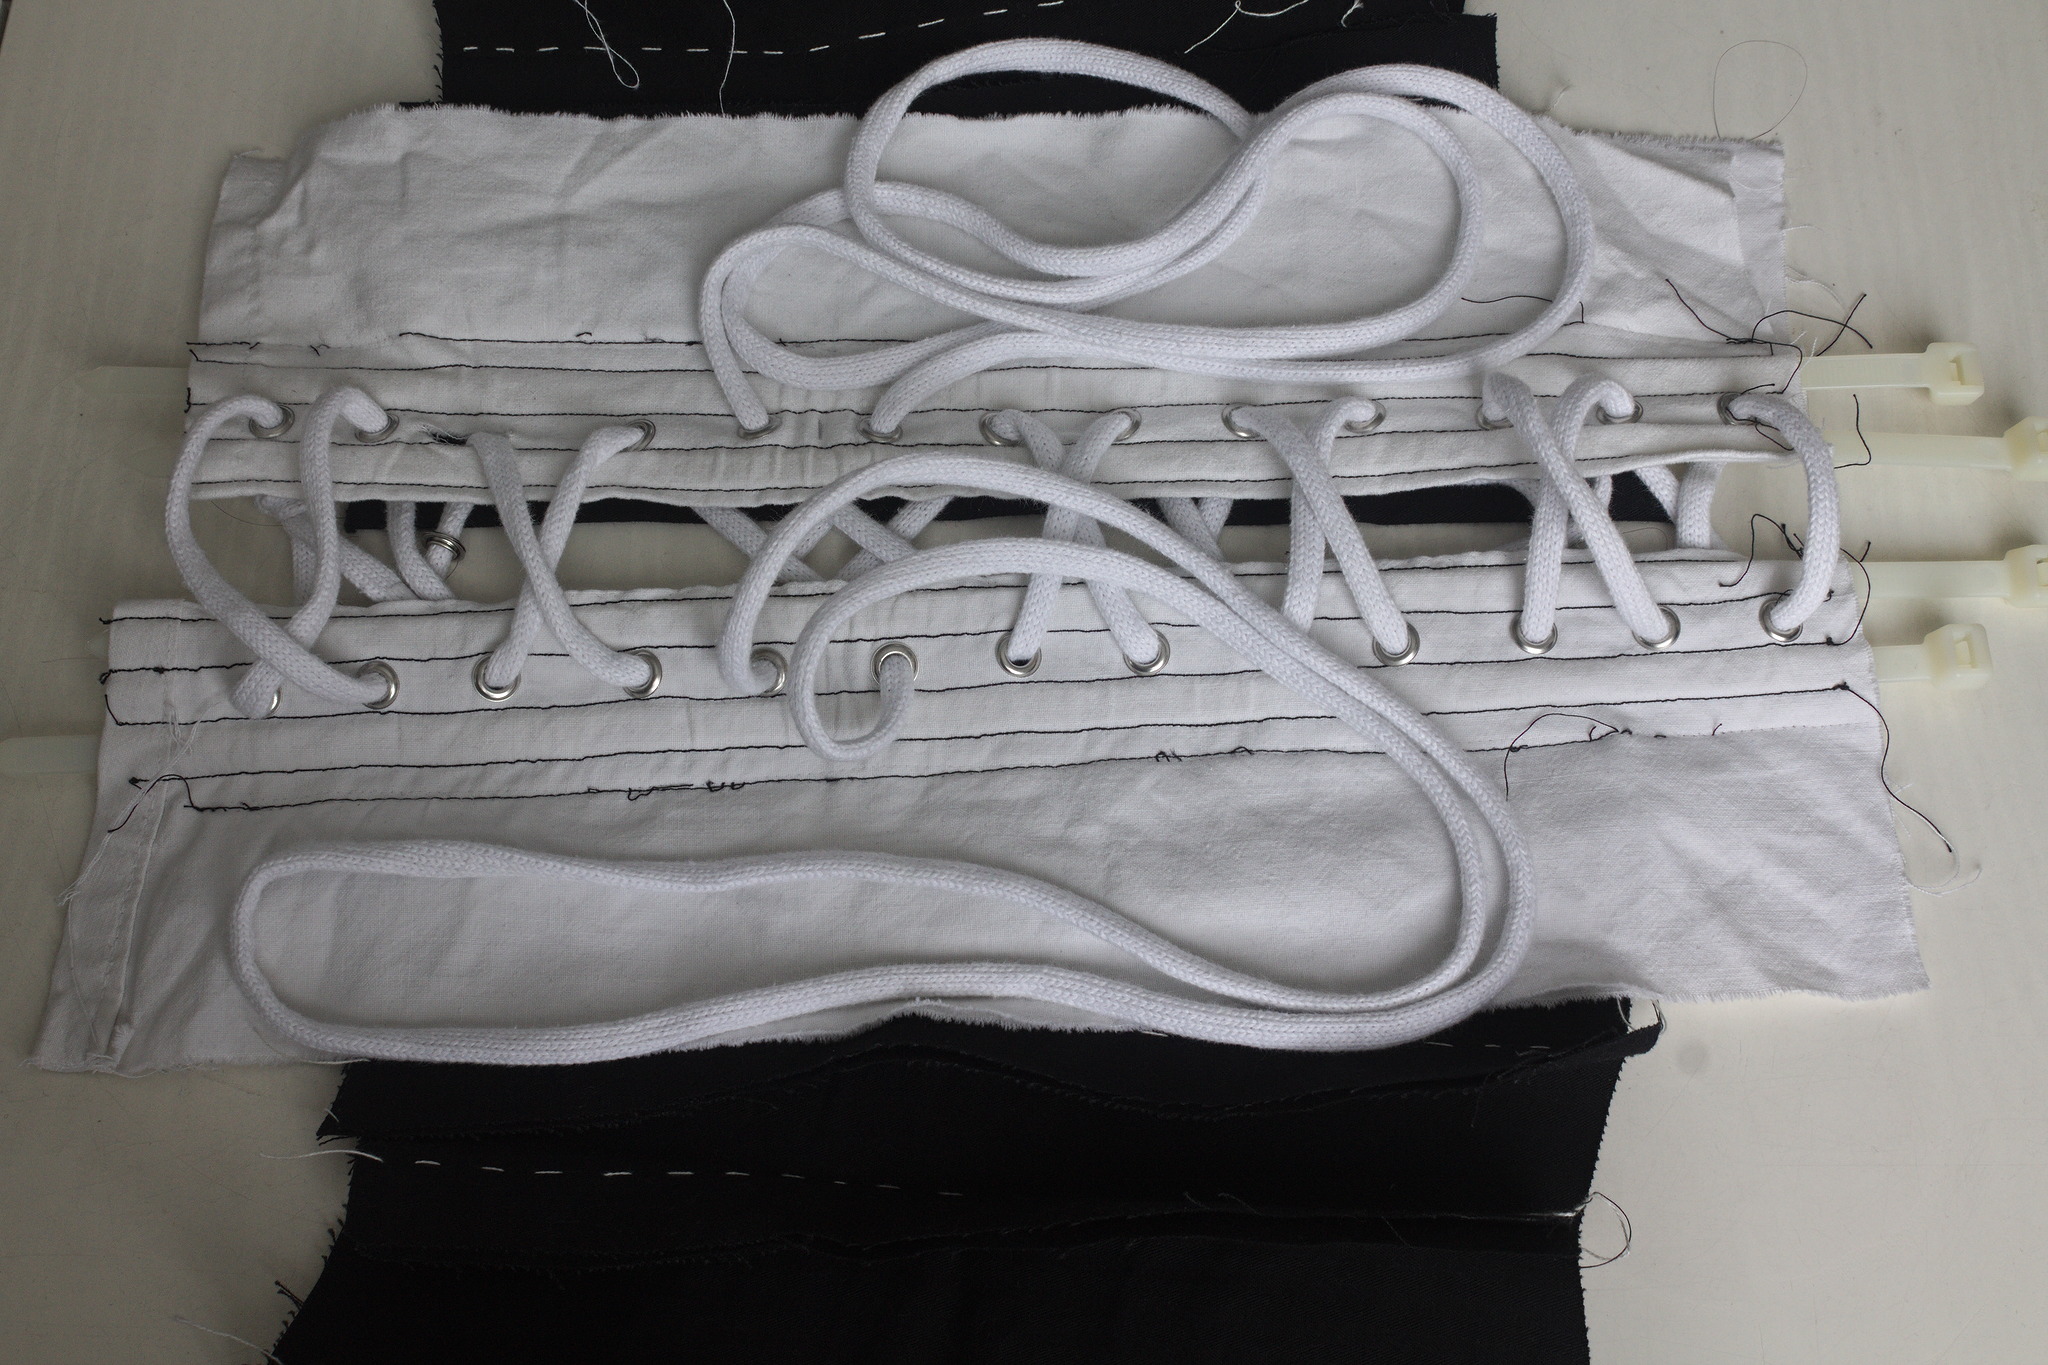
Lacing holes

Starting at 1 cm on each side of the waist, mark the position for lacing holes on panel 6 at a distance of 2 cm, reaching to the top and bottom of the panel.
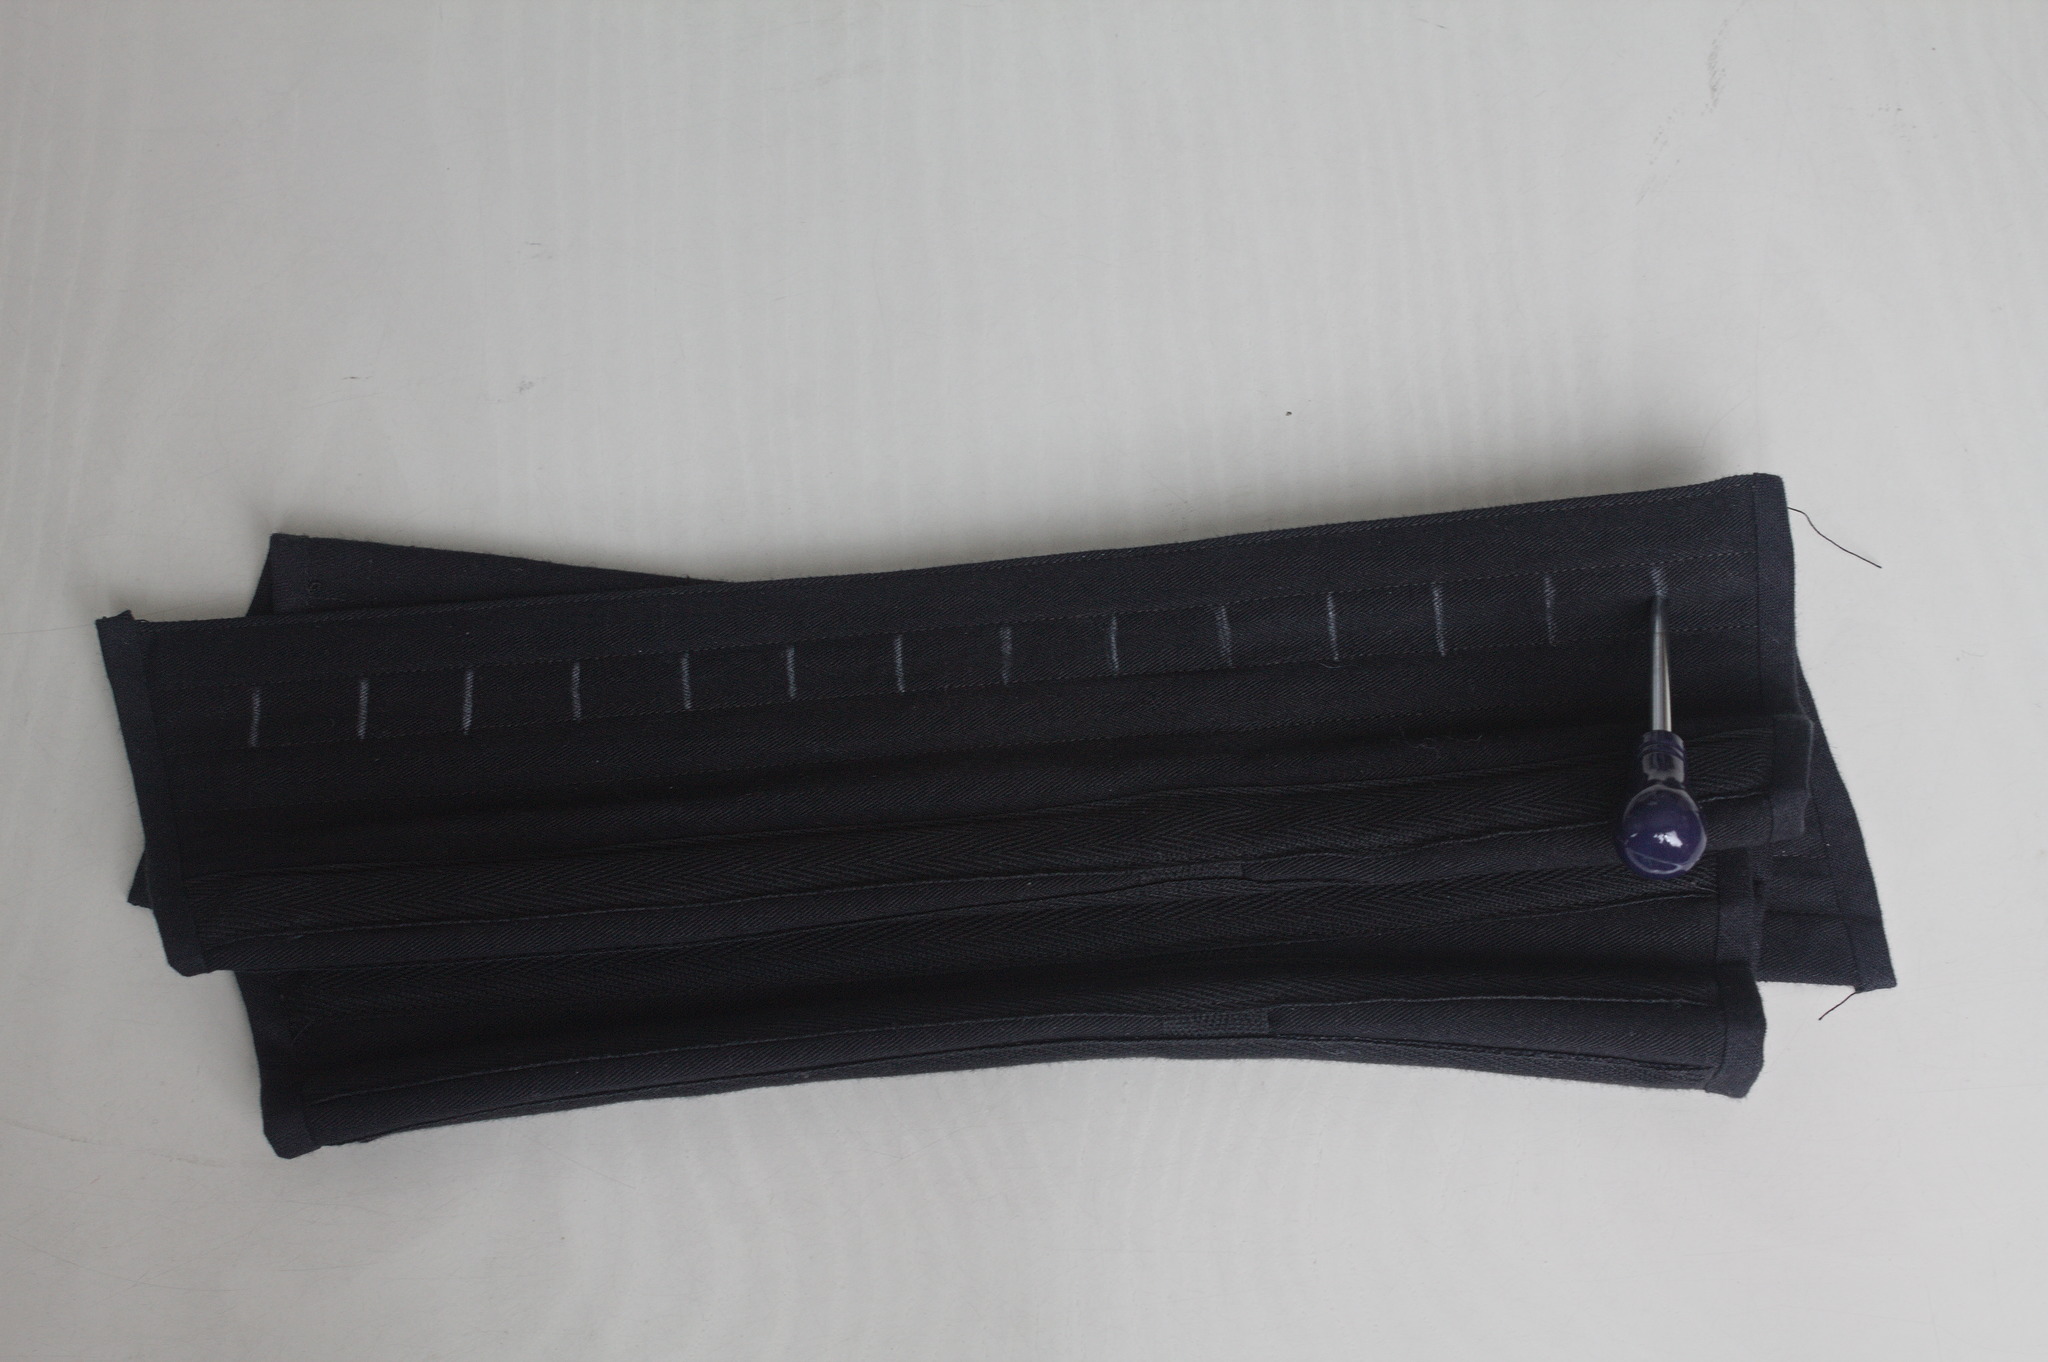
Open each hole with an awl, trying not to break the threads in the fabric,
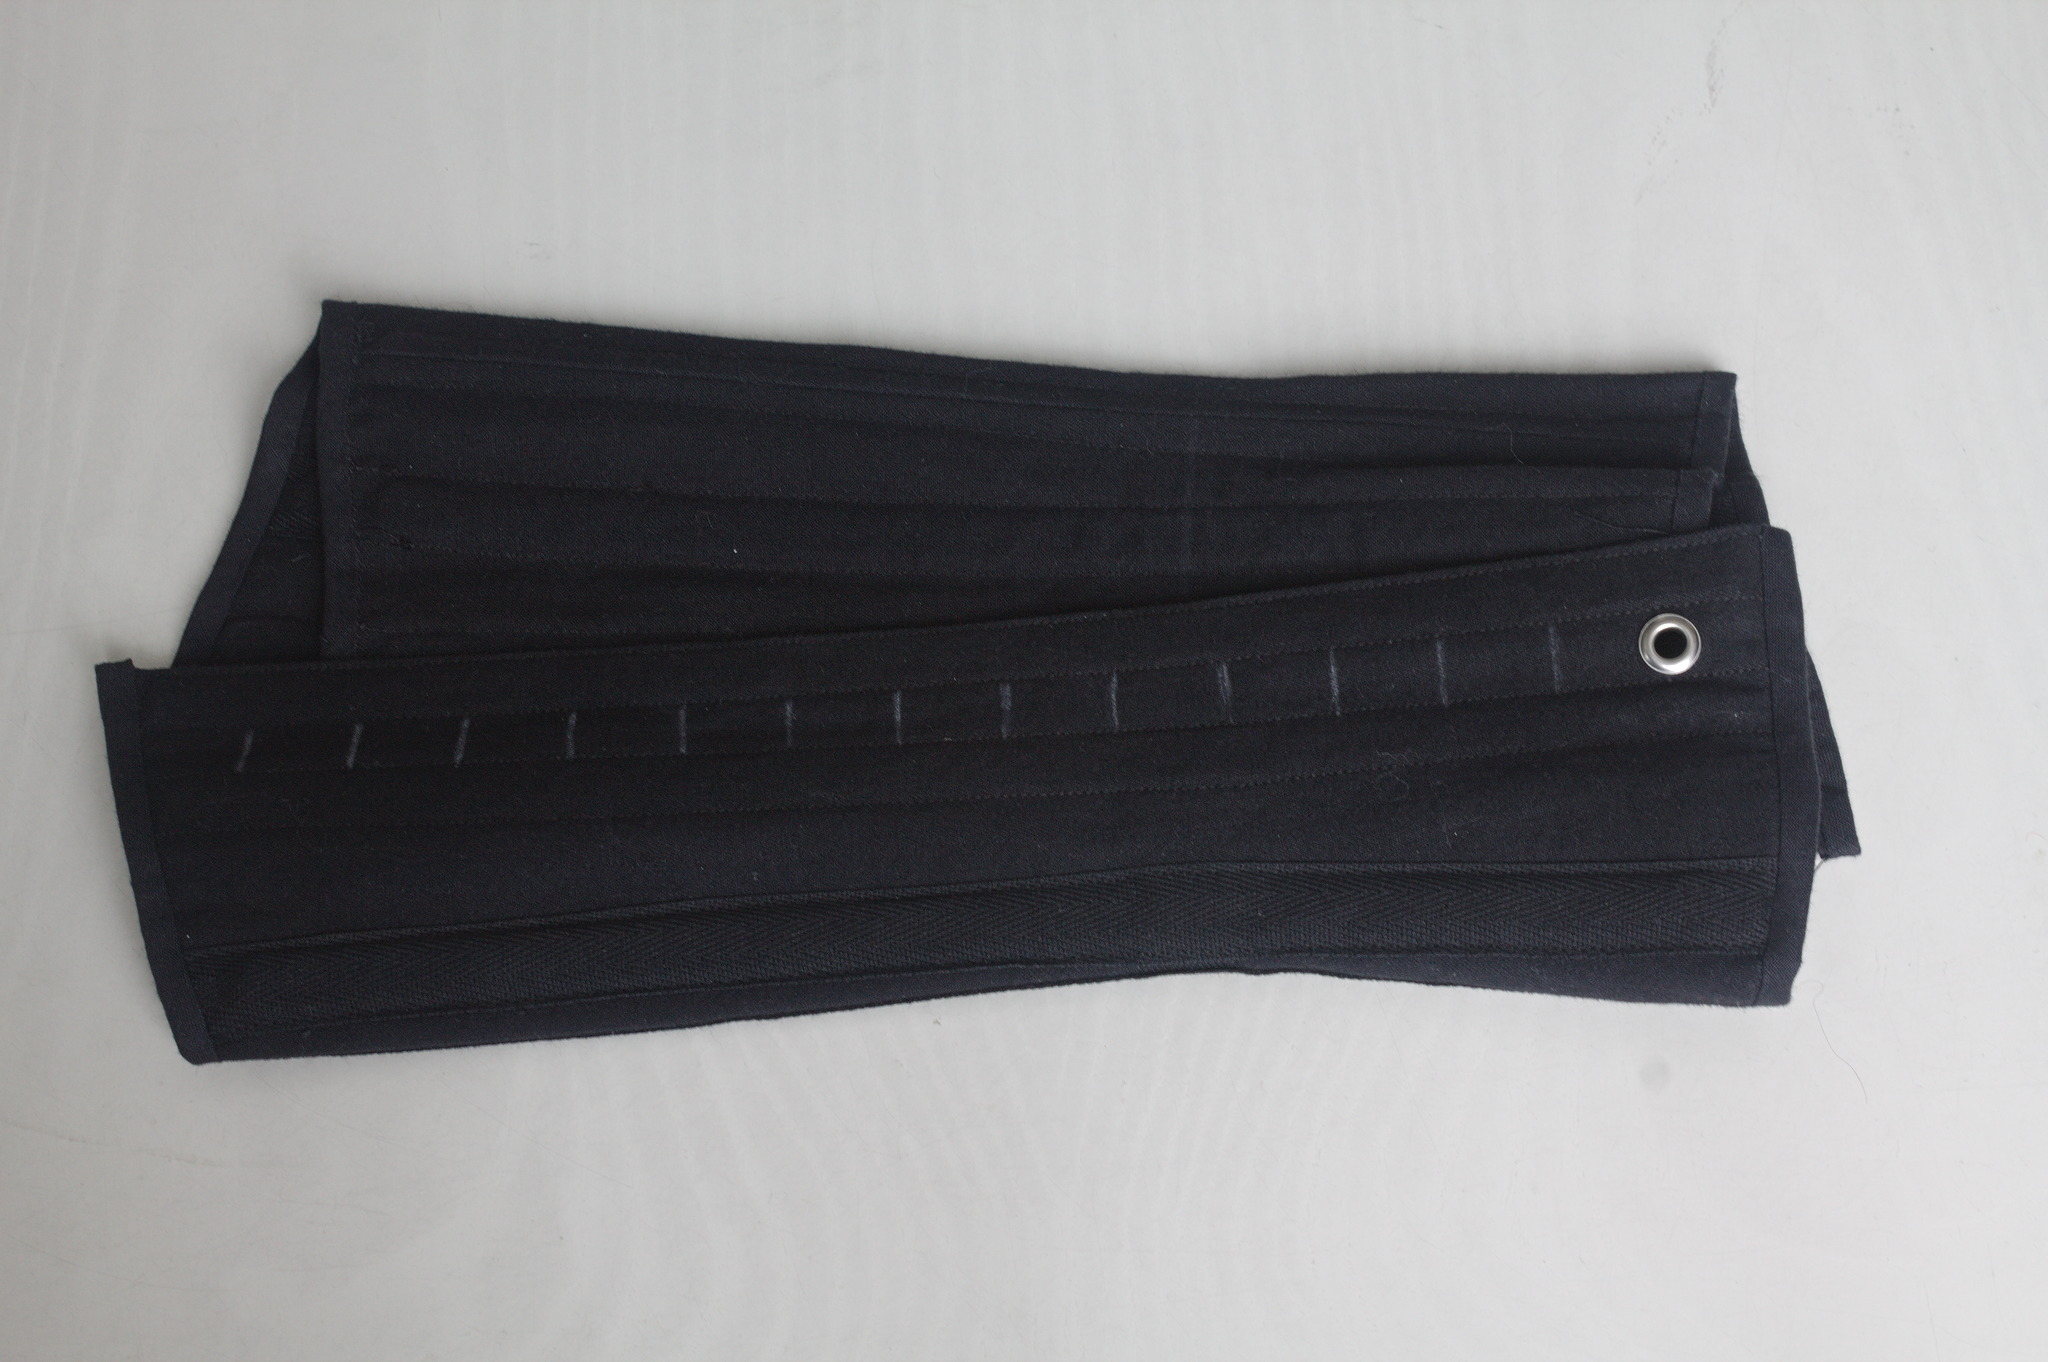
and insert a metal eyelet.

Thread lacing cord through the eyelets: start with the center of the cord at the top and thread the two ends alternating the sides making sure that each X formed is either on the outside or the inside of the corset; when you reach the waist make sure that you’ve just done an X on the inside of the corset, skip a hole, thread each end of the cord in the eyelet just below the waist from the inside to the outside, then in the eyelet just above the waist on the same side, going from the outside towards the inside and forming two loops, and then continue doing regular Xs until the bottom of the corset. Close the lacing with a sturdy knot and move all excess towards the loops at the waist.
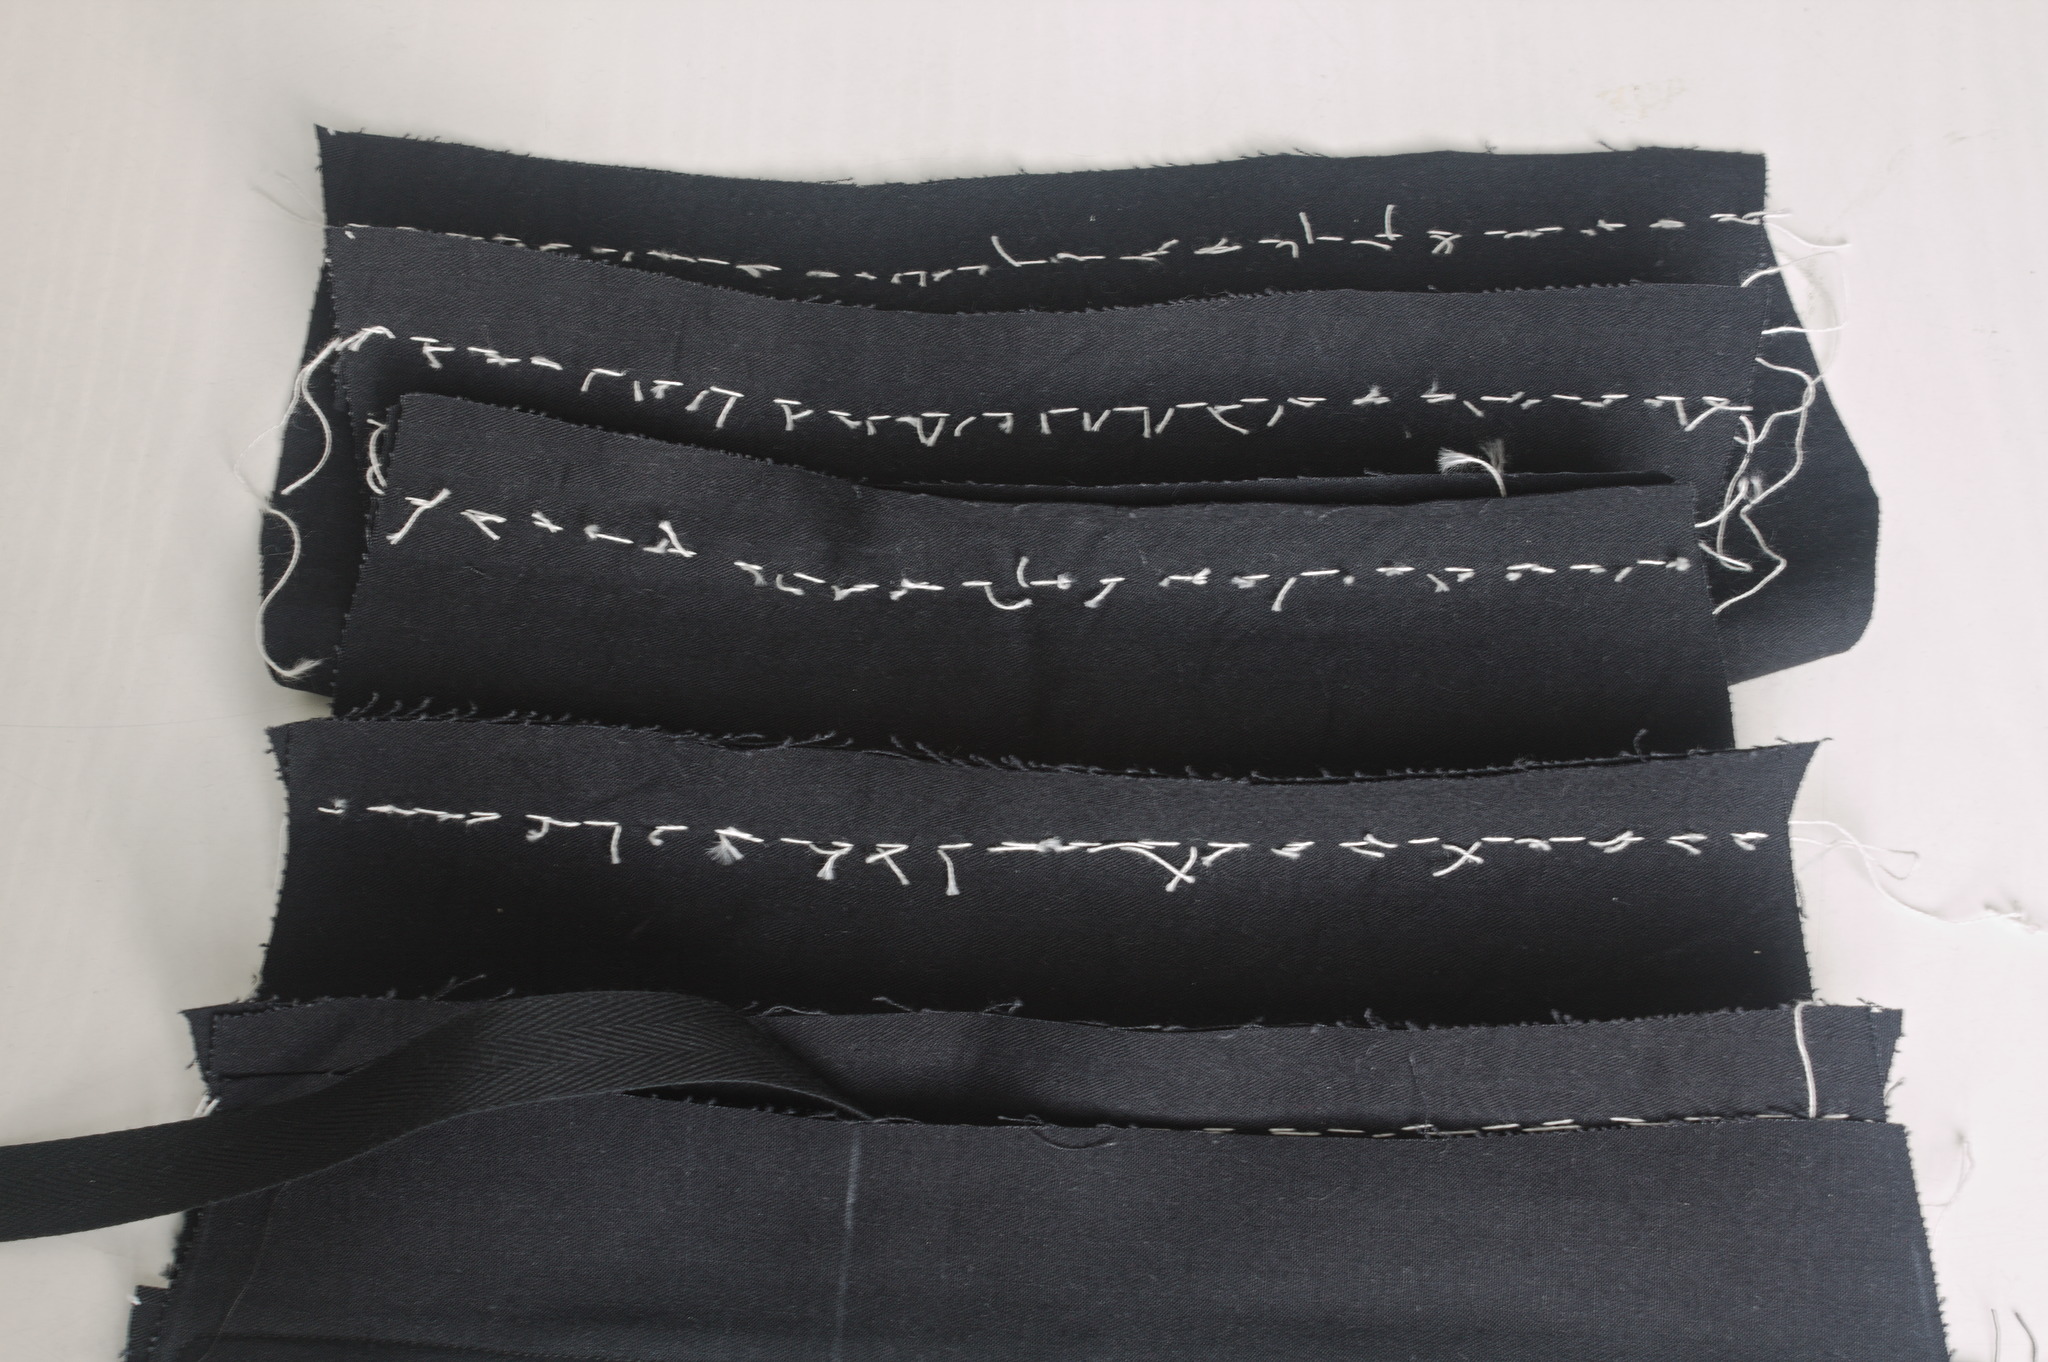
Flossing
Using a strong thread such as silk buttonhole twist make a few embroidery stitches at the ends of each spiral steel bone, going through all layers of the corset, to keep it in place and prevent it from rubbing on the fabric.
This can be as simple and utilitarian as you’d like, but you can also look at extant corsets for examples of decorative stitches.
Gallery